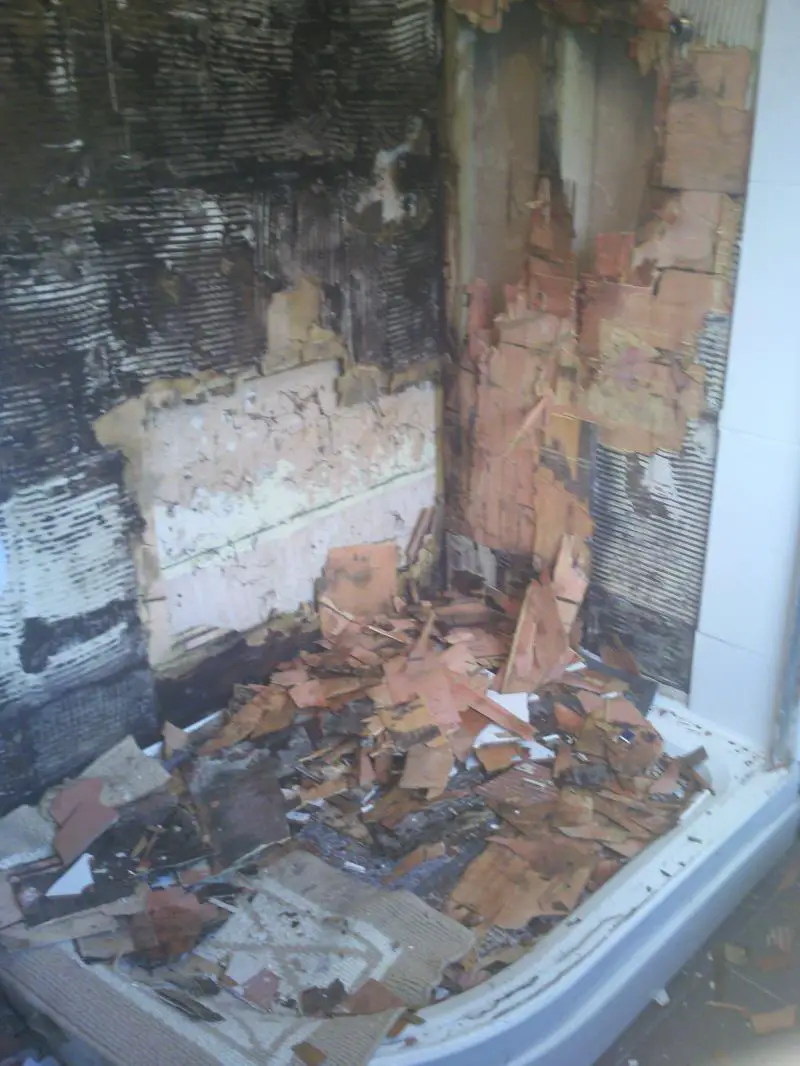
I went behind the ply. The plys are on the stud wall.
As I said looking at the back of the ply will tell you nothing about what’s going on under the tile. [/quote]
The builders did it, with some waterproofing material on them. I thought that's normal on stud walls.
If only that were the case

. What sort of waterproofing material? An SBR primer will seal the surface but it won’t make it waterproof to the degree that tanking will. SBR or acrylic primer should always be use on the back & edges of ply but the tile surface needs tanking or you will eventually end up with the mess you see in
1john’s pics. Ply was used a lot in the past but it’s old fashioned, not particularly easy to cut & work with, is not dimensionally stable when it’s damp/wet (which causes tiles to delaminate & cracks), should be sealed on the back & edges against moisture ingress & the tile surface should be tanked. Some use Moisture Resistant plasterboard in shower enclosures but that will still turn to mush if water gets in & should also be tanked in wet areas. Taking all this into consideration, it’s easier, quicker & probably cheaper to use a decent waterproof backer board which will accept heavy tile weights & requires no further treatment before tiling.
I am not sure what ply was used. I can ask the builders and post you an update tomorrow.
It’s important; only WBP ply should be used which uses waterproof adhesive in construction; the standard stuff & will fall apart if it gets wet.
The adhesive used was Granfix flexible and the grout used was BAL Superflex Grout.
The product brands are OK but it’s not really good practice to mix & match. There is always a risk of incompatibility & apart from anything else it will probably invalidate the manufacturers warranty; this may be your last port of call if all else fails but products must be used strictly in accordance with warranty conditions. Which addy was used; I assume it was cement powder not tub mix?
If it’s a newish shower, the sooner you tackle this the more likely you are to be able to salvage the situation; for a while at least.
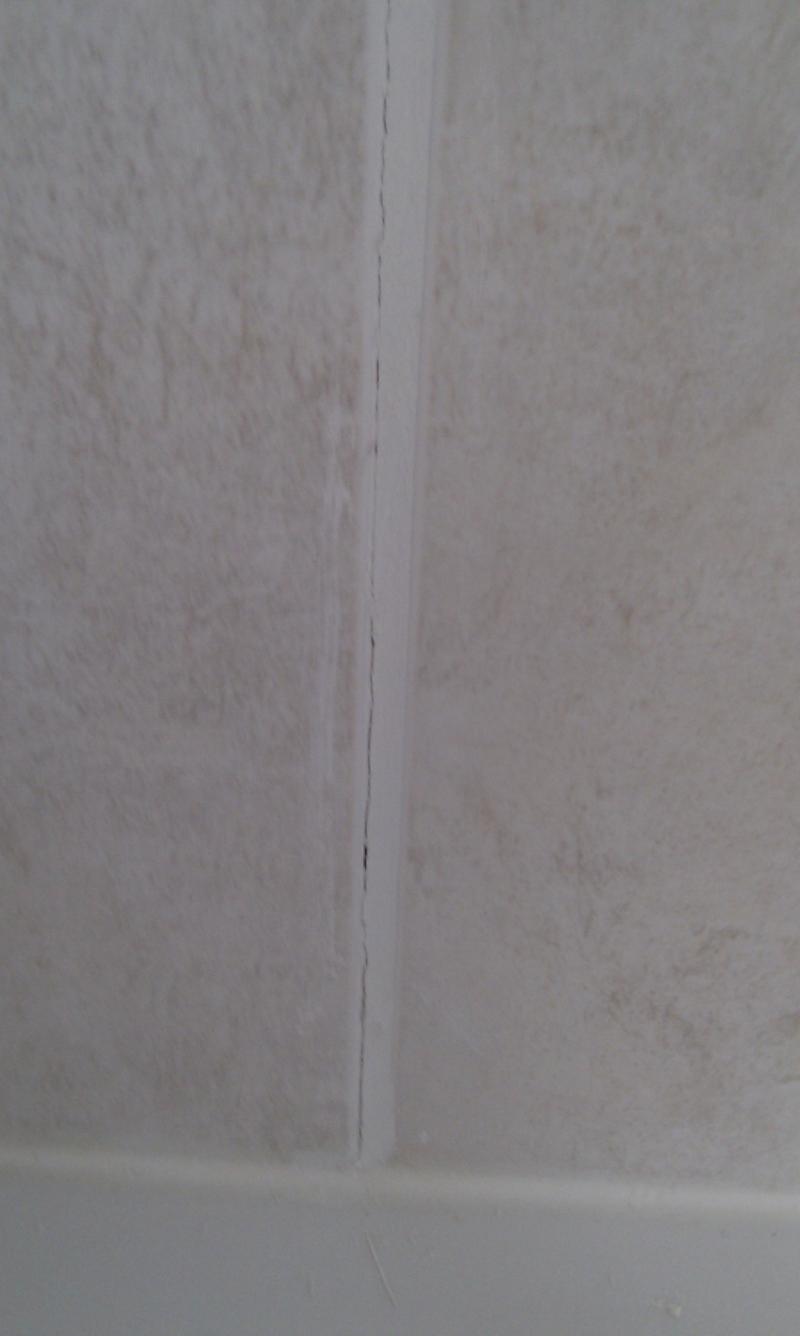
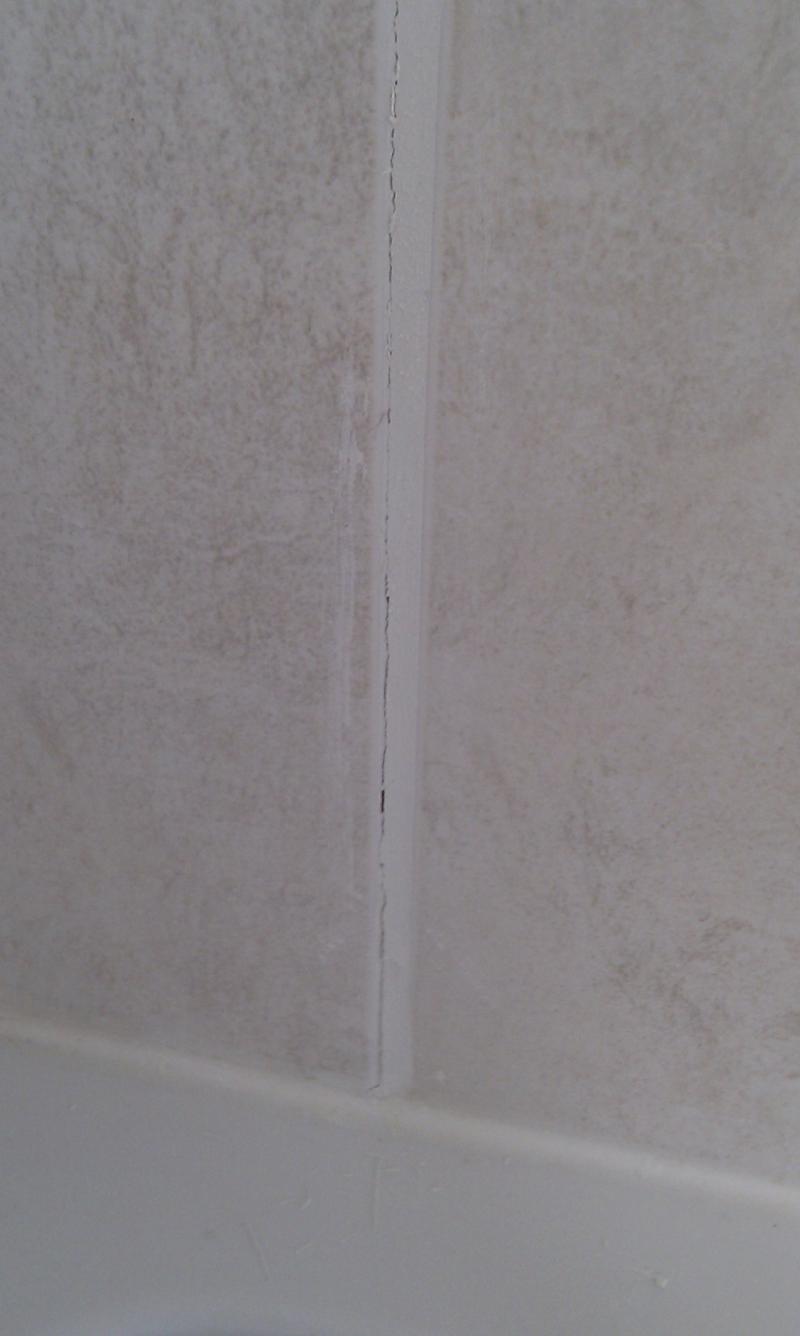
I am including a couple of images I've taken of the cracks:
I reiterate; you must remove at least the tile & any others that are loose. It’s already been re-grouted & failed again; if it’s just a failure of bonding on that particular tile (not a good sign in itself) just raking out & shoving new grout in there isn’t going to cure it. If the tile is loose & moving, the grout will just crack open again. If you’ve been running the shower with it like that, water will have wicked into the cracks & I will guarantee it will be wet behind there, even if the rot hasn’t yet set in. I’ll say again, if you remove the tile now & all appears well behind, let it dry out for a few days, stick the tile back (with the correct adhesive) & re-grout; if you do this you may salvage the situation, if you dontl it will only get worse.