Best way to deal with hairline cracks and chips in marble?

Joined
7 Feb 2012
Messages
54
Reaction score
0
Location
Selkirkshire
Country
United Kingdom
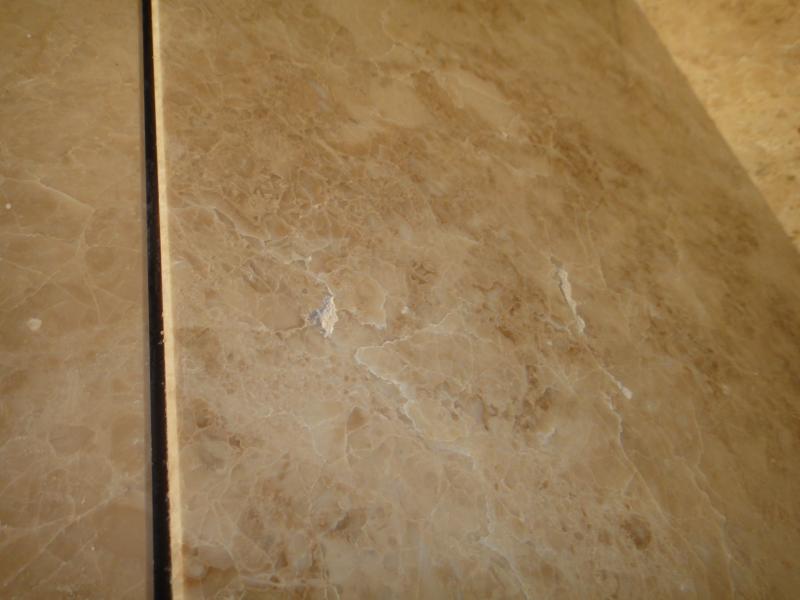
Have just put marble tiles for a shower. Hasn't come out perfect but not too bad and it's my first ever tiling job.

- One tile has some quite bad chips in it (max 3-4mm deep), just didn't notice before it went on the wall. Should I just seal it and live with it, or should I fill it with grout, or something else?


- One tile I pushed on too hard to try to get it level and there's a hairline crack appeared through the polished surface. It's not deep and I think it would probably seal up, but can I polish it down any way without professional polishing equipment?

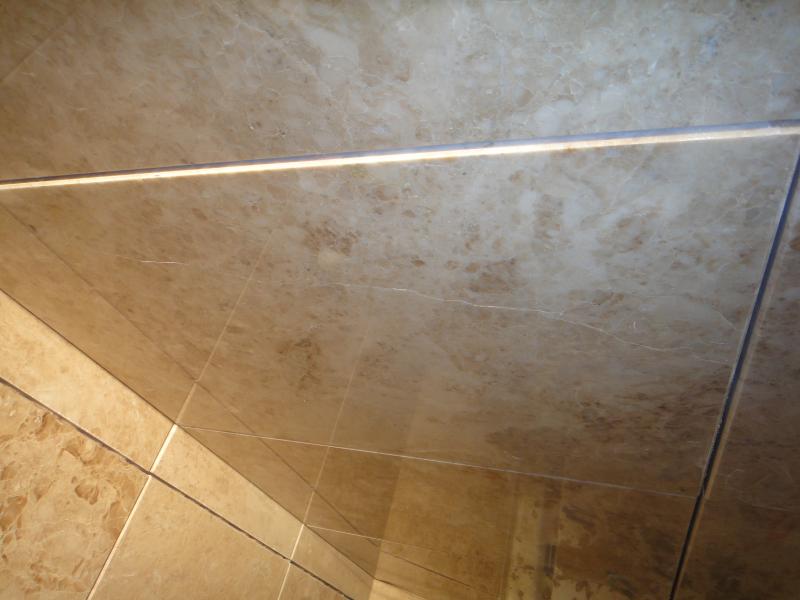
- I'd like to make a feature of the visible edges, I've found giving them a rub with fine grit sandpaper seems to help, but any better ideas?

Thanks.
 
Sponsored Links
With any polished natural stone products, you will always get small imperfections, Travertine in particular. It's a part of their natural but the number & size of imperfections is generally an indicator of quality.

Unglazed or polished natural stone tiles are not the best choice for a shower area, they are porous to a greater or lesser extent & will need sealing on a regular basis if you want your shower to last any length of time. You could use grout to fill out but not white or it will stick out a mile, you need a darker colour that will better match the background colour of the tiles.

The cracked tile will have to be replaced or it will siphon water into the tile base which will do it no good at all. If you had to push hard on the tile to level it then either the tile base isn’t flat, you used the wrong size notched trowel or both. They look fairly large format & you should have used at least a solid thin bed trowel. What type of wall are the tiles laid over, is the tile base suitable for large/heavy tiles? What type/make adhesive/grout did you use?
 
Thanks for that.

Will I definitely need to take that cracked one out? I was hoping I could just get away with a few coats of sealant. The tiles are on 12.5mm Aquapanel, and are 457 x 305 x 12 mm - and I put them on with Keraquick with Latex Plus, which sets pretty hard. I could probably get the tile out just by drilling and smashing, but how would I get the adhesive off the Aquapanel? Wouldn't it just take chunks of the Aquapanel with it, which might then weaken the wall all round, no? Angle grinder?

What about pushing some grout in the crack, sanding with 120+ paper when grout dry, then making sure it gets a good few coats of sealant? Would that do?

The Aquapanel is flat and I did use a bed trowel with semi-circular notches, just not very well (my first go at tiling). Adhesive definitely ended up thicker on that tile, probably holding the trowel at different angle; wasn't really sure how much of a bed, if any, you were supposed to leave in the bits in between notches.

I've got some grout that matches the stone reasonably so I'll fill those chips with that.

Thanks again.
 
Sponsored Links
Extremely unlikely you will get any grout penetration into a hairline crack, grout is just not fine enough. Sealant may work for a short while but it’s unlikely to provide a permanent solution. If you crack a tile, always take it out & replace before the adhesive sets, especially in a shower enclosure. A cracked tile in any shower is going to look pretty naff but in a newly tiled shower; I couldn’t live with it! I’ve no idea how difficult it’s going to be to get the adhesive off the AQP, it is possible but it will probably take a while. AQP has a reinforced mesh facing & this will protect the board to a certain extent as long as you don’t go in ham fisted & hack away at it, light surface damage wont matter.

I did use a bed trowel with semi-circular notches, just not very well (my first go at tiling). Adhesive definitely ended up thicker on that tile, probably holding the trowel at different angle; wasn't really sure how much of a bed, if any, you were supposed to leave in the bits in between notches.

It is important the correct size notch trowel is used for tiles that size as 100% coverage is required in a wet area, did you use the one I advised on your previous thread! Spread the adhesive out in a flat bed first & then pull the trowel across at an angle of 45 degrees, pressing into the base. This will leave well defined ridges of adhesive, there should be no adhesive between the ridges. Bed tiles using a slight twisting/sliding motion which spreads the adhesive out beneath the tile. It’s important the adhesive is the correct consistency, too thin & it’ll run & fall out all over the place, too thick & the tiles won’t bed properly & are likely to be uneven.
 

DIYnot Local

Staff member

If you need to find a tradesperson to get your job done, please try our local search below, or if you are doing it yourself you can find suppliers local to you.

Select the supplier or trade you require, enter your location to begin your search.


Are you a trade or supplier? You can create your listing free at DIYnot Local

 
Back
Top