Fitting an L shaped bath backwards

Joined
18 Mar 2005
Messages
632
Reaction score
14
Country
United Kingdom
We're about to redo our bathroom and we are trying to maximize space.

We currently have a shelf along the edge of the bath partly due to the toilet stack pipe which goes up in the corner of the bathroom and partly due to the fact that the outer edge of the bath needs to be where it is to cover the slope from the stairs.

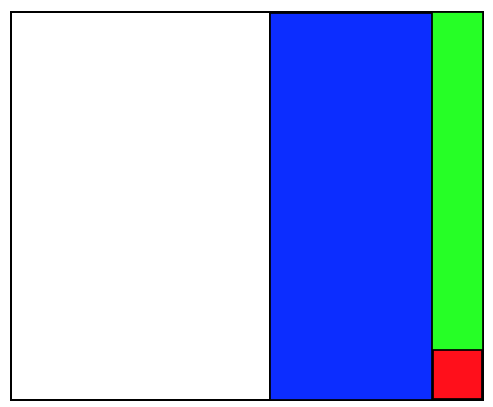
I have uploaded a very crude image to demonstrate - the blue is the bath, the red is the toilet stack pipe, the green is the shelf.

What we are thinking of doing is putting an L shaped bath in to give a wider end to the bath for showers etc. However I want to put it in back-to-front so that the extra part of the L goes into to where the shelf was. I would still have to make a small section of shelf to fill in the gap that is left.

Can anyone see any problems in doing this?

Is the back of the L shaped baths finished as well as the front? It isn't just flat and unfinished at the back is it?

Can I just use a standard straight bath panel on the side? Or perhaps make a tiled panel?

Thanks

 
Sponsored Links
Wouldn't be a problem if you have the skill to pull it off. I mean that in the nicest possible way.

You need to ensure that there will be zero movement, ensure your seals are spot on and that your tiling is top end.

It's more than do-able but you need to understand where the problems are going to start and plan for them.

Jon
 
Thanks for the reply, I'm not worried about the tiling I've done plenty of tiling in the past and never been unhappy with it. I've fitted a few showers, toilets and sinks but I've never actually fitted a bath.

Also - with the bit that would need filling, would I be better to do it level with the bath or raised?
 
Sponsored Links
Yep, it's all do-able but I'd be looking at building a box frame either side and end to support it, especially if it's acrylic, when it's full with a person in it or standing when showering, it will want to move and flex and will eventually burst any seals that are being used.

I'd have the small filler raised a mill or 2 above the level bath level for ease of cleaning
 
Thanks, that sounds doable - with the box frame - how exactly do you mean for this?

Do you mean a framework made of CLS timber or similar - screwed to the wall for the bath edge to fit on so it can't move down? Going round the 3 edges?

With the sealant is it better to have lots between the bath edge and the wall and as little as possible on show?
 
Yes, there has to be a small amount of flex allowed if it's acrylic to avoid cracking but with such a shape it needs stability especially at the bottom part of the L shape, hence the framing. Especially around the inside of the L shaped as it will want to flex more at that point, type of feet/legs dependent.

I would seal on the frame all way around and along the edges that will make contact with the walls to allow the small amount of flex needed, fit and set, then tile down to bath edge and a fill the gap under the tile edge to the bath leaving a small fillet to allow the water to be directed downwards.
 
A good tip is to fill up water to the overflow in the bath before sealing around bath edge/tiling. That will give a good seal when full and person in it.

Daniel.
 
Right I now have the bath, and a gutted bathroom!

The bath fits snuggly between the two end walls so I will have to fit it in place before tiling.

I have created a framework at the rear to support the L shape part. This attaches to the wall at the rear and has vertical supports to the floor.

I have test fitted this and it sits perfectly onto this framework. Now this edge had lumps of wood level with the lip - which were intended to screw in clips for the front panel so these sit on my framework and give it extra support (not just sitting on the lip).

I now need to do the frame work for the two ends of the bath. This will be screwed to the wall and again I will put vertical supports in down to the floor to ensure it is secure. However these edges are different. The edge of the bath itself is reinforced and has a thinner strip of wood but the lip hangs down further - is it enough for the lip to sit on the framework or should I make a framework that the lip goes over? I could use the proper mounts here which are a bent piece of metal (they screw to the underside of the bath edge and go round the lip then up). You then screw them to the wall then tile over. However the box frame seems to be more secure. I just need to be aware that the taps need to go through at some point too!

I'm going to make a tiled front panel for the bath - so I will also make a frame for the front edge. This will need to go behind the lip to give room for the board and tiles to go on. So the lip definitely won't sit on the frame here.

So I guess from this my main question is can the lip sit on the frame at the ends or should the horizontal edge of the bath sit on the frame?


As an additional question when filling the bath with water to seal it - should I adjust the bath up slightly (using the 4 legs) so it is above the framework then fill the bath in case it lowers - if it is still above then lower it down onto the framework whilst full?

Or would I be better to sit it on the framework on a bed of sealant, then fill the bath and tighten the legs to take up any slack?
 
Right I've finished the framework. I ended up building a two part frame so the lip goes over the first part. This should give it much better support.

I managed to build a full frame across the rear supporting the L part well - this wall has 5 uprights to give added support too. I went across one wall at the small end of the bath - only battened onto the wall at this point as verticals would get in the way of the toilet pipe and they wouldn't do much as the floorboards are unsupported at that end. At the wide end there are the taps so I could do much of a frame here. I did have to build a low level frame though for the feet to sit on as the floor boards ended here and it was above the sloped ceiling from the stairs - this seemed to work well although the legs are now on the shortest setting they will go on. I also made a box section frame to support the front and to give somewhere to screw the front panel to.

I've walked about in the empty bath and there is no movement at the moment, fingers crossed that this will stay the same with it full of water. I've just connected up the waste so it is ready for a test.

I now just need to do the sealant. What is the best order to do it?

Should I put sealant on to the frame to bed it down on to? Or just between the walls and the bath?

Should I lift it off the frame a little before adding the water? I can't see it moving down at all given the framework.

Thanks
 
Just wanted to post a quick post to say thank you to everyone who has given advice with this and all the other parts of the bathroom!

It has taken me three months due to work but it is just about finished.

To summarise from my many posts, I have:

Gutted the bathroom completely.
Re-plumbed all the pipes to their new locations.
Redone the waste pipes.
Removed the boxing in from the toilet stack pipe.
Aquaboarded the wall and boxed in the stack pipe with smaller boxing in.
Built a wooden frame for the bath to sit on.
Fitted the L-Shape bath back to front to fill the gap.
Built a small shelf to fill the gap between the L and the stack pipe.
Tiled the complete bathroom.
Moved the pipes for the radiator and fitted the new radiator.
Put new architrave and skirting in place.
Fitted coving.
Fitted new bathroom laminate.
Made a tiled bath panel for the side of the bath.
Fitted vanity unit toilet and sink.
Fitted Mirror.

Every job seems to have taken longer than planned! The pipework was particularly tricky due to the fact that loads of pipes run under the floor so the pipes I wanted to alter were often tight against others.

It looks great though - so much better than the old bathroom and everything is hidden and neater now.

But anyway back to the point of this post!

Thank you to everyone has offered advice!
 
bathroom1.jpg
bathroom2.jpg
 

DIYnot Local

Staff member

If you need to find a tradesperson to get your job done, please try our local search below, or if you are doing it yourself you can find suppliers local to you.

Select the supplier or trade you require, enter your location to begin your search.


Are you a trade or supplier? You can create your listing free at DIYnot Local

 
Sponsored Links
Back
Top