Hammie's Loft Conversion

Joined
30 Apr 2010
Messages
75
Reaction score
7
Location
Leicestershire
Country
United Kingdom
Evening all!

I thought I'd share with you my loft conversion, hopefully it will be educational for those considering doing their own, there's not many documented conversions about so I hope this one will be helpful to people.

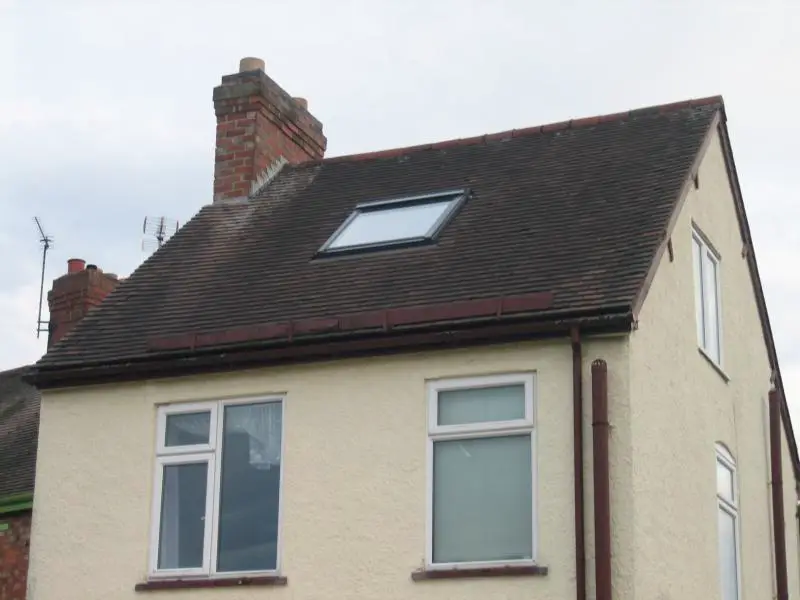
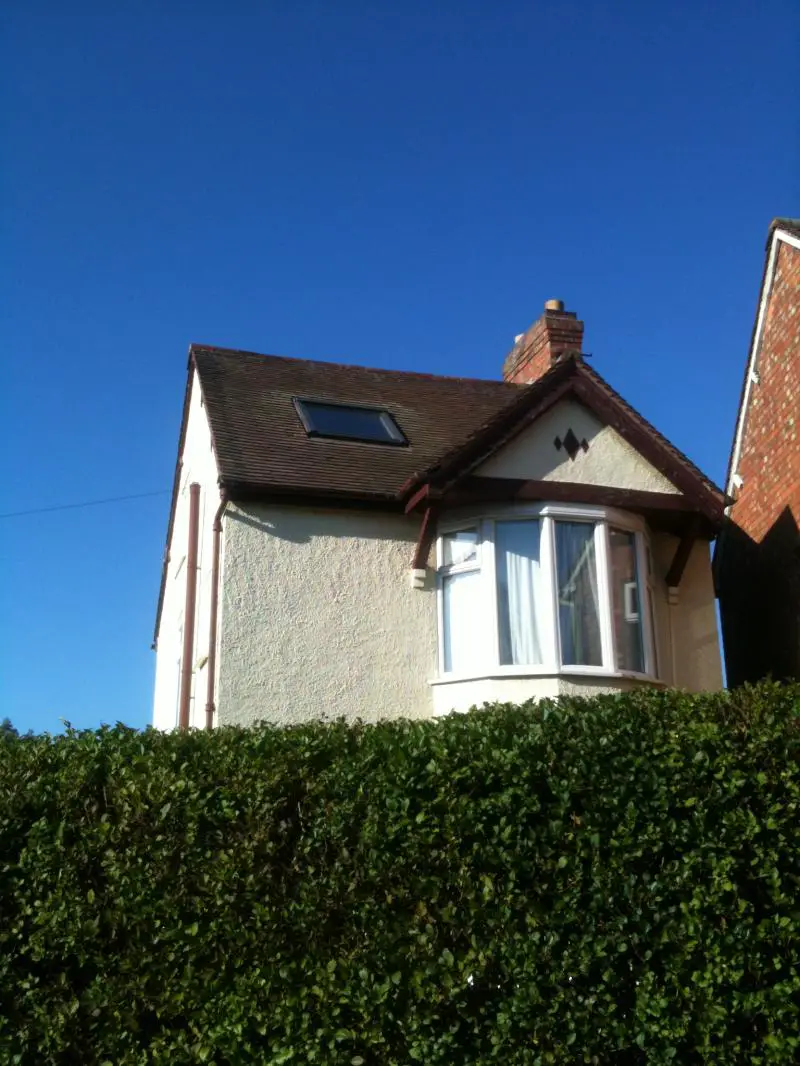
I bought my house just over a year ago, a detached 1930s house with a gabled cut roof, and already had a loft conversion done by the previous owner, but sadly not to building control standards (I was fully aware of this when I bought it, and bartered a significant discount because of it :mrgreen: ).

After much research, I came to the conclusion that it had to be completely stripped and redone, the only helpful thing about the current conversion is that the 1st floor bathroom had already been relocated to make way for the staircase.

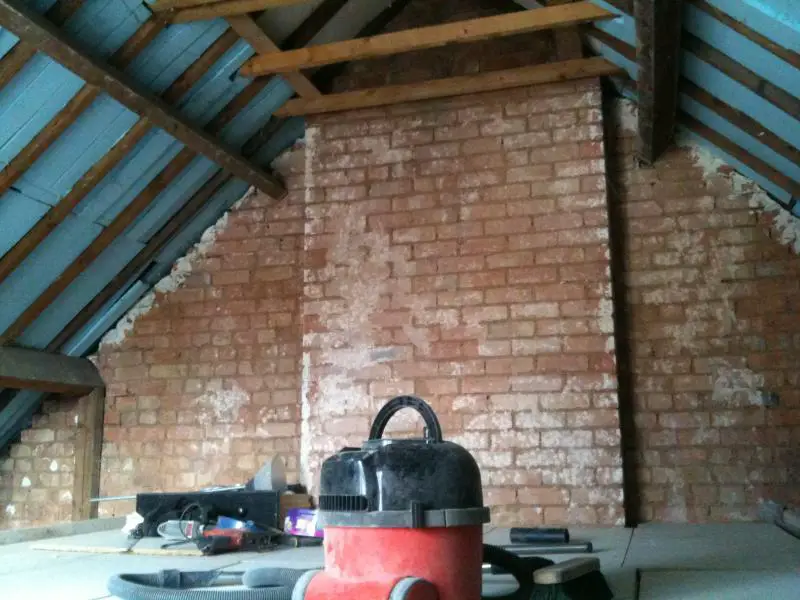
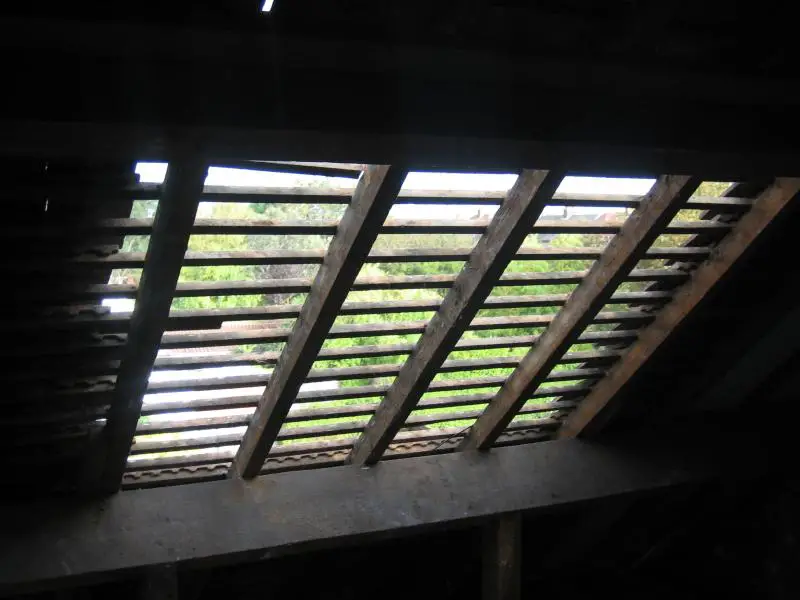
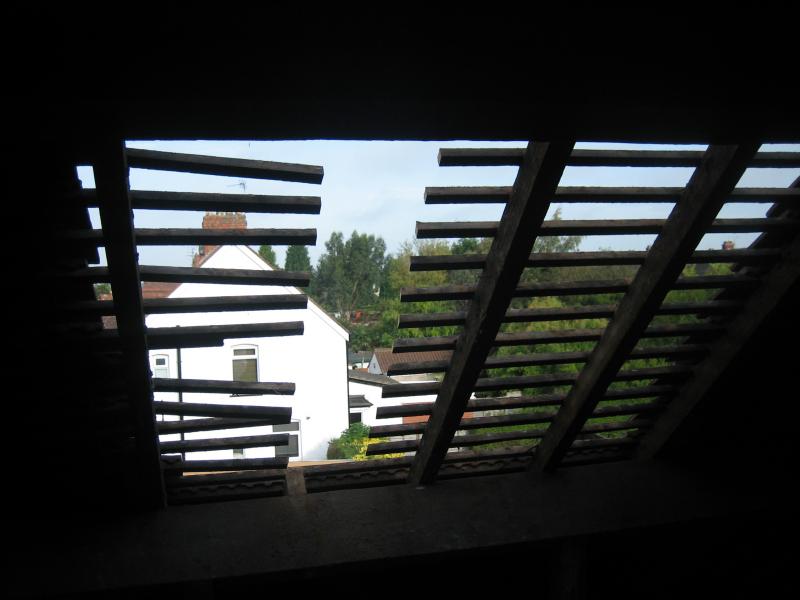
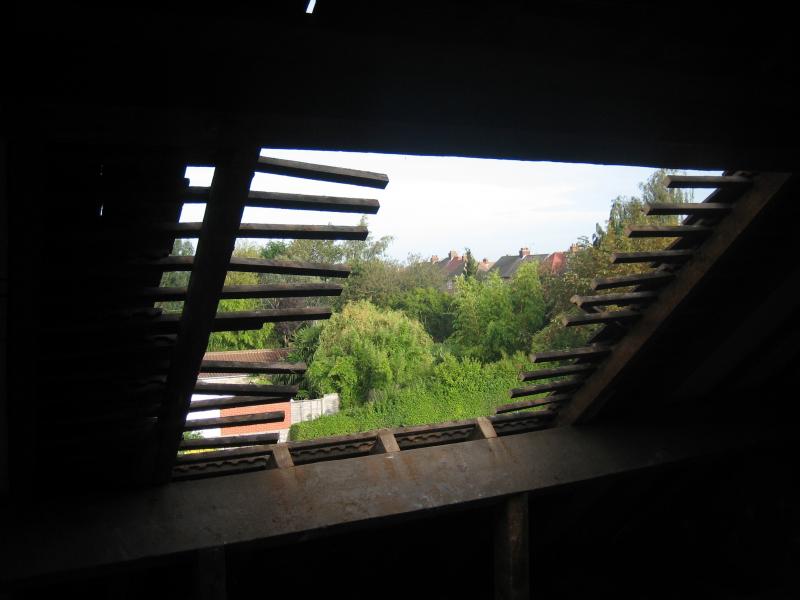
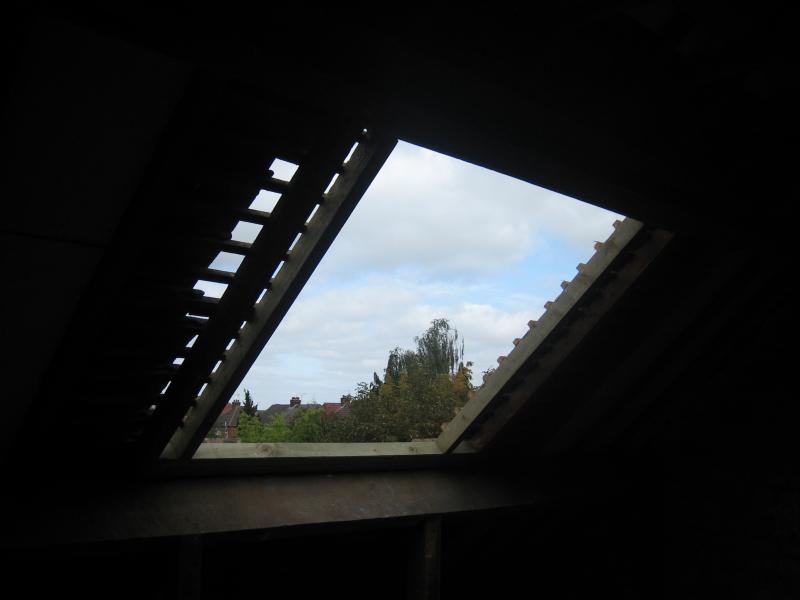
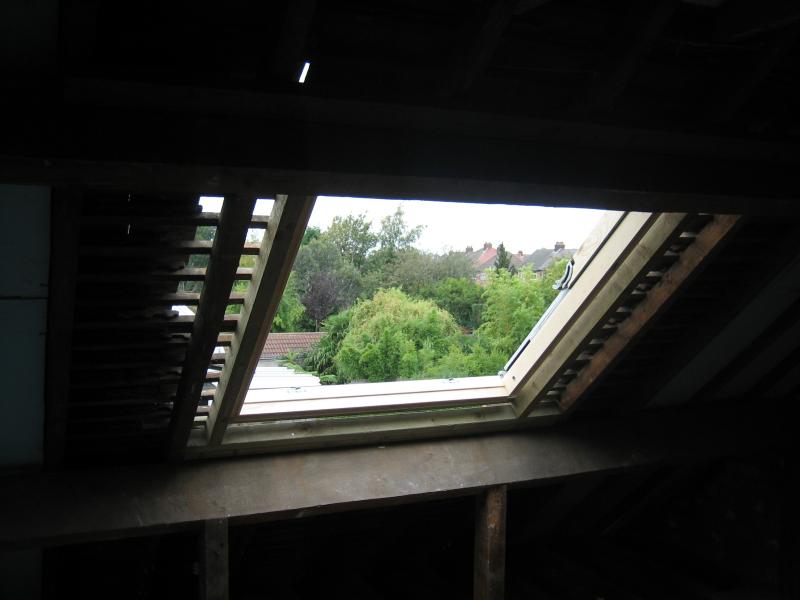
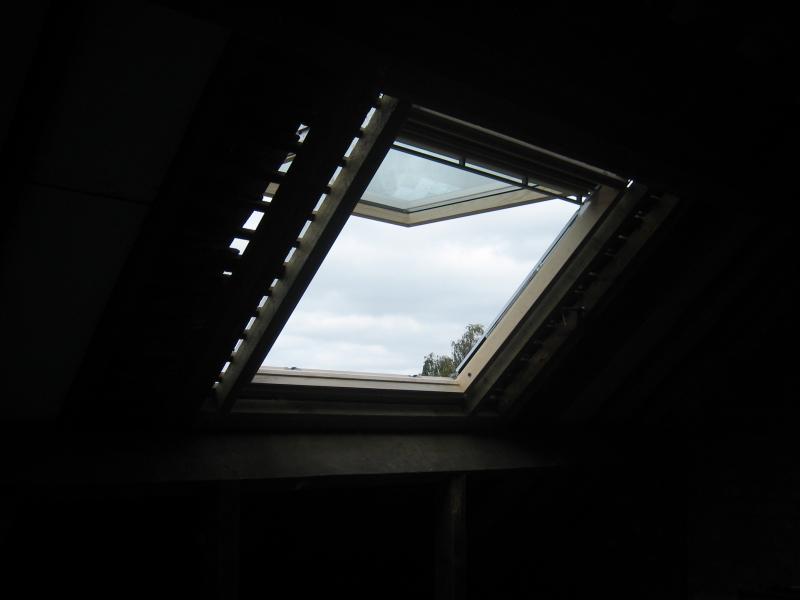
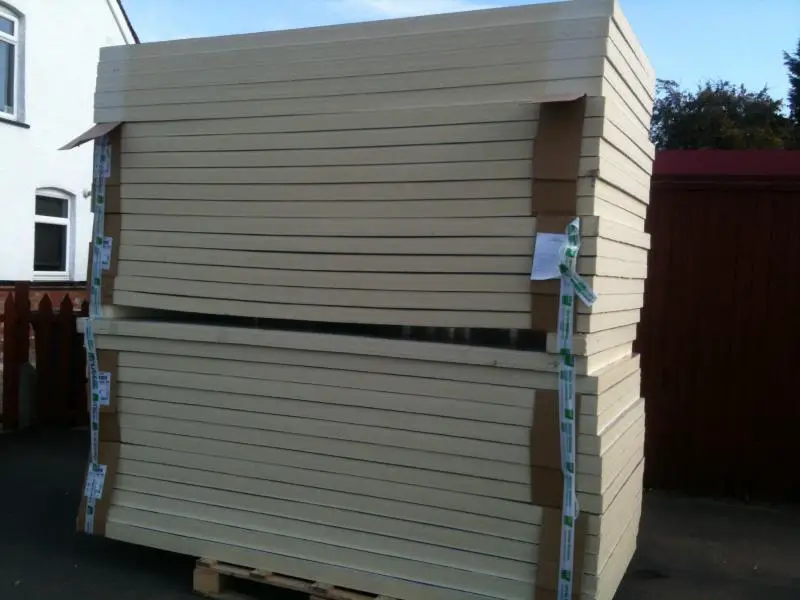
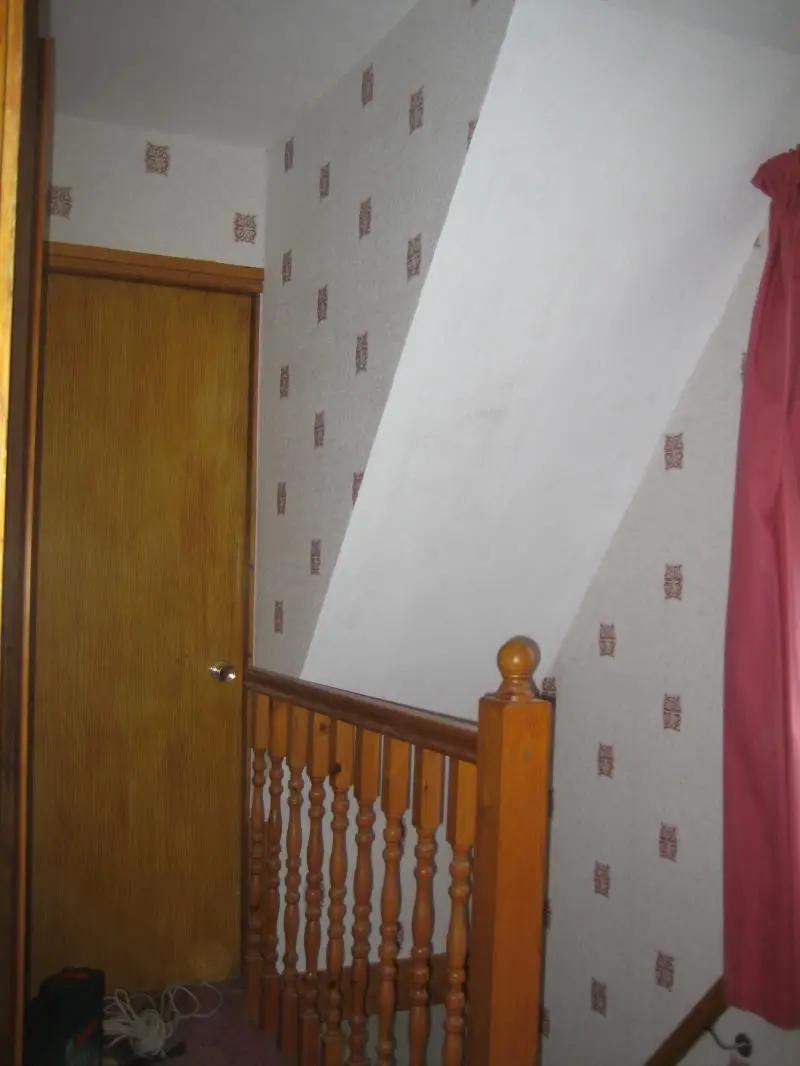
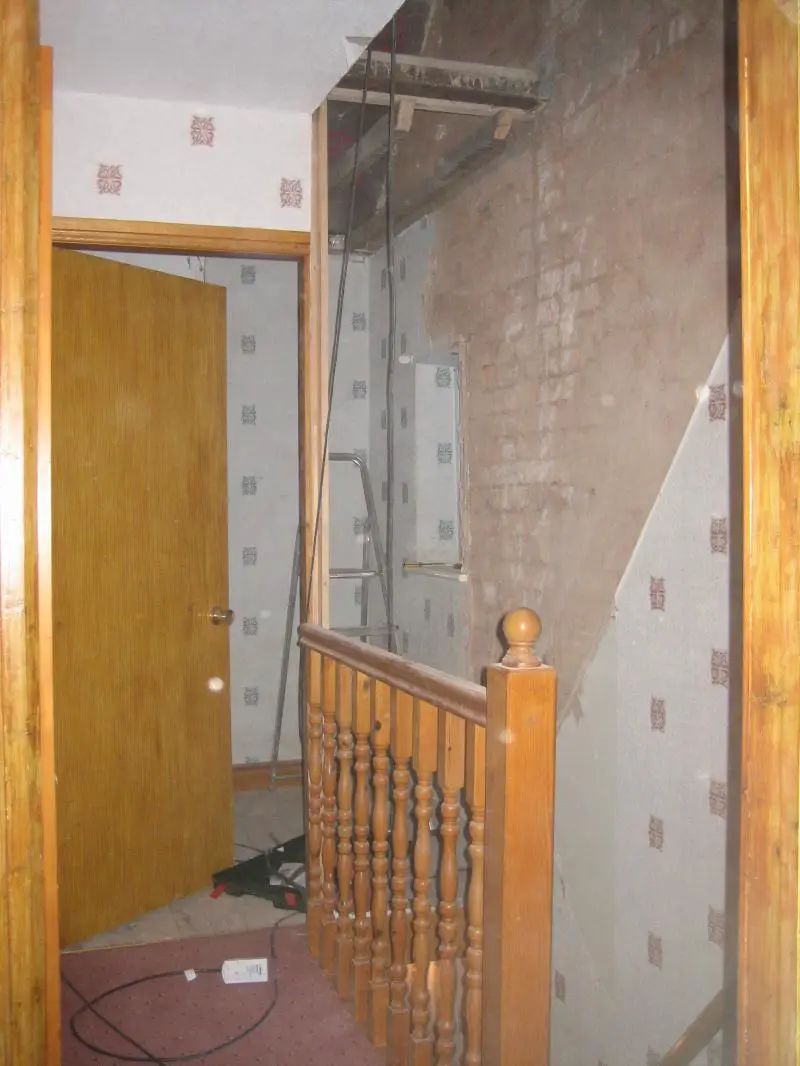
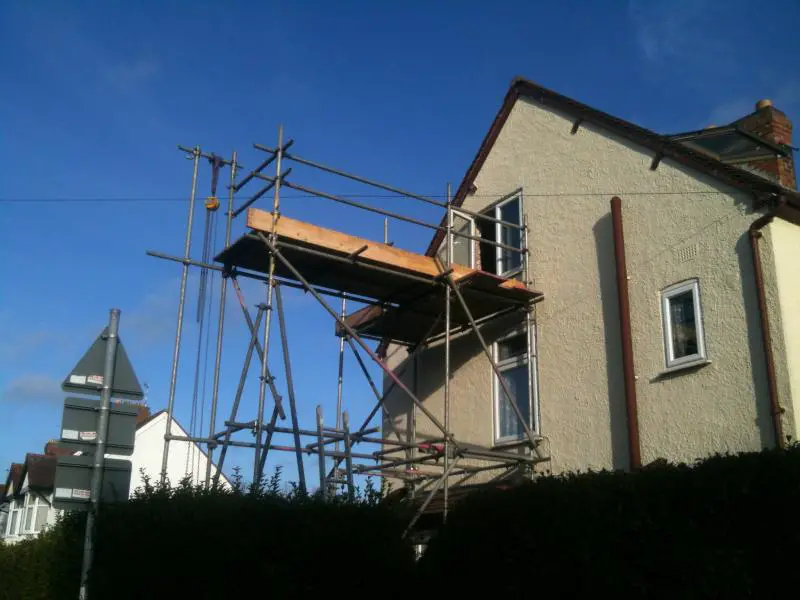
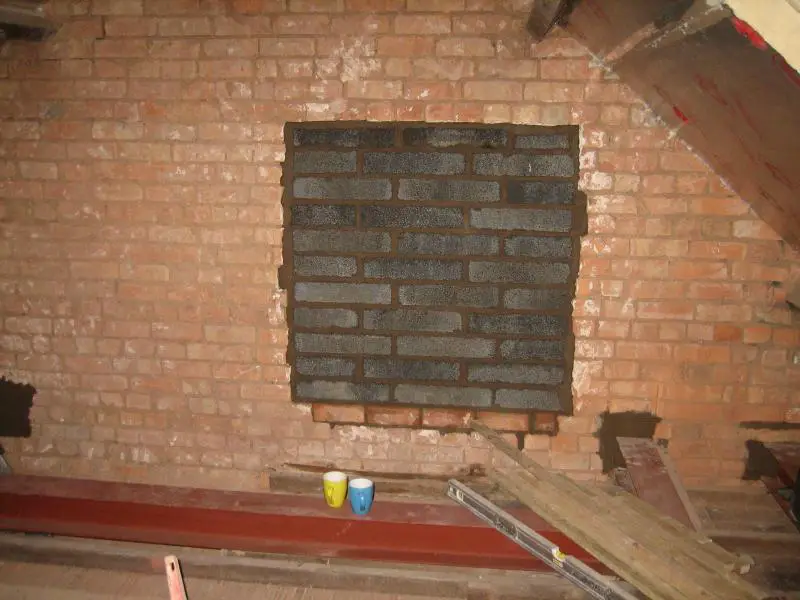
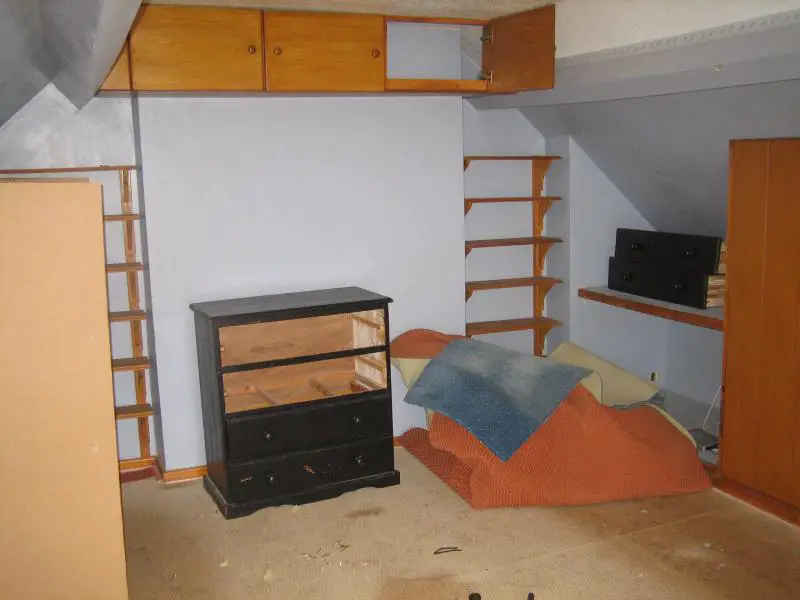
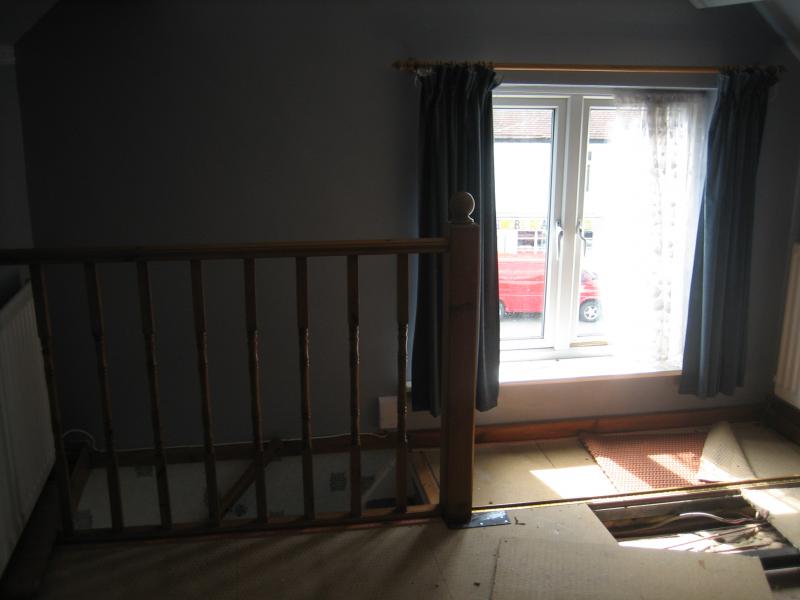
My intention is to do the conversion myself, apart from the steels installation, bricking up of the gable window, fitting the fire doors, electrical certification and plastering. That still leaves me with a lot to do, I anticipate it won't be complete for 6 months yet. Here's some pics of the original conversion....


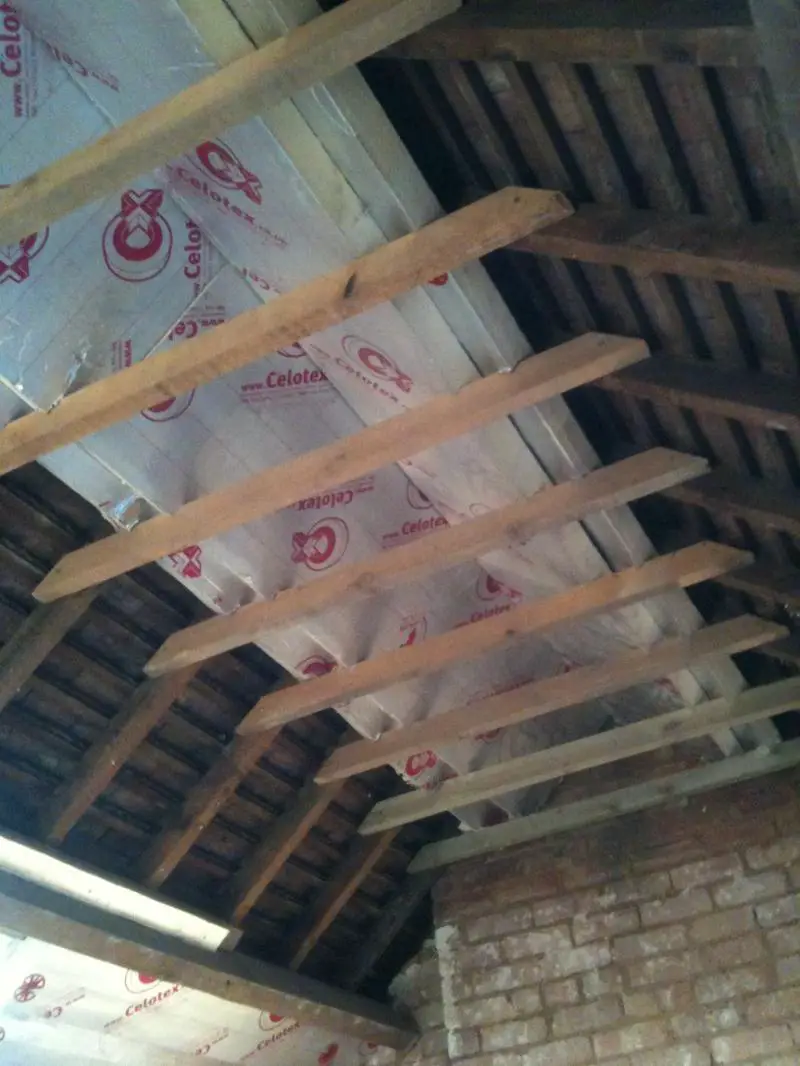
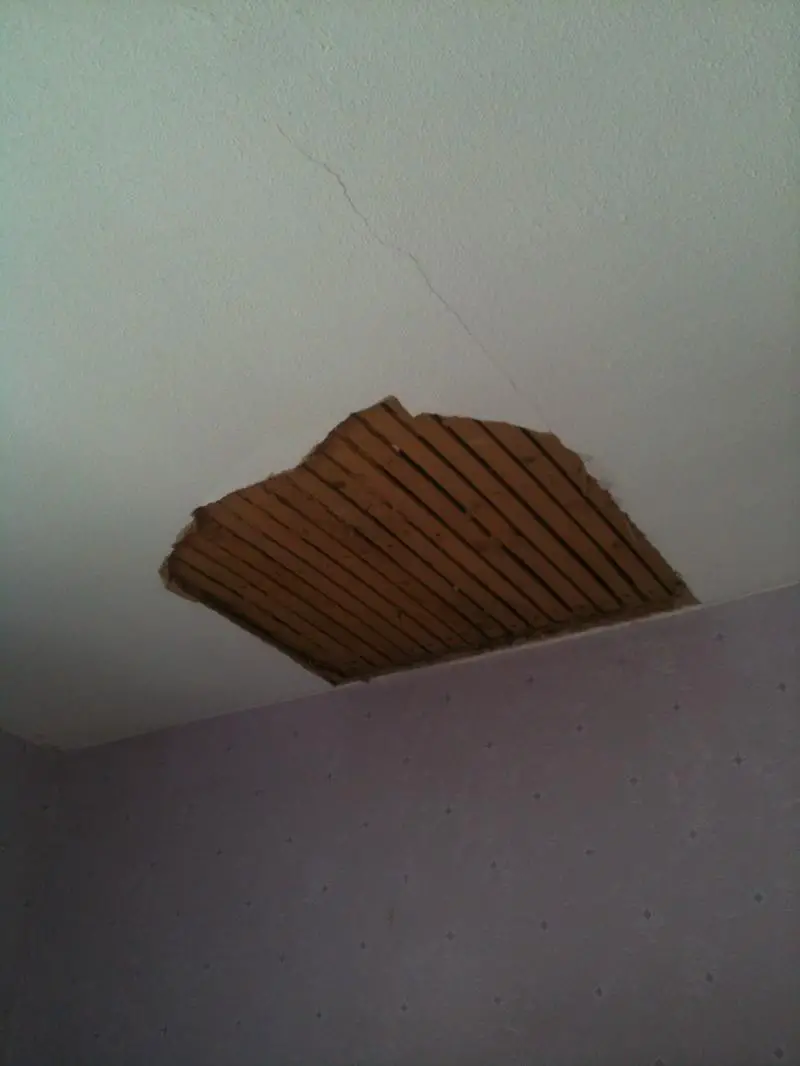
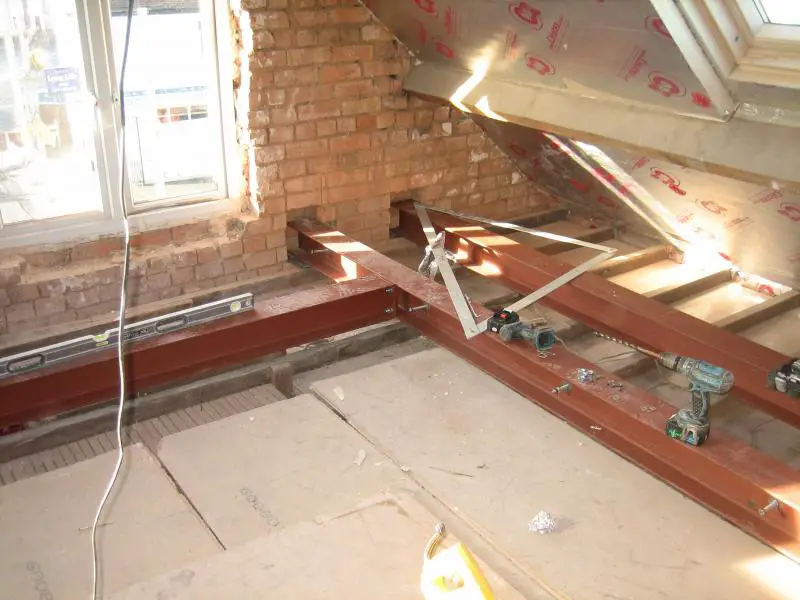
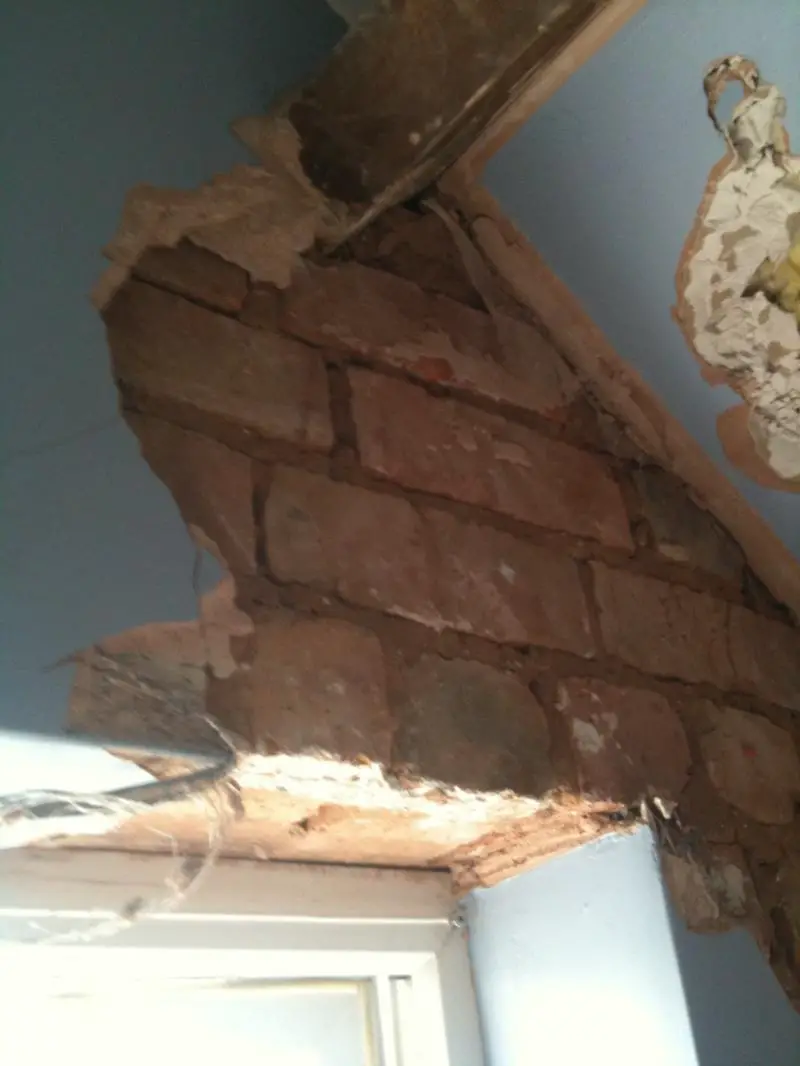
Stripping the old conversion revealed some rather terrifying things, like the electric shower cable which ran under the floor that had completely burnt out due to usage of a tiny connector block or the usage of 3 phase cable everywhere (how he wired them up I don't know, 3 phase wires are all black)! Worst of all though was the gable window, which had no lintel above it, one of the purlins was almost right above the window, I'm amazed it's still standing!


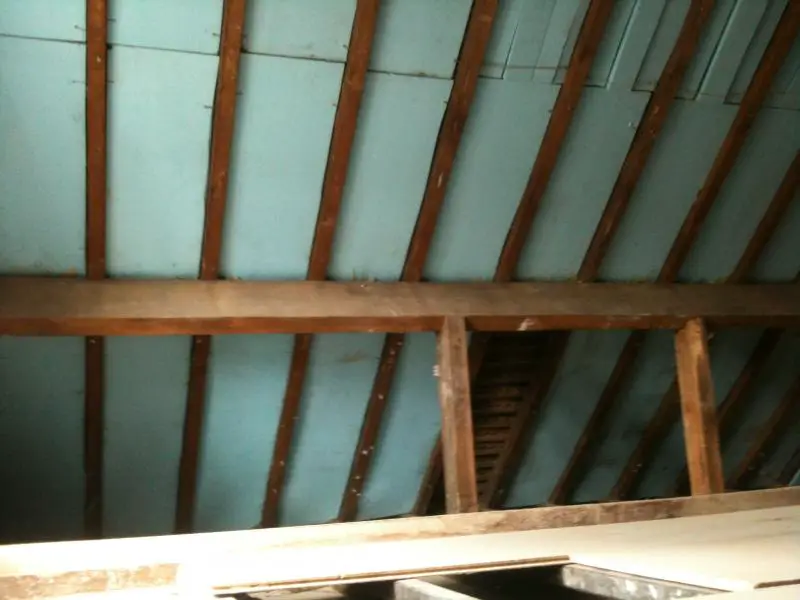
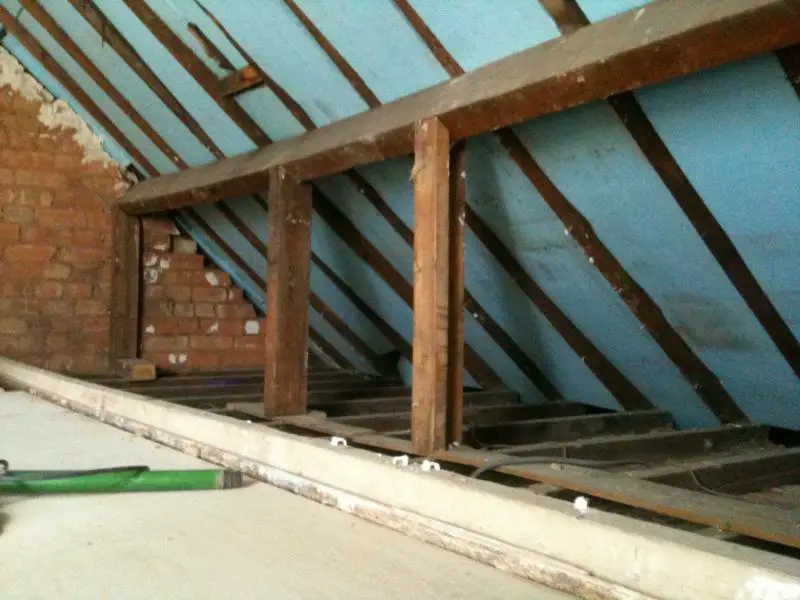
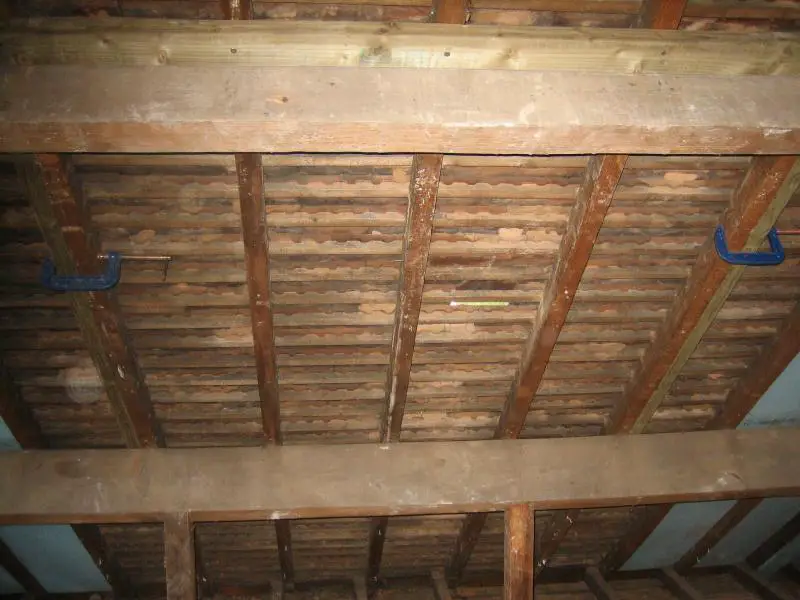
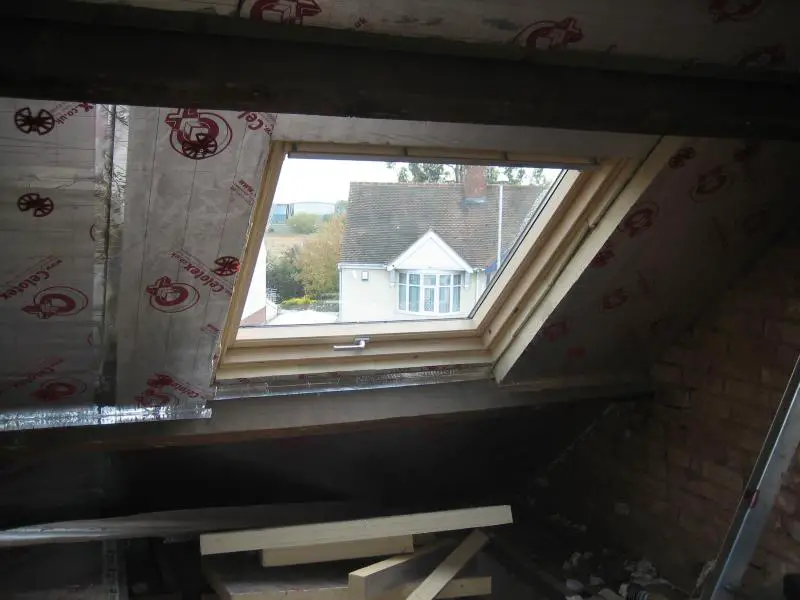
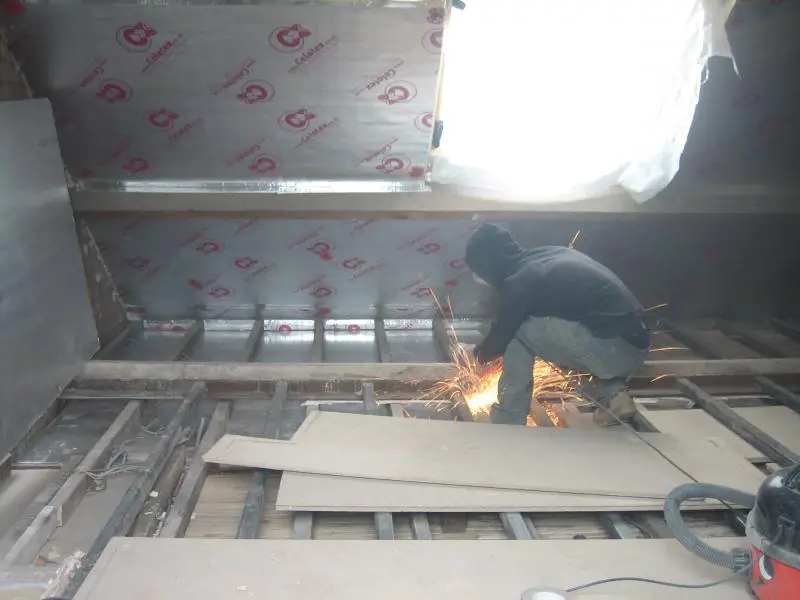
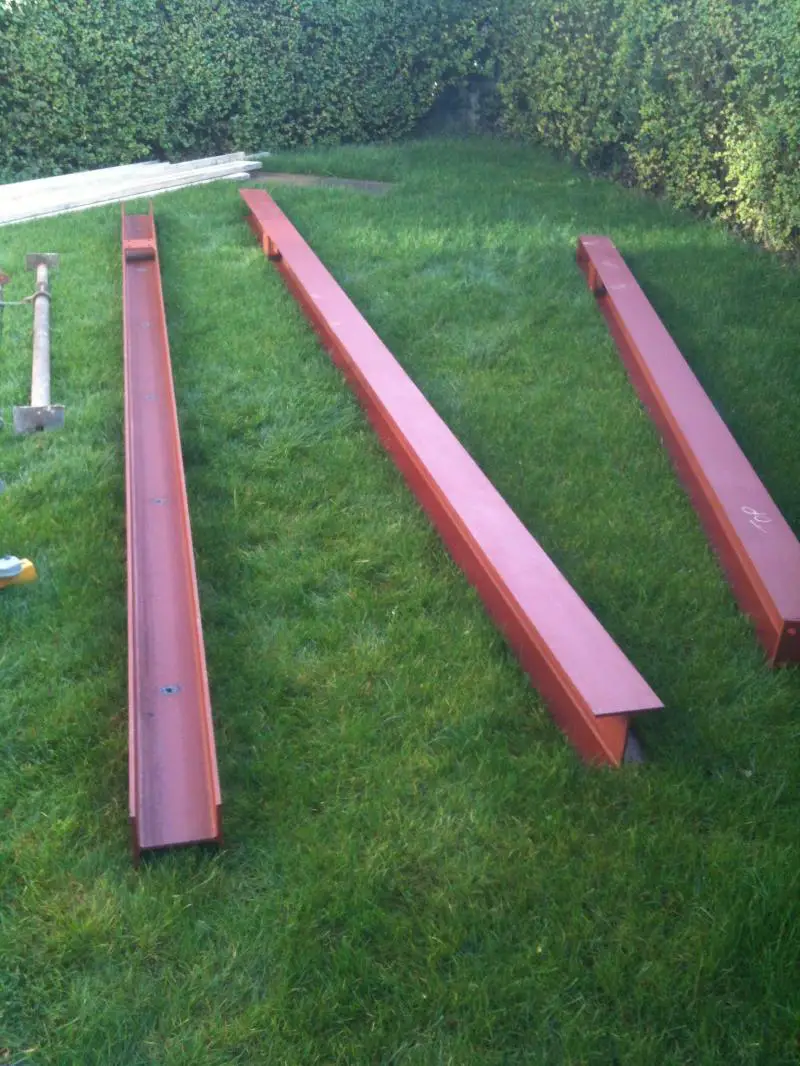
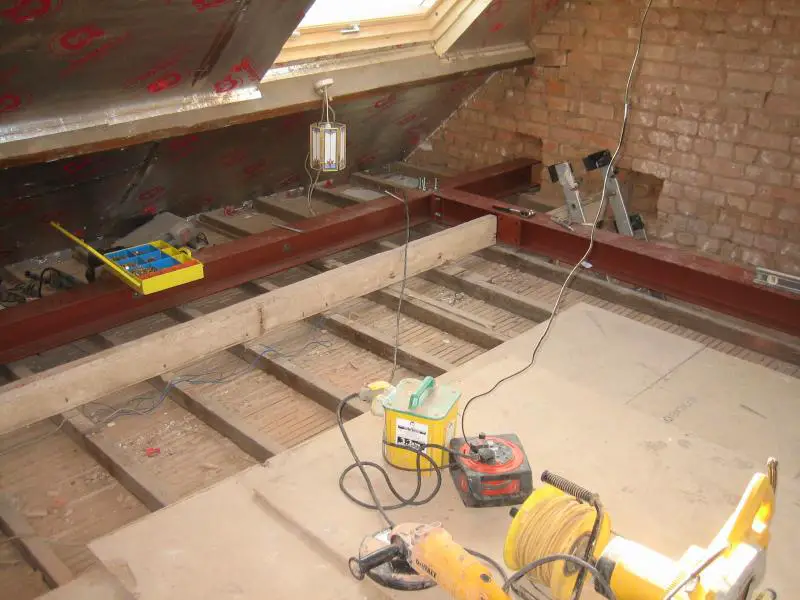
The floor also bounced like a trampoline due to the woefully inadequate steels that had been installed, and the staircase headheight was so low that even the shortest person I know has to duck :rolleyes: The insulation consisted of loose fitting polystyrene and about 100mm of fibre glass wool compressed down to about 25mm, I suspect the room was very cold since he'd also installed 4 radiators :p I've now removed all of it apart from the staircase, and I'm into the construction phase of the project...

 
Sponsored Links
Last weekend I put in the first of 2 velux windows, I'd never attempted anything like this before and it was a sizeable window (114 x 118cm!), but thanks to careful research and planning it went without a hitch. Oh, there was one hitch, I couldn't get the frame up the attic stairs! Instead I had to knock a hole in the ceiling and hauled it up through there :mrgreen: Anyhow, time for some pics...

Tiles removed...
First rafter removed, I was a little nervous doing this!
Other 2 rafters removed...
New trimmers fitted and rafters doubled up...
Window frame fitted...
Window in!
Flashing complete...
My new view :mrgreen:

The window itself went in suprisingly quick, about 5 hours, but I spent another 10 hours fitting the flashing (lots of tiles to cut and drill). It's been torrential rain here today and I'm happy to report not a single drop made it through :) 2nd window is going in next weekend, in the meantime I'll fitting some of this huge stack of celotex....


The fun never ends :)
 
Sponsored Links
what guidance did building control given you when you contacted them ??

They told me that there was no certification for it, and it would have to comply to current regulations, I didn't bother getting any more advice from them on the original conversion because it was so clearly not acceptable (even if it was acceptable by their standards, it's not by mine!). I've got full plans approval for the new conversion, this one will be done properly :D
 
LOL

Not a bad job (your window) , saw one recently a "chippie" had cut in for a Velux and it was terrible. Wrong starting place to the tiles, just bad all round and leaked.

Well done.
 
have they given specific points that they they would like to inspect the work for compatability ??
 
No they've not specified (yet), the new steels are due in 3-4 weeks so I was going to arrange for them to inspect those plus the windows at the same time. I spoke to building control and told them i was starting, they weren't interested in inspecting at that stage so I've just continued. Is there something I should be concerned about or are you just curious?
 
its best to check with them at what point they would like to be made aware off
for example structural supports
insulation
electrics
fire doors
they will all have there key point they want to inspect [or at least be invited to inspect]
 
its best to check with them at what point they would like to be made aware off
for example structural supports
insulation
electrics
fire doors
they will all have there key point they want to inspect [or at least be invited to inspect]

Couldnt agree more. I got told to build away and when I did begin to wonder when and asked the question he told me ok Ill will let them know you have started. Started! I deal with BC direct now and dont go through the agent
 
Just a quick update, second window is in now, as well as the first layer of insulation...


New collars are in place...


Now you see it....


Now you don't!


I also removed the old steelworks, which was somewhat interesting with the stairs gone, the biggest peice weighed just shy of 80kg! (Yeh yeh, I could have chopped it in half but I ran out of discs and I was impatient :p) Managed to slowly lower it to ground level without punching holes in anything :)


Part of the ceiling in one of the bedrooms decided it'd had enough the other day, so that's another job to add to the list...


Builders are coming on Wednesday to install the new steels and brick up the old window, followed by building control visiting on Friday or Monday, it's all moving quick now! More updates soon...
 
Alls going well eh :D I was wondering how it was going.

I have a number of cracks in the lathe n plaster but was lucky to just have to wraggle and fill. A bit of plasterboard mesh tape for the worst.
The lathe looks very clean so doesnt look like it was bonded to well in the first place.

Good luck with BC.
 
It's been an exciting few days, the builders have now nearly finished, they just need to return on Monday to paint the outside of the bricked up window and remove the scaffolding. I expected they would have used a crane to get the steel in place, but instead they set up a scaffolding and pulley system...


This involved first getting the steels perpendicular to the house, but the hedge was in the way, so they just laid a scaffolding board on the hedge and slid the steel onto it until it was balancing on top! Hedge is a little squished now, but I'm sure it will rebound in no time :p


The steels were hauled up with pulleys and pushed through the window, out through the holes in the far wall, then back into the first wall (this meant there are no external holes on the visible side of the house).


There's still one beam to install in that last photo, the building inspector seemed quite happy with everything so far, but rather unnervingly didn't really ask any questions (or say anything infact, I had to specifically ask him about each detail he was there to check!). The gable window is now bricked up too, which I'm quite sad to see go, but was necessary to ensure the stability of the wall.


I was very impressed with the builders, done a very solid job and were keen to give me tips on the conversion, I'll definitely be recommending them. Next job is the staircase, I'm still toying with the idea of installing myself, as it's only a standard straight flight (maybe with a kite winder at the bottom), more research is required I think. More updates soon...
 
I reckon your right with the gable end wall window. I would of wanted to keep or install one but dont have such a wall. I dont see why you couldnt keep it by installing a lintel. Putting a lintel in would require propping but thats not such a huge job.
You could still install one different size or in a new position. If you dont have anything solid to prop off in the loft (such as a beam) you can put a needle below the intend window and one above with a prop between either side and cut out your lintel and install.
Does your engineer think the wall is not solid enough. Ask him what it would take. Resin anchored steel plates?
You can buy direct from the builders supplier. Drill the plate yourself, resin from most outlets as well as threaded rod. It would take a couple of mates to help fix in but doesnt have to be expensive.

I would consider it as now is the time.
 

DIYnot Local

Staff member

If you need to find a tradesperson to get your job done, please try our local search below, or if you are doing it yourself you can find suppliers local to you.

Select the supplier or trade you require, enter your location to begin your search.


Are you a trade or supplier? You can create your listing free at DIYnot Local

 
Sponsored Links
Back
Top