
- Joined
- 2 Feb 2014
- Messages
- 412
- Reaction score
- 2
- Country

We had a list of small jobs that required doing at our house, one of which was plastering. I don't know about the plasterers around your areas but i'm in touch with a lot of plasterers through my work & it seems they don't get out of bed for such small jobs. So for all these jobs we got a handyman that came recommended.
For the most part his work has been perfecto. It's just a couple of issues with the plastering.
1) lumps
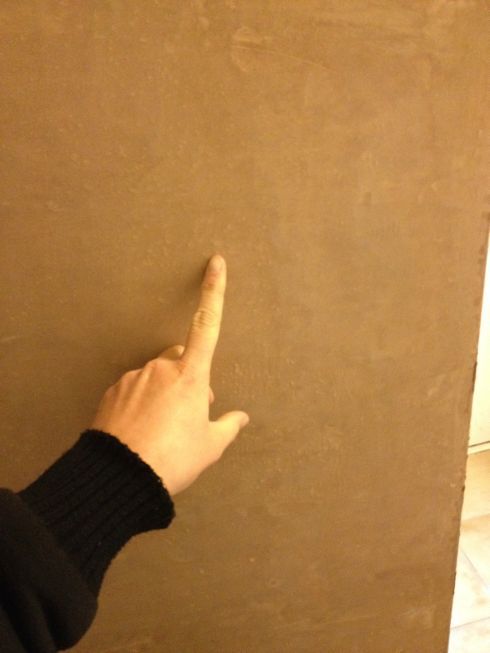
He plastered a section of the kitchen. The surface was a bit of a strange tacky surface. 99% of it is perfectly fine, but there's a small section which is quite lumpy.
I'm not majorly bothered as the fridge is going to go where it is lumpy & as such it just wont get seen.
Doesn't stop me wondering WHY it is lumpy when the rest of the plastering is smooth. I took a photo as best i could...
2) Cracking
This is the one that concerns me.
He carried out the job on Thursday. There was a list of jobs so i'm not sure at what point he started this particular one, but he was down for 8:30 & wrapped up by 4:30.
Friday dinner time it was still visibly wet & looked perfectly fine...
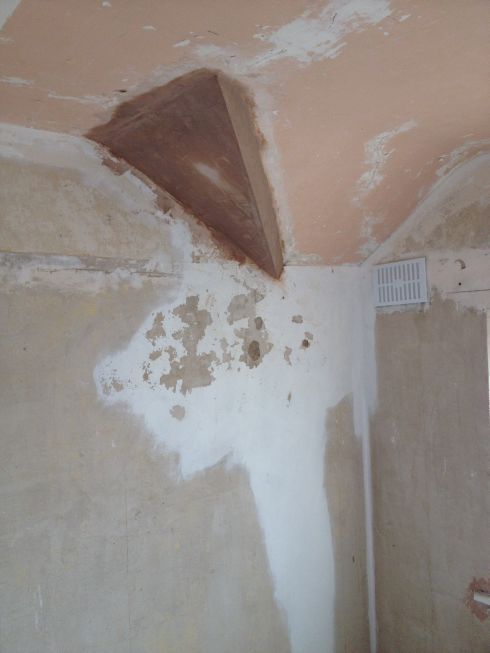
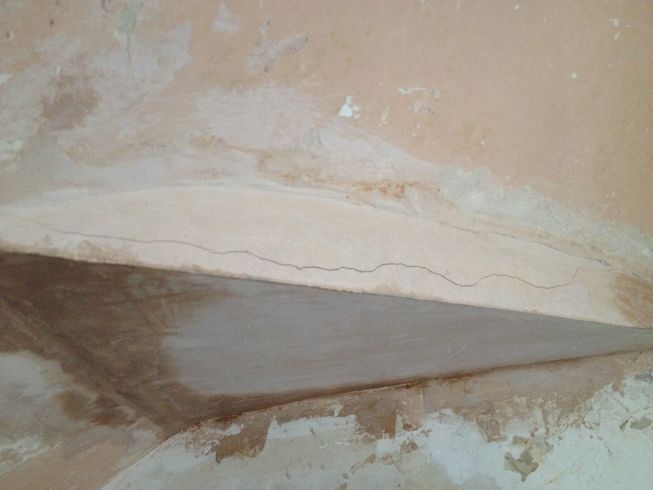
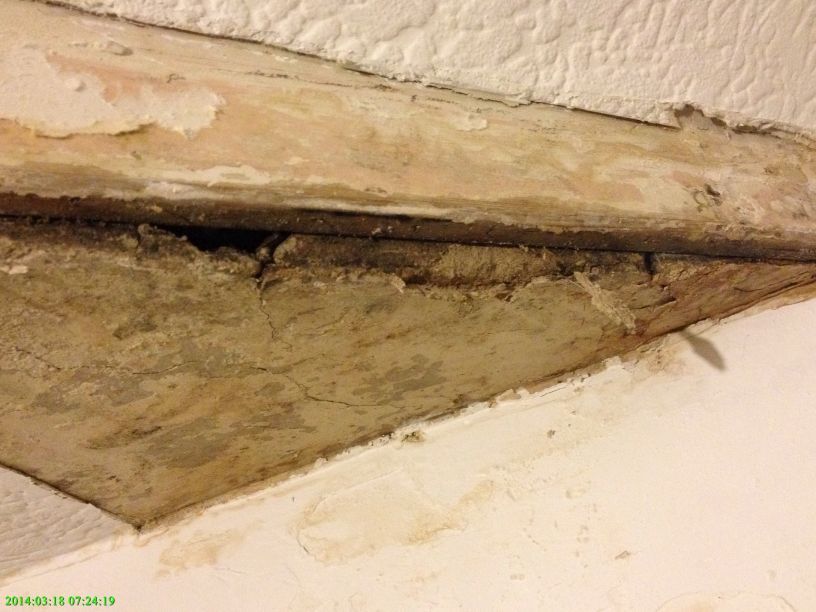
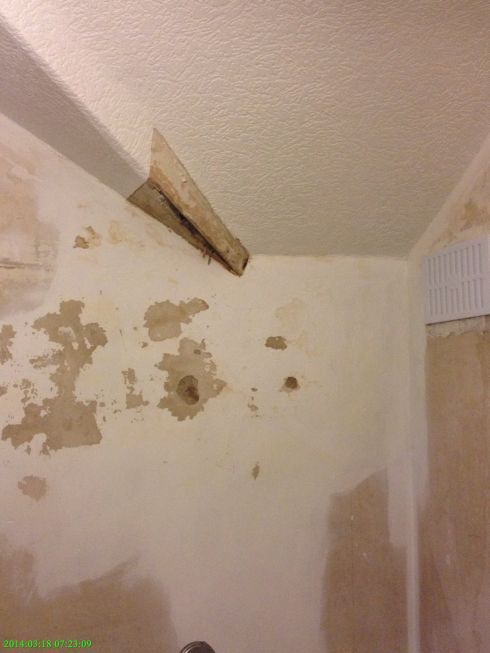
I came to it this morning and it had almost totally dried out & there was a whopping crack...
The main triangular piece that is fine is plasterboarded.
The bit that has cracked, underneath this was wood & i doubt he would've boarded this. Originally it did have some 1930s plaster on there anyway.
It looked like this previously...
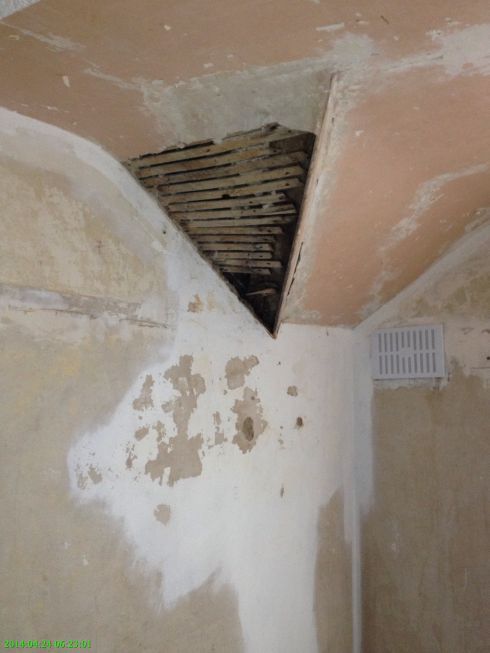
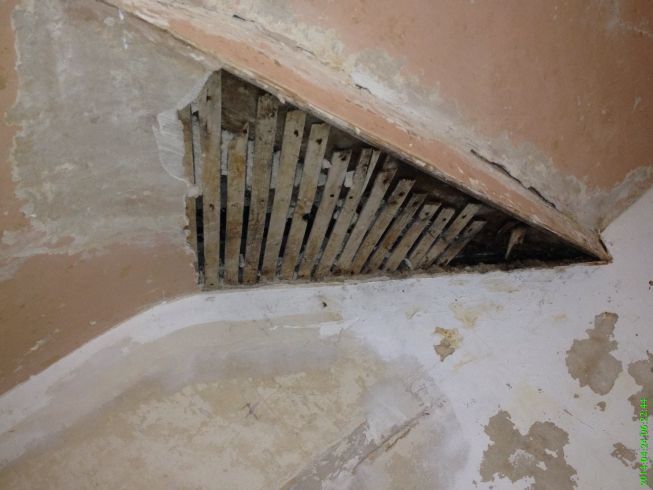
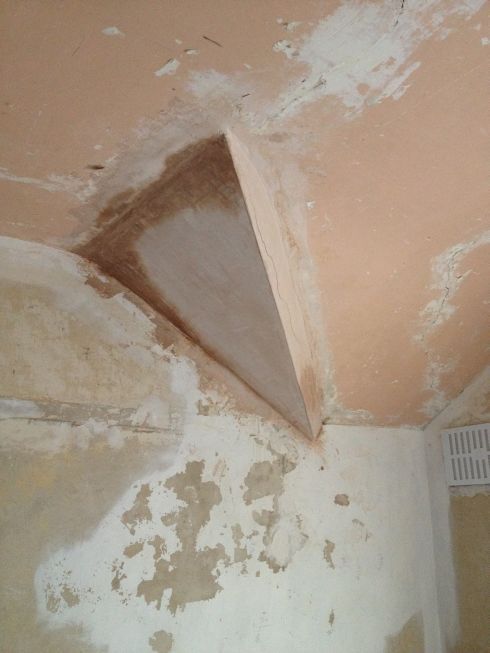
And then before that...
Now i made sure that the heating wasn't on high, the windows weren't fully open & no dehumidifier was used (my mum made these mistakes & her plaster cracked, although not as bad as this).
How can this get rectified?
This guy is booked up. We had to wait 7 weeks just to get this slot. He's rammed with work.
Problem is, a family friend is coming to wallpaper & ceiling paper that room on 7th November. He's coming from quite far away & his train etc have already been paid for, so we need it sorting by then.
I imagine the ideal solution is to rip it all off & start again. Problem is we can't do that as we don't have the time to get it put right again.
Is there some sort of [insert whatever it is here] we can put over it? I've heard of textured paint for filling in cracks & then there's filler. I imagine whatever is used (if it will work) would need to be somewhat flexible otherwise it'll crack again.
As an aside - why will this have cracked? Is it likely to be the draught from above (the roof)? Though surely not, else the main triangular piece would've surely cracked.
Help very much appreciated.
For the most part his work has been perfecto. It's just a couple of issues with the plastering.
1) lumps
He plastered a section of the kitchen. The surface was a bit of a strange tacky surface. 99% of it is perfectly fine, but there's a small section which is quite lumpy.
I'm not majorly bothered as the fridge is going to go where it is lumpy & as such it just wont get seen.
Doesn't stop me wondering WHY it is lumpy when the rest of the plastering is smooth. I took a photo as best i could...

2) Cracking
This is the one that concerns me.
He carried out the job on Thursday. There was a list of jobs so i'm not sure at what point he started this particular one, but he was down for 8:30 & wrapped up by 4:30.
Friday dinner time it was still visibly wet & looked perfectly fine...

I came to it this morning and it had almost totally dried out & there was a whopping crack...


The main triangular piece that is fine is plasterboarded.
The bit that has cracked, underneath this was wood & i doubt he would've boarded this. Originally it did have some 1930s plaster on there anyway.
It looked like this previously...


And then before that...


Now i made sure that the heating wasn't on high, the windows weren't fully open & no dehumidifier was used (my mum made these mistakes & her plaster cracked, although not as bad as this).
How can this get rectified?
This guy is booked up. We had to wait 7 weeks just to get this slot. He's rammed with work.
Problem is, a family friend is coming to wallpaper & ceiling paper that room on 7th November. He's coming from quite far away & his train etc have already been paid for, so we need it sorting by then.
I imagine the ideal solution is to rip it all off & start again. Problem is we can't do that as we don't have the time to get it put right again.
Is there some sort of [insert whatever it is here] we can put over it? I've heard of textured paint for filling in cracks & then there's filler. I imagine whatever is used (if it will work) would need to be somewhat flexible otherwise it'll crack again.
As an aside - why will this have cracked? Is it likely to be the draught from above (the roof)? Though surely not, else the main triangular piece would've surely cracked.
Help very much appreciated.