Progress pics of my Decking

Joined
3 Aug 2007
Messages
110
Reaction score
0
Location
Essex
Country
United Kingdom
My Wife and daughter are abroad for a month visiting my inlaws.

I wanted to surprise the wife with some nice decking for when she gets back. I know it's probably too late for this summer (or what we had of it), but thought it would be nice for her to come back to something she really wanted.

So I decided to order what I needed from the local timber yard before she went and have it delivered on the afternoon I got back from taking them to the airport.

Unfortunately I'm working every weekday so I've only really had weekends and a few evening to get stuck into it.

I'm in the frame of mind that if I can't finish it in time then I'll have to finish it when she gets back, but I'm not going to be cutting any corners. So if it takes longer it takes longer.

Anyway here's some pics of the progress....


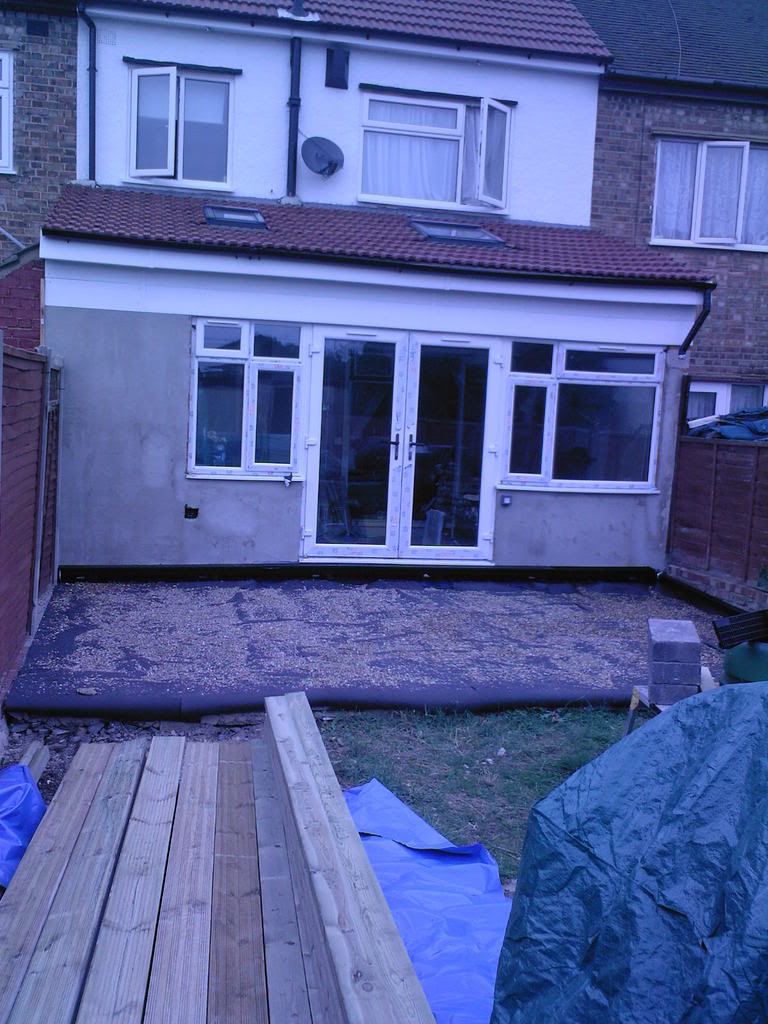
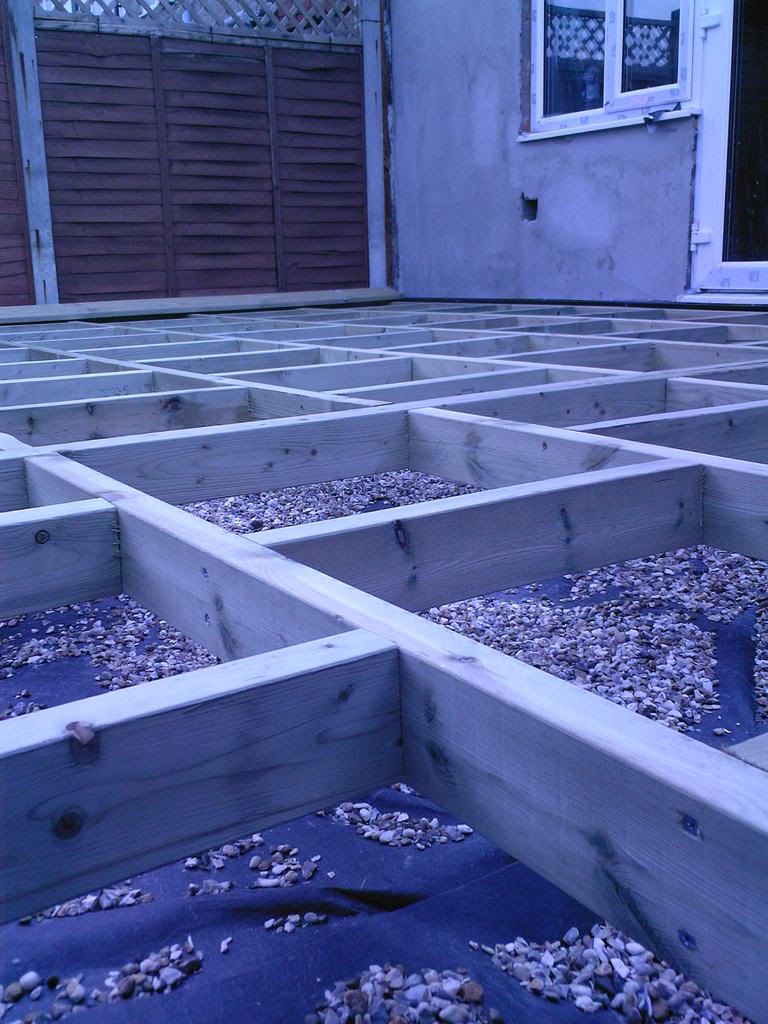
Patio levelled, membrane put down, pea shingle on top and drain system built and put in place.....

d.jpg


Concrete blocks set out and cemented through "X splits" in the membrane, all levelled. Frame them layed on top and bolted into the blocks...

f.jpg


Posts levelled and bolted to frame. Stair Frame built and decking beginning to go down....

h.jpg


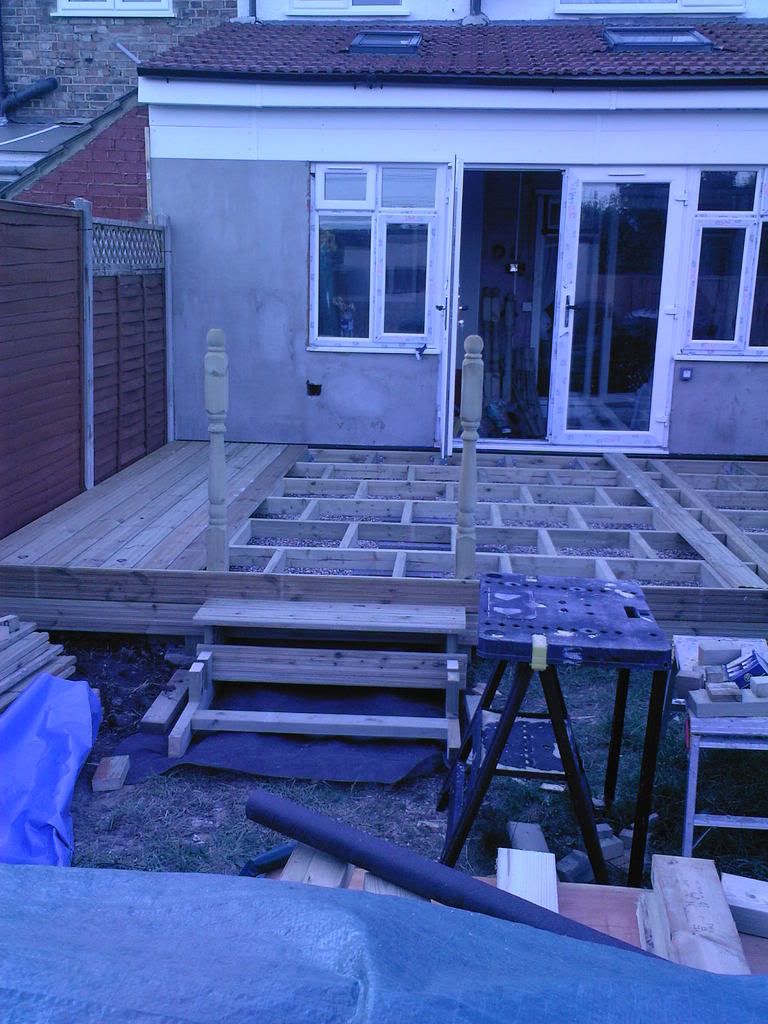
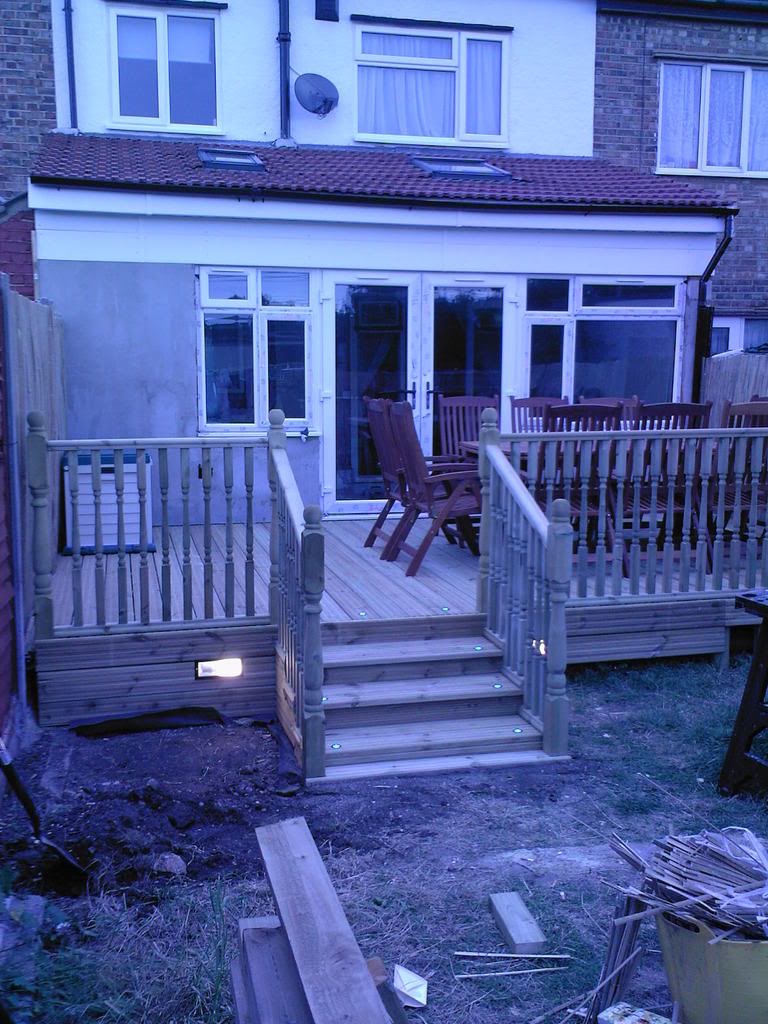
Decking down and lights installed.....

Photo-0055.jpg


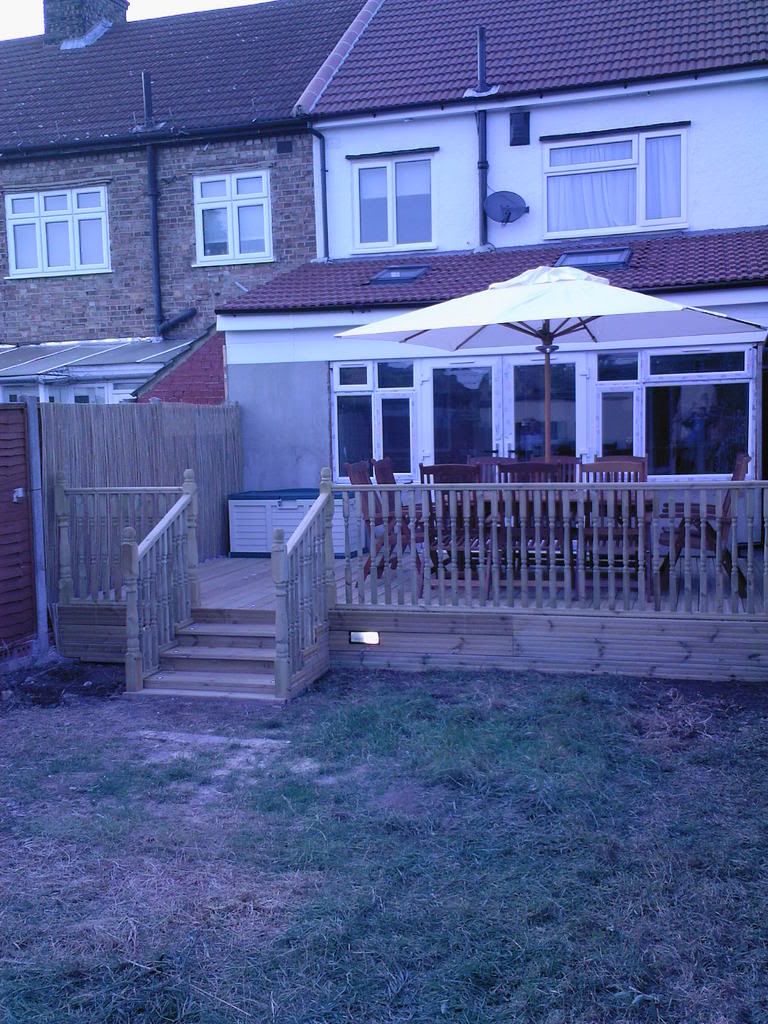
Ground level post holes dug out, posts levelled and concreted in. Small Handrail build and secured in place....

m.jpg


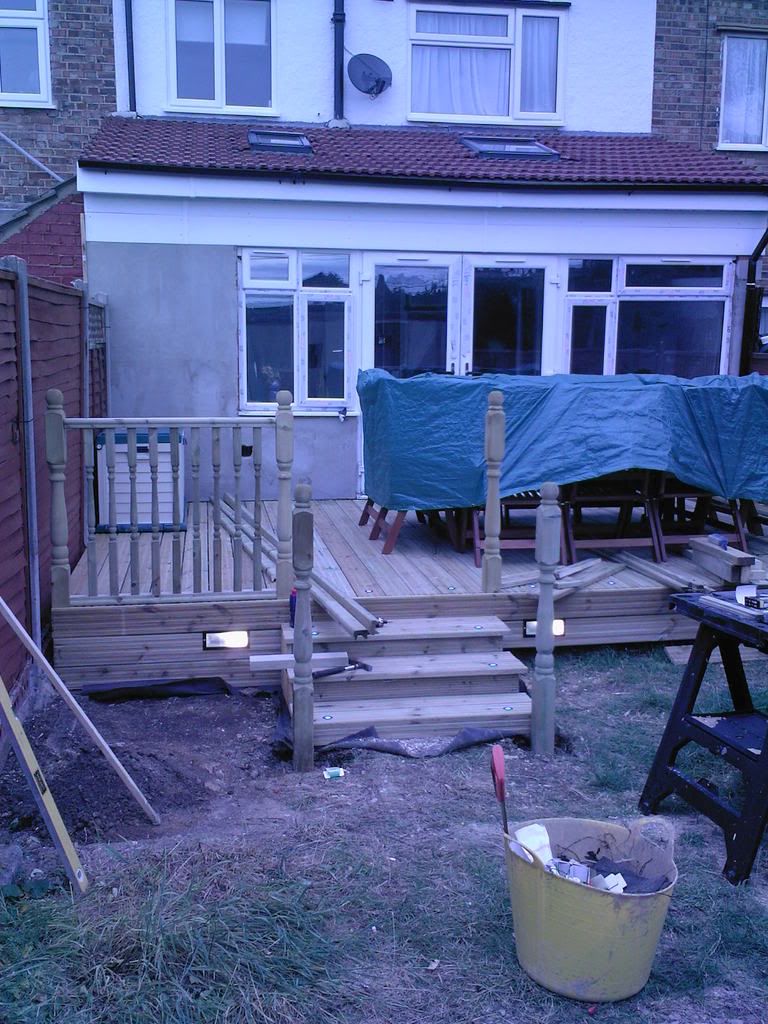
Just got to put the finishing touches in now and finish off the hand rails along the front and down the stairs. I hope to get it all done this bank holiday weekend. I pray for the rain to hold off.

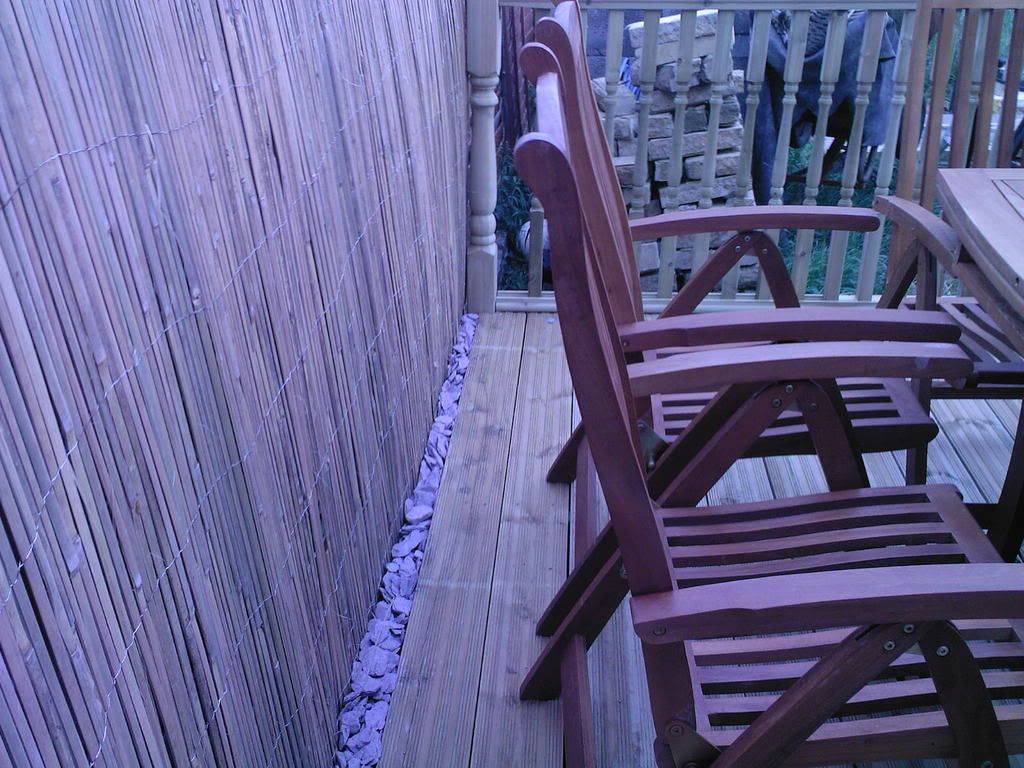
Anyone know what I can use to block the gap off between the decking and the fence to the left in the last picture ?. I'm going to have a BBQ there but don't slipping down the narrow gap.
 
Sponsored Links
what a good hubby you are :D as for the gap between the fench/desking I planted lots of climbers in the soil in the gap between the fence/decking then screwed trelessing to the fence and the clemates grew up between the gap & covered the fence.

oh yer, decking looking good.
 
That, my friend, is a fine looking job. I have seen far far worse built by so called pros. The lights look very good. Never seen such neat Noggins. :cool: :cool:

What's yer fall from the house to the garden? How about using some square beading to edge against the fence. This would stop anything falling into the gap.
 
Sponsored Links
A litte more done today.

Stairs now finished, Final step put in place and handrail made up. I did try the lower rail running parallel with the top to start with but I just really didn't like it like that.

n.jpg


Finished all the handrails now as well. Also fitted some babmoo screening on the fence in the decking area.


o.jpg


Hope to have it all finished by midday tomorrow :cool:
 
Finally Finished.

She's back in two days and I've just got in from completion.

p.jpg


q.jpg
 
Looks like a nice job, well done.

Just an observation, the run of balustrading to the left (looking from the garden) looks quite long between newel posts. How long is it and is it solid?
 
looks really nice.
Does it come as a kit or did you make it all up as to speak?
 
What's yer fall from the house to the garden?
The fall from the house to the garden is a total of 45cm / 18" or just under.
How about using some square beading to edge against the fence. This would stop anything falling into the gap.
as for the gap between the fench/desking I planted lots of climbers in the soil in the gap between the fence/decking then screwed trelessing to the fence and the clemates grew up between the gap & covered the fence.
Was at a loose end as what to use but in the end I used the excess cuts from the bamboo screen to fill the gap down the sides, left about 3" on top and filled with plum coloured slate chips.
Just an observation, the run of balustrading to the left (looking from the garden) looks quite long between newel posts. How long is it and is it solid?
To the left looking from the garden is 1.1m to the right of the stairs it's 3.5 meters. I was worried that I may need another post in there to give it extra strength as having a youngster, she's going to be climbing all over it in a few years I'm sure. First I thought I'd see how secure I could make it without another post. Each of the spindels is 8mm dowel rods in the top (glued with weather proof wood glue), and screwed from the bottom. The balustading was then put in place and screwed to the joist (through the decking) between every 5 spindels, the infil then covered all screws. It was also bolted each end (top and bottom) using two recessed screws and and holes filled with a plug cutter bit (matches up very well and is hardly visable). This was a bit of a pain doing it this way as I had to temporarily remove the fence panels either side to actually get a drill in there.
Does it come as a kit or did you make it all up as to speak?
You can buy kits from somewhere like screwfix where you have to make it all up but it kinda just slots into place (or so I'm told), however I designed it before and worked out that I could save £400 buying the timber from a timber yard. Knowing that the lengths of Deck & 4x2 were either 2.4m, 3.6m or 4.8m. I designed it so that it would come out from the house by 3.6m, that way I didn't have to cut any of the deck board (except round the posts) on the deck itself.
I bought the following:

45 x lengths of Pre treated Deck planks (3.6m x 150cm)
45 x lengths of pretreated 4"x2" joists (3.6m)
60 x Cordinal spindels
6 x Cordinal Newl Posts
3 x lengths of Hand/Base rail (4.5m)
5 x lengths of infil wood (2m)

Hope this answers all the questions, sorry if I missed any out.
Thanks for the comments.
 
Nice work. Very impressive.

What type of cable did you run for the deck lights ? Hi-Tuf, SWA or did you conduit regular T&E ?
 
What type of cable did you run for the deck lights ? Hi-Tuf, SWA or did you conduit regular T&E ?

I have no idea, they came as a set.

10 lights each with 5 meter cables and a little AC adapter type plug, these plug into the outdoor control box. Then one power lead runs from that to a mains plug. I didn't have to do any wiring, just plug them in.

The only insulation type I did was a small plastic pipe running along the inner fron tof the decking then each of the light plugs were passed through thier individual hole and up the pipe to the control box.

I've never seen or heard of a rat or mouse in my garden, but have heard they love decking, so I didn't want to leave any wires hangin about for them to chew on, just in case.
 
nice job! :LOL:

:idea: don't forget to remove the protective tape from the upvc windows as it can be impossible to remove once the elements have had a crack at it. :idea:
 
nice job! :LOL:

:idea: don't forget to remove the protective tape from the upvc windows as it can be impossible to remove once the elements have had a crack at it. :idea:

Waiting for another visit form building control before I do that just incase ;).

Had to make some changes but looks like I should have a green light to get the sparks in and get it all signed off.
 
That looks great! Nicely done. You'll have to do something with the lawn now though ;)
 
That looks great! Nicely done. You'll have to do something with the lawn now though ;)

I wish it was just the lawn lol.

I have to sort out the rest of the garden first, then do the lawn.
I want to build a storage area for the ladders etc. I will then cover this with Decking and make a hidden storage / seating area at the back of the garden.

The I guess we need to decide where we want plants etc before we can sort the lawn out.

Grass seed or Turf roll (both after prep of course) And vierws on what's easier chaeper ?.
 

DIYnot Local

Staff member

If you need to find a tradesperson to get your job done, please try our local search below, or if you are doing it yourself you can find suppliers local to you.

Select the supplier or trade you require, enter your location to begin your search.


Are you a trade or supplier? You can create your listing free at DIYnot Local

 
Sponsored Links
Back
Top