

Hello all
I'm in the process of tidying up the internal plaster following some new double glazing. The internal plaster is not great in some places (as may be familiar if you've seen any of my earlier posts).
The loose stuff has been sorted and bonding has been applied and is all secure now. However, I'm in a bit if a dilema with the best way to proceed with the finishing skim - I've put some pics on to illustrate...
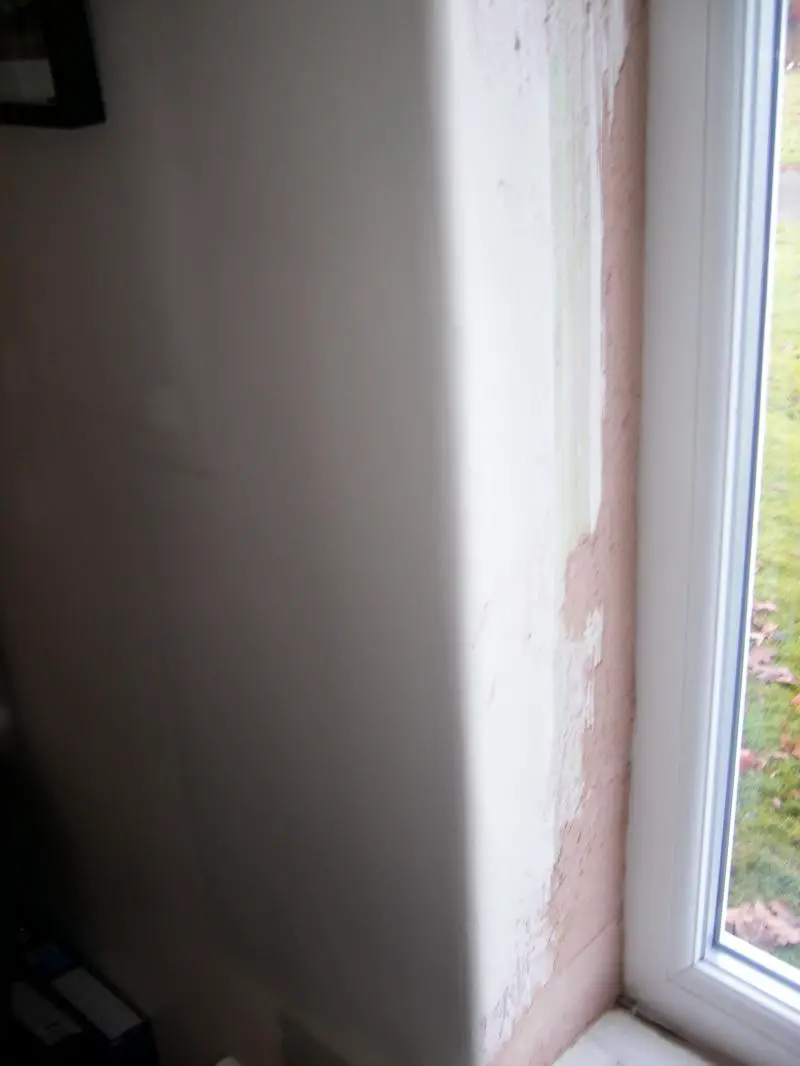
Some reveals didn't suffer too much damage-
Some reveals were very weak and most of the plaster came off-
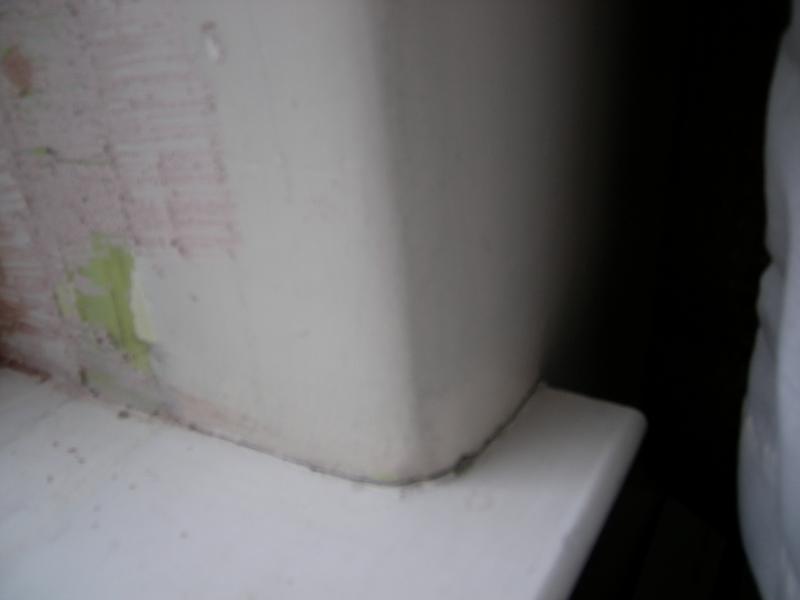
And a close up of the corners' radius-
My thoughts on the way forward are:
Where damage does not extend beyond the corner, then a finish skim and feather it in just before the radiused edge could be possible.
Unfortunately with some of the damaged reveals where it extends round the radiused edge, I'm a bit unsure how to patch and recreate the same radius as previously. I have picked up a trowel which is basically flat with a slight rounding at one long edge. This would seem to be ok, if applied from main wall and reveal.
But it would seem to be easier to apply a bead and change to a right angle to achieve a better finish along the full edge. However, this would mean plaster on the main wall leading up to the bead. I would be reluctant to re-skim an entire wall and in trying to feather in a small amount (e.g. 18") from the bead, it may be difficult. The emulsion paint on the wall seems to make feathering difficult once the skim gets very thin (even after diluted PVA has been applied previously).
Of course if I start adding beading, then even the reveals with minor damage should be upgraded otherwise there will be differences between windows.
Advice/suggestions appreciated!
[/img]
I'm in the process of tidying up the internal plaster following some new double glazing. The internal plaster is not great in some places (as may be familiar if you've seen any of my earlier posts).
The loose stuff has been sorted and bonding has been applied and is all secure now. However, I'm in a bit if a dilema with the best way to proceed with the finishing skim - I've put some pics on to illustrate...
Some reveals didn't suffer too much damage-
Some reveals were very weak and most of the plaster came off-

And a close up of the corners' radius-
My thoughts on the way forward are:
Where damage does not extend beyond the corner, then a finish skim and feather it in just before the radiused edge could be possible.
Unfortunately with some of the damaged reveals where it extends round the radiused edge, I'm a bit unsure how to patch and recreate the same radius as previously. I have picked up a trowel which is basically flat with a slight rounding at one long edge. This would seem to be ok, if applied from main wall and reveal.
But it would seem to be easier to apply a bead and change to a right angle to achieve a better finish along the full edge. However, this would mean plaster on the main wall leading up to the bead. I would be reluctant to re-skim an entire wall and in trying to feather in a small amount (e.g. 18") from the bead, it may be difficult. The emulsion paint on the wall seems to make feathering difficult once the skim gets very thin (even after diluted PVA has been applied previously).
Of course if I start adding beading, then even the reveals with minor damage should be upgraded otherwise there will be differences between windows.
Advice/suggestions appreciated!
[/img]
 ! Fitting a thin angle bead & plastering up to that will give you nice, square edge reveals but unless you bead all around the reveals, it would look very odd with a mix of square & rounded edges! With bead, you would really have to re-skim the entire wall to get it to look right; you could try & blend it in but that can be difficult (as you’ve already discovered) & in all probability you will be able to see the difference in levels. Filler or one coat plaster (I normally loath the stuff but!) may be a better option where the damaged area is small & located near the frame as this will be easier to blend in but take a ¼ sheet sander to the walls to remove that emulsion or at least give it a damn good key or it wont stick properly. I’ve repaired curved corner sections like that before by plastering either side of the corner (without any bead) & then dressing the plaster back into a matching curve when it’s “set” & then sanding to match after it’s fully dry; but you will still have to do some local filling to get a blend into the existing wall.