bathroom floor tiling question.

Joined
20 Nov 2009
Messages
44
Reaction score
1
Location
Ayrshire
Country
United Kingdom
Hi folks,

Im currently in the process of refitting a bathroom and am at the stage where I am removing everything before starting to consider putting some new stuff in.
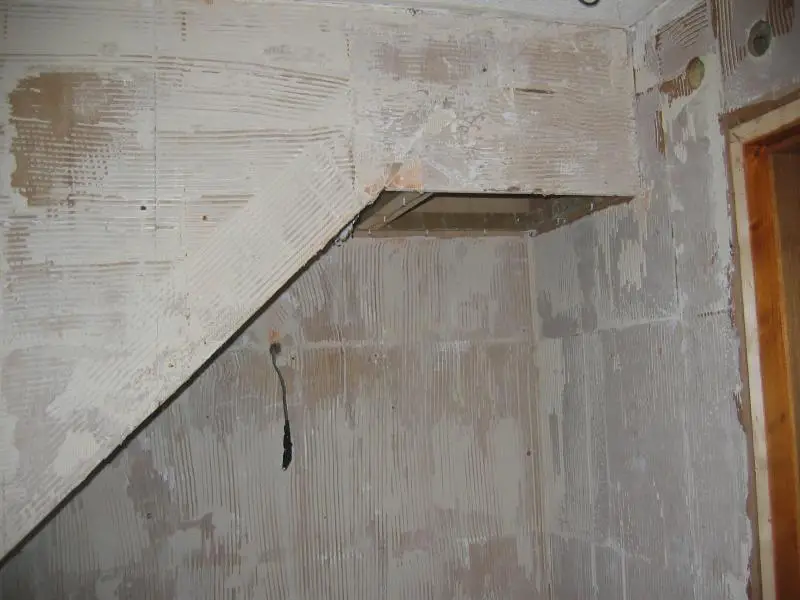
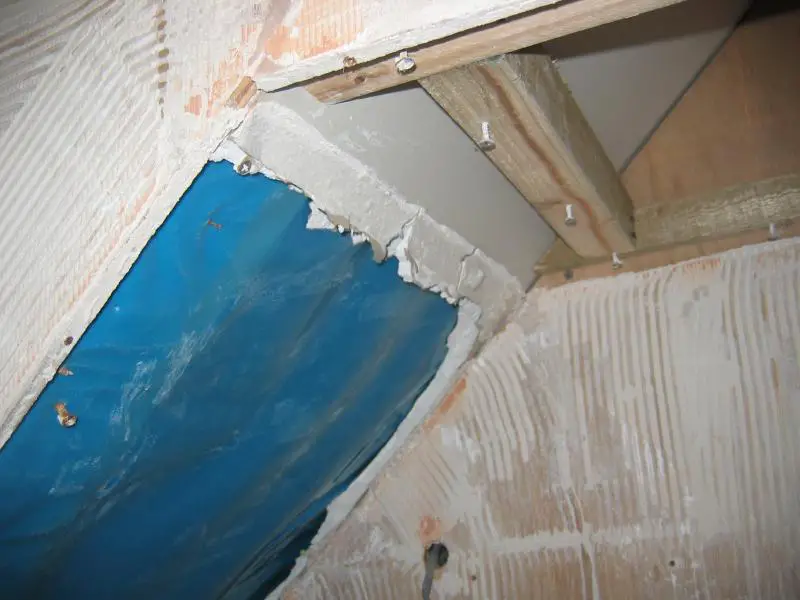
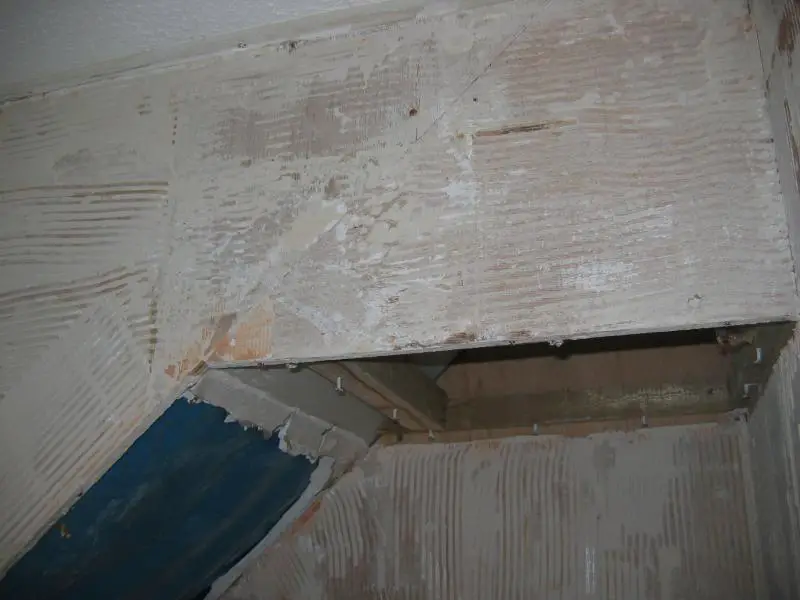
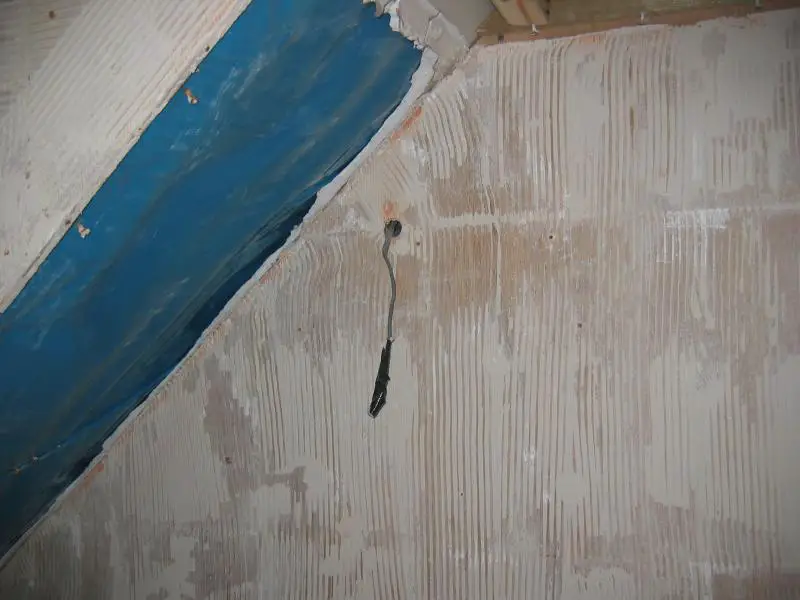
Whilst removing the radiator I noticed that the floor tiles around the trv pipe had raised up a little due to a leak allowing water to swell the wood underneath. I tore out all the softened wood till I reached more solid wood again and am left with a circle about 10inches in diameter which will need replaced.
Since removing the bath, (which was also the shower) I noticed another area where this had happened and the soft wood needed to be removed.

OK so Im thinking Ill need to cut some peices of MDF to fit these holes once I cut them back to a regular shape but then I started trying to remove the floor tiles. What a nightmare. I am a big strong lass but I can barely make any progress with it so I got to thinking.

Why not just whip out the whole floor and replace it with one or more sheets of 18mm ply.
Anyone have any thoughts about why this may or may not be a good idea and what might be the best type of wood to use?

thanks in advance..

Paula :)
 
Sponsored Links
Hi Paula
Presumably you have some sort of ceramic tiles on your floor, which are so well stuck down that you can't budge them?
If thats the case I'd be inclined to remove the entire flooring back to the joists if possible - then make good any dampness damage prior to installing a new floor.
You can use chipboard (which sounds as if thats what it was in the first place - hence the swelling) but use the green stuff which is water resistant to some degree.
WBP plywood is also a good choice - slightly more expensive but lasts well. Both products are available in 18 and 22mm thicknesses so use the same thickness as existing. You can also use tongue and groove flooring if you prefer. In either case, screw the floor down rather than nail.
If you find that those tiles really have to come up, then use a hammer drill with roto stop, together with a broad SDS blade.
Do be careful if you do decide to remove the existing floor completely though, as excess banging / heaving could upset the decorations within the room below.
John :)
 
Thanks John,

Yes they are scabby old floor tiles with an adhesive that seems to be slightly pliable and a grout that is grey and crumbly. Horrible all round.

I think Im gonna just whip the floor up to expose the joists then get a new floor down. Since the existing floor already has a couple of holes in it I think I might as well. Im minded to go for ply so as to avoid this kind of problem in the future... I may be renting this house out at some stage and think that tenants might not be so careful to avoid flooding the floor as I would be.

As a kinda aside question, where is the best place to get sheet materials from.

Im guessing that the guys in the trade dont shop at B&Q with prices like this http://bit.ly/cvnMwx but I also understand that some of the more specialised builders merchants might not deal with joe (or even jane) public.

thanks again,

Paula.
 
Ripping up the entire floor & replace with 18 -25mm WBP ply (depending on floor construction) is the right decision; DO NOT use chipboard, even the green moisture resistant stuff. You can get WBP form the larger B&Q Trade stores & the price isn’t that bad, probably better than the large chain Builders Merchants. They will deal with anyone & can be useful if you need delivery but are largely rip off merchants these days; I hardly ever use them. You need to lay the ply sheets as large as you can, full size if possible & fix every 150mm into the joists with screws. Fix the ply with the longest edges fully supported down the centre of a joist & any joins across the joists must be supported with noggins. Seal the back & sides of the ply with an SBR sealer before laying.

Before going any further, take some time to read the Tiling Sticky & the Tiling Forum archive posts where you will find most of what you need to know about already covered; this will help you avoid making expensive mistakes. Only use quality trade tiling materials, not cheopo DIY shed stuff, they can cause problems.
 
Sponsored Links
Thanks Richard,

Great advice... :).. Ive just learned we call them Dwangs in Scotland :-/

Right Im off out to buy a crowbar ;)

Paula
 
Thanks guys,

Im gonna need 2 sheets so am looking around for the best deal including delivery but will leave the existing floor in place while I strip out the remaining existing wall tiles and then complete the ceiling work/lights/double pole isolator etc.
I have a delivery from B&Q coming in the next week or so with the shower tray and enclosure so might find its possible to get a couple of sheets of 25mm ply lumped in with that.

This stuff surprisingly expensive but I guess its a whole lot better in the long run to remove the risk of dampness and swelling from using chipboard. Thing is, the walls were already done in ply and in the areas where that had got a little damp I can see that it didnt swell and just got a little black and mildewy. Ill be happier doing the job right despite the moderate cost increase.

thanks,

Paula.
 
might find its possible to get a couple of sheets of 25mm ply lumped in with that.
This stuff surprisingly expensive but I guess its a whole lot better in the long run to remove the risk of dampness and swelling from using chipboard.
It must be WBP ply, ordinary ply isn’t good enough. The back & sides should be sealed with an SBR sealer before you lay it. Even moisture resistant chipbord has no place in a bathroom & is of very limited value in the rest of the property IMO.

Thing is, the walls were already done in ply and in the areas where that had got a little damp I can see that it didnt swell and just got a little black and mildewy. Ill be happier doing the job right despite the moderate cost increase.
I would not advise ply as a tile base on walls & if it’s in a “wet area”, it should be tanked or you’re asking for problems; better still, replace it with a decent waterproof tile backer board. It may seem an additional & unnecessary expense but in the scheme of things the cost is small compared to the expense & aggravation you could have if it all goes wrong. Have a read in the forum archive, it’s is littered with sob stories where, shortcuts, using the wrong materials or just incompetence has resulted in expensive tile failure in a very short time.
 
Hi Richard,

Thanks for that. I had read the sticky and was planning on tanking the ply walls in the shower area. The bathroom is a small ensuite and will just have a shower, sink and wc. Having read your post though I think I will get myself four of these http://bit.ly/aomipn and replace the ply in the shower area. Its a 760x1200 shower base.
Im planning on placing the shower base on a plinth in order to create an access panel to get at the pipes underneath if necessary so Ill be tanking the plinth and the floor underneath which will be the replacement floor.

I appreciate your advice as its my first ever attempt at a job this big :)

thanks,

Paula
 
Thanks for that. I had read the sticky and was planning on tanking the ply walls in the shower area. Having read your post though I think I will get myself four of these http://bit.ly/aomipn and replace the ply in the shower area.
Choice is yours; if you tank the ply it should be OK;
http://www.bal-adhesives.co.uk/products/wp1-coating
but, personally, I would replace & I mainly use Aquapanel; but check out your local Wickes it may be cheaper as BNQ have only recently started selling it. Tape the joins (I would not use silicone) & position them so the tile joints dont line up.
Its a 760x1200 shower base.
Just an observation but I’ve found an 800mm is really the minimum but you do have 1200mm the other way & standing sideways with the shower head on the longest wall works very well; but if that’s all you have, so be it.
I’m planning on placing the shower base on a plinth in order to create an access panel to get at the pipes underneath if necessary so Ill be tanking the plinth and the floor underneath which will be the replacement floor.
Have you looked at an easyplumb tray; if the joists are against you, it's usually all you need for waste access & they look much neater than tiled/whatever plinths ---- IMO. Personally, if joists faviour it, I prefer to sit the tray on the floor & b u gger the access; if it leaks you can always cut a hole in the ceiling (assuming you have one :confused: ) to fix it & it’s an easy, cosmetic repair. You need to be careful with slim line trays if you have a pumped power shower; if waste flow is marginal, (for whatever reason) it can easily overflow & flood your bathroom!

You certainly seem a very well informed “chick” & I’ve come across a few over the years; almost the practical mans dream ;). Come back if you need more.
 
Ha thanks Richard :),

I might end up just tanking the ply actually as I will be mounting an electric shower onto one of the walls. 760 is as much as I can fit in behind the door unfortunately :(.

Ive already bought the shower tray and its a quite deep cast stone tray. I could conceivably use the ceiling below to access the underneath but thinking about it the joists are perpendicular to the direction the waste would need to go as it was a bath in there before. Will have a think about that. I am going to be building a new kitchen in the room below and was thinking about boxing in some recessed spots in that area but I think Ill probly stick with the plinth..

The biggest problem I have is getting the stuff home. I cant believe the delivery prices Wickes charge... Id be cheaper renting a van for a half day at those prices. Im thinking I might just tank the ply and get the new floor sheets delivered by B&Q for free at the same time as the shower base and enclosure is delivered.

Just about finished clearing the wall tiles out now but found a little area this evening that was tiled on plasterboard so might have to rip that out and replace with ply but its not in a wet area. Then its on to the ceiling and power cabling which I had to wire up new 10mm T&E for the shower from a new CU I had to put in. Ill be glad when its all done.

thanks again,

Paula
 
Hi guys,

I thought Id ask a few opinions on this. As you can see from the photos below, I have been clearing all the old tiles out of my ensuite bathroom and one of the problems I have come across is that a small section of the sloping wall/ceiling was tiled directly onto plasterboard. Of course removing these tiles destroyed the plasterboard but the problem is that the plasterboard section goes on beyond the vertical plywood panel as it is part of a longer section of wall.


So... Im thinking im gonna replace it with a section of plywood which will probably be a better solution than what was there before. The problem is this;
because the point at which the two surfaces meet is not at a roof joist, I can only anchor this new piece along the left hand side and horizontally where one horizontal member crosses the area.
I hope that makes sense and if not then hopefully the pictures help make sense of it.

Im also a little concerned with puncturing the blue plastic.

Anyways, I thought Id get some opinion and see if my thinking is sound...

thanks,

Paula
 
Paula,
Just 1 word of warning ref re-tiling your floor, you will have a single layer of plywood and not a plywood overlay of existing timber layer. Therefore standard cement based flexible adhesives (Class C1 or C2) are not suitable without additional 15mm ply overlay. The best choice when going direct is an adhesive such as BAL Single Part Fastflex (Class C1S2)
The floor should still be sound and stable, so as has already been mentioned additional noggins inserted between joists may be required.

Gaz
 
That’s a tricky one; I would still use 12.5mm PB or a cement backer board rather than ply. It’s much easier to cut & work with than ply & I don’t like the idea of using ply as a tile base anywhere other than floors. The downside is that you’re going to be restricted on tile weight, what size/weight were you planning to use? Their doesn’t seem to be any intermediate noggins (cross support) which is a bit worrying which, again, will reduce max tile weight; you don’t want the lot falling down on you!

You’re going to have to provide support down that r/h side somehow. What’s on the other side of that wall, is there access to the sloping ceiling (the other bit of the PB) on the other side? A possibility is to take a piece of 12mm ply & fix it to the backside of the plasterboard full length of the sloping bit, screwing through the ceiling on the other side of that wall. It’s needs to be wide enough so you can get a closely spaced & staggered row of screws into it on the other side of that wall & leave a flange, say, 50mm wide onto which you can fix the new piece of PB down that r/h side. Does that make sense!
 

DIYnot Local

Staff member

If you need to find a tradesperson to get your job done, please try our local search below, or if you are doing it yourself you can find suppliers local to you.

Select the supplier or trade you require, enter your location to begin your search.


Are you a trade or supplier? You can create your listing free at DIYnot Local

 
Sponsored Links
Back
Top