
Table of Contents
- Common Issues of This Type
- Checks First (Safe)
- Proper Fix (Good / Better / Best)
- Alternative Methods – What Works in the Real World
- Repainting – Prep and System
- How Long Will Exposed Render Be Water Resistant During Interim Period?
- Mistakes to Avoid
- When to Bring in a Specialist
- Reality Check
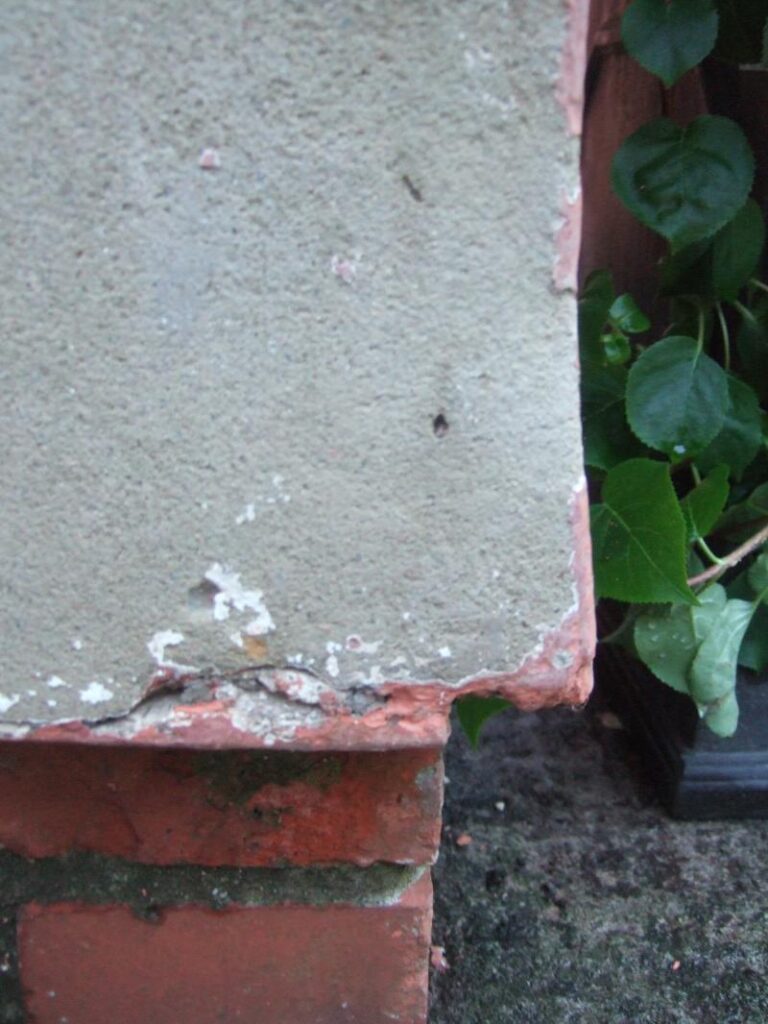
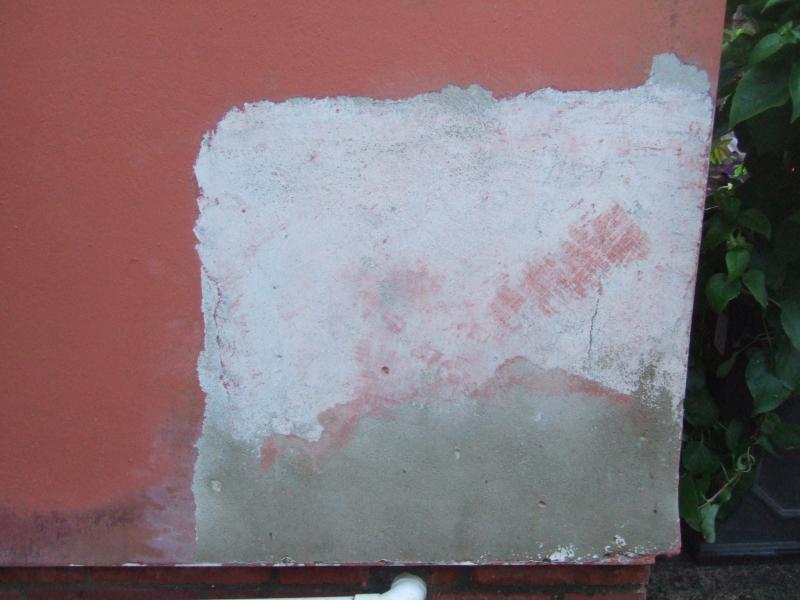
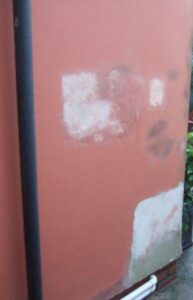
A homeowner has a rendered extension that has been repainted last year. A stabilizer/sealer coat has been applied over the previous masonry paint, and the finish has subsequently bubbled, flaked, and lost its adhesion. They have tried using sandpaper, scrapers, and a general-purpose paint stripper with very little success; they would like a quicker means to strip the paint away from the render, want to know how to prepare the render prior to painting, and if the bare render will be okay left exposed until they are ready to paint (images depict uneven paint removal with sections where the paint remains well-adhered). This is a common problem in many UK homes. Prior to investing in materials and labour, there are a few simple things you should check to ensure that you are addressing the root cause of the issue rather than just treating the symptoms. Below, we will describe the most common causes for this type of failure, provide several simple self-assessment tests to help determine the most probable cause(s) of the failure, and describe the proper repair process – along with common “bodges” that typically don’t last.
Common Issues of This Type
In many cases issues such as these result from either moisture or a poor layer within the system. That is, the new coats of paint have essentially formed a skin over something that should have been allowed to breathe or was already compromised in some way.
A stabilizer is not always bad per se. However, if the render was still green, meaning not yet fully cured, or if the surface of the render had powdery or weak materials, salt, algae, or old flaky paint under the new coats, the paint could seal in dampness and prevent the wall from drying properly. Once the sun hits the wall, moisture pressure increases and blisters and sheets of paint lift. Neat masonry paint over new render can also form a barrier that prevents drying when applied in a single, overly-thick coat.
The worst part is that there is rarely a single product that will magically turn this into a 10 minute task to strip an entire elevation of paint.
Checks First (Safe)
Prior to committing to strip the majority of the paint off, prove why it failed to begin with. Otherwise, you could spend hours to days stripping, only to put on a new coat that does the exact same thing.
Tap Test
- Tapping on the surface with your knuckles or the handle of a scraper.
- Hollow sounding surfaces typically indicate that the paint has separated from the render.
Scrape Boundary
- At an edge where paint is flaking, try scraping back to see if the render surface is solid or dusty.
- If the render surface turns to powder easily, that requires consolidation or repair, regardless of paint.
Moisture Clues
- Check for cracks at junctions such as windows, roofline, coping, or where the extension meets the main house.
- Inspect gutters, downpipes and overflows – water enters and eventually manifests elsewhere.
Salt / Efflorescence
- White deposits of salt and or efflorescence on the render or behind the paint indicate moisture migrating through the wall.
Cure & Weather History
- Was the render painted immediately after application? If so, that’s a huge warning sign.
- Does it receive intense sunlight and wind-driven rain? Coatings take a beating from exposure.
Proper Fix (Good / Better / Best)
Good – Remove Loose Paint, Re-coat Correctly
If only certain sections of paint are failing, a reasonable approach is often:
- Remove all loose or flaking paint back to a solid edge.
- Feather edges, wash down, and treat any algae.
- Repair cracks properly rather than just smearing filler over them.
- Prime where necessary, then apply a breathable masonry system.
This is the least invasive approach. However, there is a possibility that additional apparently sound paint may fail at a future date if the original cause is still present.
Better – Strip Back to Sound Substrate Where Failing, Standardize Surface
When the topcoat or stabilizer has created a mosaic of different suction and adhesion:
- Mechanically remove as much as possible from the failing areas by scraping, wire-brushing, or possibly carefully using a rotary wire cup. It is messy and dusty.
- Thoroughly clean.
- Patch and make good the render where damaged.
- Only prime the substrate where necessary, such as chalky areas or repairs, and not as a blanket treatment over everything.
- Apply the masonry paint in thin coats, allowing sufficient drying time.
Best – Accept It Is a Full Strip or New Finish
If you are experiencing widespread bubbling and flaking and do not trust any of it, your best long-term options are:
- Total removal via abrasive or steam methods – messy and time-consuming, but it allows for a clean slate.
- Re-render or apply a new finish coat if the render is poor, crazed, or breaking apart.
Rendering sounds extreme, but the cost of labour, chemicals, disposal, and the potential for a non-uniform surface can add up.
Alternative Methods – What Works in the Real World
General Paint Stripper
- Will work, but it is slower on masonry coatings and stabilized layers.
- Expect multiple applications and extensive scraping.
Very Strong Chemical Stripper
- Can be significantly more effective than the typical DIY products, but it is unpleasant to use. PPE, ventilation, eye protection and protecting everything below is not optional.
- The job becomes containment and clean-up rather than stripping.
Steam Cleaner
- Surprisingly successful on some masonry paints and eliminates chemicals.
- Still slow and messy, but safer and can be a decent compromise for large areas.
Abrasive Blasting
- Fast, but can ruin the surface of softer render and create repairs throughout.
- Requires proper masking or you will pepper windows, sills and everything surrounding the area being blasted.
If it were my house, I would consider testing a few small test patches, one difficult area and one typical area, before making a commitment. On jobs such as this, 1m² tells you far more than any label on a tin.
Repainting – Prep and System
Once you have the paint removed and the render, or a sound painted surface, exposed, the primary goal is a consistent, clean substrate:
- Let it dry properly, particularly if you used steam cleaning or water-based methods to strip the paint.
- Remove dust and residue – scrub and rinse, then let dry.
- Repair cracks properly.
Crack Repairs
- Open up hairline cracks slightly, fill with an exterior compatible repair material, and feather blend.
- If the cracking continues due to movement, paint will continue to split and you may require a more flexible coating system.
Prime Only Where Necessary
- Areas of bare render requiring repairs and chalky areas may require a stabilizer.
- Do not apply a stabilizer universally if the surface is already sound – over-sealing can catch you again.
Apply Masonry Paint in Proper Coats
- Do not apply thick coats in a single pass.
- Follow the manufacturer recommended drying times and do not paint in adverse conditions such as cold, damp weather or direct blazing sunlight.
How Long Will Exposed Render Be Water Resistant During Interim Period?
Render will shed some water, however it is not a waterproof jacket. It will absorb rain, then dry out if it can breathe. Generally, short term, that will suffice provided:
- No prolonged periods of heavy weather are expected.
- No obvious cracks are allowing water to track behind the render.
- Temporary coverings are not trapping moisture.
If the render is cracked, crumbling or you have exposed weak spots, that is when water will enter, particularly at edges and junctions. In such cases, prioritise repair of cracks and monitor for signs of internal damp.
Mistakes to Avoid
Painting Over Flaking Edges
- Simply bridges over weak areas and peels again.
Stabilizing Everywhere “To Be Safe”
- Creates a sealed surface where you actually require breathability.
Using Random Interior Filler To Fill Cracks
- Won’t stand up to the elements and weathering.
- Won’t withstand movement.
Applying Thick Coats For “Coverage”
- Traps moisture and cures improperly – you will end up back where you began.
When to Bring in a Specialist
Abrasive Blasting
Get someone who understands rendering, not just blasting.
- If the render itself is failing, hollow or has widespread cracking, you may require a professional renderer to determine whether it is worthwhile repairing or re-doing.
Water Ingress Issues
If gutters, flashing, roof junctions or parapet details are letting water in, fix the source first or painting becomes an annual chore.
Reality Check
This type of project is mainly grunt work and managing mess:
- Protect patios, walkways, windows and everything below with sheeting – stripped slurry stains.
- Consider the waste – paint sludge, stripper residue, and contaminated rinse water.
- Allow drying time between phases, particularly after steam or water-based methods.
- Expect surprises at edges and junctions – that is where failures typically occur.