It helps to have unpainted MDF - yours appears to have been primed which would have much reduced its ability to absorb moisture. As to getting the skirting to match the wall curve that is always a bit of a compromise. Have you fixed the skirting with grip adhesive such as "Grip Fill" in addition to screws? Whilst grip adhesives take 2 to 4 days to go off at this time of year (not instant, but that's how it rolls) they will eventually former a rigid fixing between skirting and plasterboard but you need to assist them by fixing blocks to the floor and wedging the skirting back with a couple of folding wedges - ideally a similar height to the skirting to keep it all plumb.
You could try that but personally I would just cut and joint it where the curve meets the flat as best as it will go nad fill in behind the small curve.
Firstly for those that replied, a hugh thank you for your help and advice.... it is definitely much appreciated.
I thought i'd let you guys know and any others who stumble across this post how i actually got on in the end.
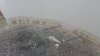
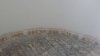
Sadly i gave up on the idea of bending the MDF, purely for the reason that i dont have a perfectly round shaped bay window (see previous posts) and in some area the bend required was far greater and bending smaller sections of the skirting board was proving to be impossible.
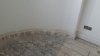
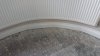
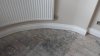
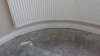
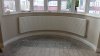
Soooo.... i realised that there was no alternative but for me to cut the skirting board between 1 - 4 inches (depending on the bend) and glue on the peices. Followed by lots of filler and sanding. I've attached the pics for you guys to see. Overall im very happy with the outcome.
thank you all once again for your help and support.
The downside of doing it this way is the there are lots of joints and it's the joints where imperfect fitting shows up and where failures can occur in years to come especially if there is any shrinkage
Your quite right.... in the hope to prevent the joints from failing... ive opted for 2 coats of shrink free ronseal wood filler along with a final coat of shrink free decorator chaulk (to smooth out any imperfection) followed by undercoat paint and then 3 top coats (satinwood).
Im hopeful that it should hold up but lets see. but as of now i think it looks fantastic if i should say so myself
If you need to find a tradesperson to get your job done, please try our local search below,
or if you are doing it yourself you can find suppliers local to you.
Select the supplier or trade you require, enter your location to begin your search.
Please select a service and enter a location to continue...
Are you a trade or supplier? You can create your listing free at DIYnot Local


")