New basin waste but not enough thread for the trap?

Joined
25 Aug 2016
Messages
9
Reaction score
0
Country
United Kingdom
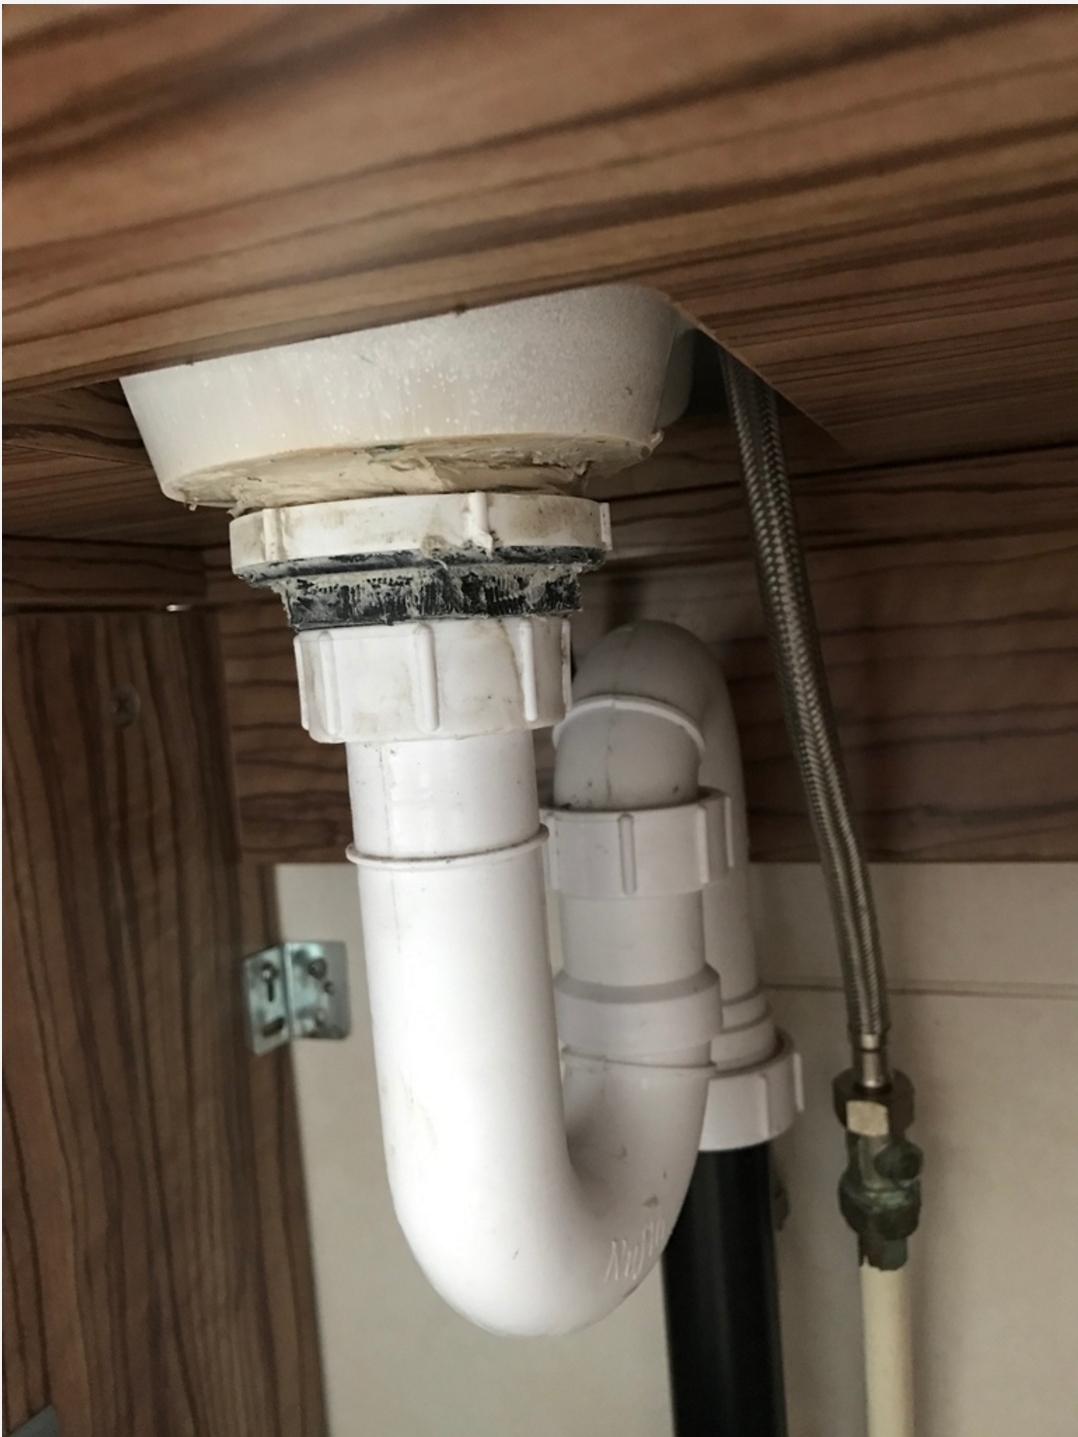
Hi, so I've fitted a new waste with one of these seal kits -
http://www.diy.com/departments/plumbsure-plastic-rubber-basin-sealer-set-of-1/178380_BQ.prd#

and it's been pushed up / tightened, but there doesn't seem to be enough thread left on the waste to tighten the trap enough to make a good seal. Seems to be leaking from where it connects?

image for reference -
c31a4388b121efa58e93fee78c32d1cf.jpg


Anyone have any ideas of what I need?
 
Sponsored Links
One of then is the OP.

Sorry, it made me laugh!

Take it apart, clean it up and only use the 'basin mate'.

Andy .
 
Sponsored Links
Thanks @kidgreen61 didn't think of that, although I'd be worried it wouldn't hold as tight?

yeah theres 2 nuts, one to fix the waste to the basin / hold the cone shaped seal in, and another to attach the trap.

@HERTSDRAINAGE2010 first attempt was with just the basin mait and supplied washers but leaked cause it didn't seal very well, that seal kit seem to have done the trick but isn't leaving much thread left for the trap.

Think I might replace the trap see if a new one would be better, if not then take a hacksaw to it...
 
Looks like too much gap between the rubber washer and underside of the basin. I'd suggest the following.

1. Take it all apart and clean all the PLumber's Mait off (white spirit).
2. Discard the foam type washer which fits between the flange of the waste fitting and the top surface of the basin.
3. Make a thin "sausage" of Plumber's Mait, and fit between the flange and basin.
4. Screw the backnut on underneath without any sealant and without the Basin Mate, to compress the Plumber's Mait.
5. Make sure overflow slot(s) not blocked, and remove excess Plumber's Mait from around shank of waste fitting.
6. Remove backnut, replace Basin Mate and re-tighten. Make sure tapered side of Basin Mate rubber washer goes (at least partly) into gap between waste and body of basin. Its the compression of that taper that seals the overflow.
7. With bucket under, fill basin to overflow level and make sure excess water comes out inside shank.
8. Should leave sufficient threads to get trap nut on and secure.
 

DIYnot Local

Staff member

If you need to find a tradesperson to get your job done, please try our local search below, or if you are doing it yourself you can find suppliers local to you.

Select the supplier or trade you require, enter your location to begin your search.


Are you a trade or supplier? You can create your listing free at DIYnot Local

 
Back
Top