My house extension diary

When you think that we literally kept 1 side wall and half the back wall and pretty much everything else has been changed I still don't think it's too bad. Every pipe, cable, internal wall, staircase, window, door... Everything has been redone. It's an awful lot of work and materials.

Wow. Well done! I'm nearly 4 years into a conversion of an industrial building and I look around at all that remains and despair a little sometimes.. it's getting here, and I do have to remind myself that this habitable space was unplastered and windowless just one year ago, so I've come reasonably far on my tod, throwing 2 days a week at it. Massive drag when everything else (expanding family) takes its toll, of course

I think in your case, I'd have gone the whole hog and demolished the entire thing first; you'd then be able to reclaim all the VAT on materials, which would certainly have paid for rebuilding 1.5walls with change to spare..
 
Last edited:
Sponsored Links
Hi to everyone who is still reading this diary. Works have started again and I'm slowly making my way through the tasks left to finish the house. It feels a little strange after having so much time off working on the house but is nice to see some change and get closer to seeing the finished product.

So onto the latest update. the first part is the downstairs hallway. Up until now the floor has been a nice concrete slab. I wanted a wooden effect flooring and as the hallway isn't huge I wanted a smaller thin plank. Like the rest of the house we ended up going for a grey colour and chose Karndean. I went with a single plank border with a contrasting trim and then had the planks set at a 45 degree angle. Here are the before and afters.

After re screeding

And the finished result

Next was back upstairs to the bathroom. If you have read through my previous posts you may remember we had custom made a double sink unit. We hadn't got around to finishing it off with doors, mirror etc.

We ended up going with acrylic doors with a metal effect edging from a company called Benjamin J kitchens. All arrived ok however the only slight issue is their standard sizes are a couple of mm too small for the b &q carcass. The gap isn't massive but still noticeable. The mirror was purchased online and imported from Poland I think. Finding large bathroom mirror made to measure in the uk is hard. The first one received was smashed to pieces in transit but they were good enough to remake it. Lastly we put in an acrylic splash back which given that the wall was a little uneven was probably a better choice than glass.

On to the last item of progress was out downstairs loo.

We went with some fancy tiles (which Kirstie fell in love with and twisted my arm to get). Personally I think they were maybe a little too Over the top, and at over £100psm it didn't sit well with the side of me that loves a bargain. Having said that I'm pretty happy with the style and I think they give the room a bit of a wow factor.

The room is very small so a lot of planning went into how we could fit in a sink. We decided rather than have a tiny one on the side that you have to squeeze pass we would put one above the toilet. There wasn't many good examples of this online but we decided to give it a go anyway.

We went with a hidden cistern and used the space above it to create a shelf. The toilet is wall hung so your feet can go under it making it easier to get to the sink. For the shelf we went to a local stone manufacturer where they had a lot of offcuts and for circa £90 got a made to measure quartz shelf. There is a bit of grouting / finishing off to do. I think we will probably put a mirror / cabinet above the sink at some point to give us a bit of storage. Anyway here are the nearly finished pics. It works really well, I just need to work a way to bring a bit of colour into the room.

Anyway that is all for this update. The next projects are to finish the balcony and put some cladding to the front of the house. I will keep the page updated when these are done.

Greg
 
Looking good. I like the way the floor goes diagonally.
Did you screed the floor yourself? What product - self levelling?
 
Also, hope you don't mind me saying so but to do those tiles justice, it would look great with a chrome towel radiator.
 
Sponsored Links
Hi bodgitnscarper. Thanks for your comments. The floor was screened by a guy who completed the karndean. I certainly couldn't have got it that neat. I think he used a stopgap screed, it certainly did the job.

I appreciate your comment on the radiator. I had actually toyed with the idea of a chrome towel radiator. The white one was there from when we first completed the central heating. Although I partly agree a chrome one might have suited the room better I was also keen to have some white in the room as it was looking a little dark with the tiles. Maybe a job for another day if I get annoyed with the white one.

Thanks
 
A mirror opposite the window, same size and shape might a) bounce some more light around, b) help add to the symmetry you've been going for and c) allow you to fit some grey coloured designer radiator - https://www.ebay.co.uk/sch/i.html?&_nkw=vertical+grey+radiator - to make the rad less stand-out. If your spare bog rolls were under the wall mounted roll, and a white towel the other side, it'd look white balanced, more so if the rad wasn't white..

IMHO, of course..
 
Links in this post may contain affiliate links for which DIYnot may be compensated.
Finally had some time free to finish the outside of the house! One of the hardest decisions on the house has been what cladding to use on the front.

On one hand I wanted to go with what I had originally planned (western red cedar) and on the other I wanted something low maintenance. You often see red cedar on contemporary projects and I’m a big fan of its natural colours. The problem is, unless you give it plenty of tlc, regular oiling etc then it can look rubbish. There is another house down my road which has been in a few house building magazines. Honestly it looked fantastic when new but the cedar now looks worse for wear and very patchy.

I hunted high and low to try and find a composite cladding which looked like cedar - none of them looked good. If you want it to look like wood - it needs to be wood. I tried to convince myself that if we got cedar I would make the effort a couple of times a year to re oil it but I knew deep down I wouldn’t. Had it been on ground level maybe.

Eventually I got annoyed with myself for umming and arring for so long. I have literally put off this part of the project for the last 2 years for fear of getting it wrong. Anyway I decided to bite the bullet and found a weatherboard I quite liked. There was a case study from the manafacturers website which wasn’t too far away so I took a look and decided to give it a go - after all if I didn’t like it I could always rip it down hey.

Anyway sorry for the ramble. Here are some pictures. One of before the cladding and balcony glass and another after.

I’m really happy with the result so far. Now I need to decide on a style for the garden wall. I want it to fit in well with the house but I don’t want render. Any suggestions are welcome as I think this decision will be as much a pain in the bum as the cladding.

 
What an excellent thread, a really good read and well documented. You should be proud!!
 
Hi all

ok so it’s been a year since I updated this thread. There are 3 main projects I had on my ‘to do” list which would mean the house is about finished. The projects were 1/ Kitchen, 2/ Build a wall to enclose the garden, 3/ landscape the garden. All pretty big projects both in terms of work involved and cost. Because of this it’s been a little slower but we are making progress.

This post is an update on our Kitchen. It was finally completed just before Christmas and we are really happy with it. Anyway onto the pictures.

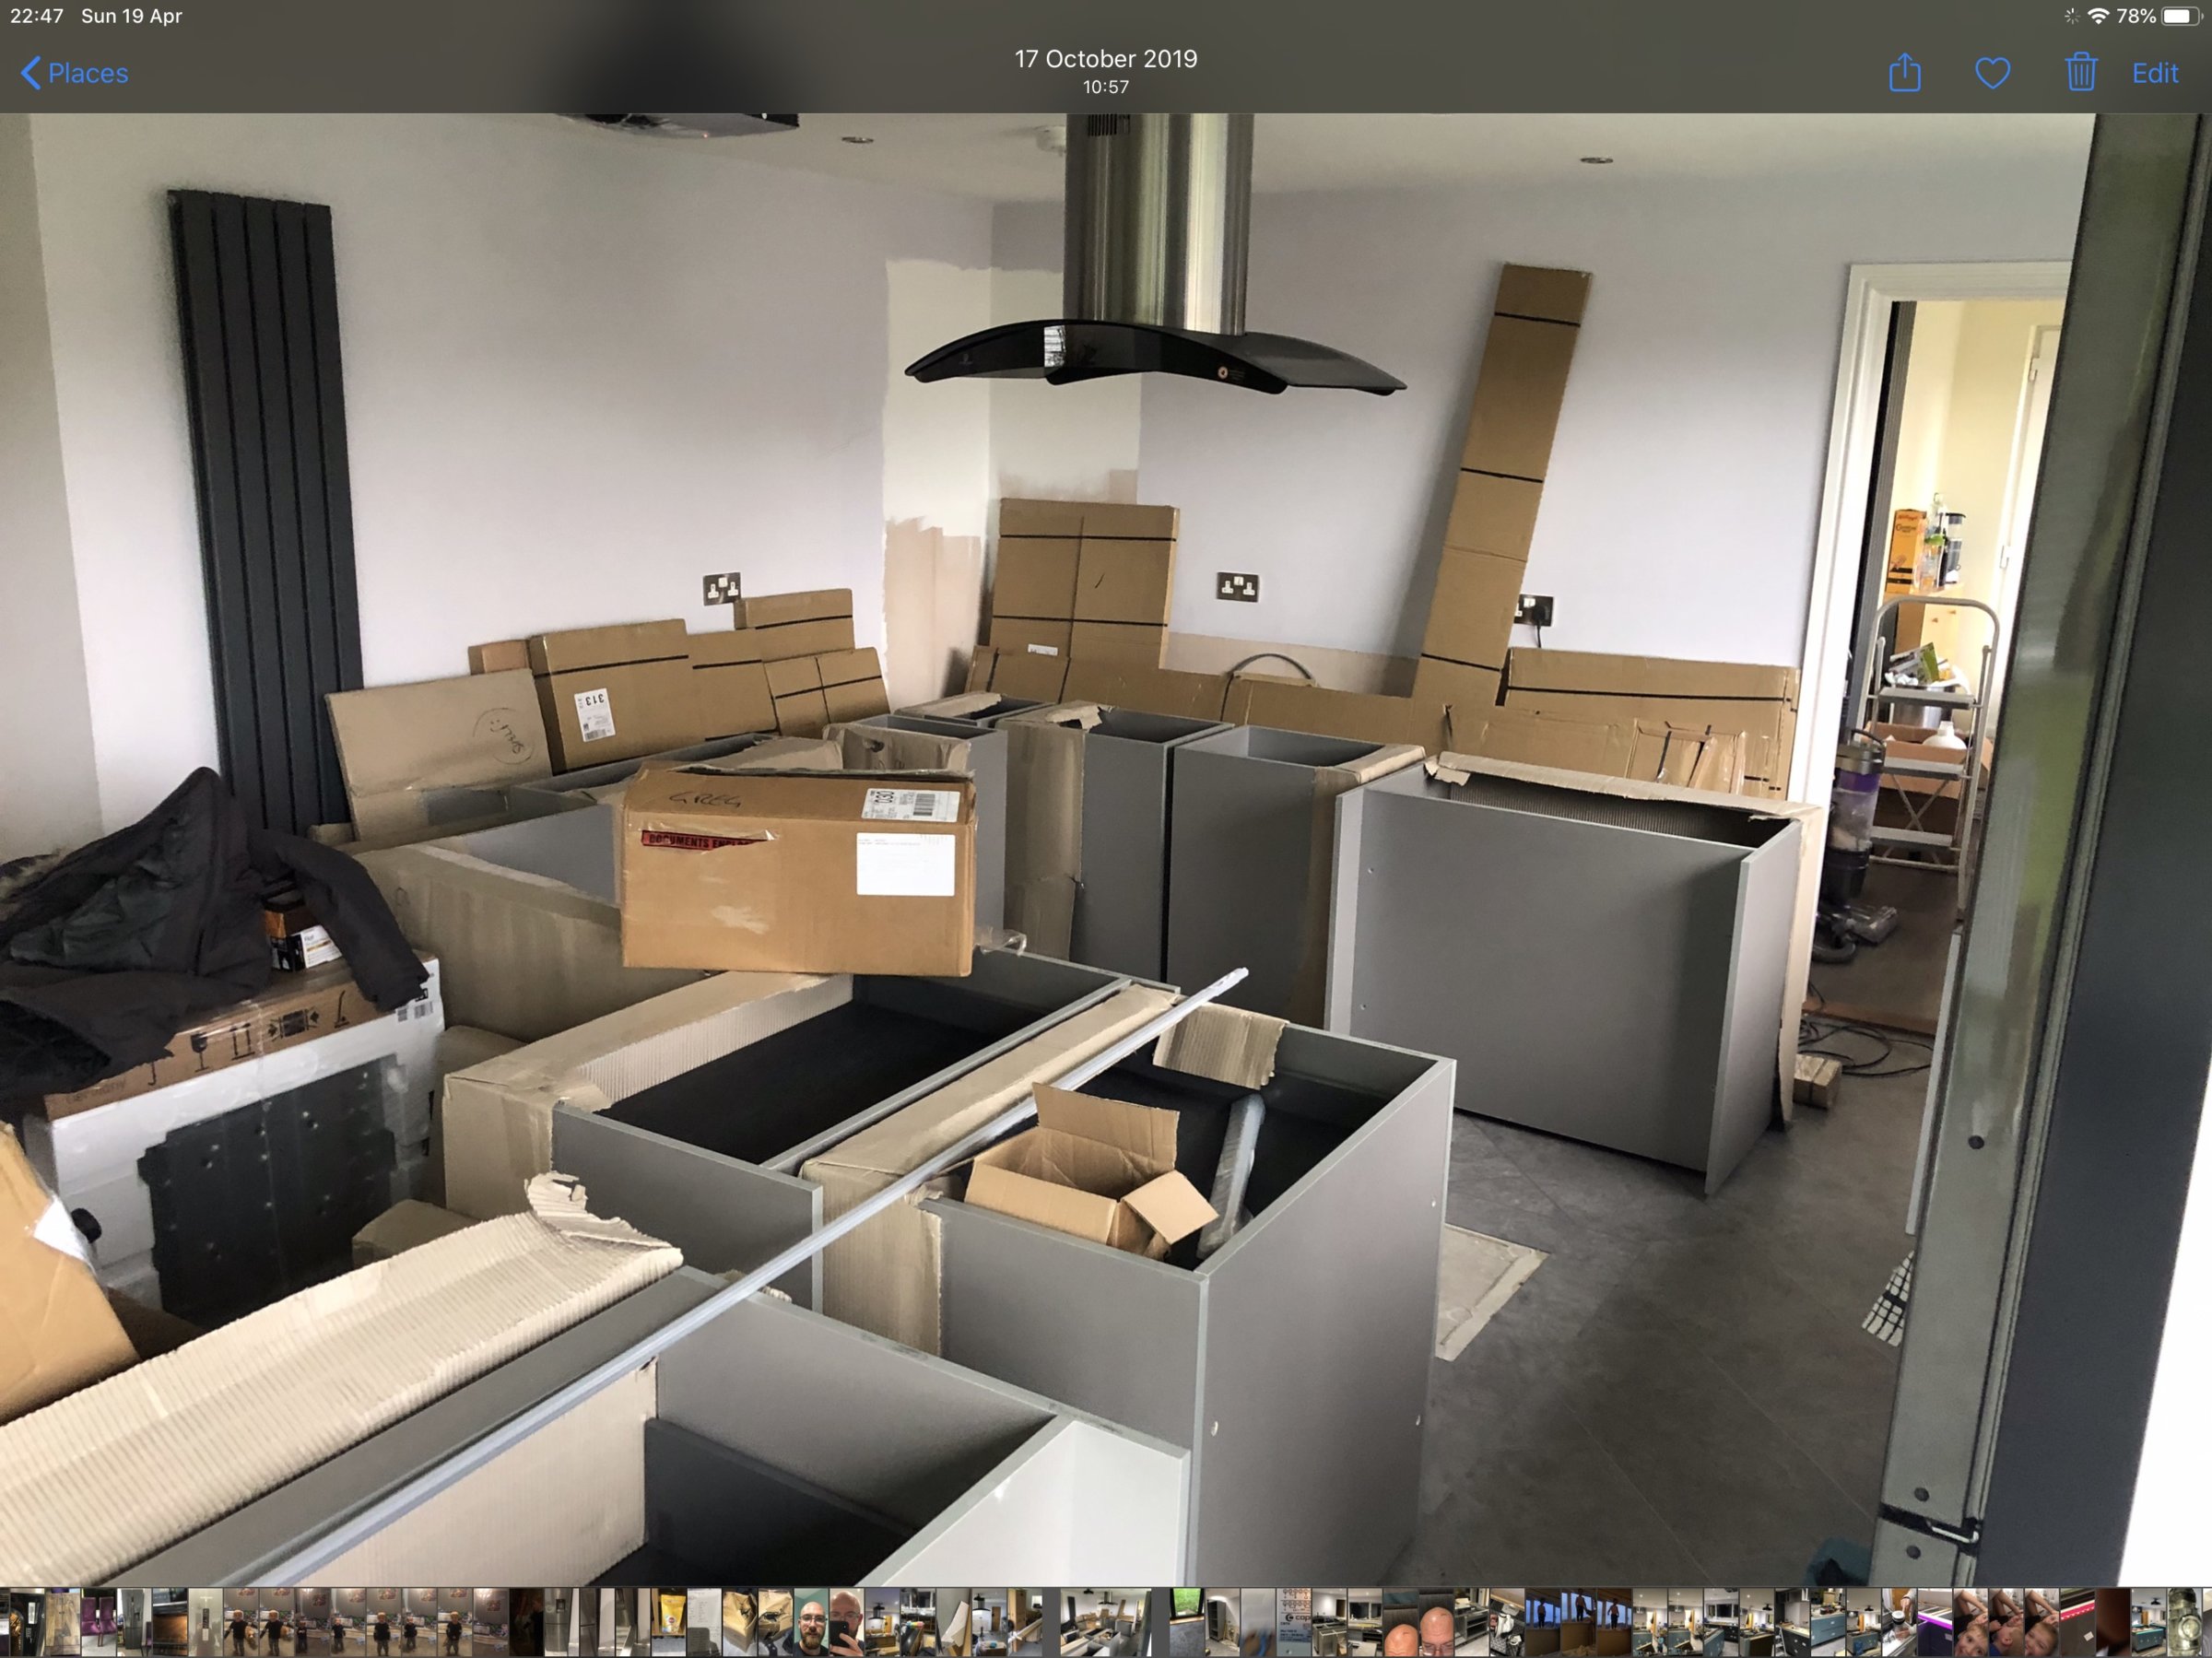
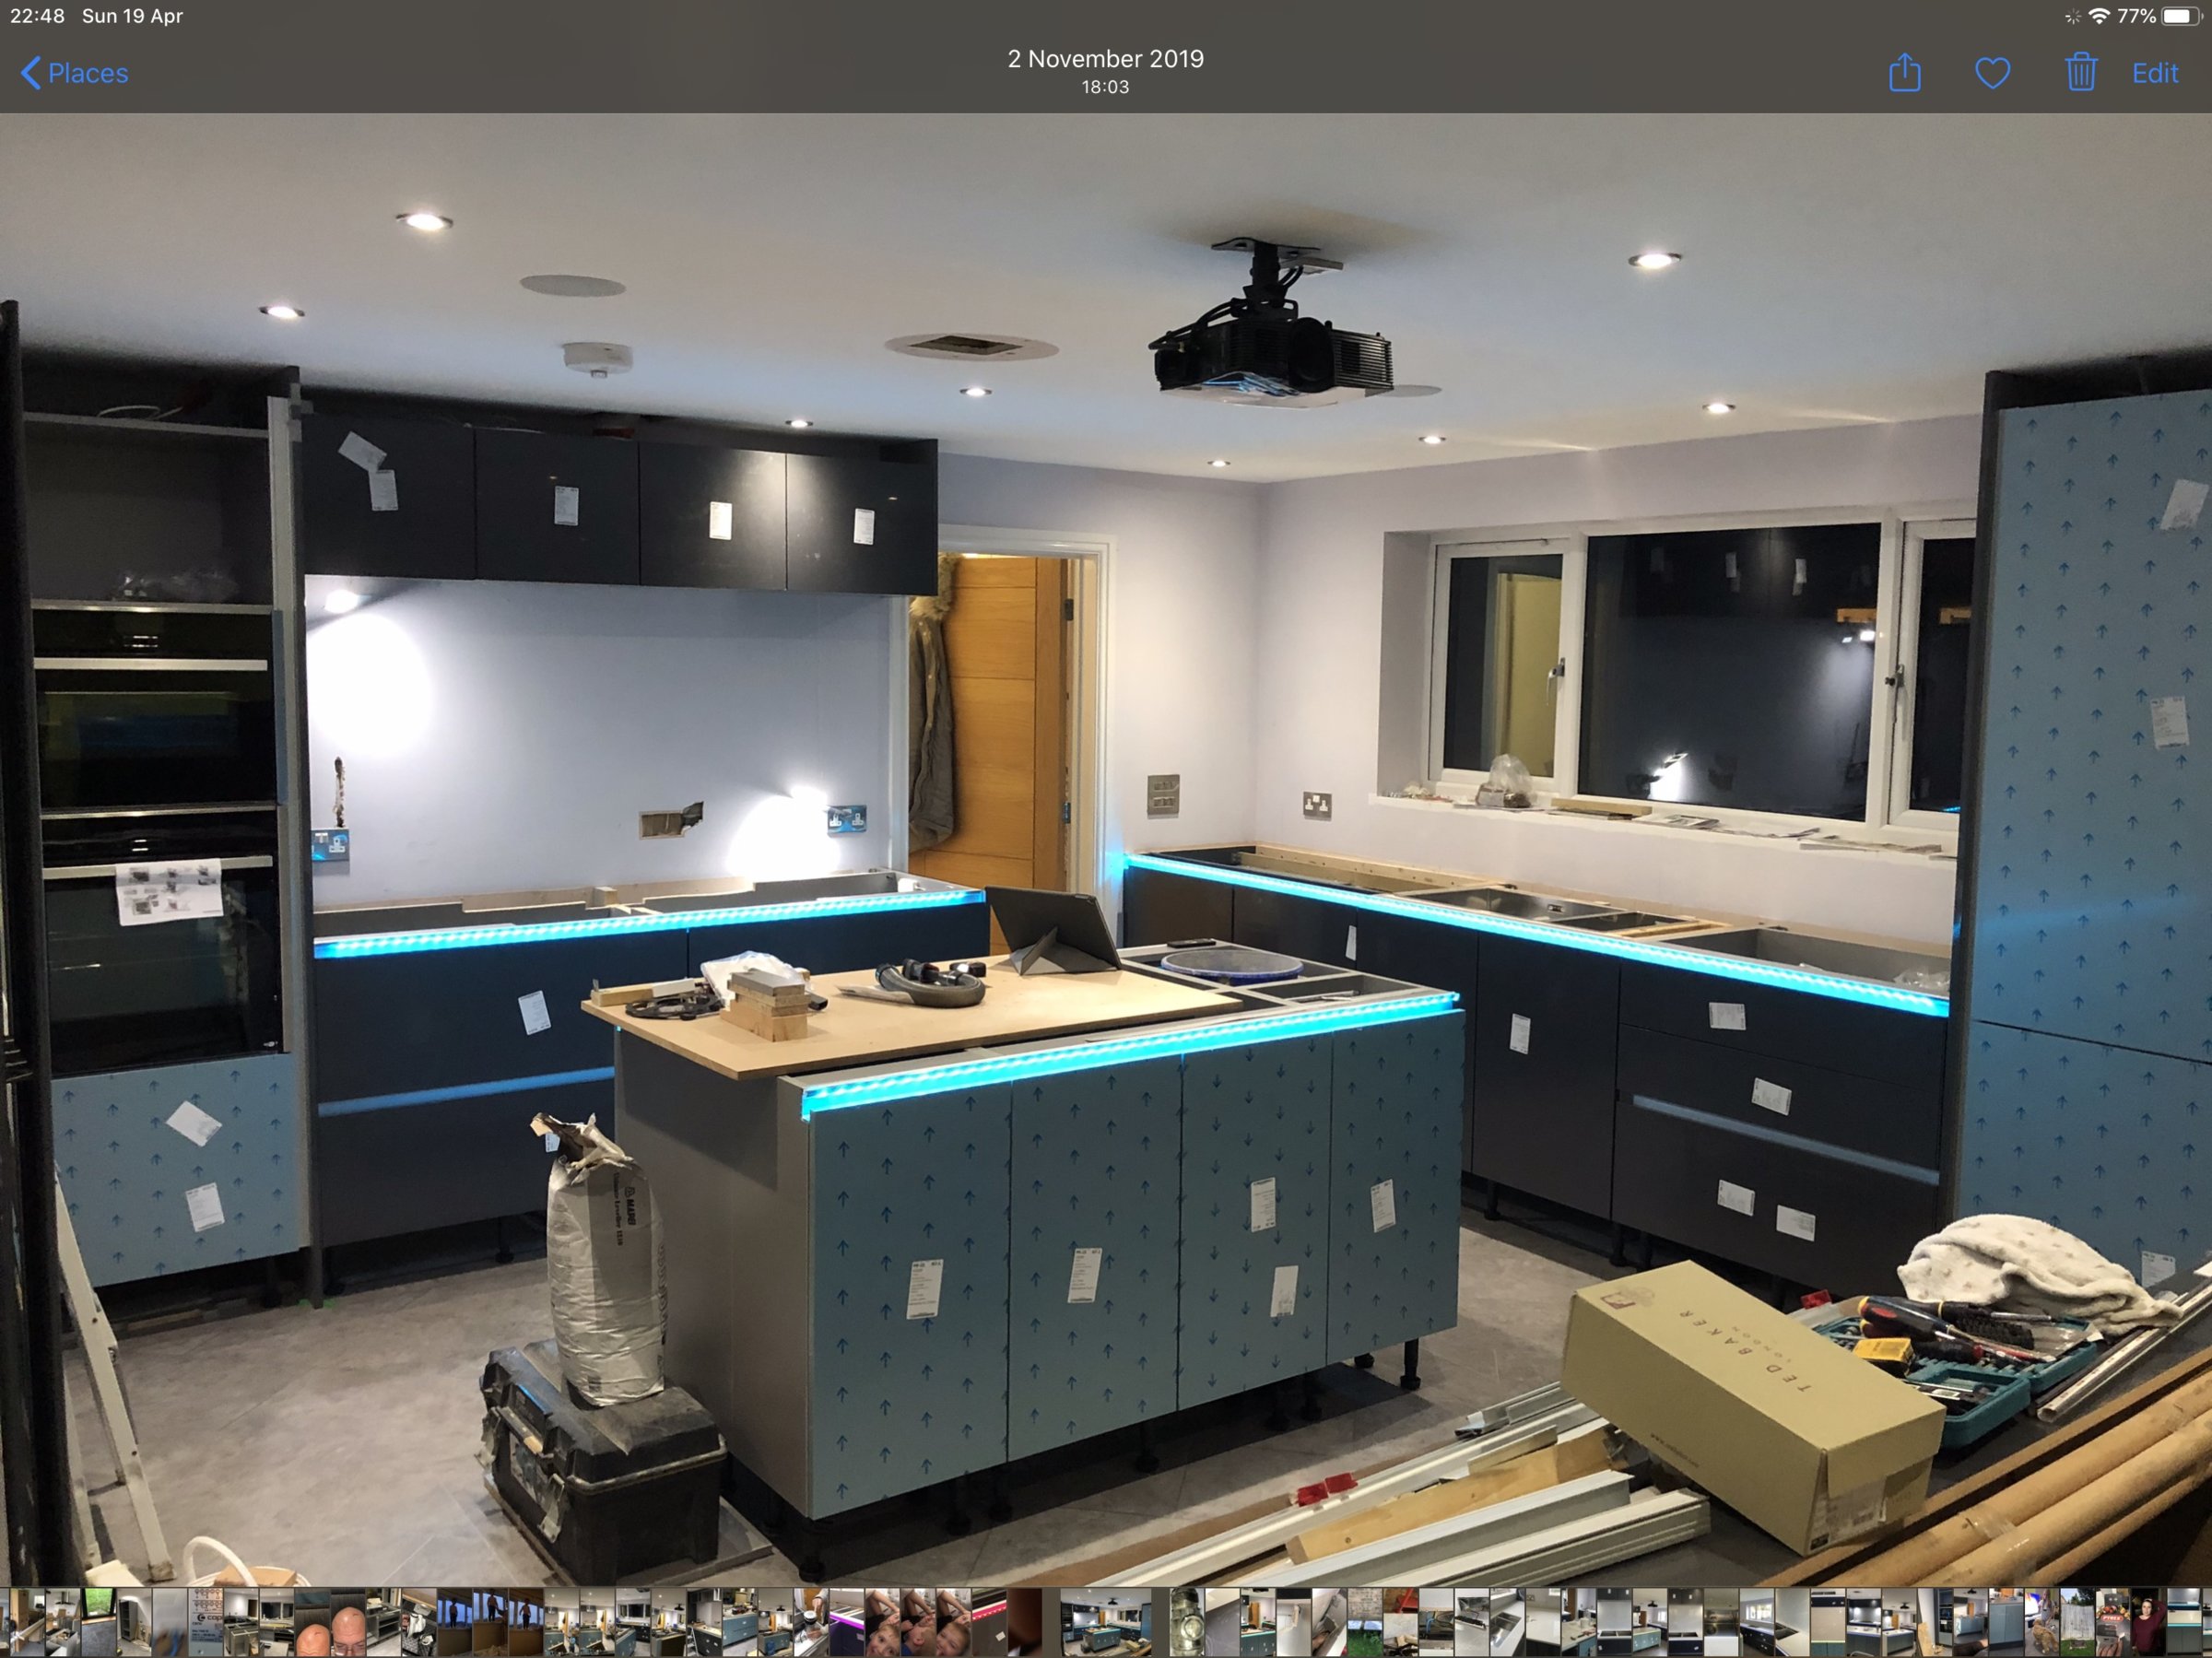
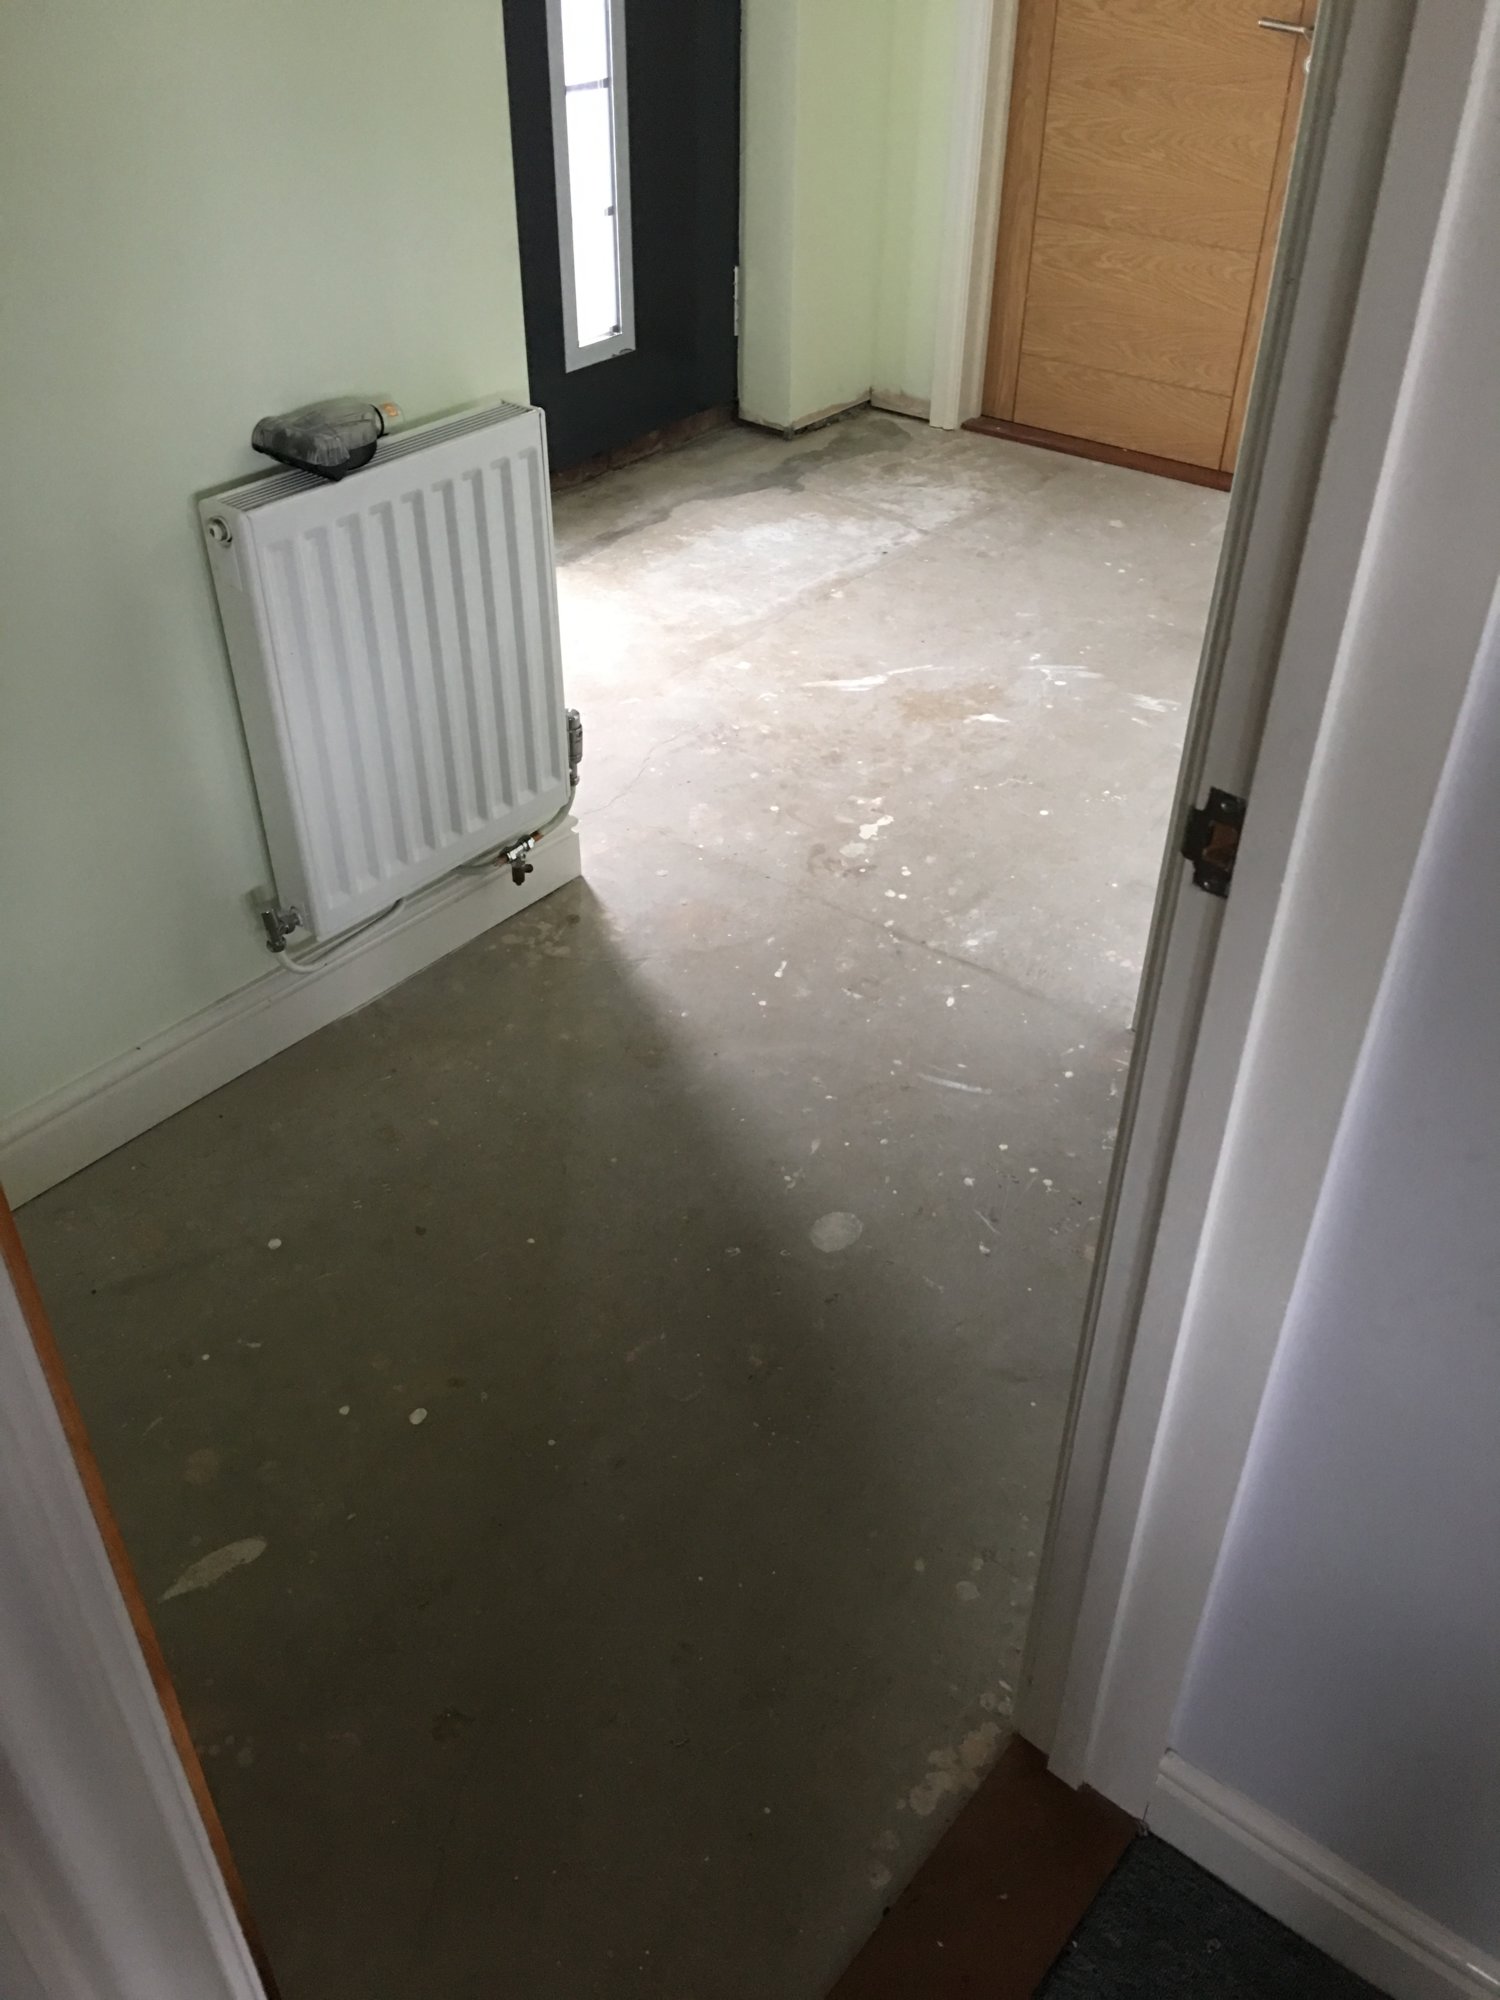
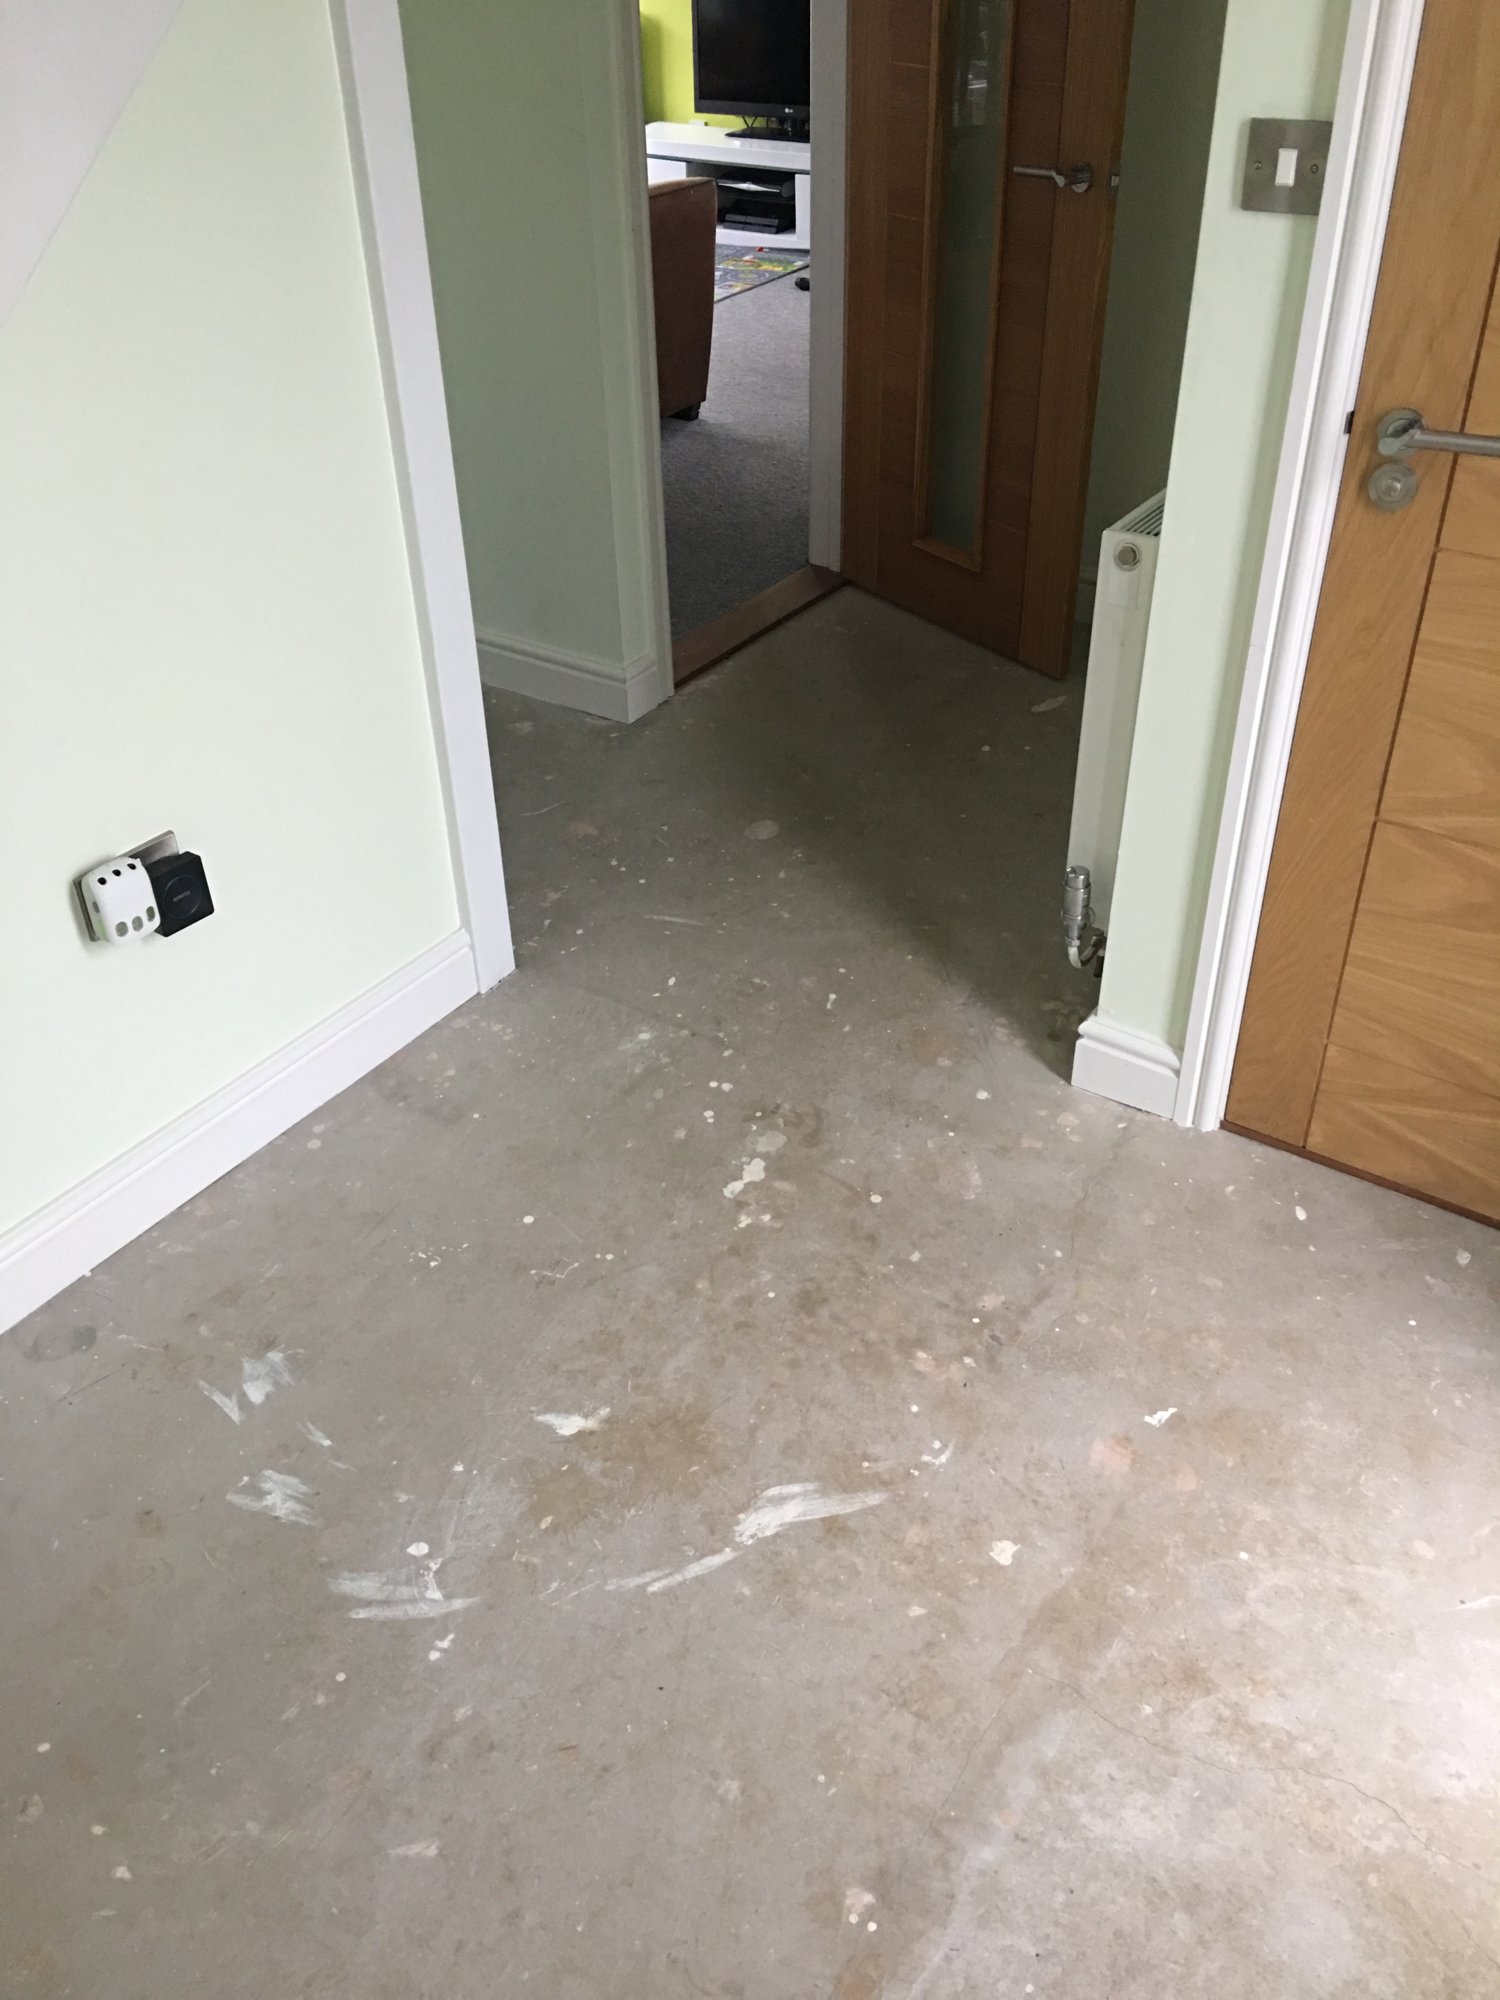
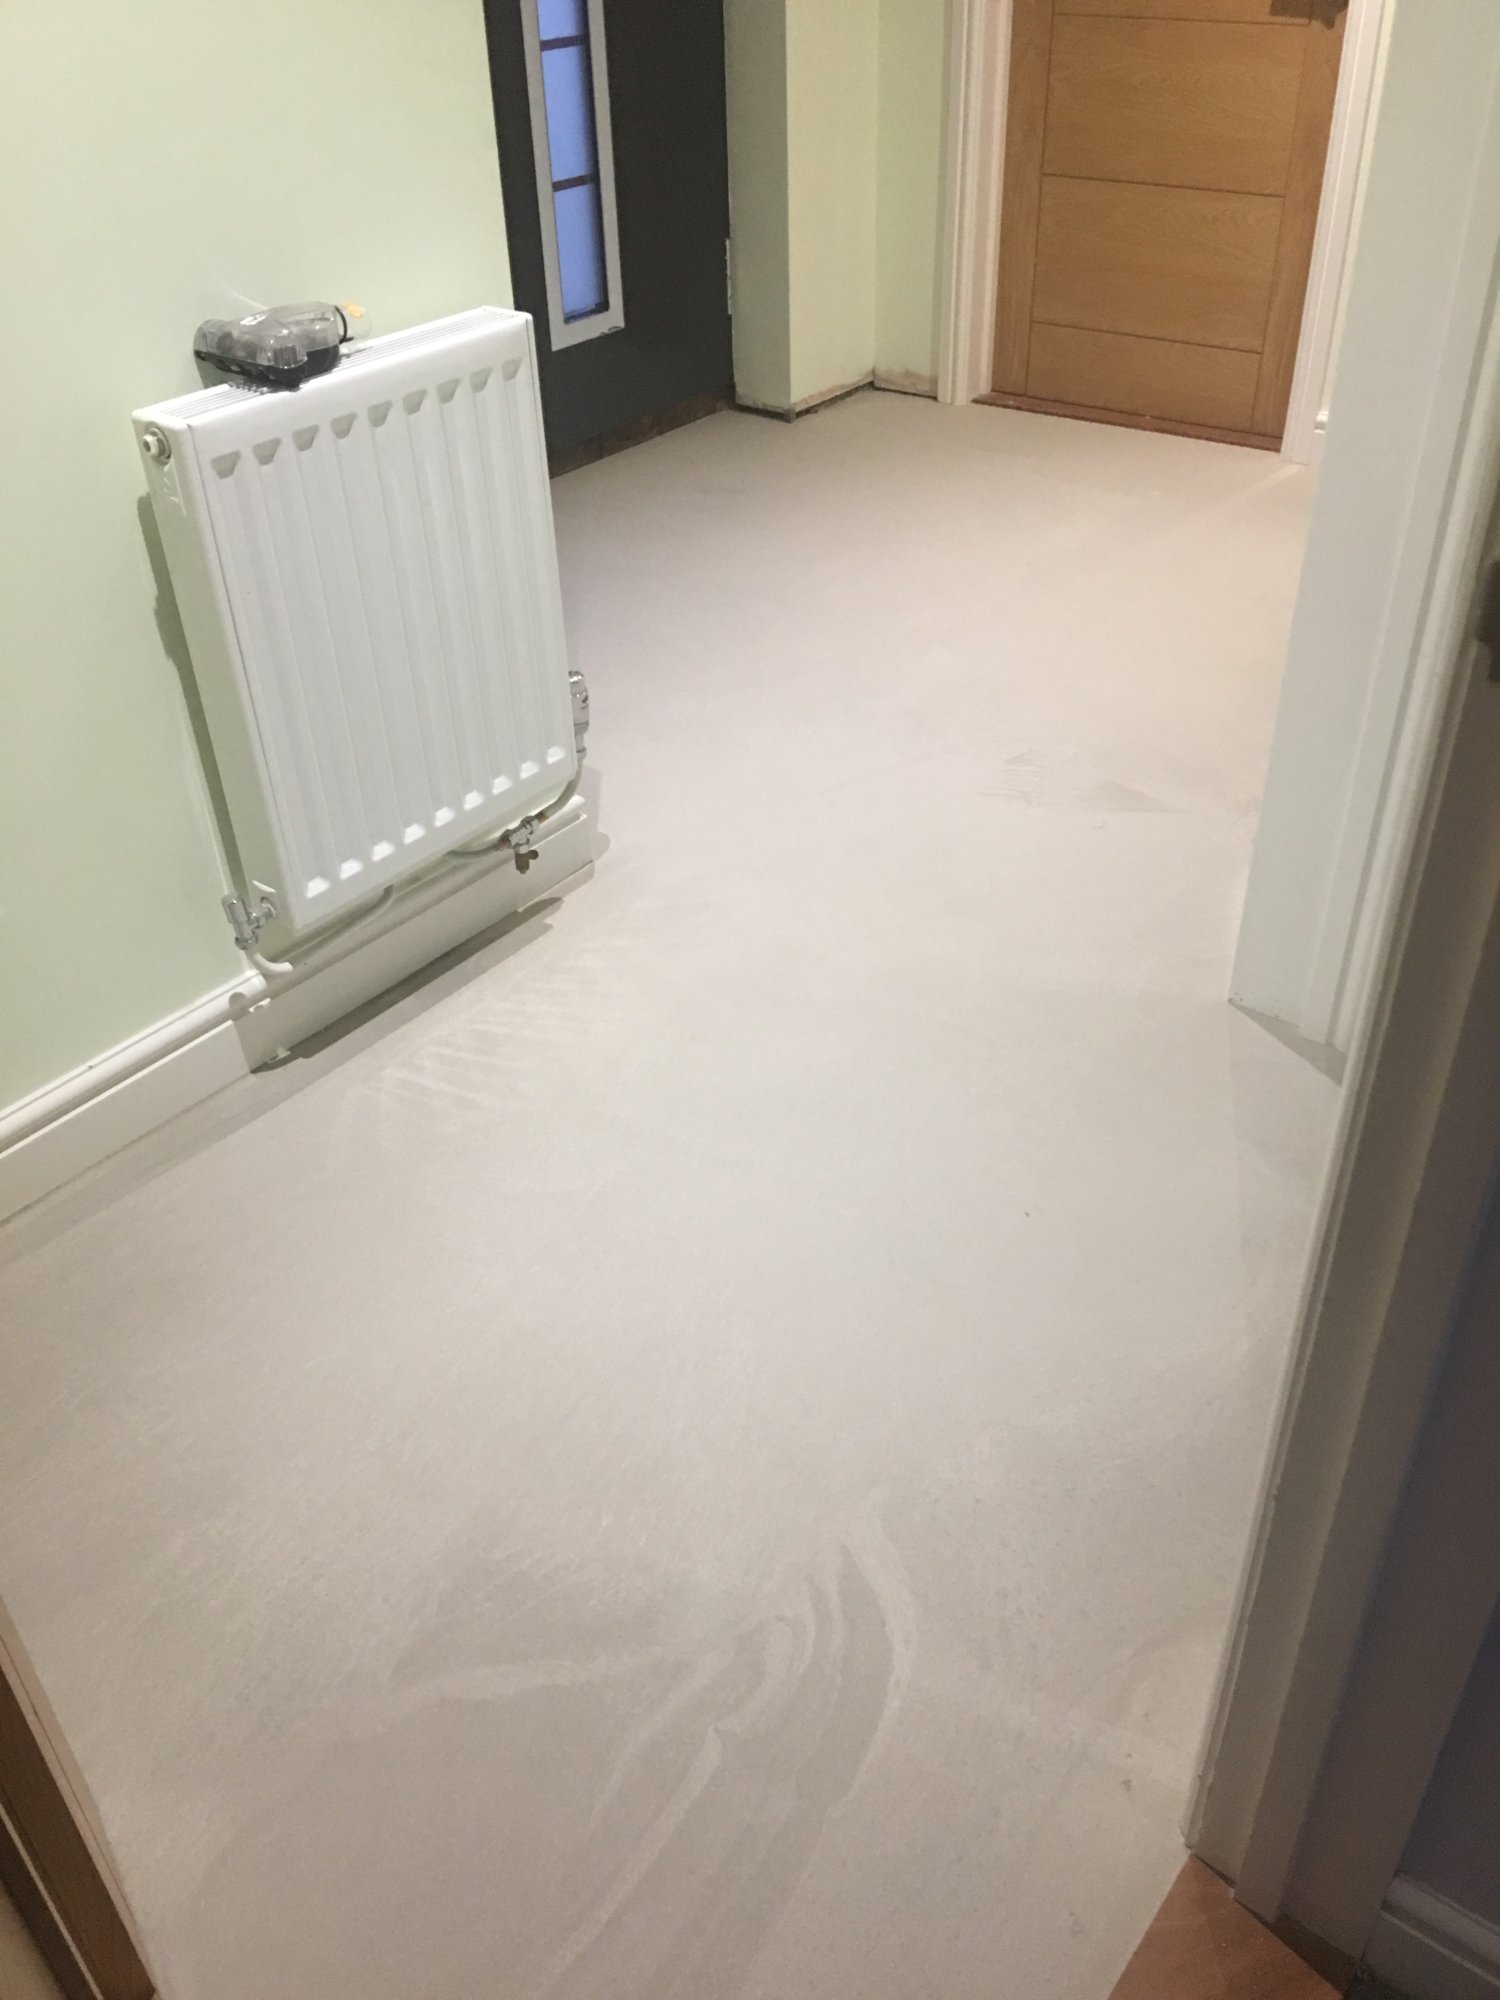
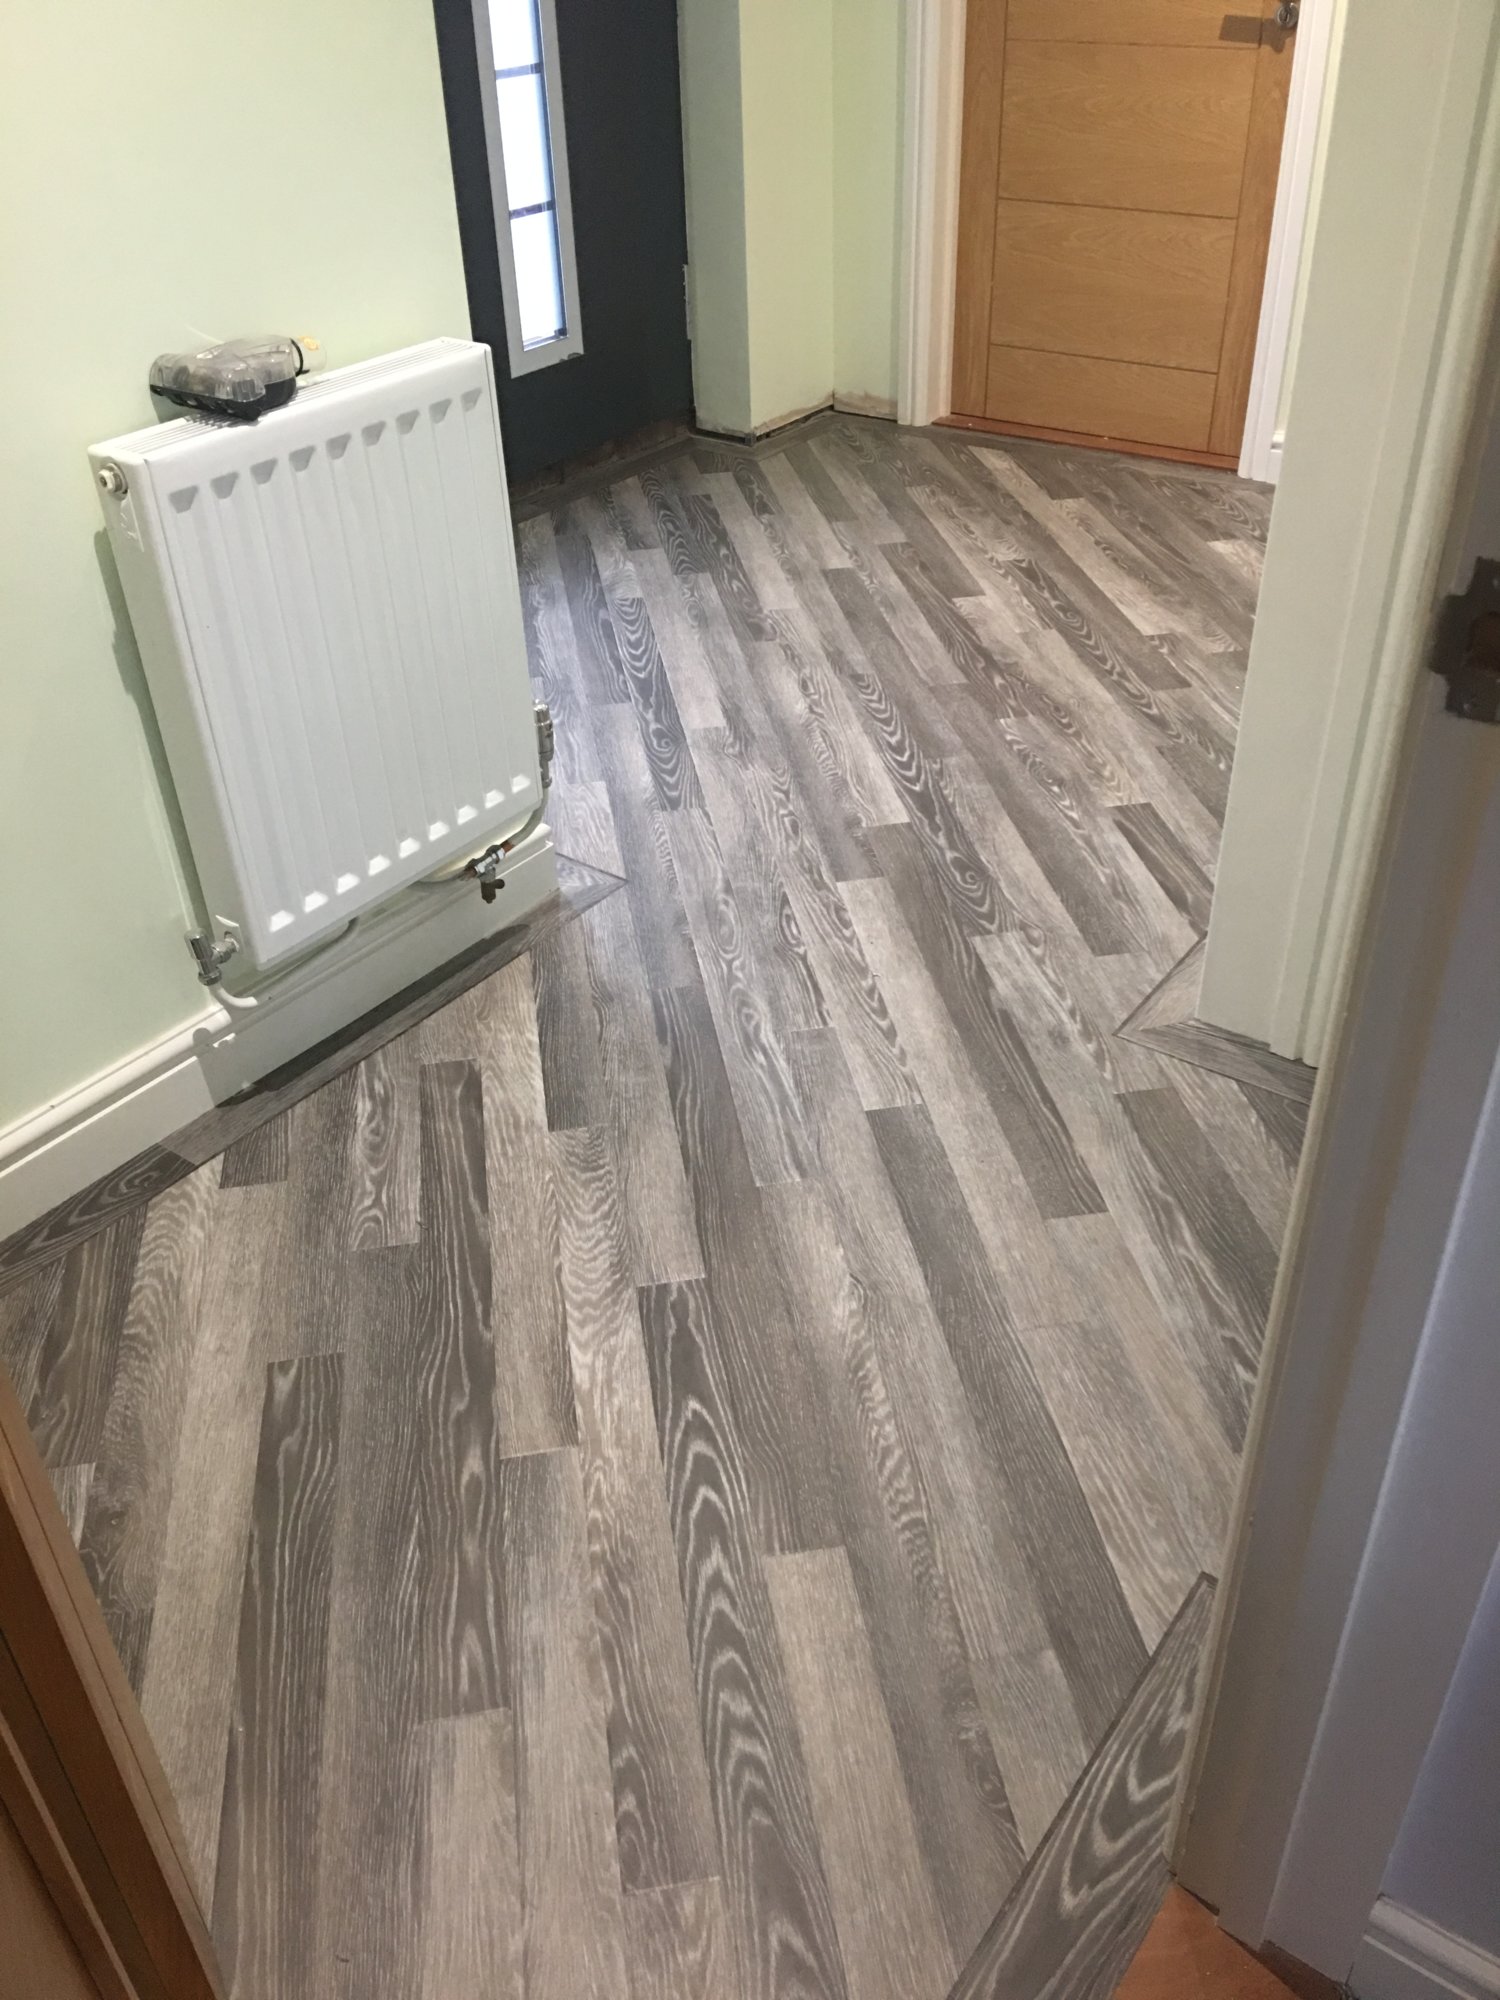
We lived the past 4 years with some temporary b+q cabinets without any doors. Originally we were going to put a new worktop on these and put some doors on. As the project evolved we decided that the cabinets didn’t give us exactly what we wanted so they were removed.

The new cabinets arrived. We went with a silver / grey colour. They were all made to measure and purchased from Benjamin James Kitchens - a really really top guy by the way. Really well priced and he never seemed to get annoyed with my phone calls, questions or changes. Thanks a Ben!
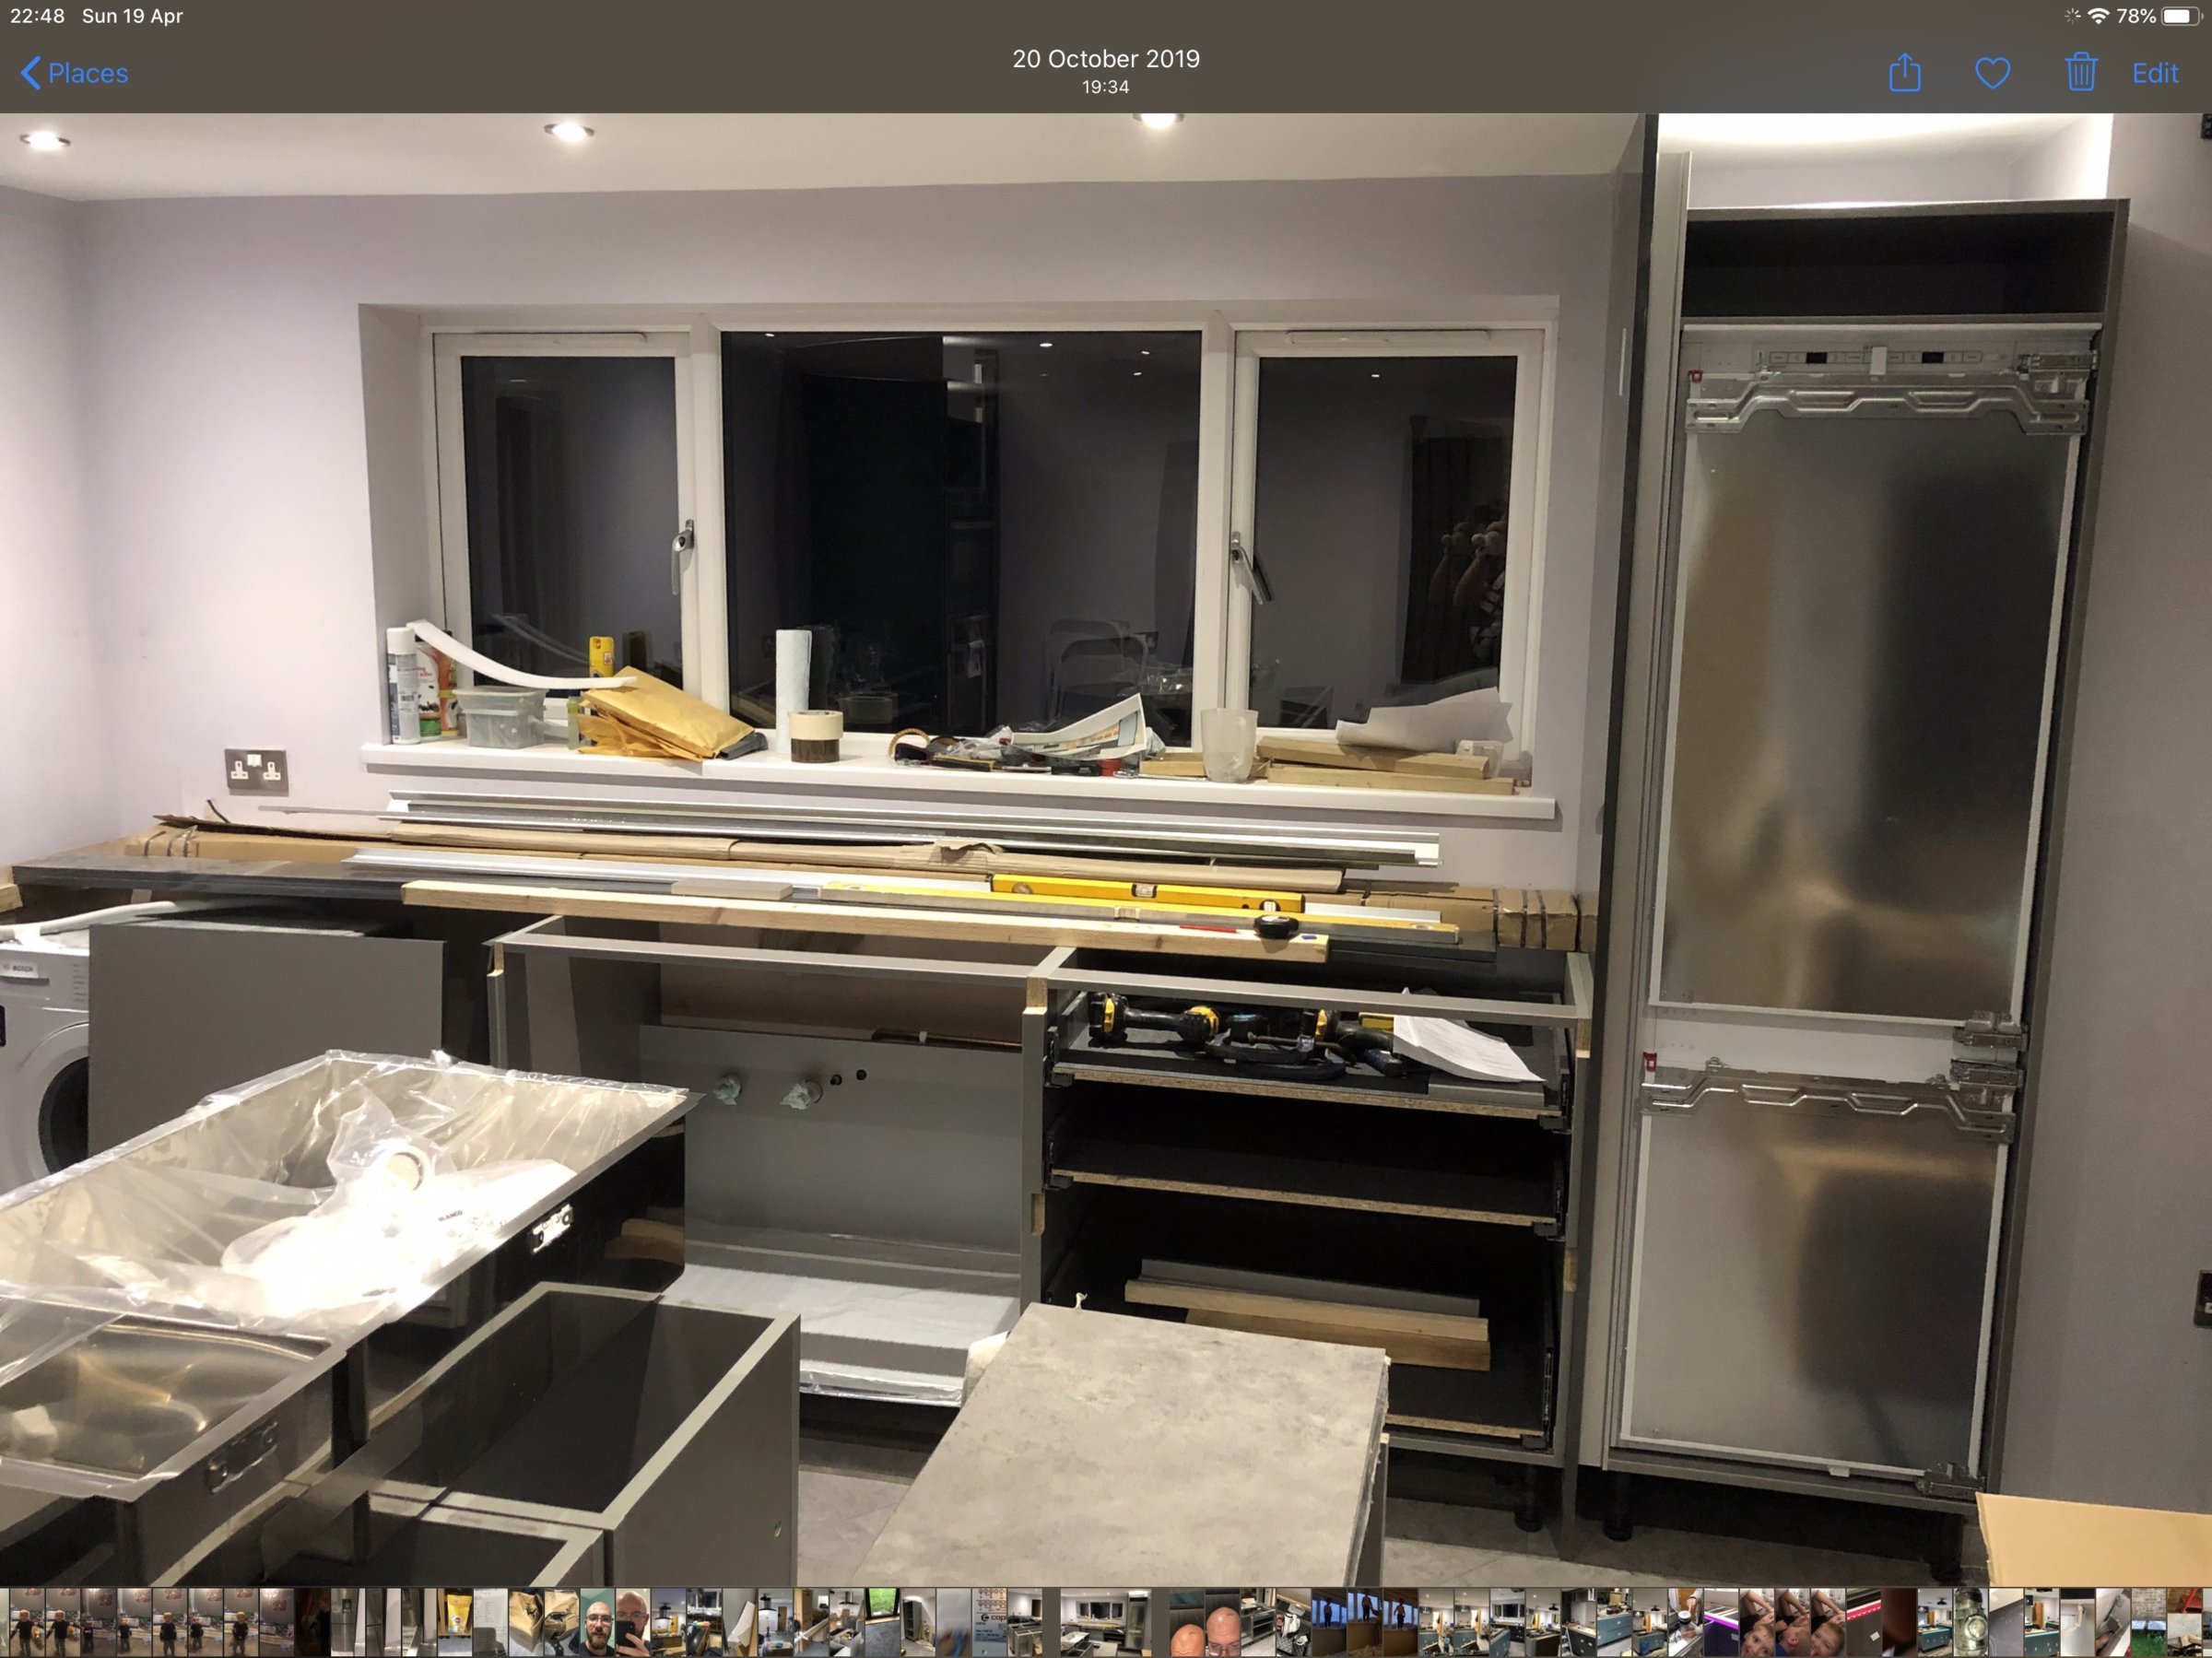
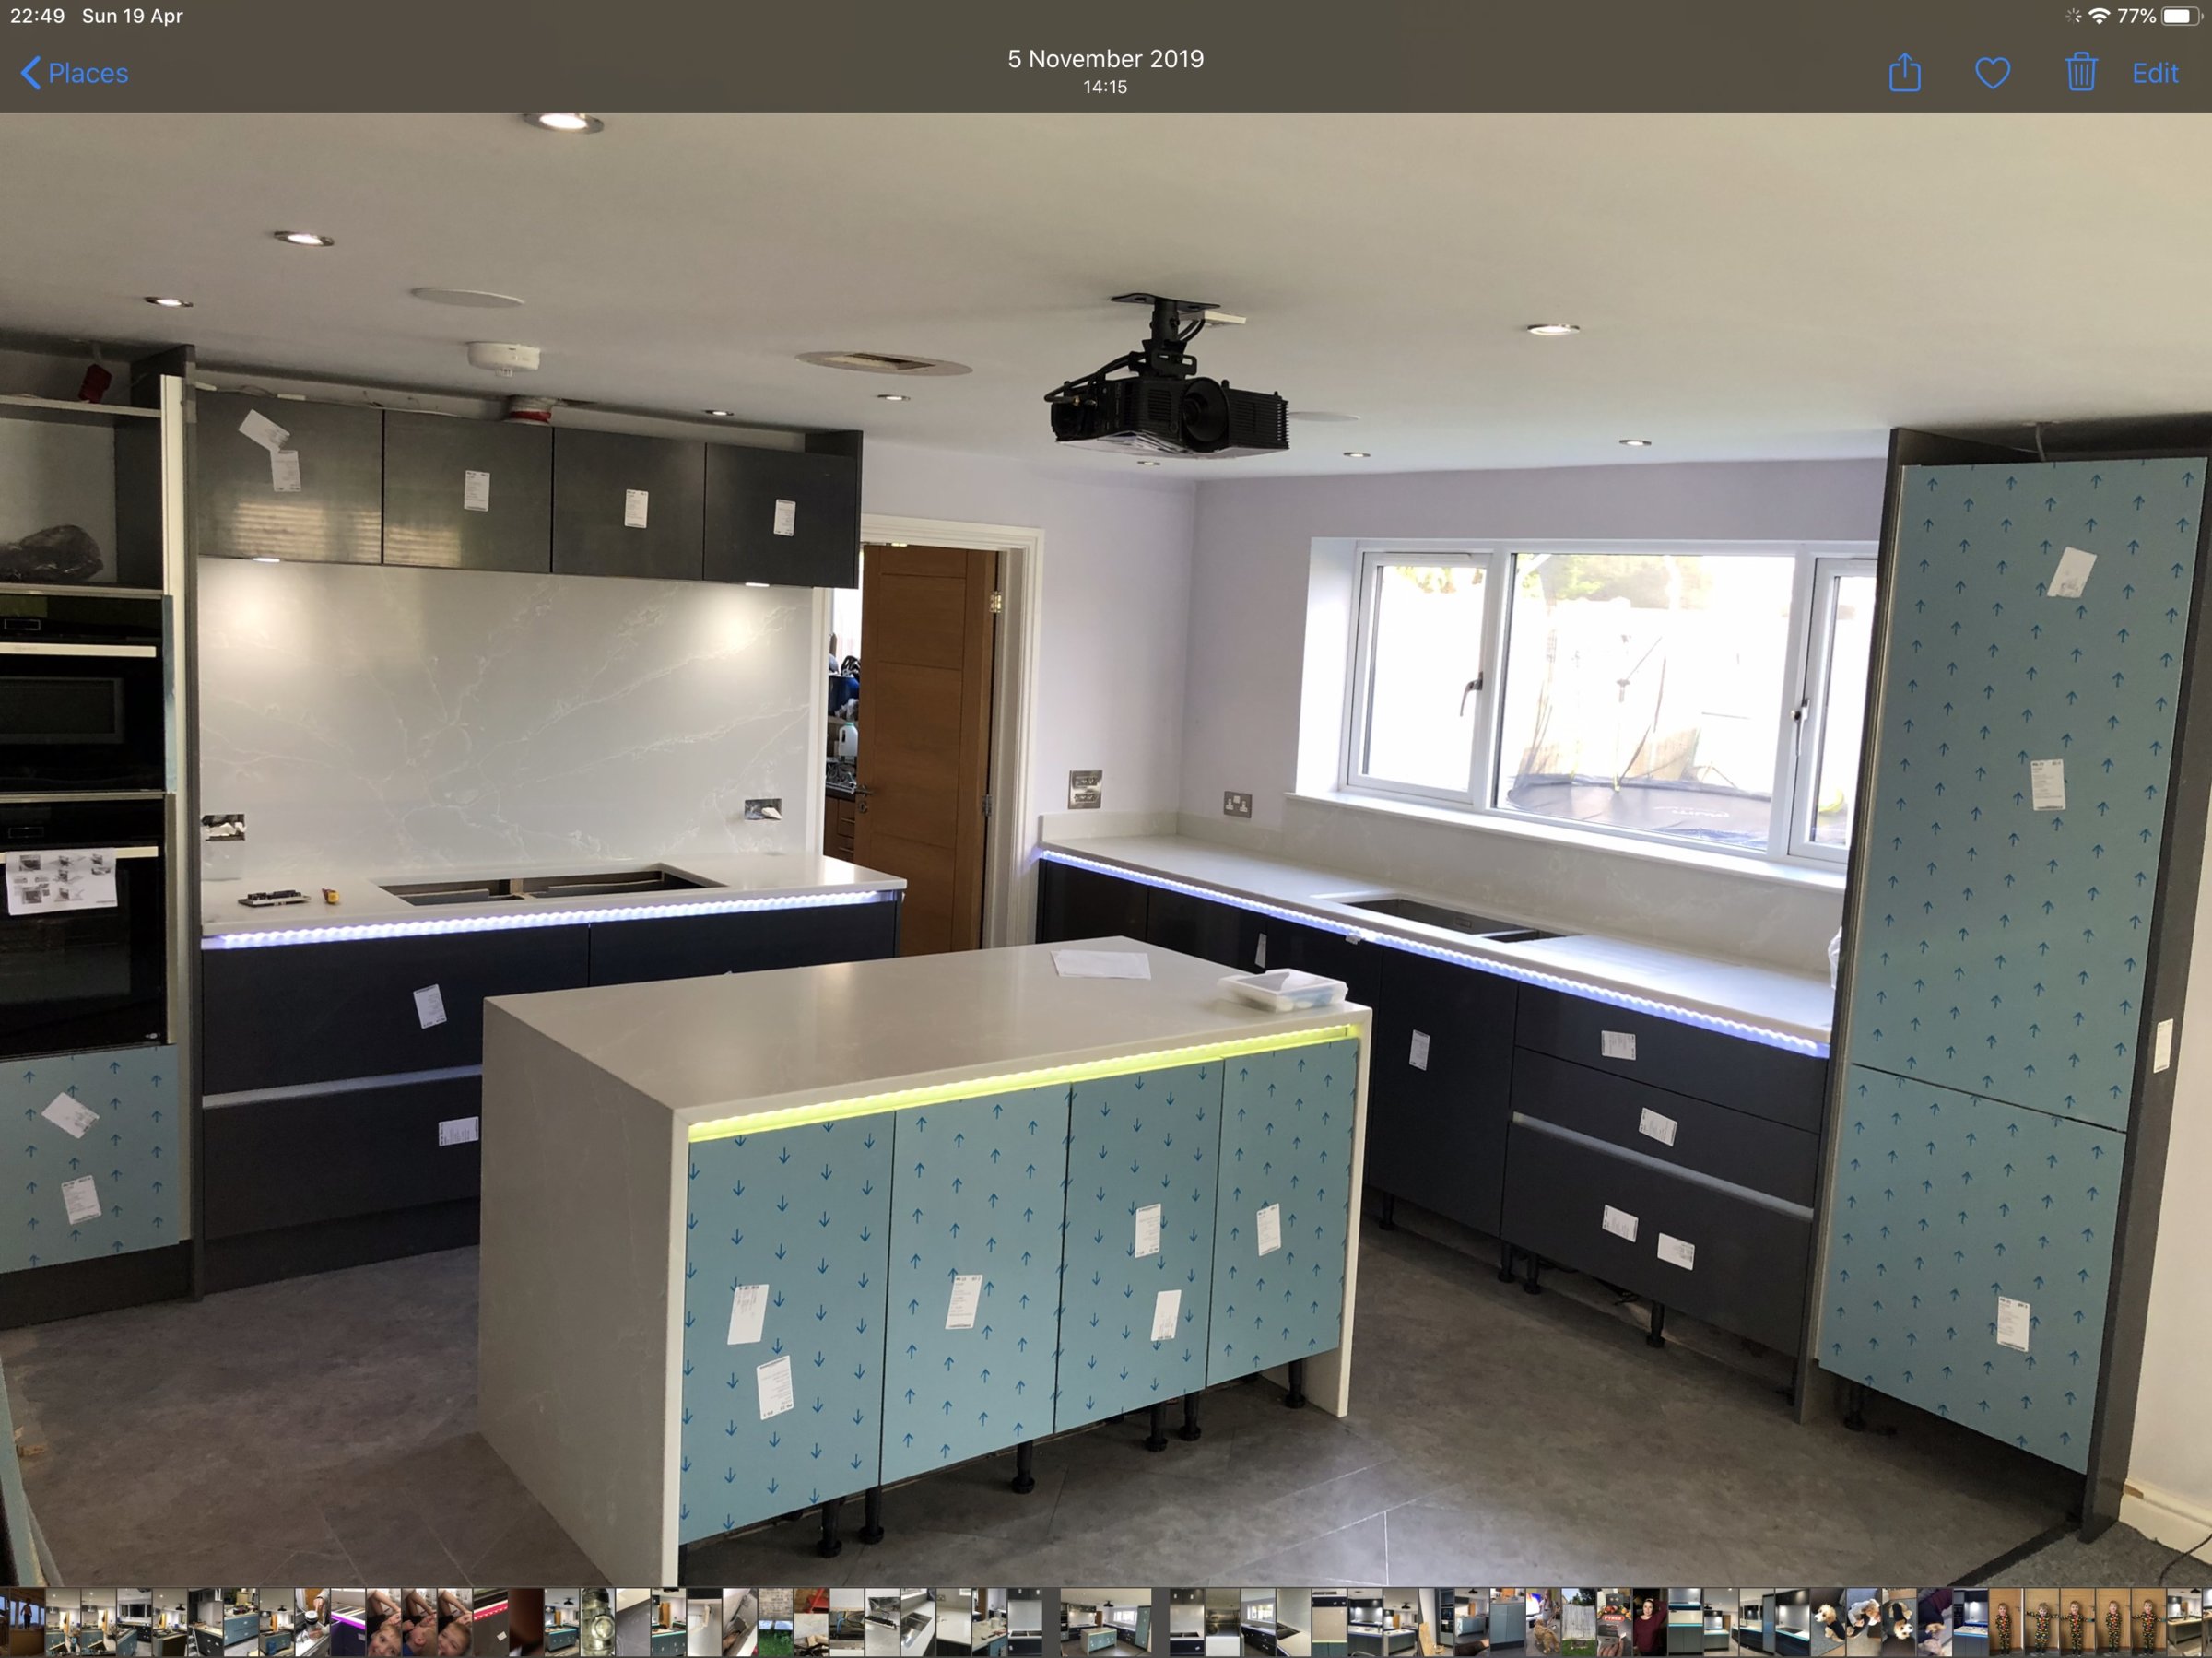
Getting the cabinets into position. You will see they are all notched out at the top. This provides space for a handleless rail design which we went for. You can get the rails built into the doors but this version gives a great continuous finish.

The cabinets were fully assembled including all the drawers which I’m sure saved a huge amount of time. We also got the cabinets made slightly deeper than normal ones. I think we added somewhere around 8cm to their depth. Although it doesn’t sound like much it really makes the workspace feel a lot bigger.
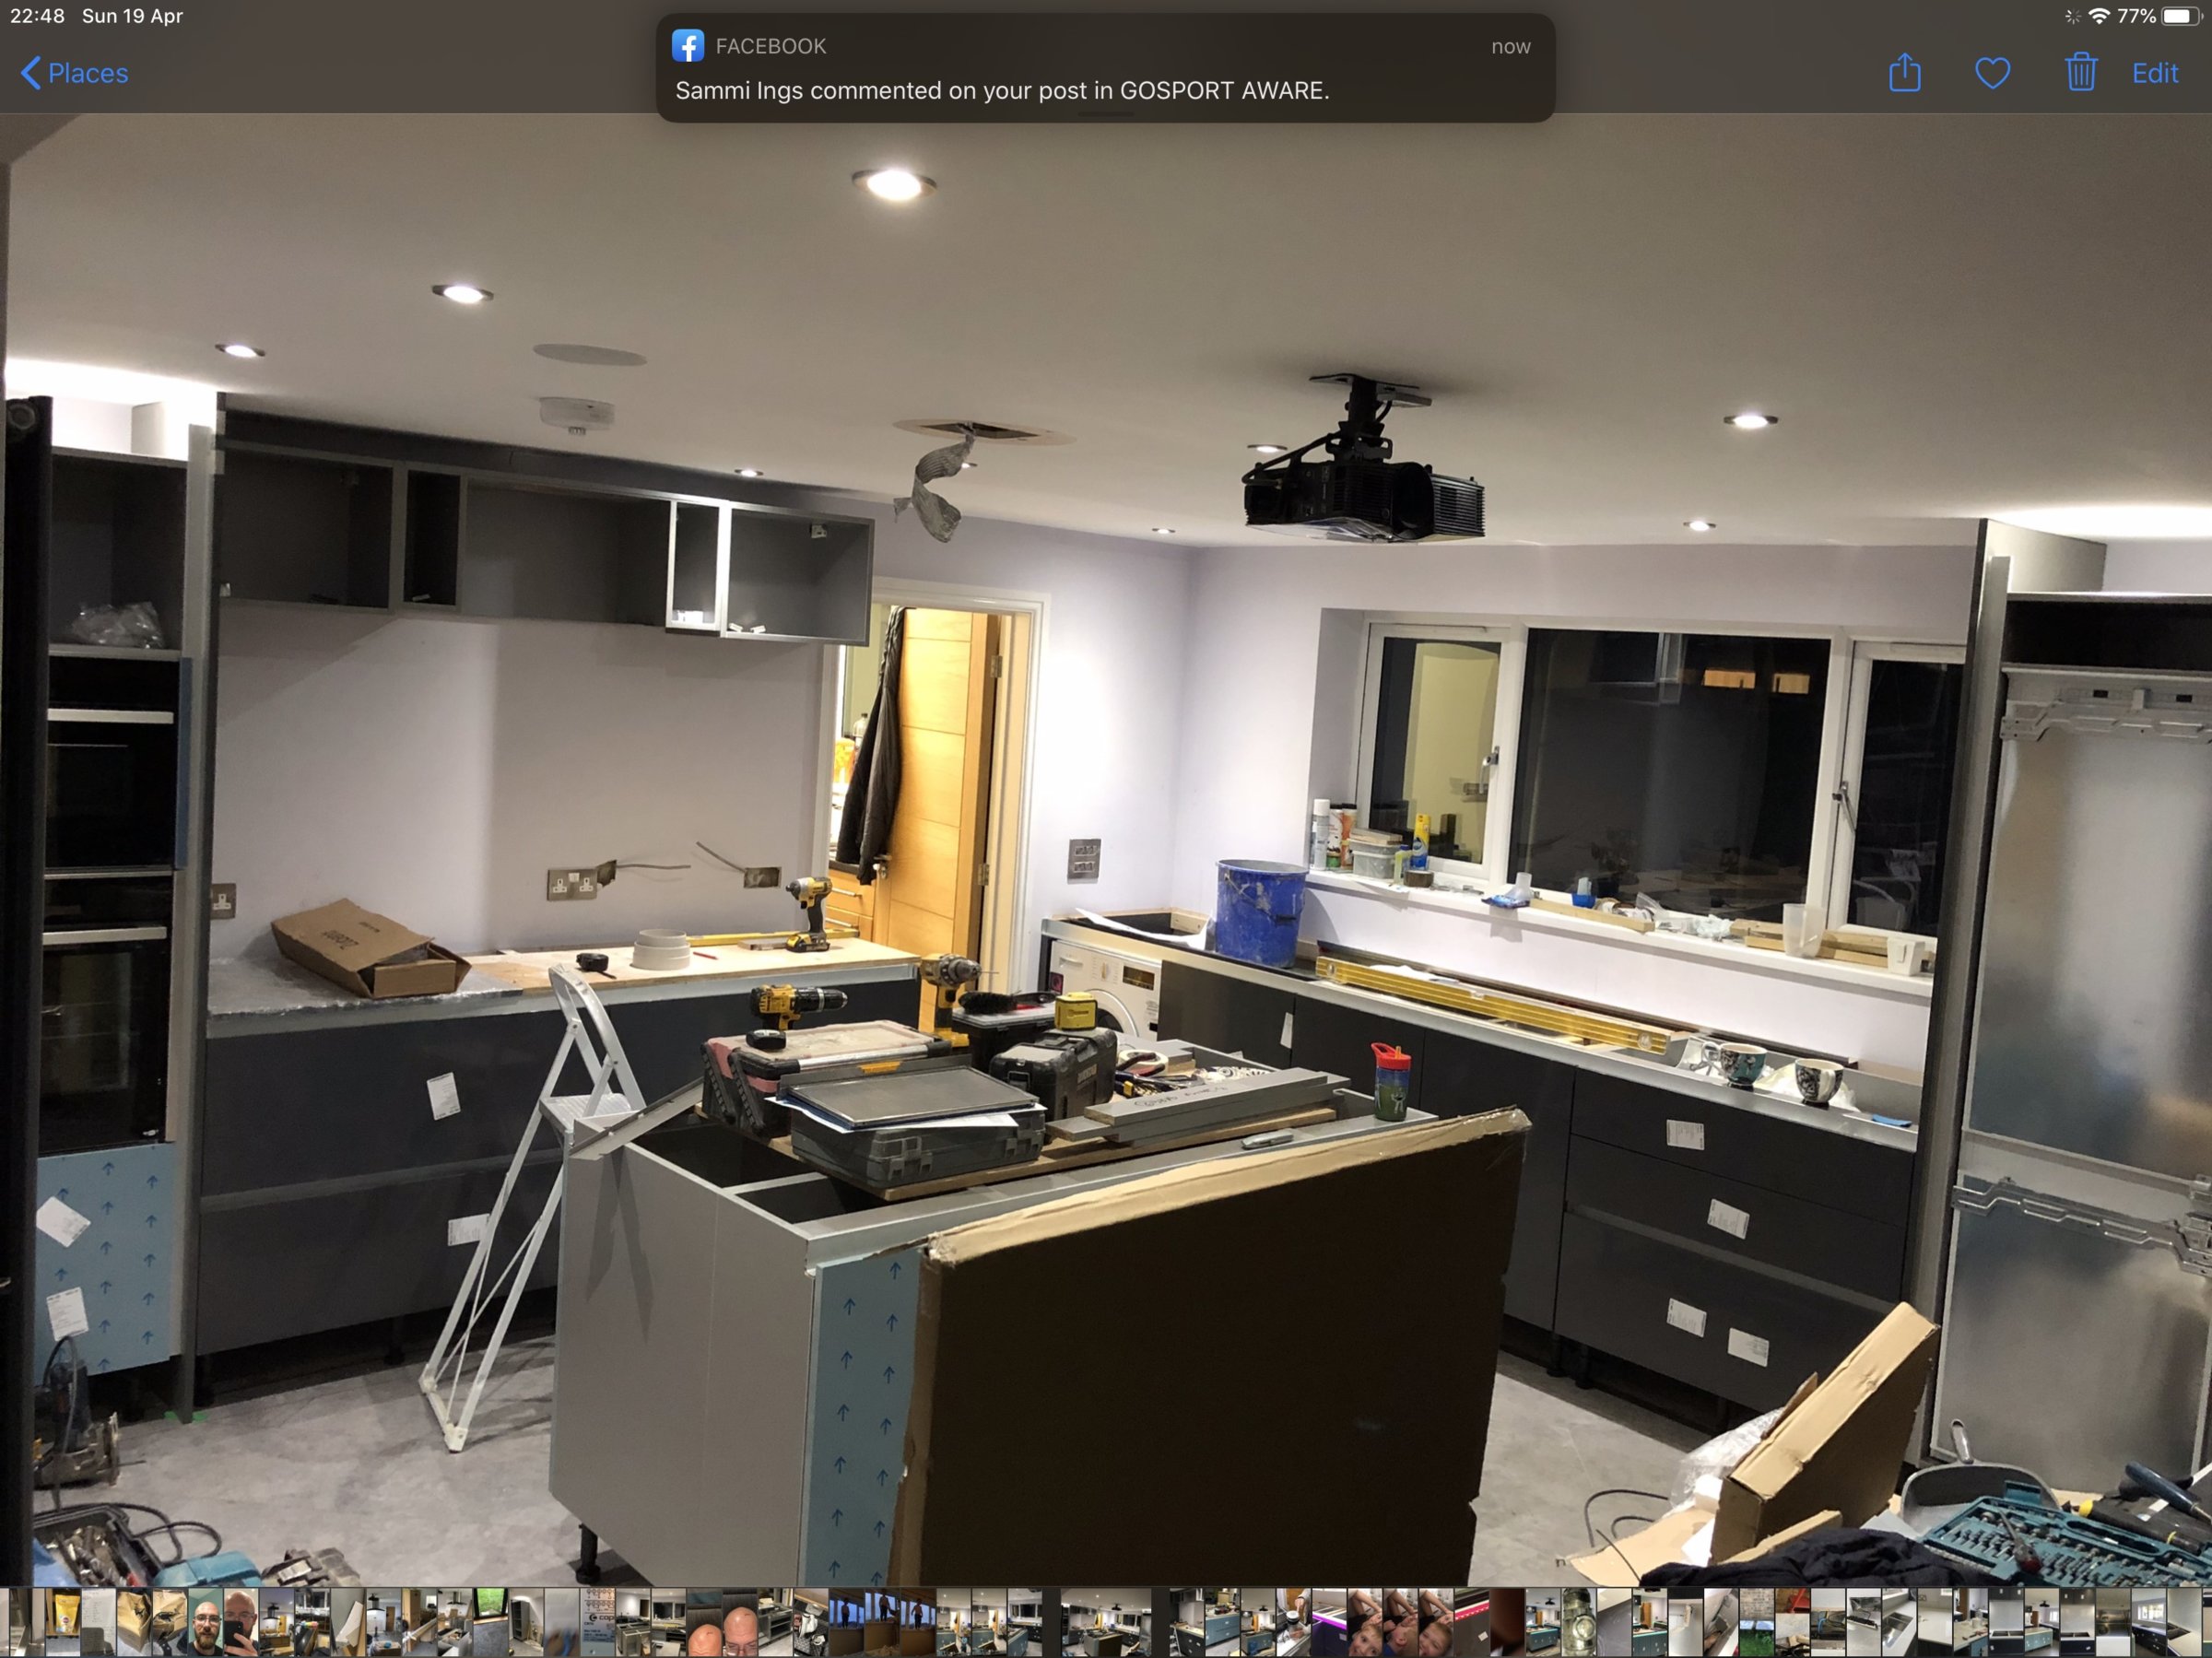
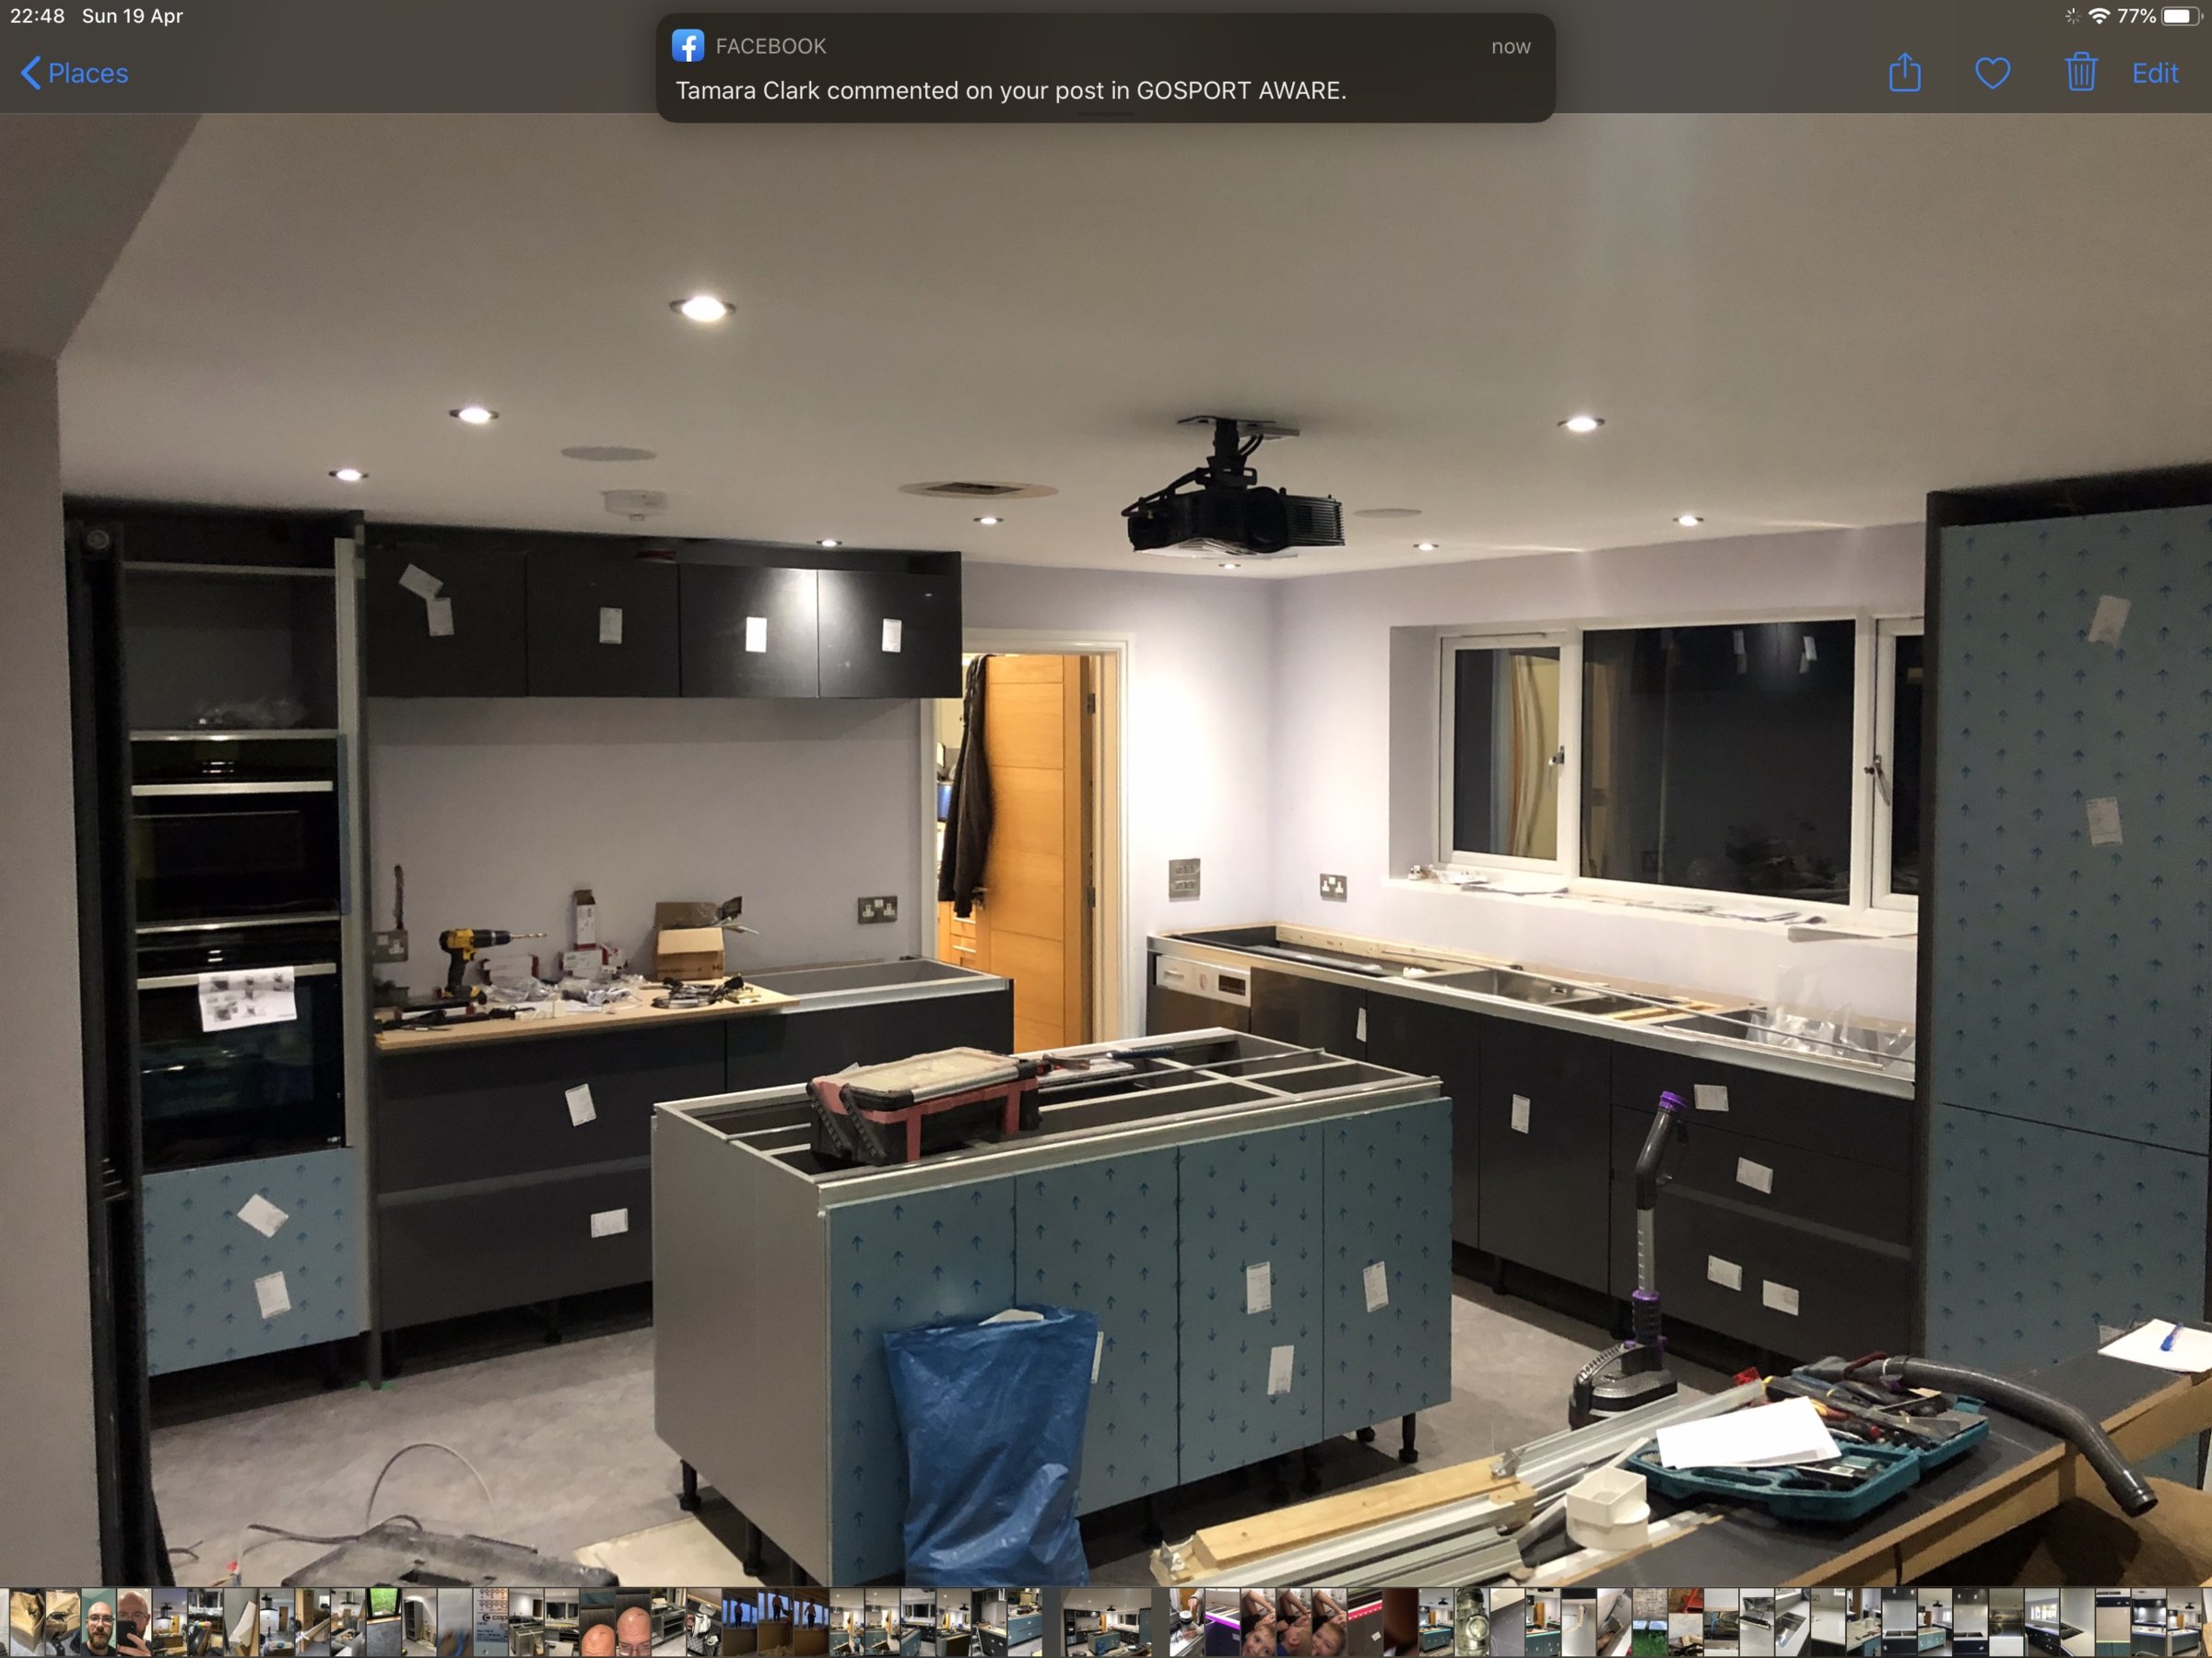
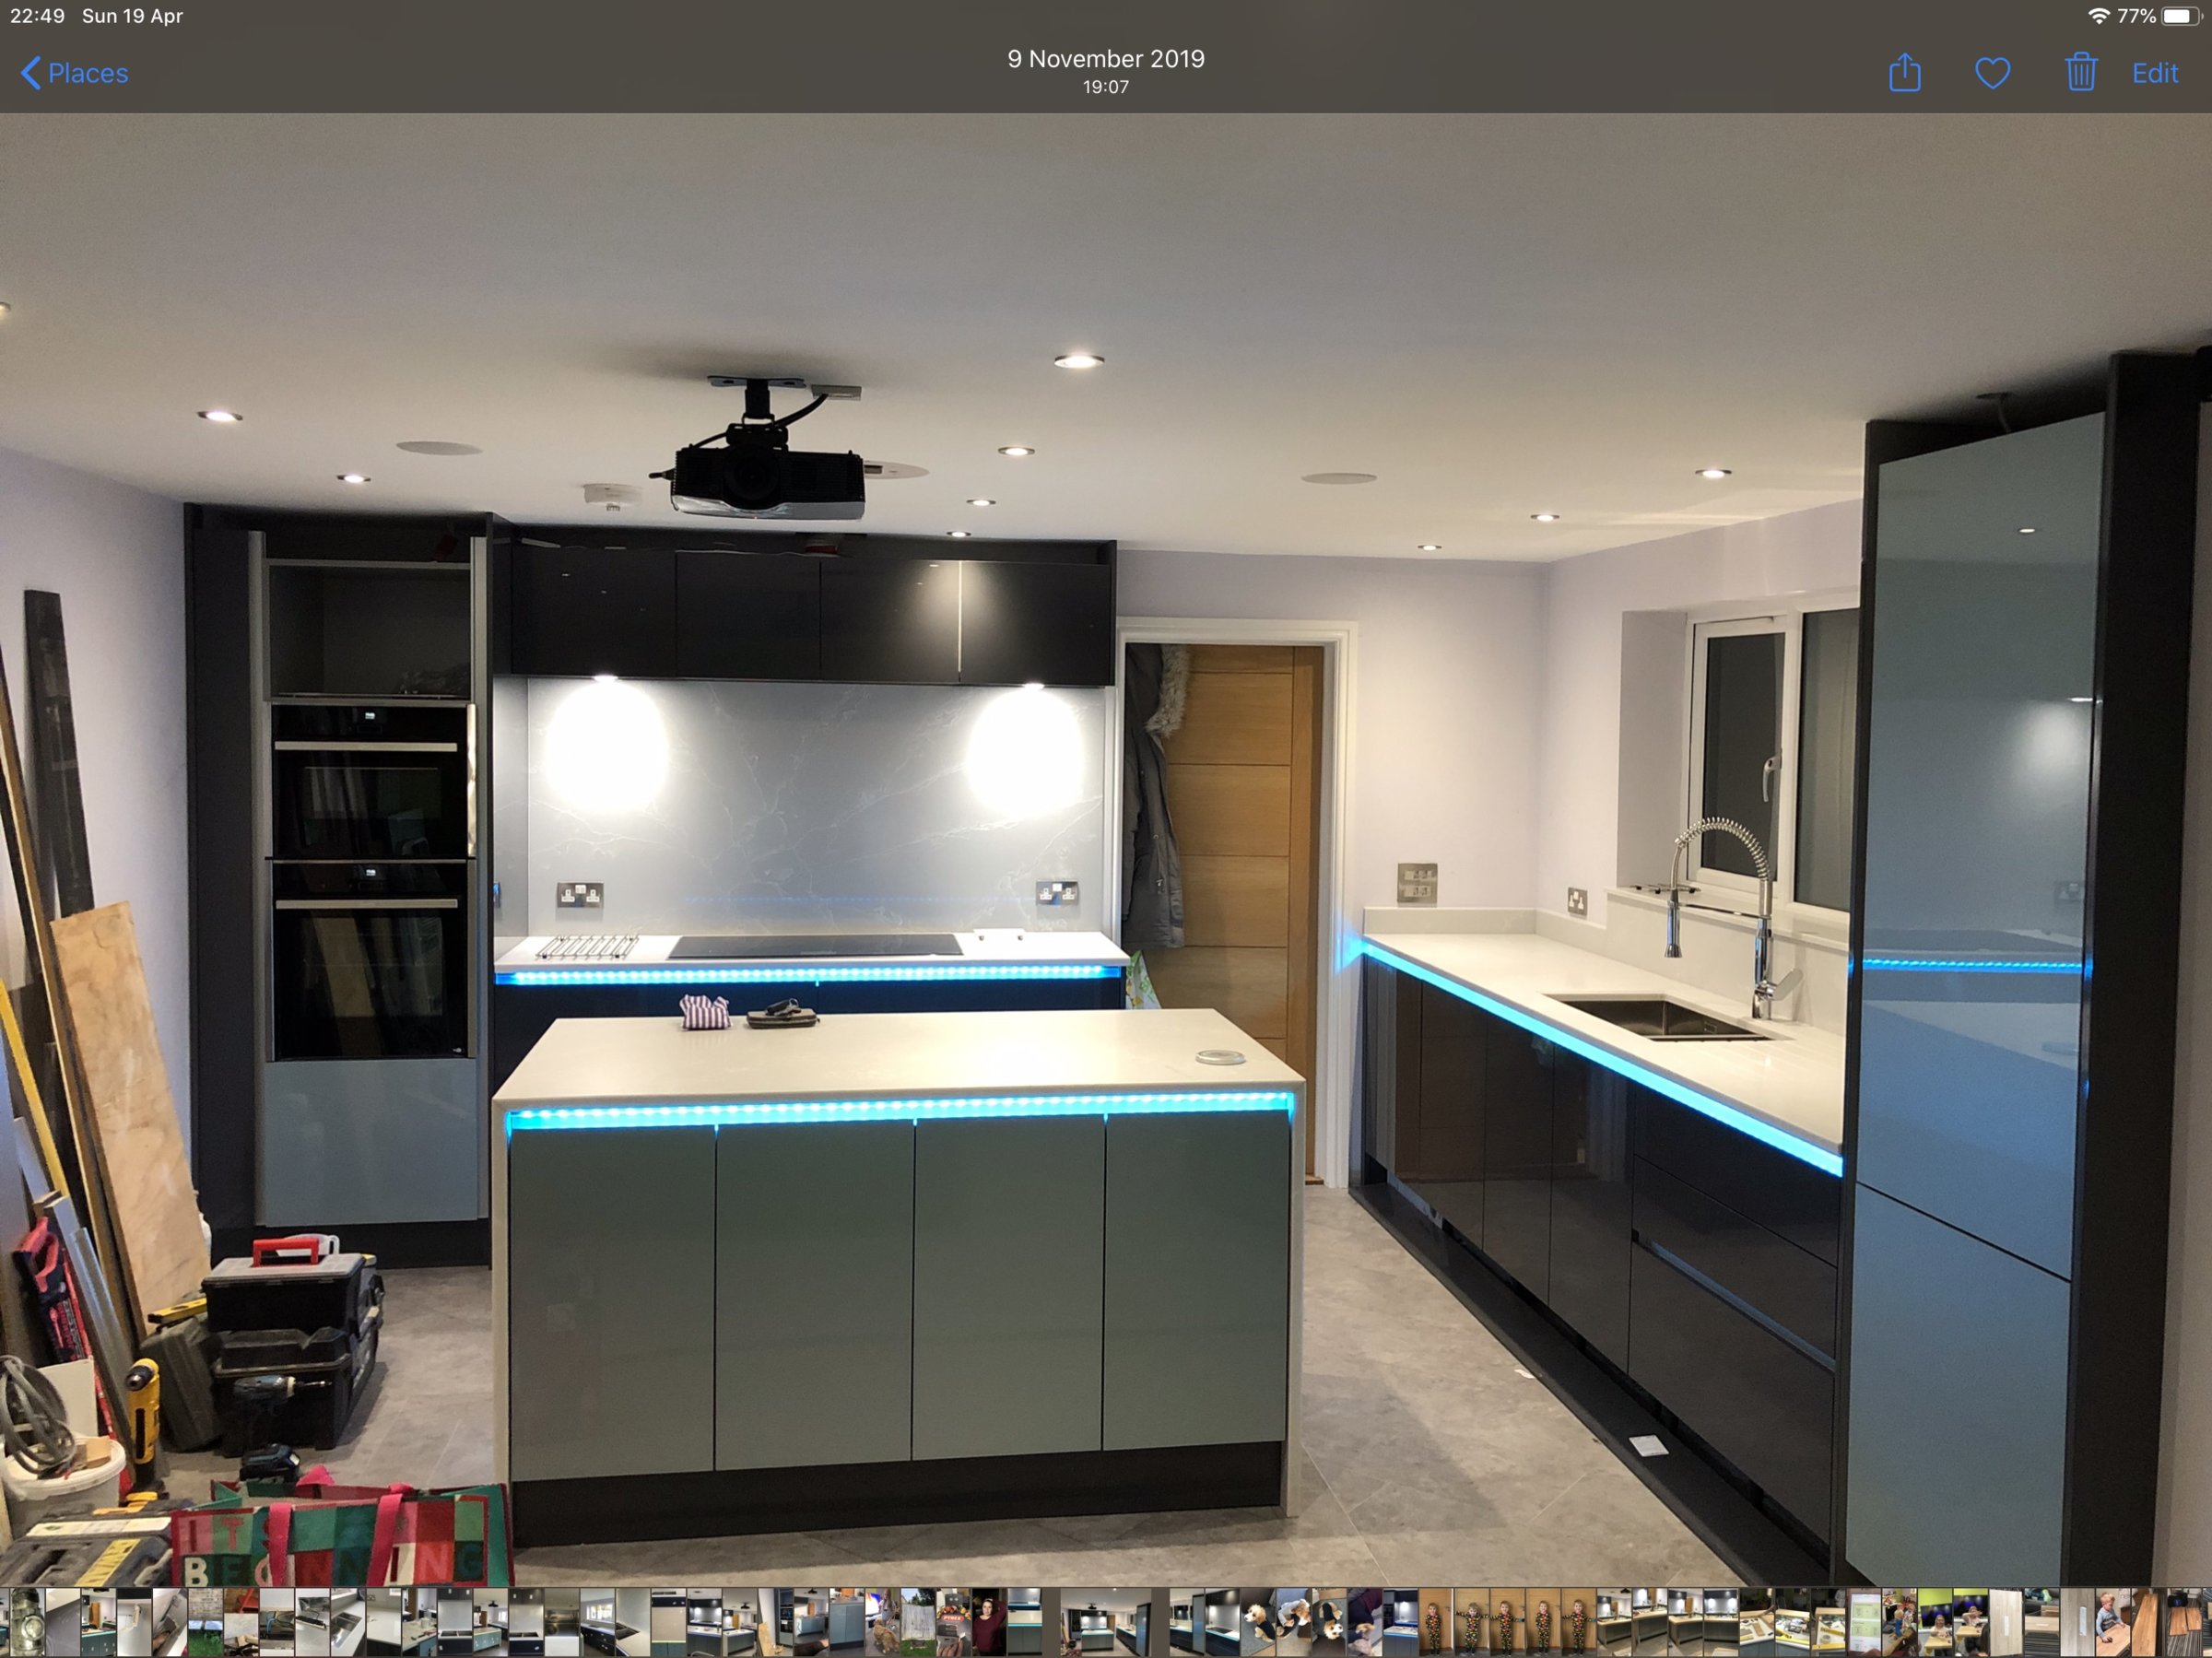
As we went with the handleless rail system it gave an opportunity to put in some LED lights. Make of them what you will. Some people think they look a bit tacky. I love them :)

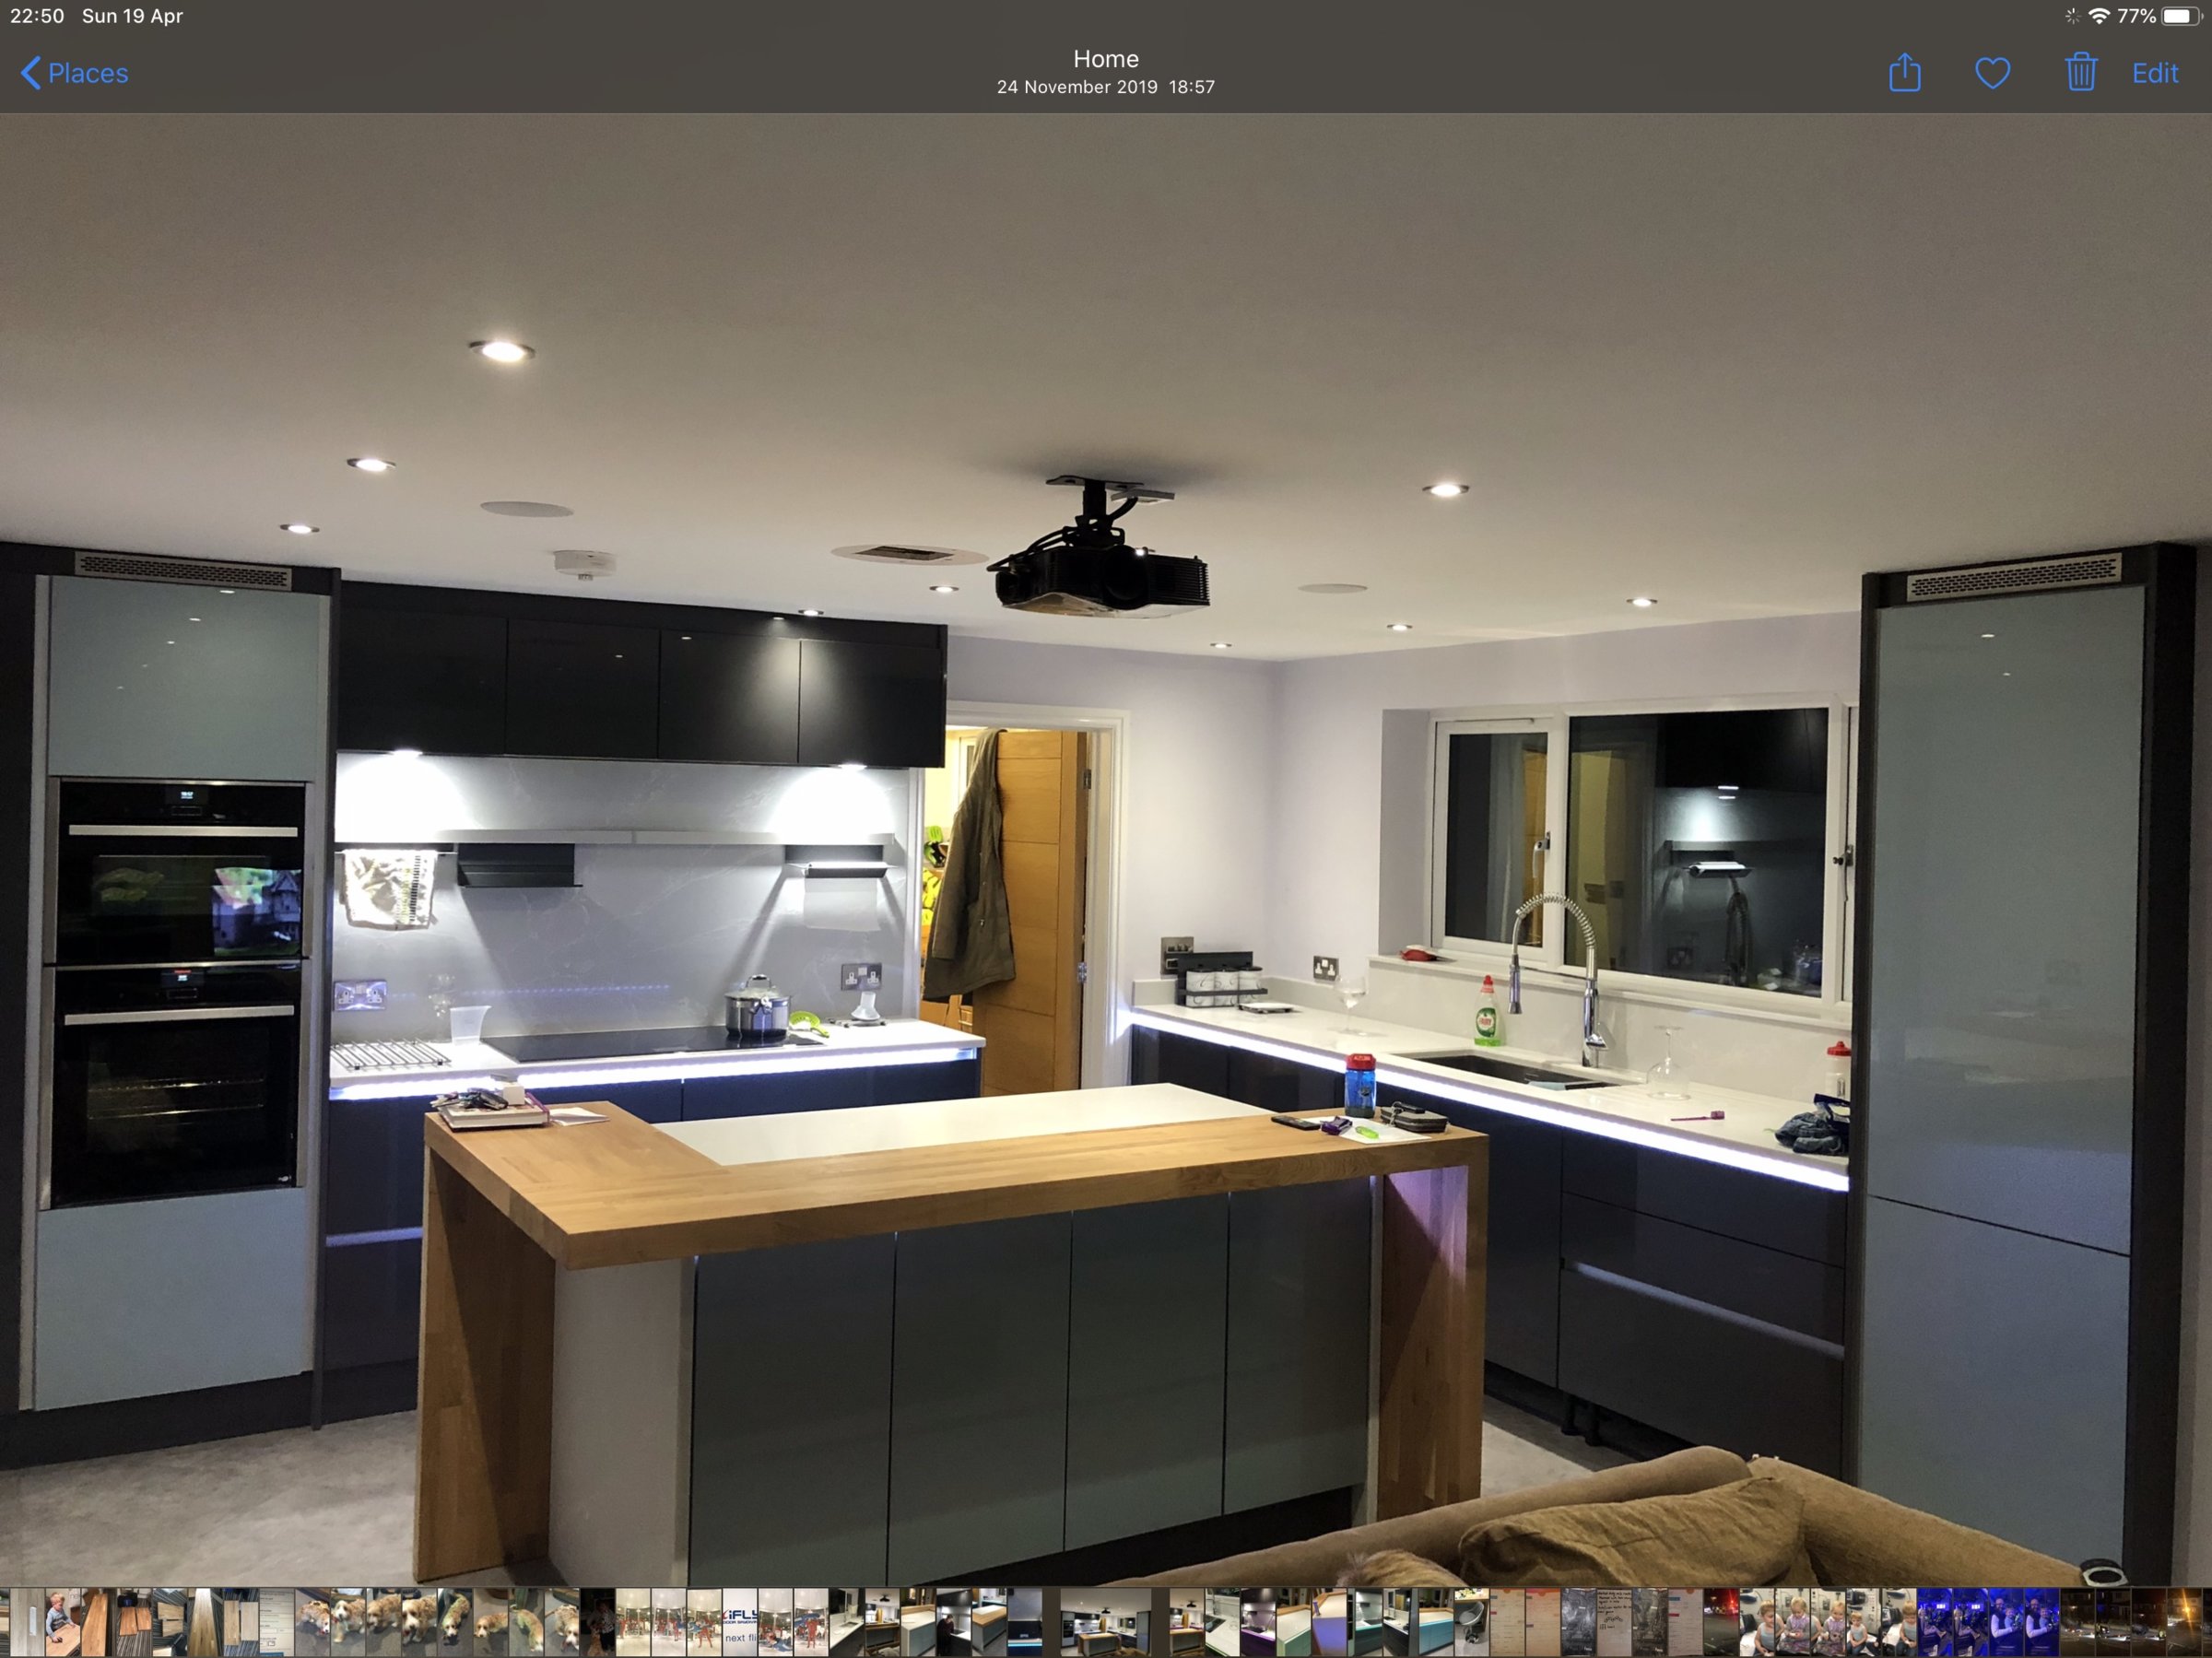
We ended up keeping as many appliances as we could integrated. This keeps a minimalist look. We were planning on keeping some of the original appliances but ended up getting all new. I managed to break our lovely job getting it out of the old worktop - note to self don’t silicone them in.

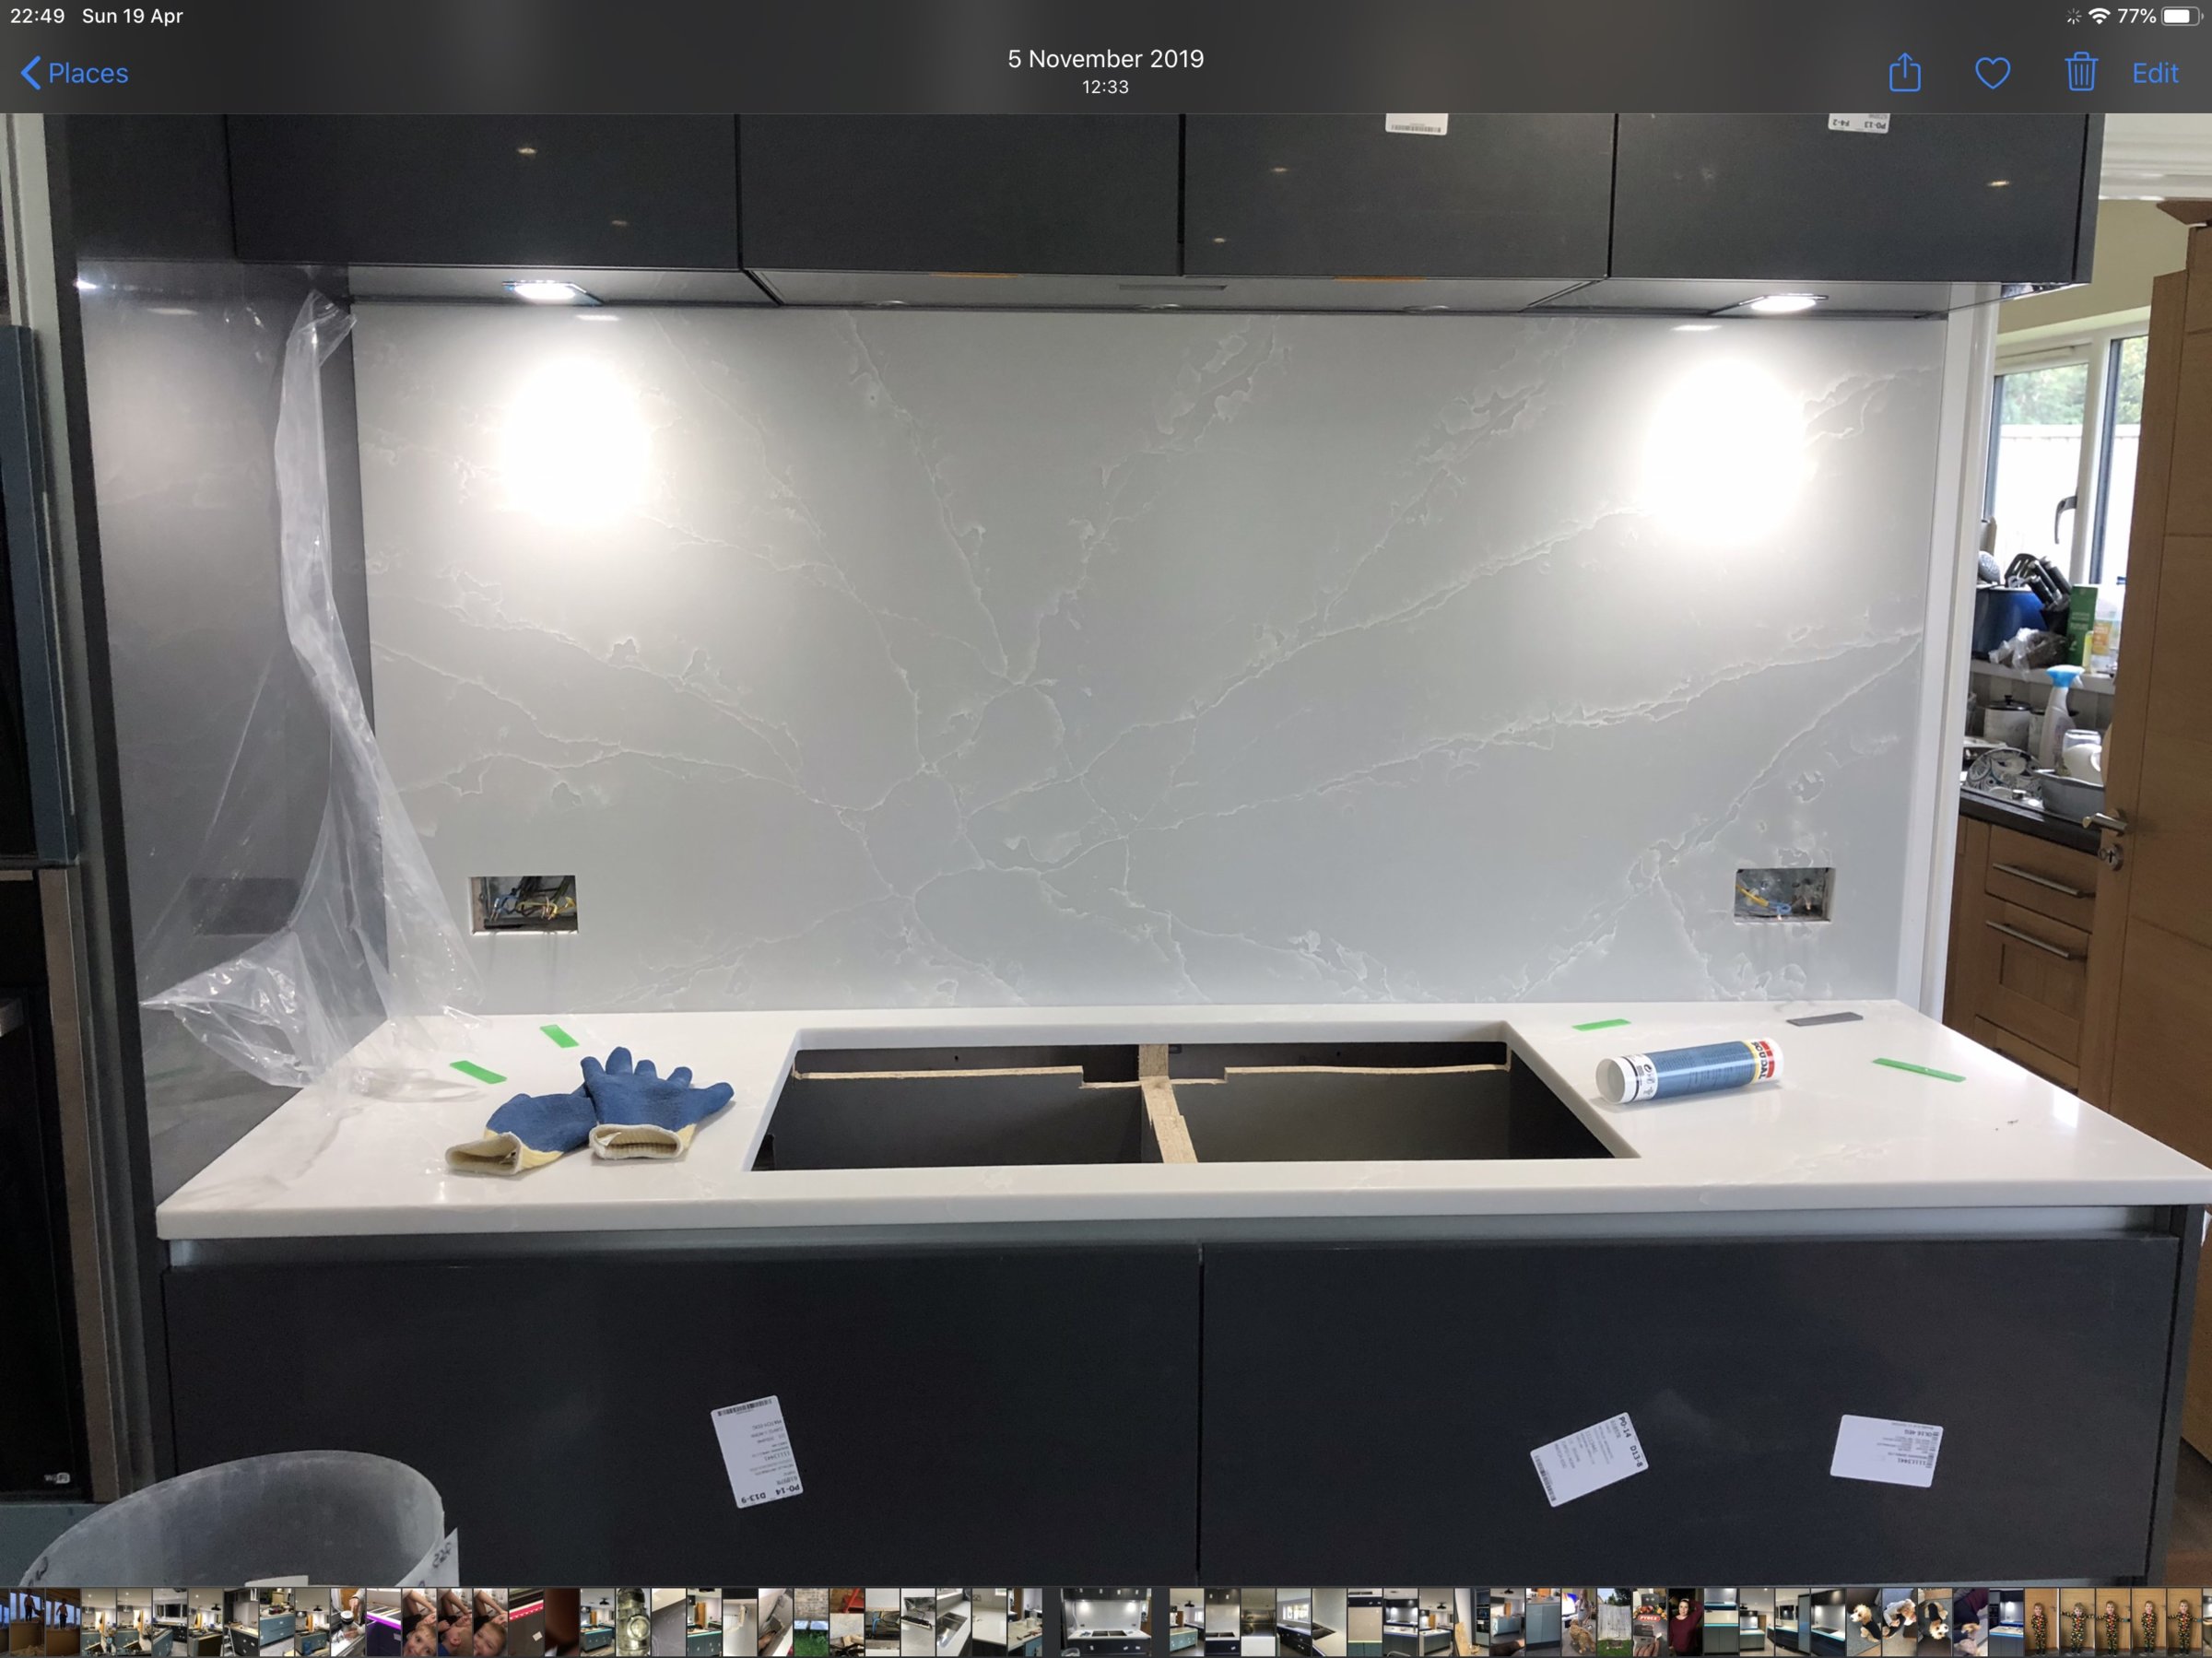
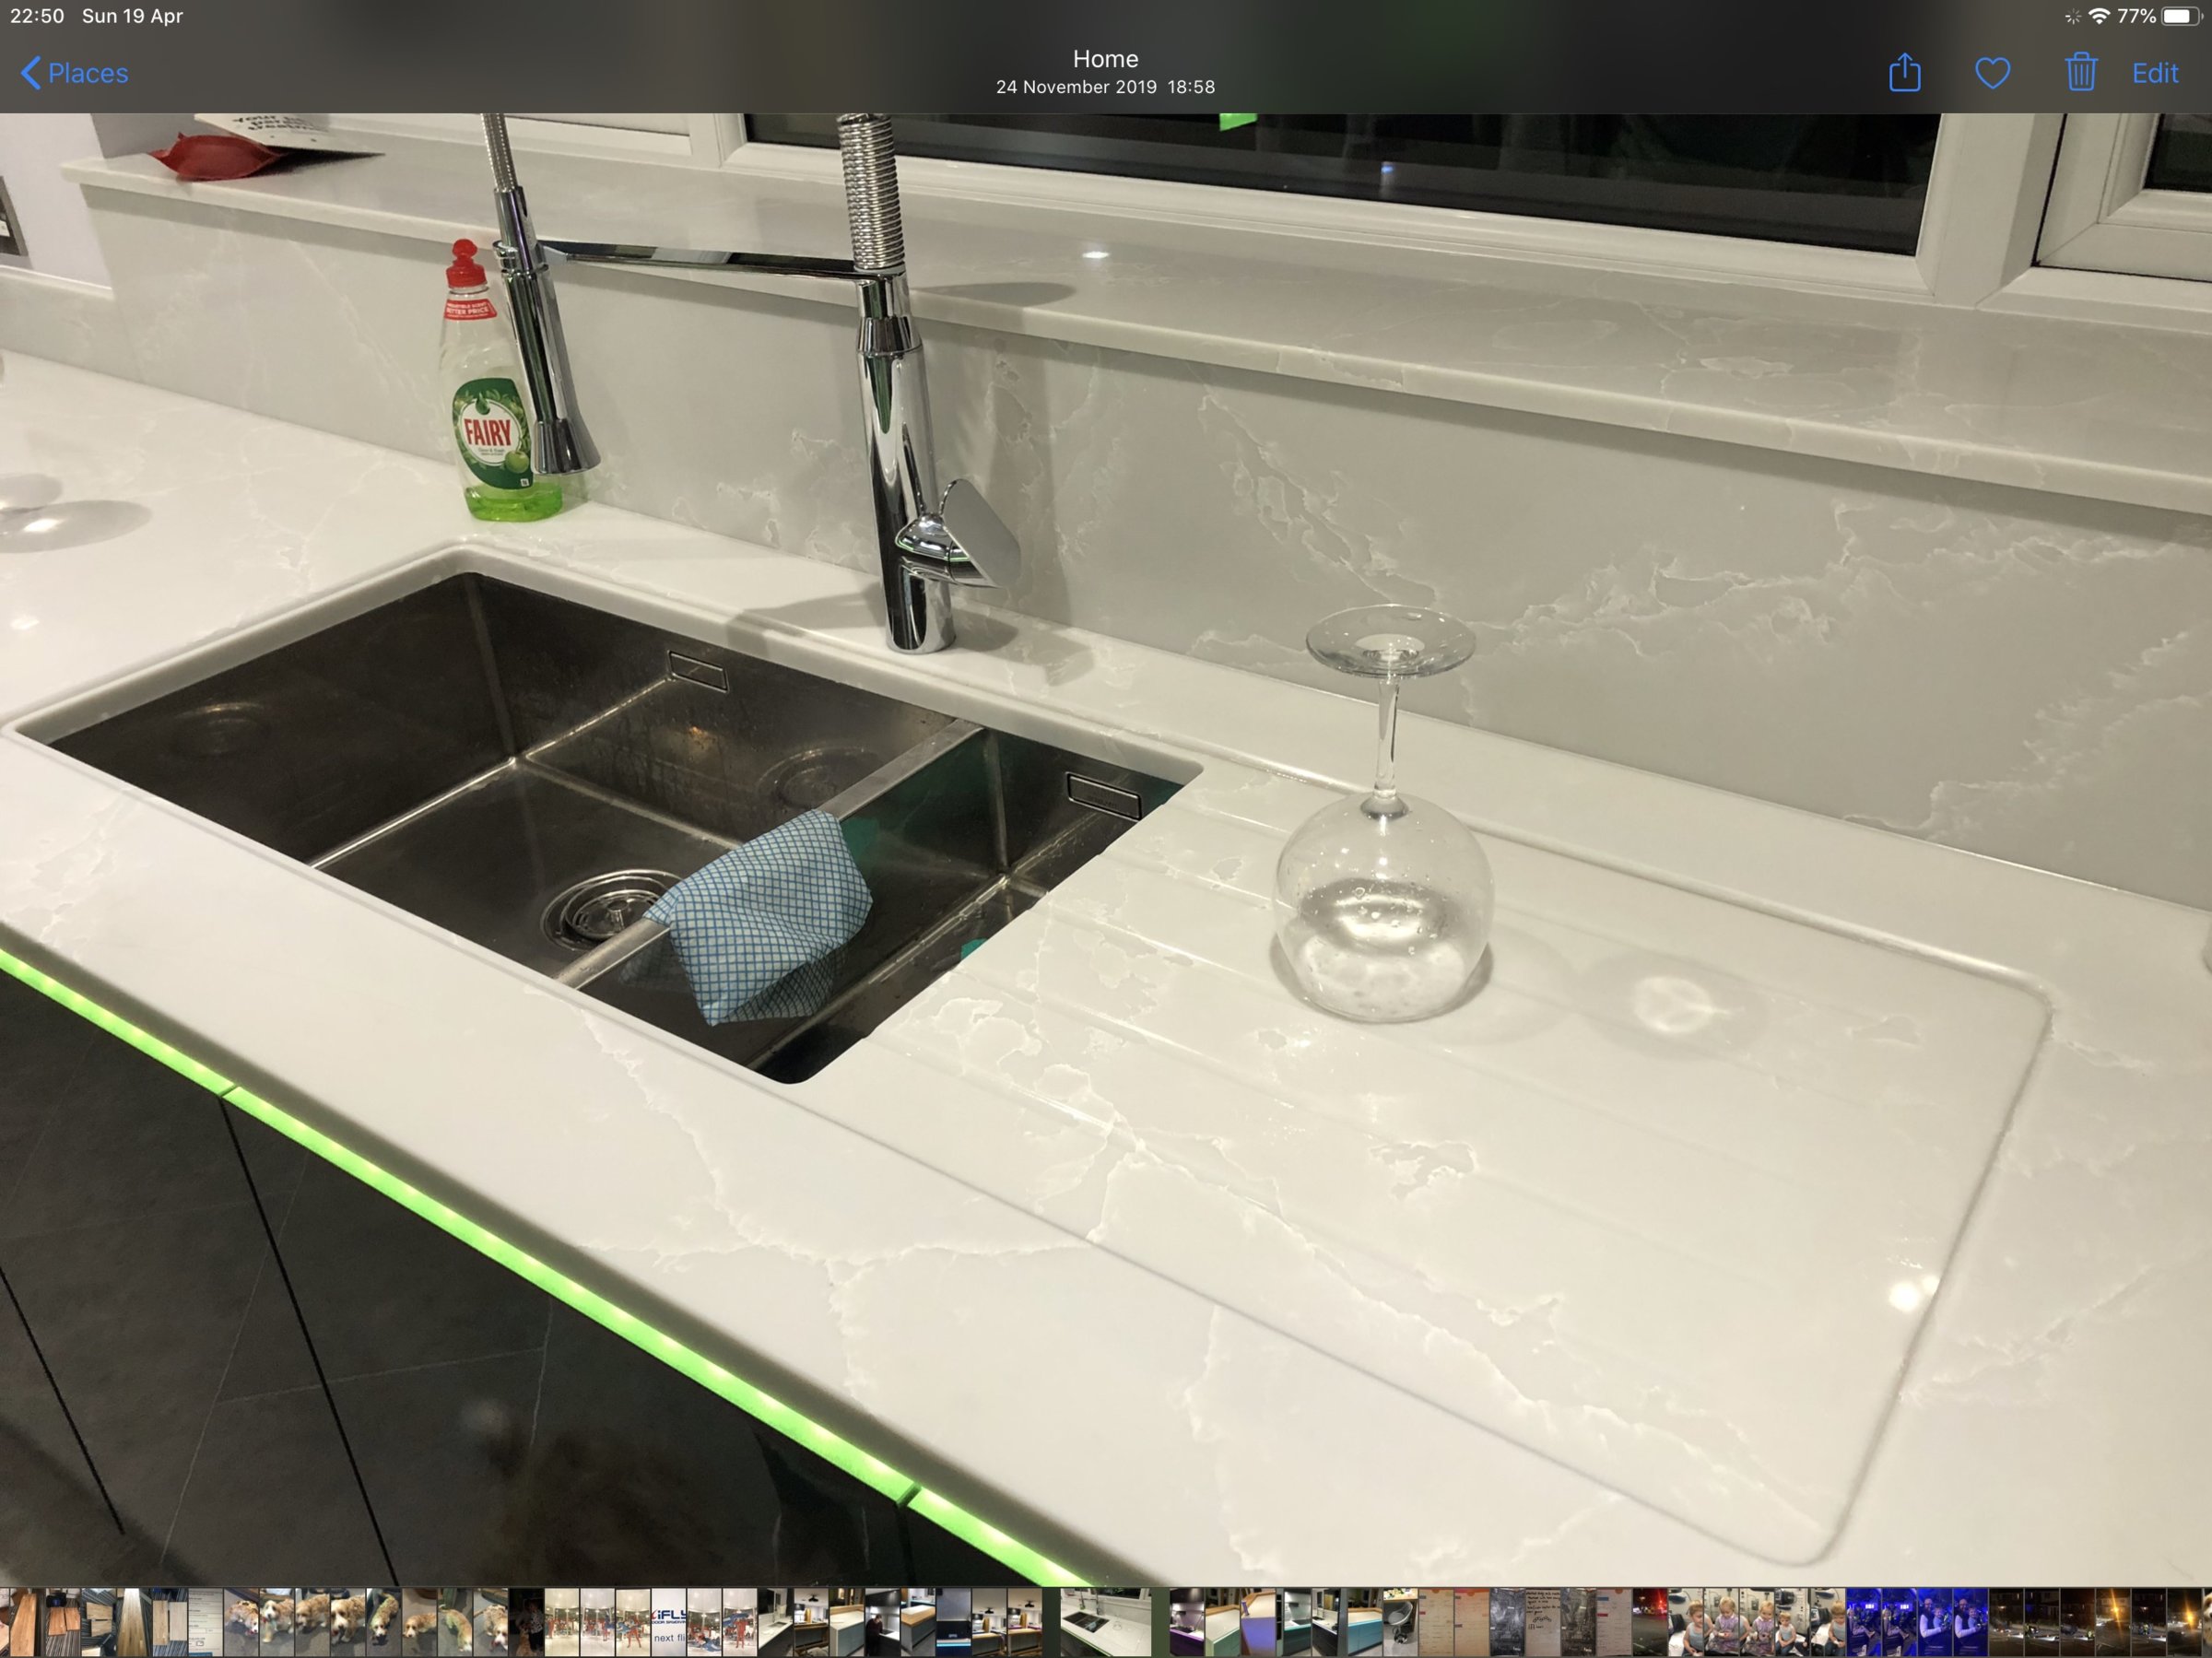
Everything about this project started spiralling but we were keen to get our dream kitchen and didn’t want to have any regrets at the end. A big part of the cost was the worktops. I’ve never had stone worktops before but my girlfriend really wanted them and my arm was twisted. Originally we were just going to get the worktops done but when I looked into the cost of glass splashbacks it wasn’t loads more to clack the backsplash in quartz. A decision in the end we were really happy with.


One bit of advice with kitchens. Really spend a lot of time thinking about the layout and how you are going to use it. Simple things like making sure your prep area is close to where you are cooking, there is a bin close by and the sink is easy to get to all make it work seamlessly. We also went with a large sink which is big enough to put a baking tray into - simple but makes a big difference when leaving it to soak.

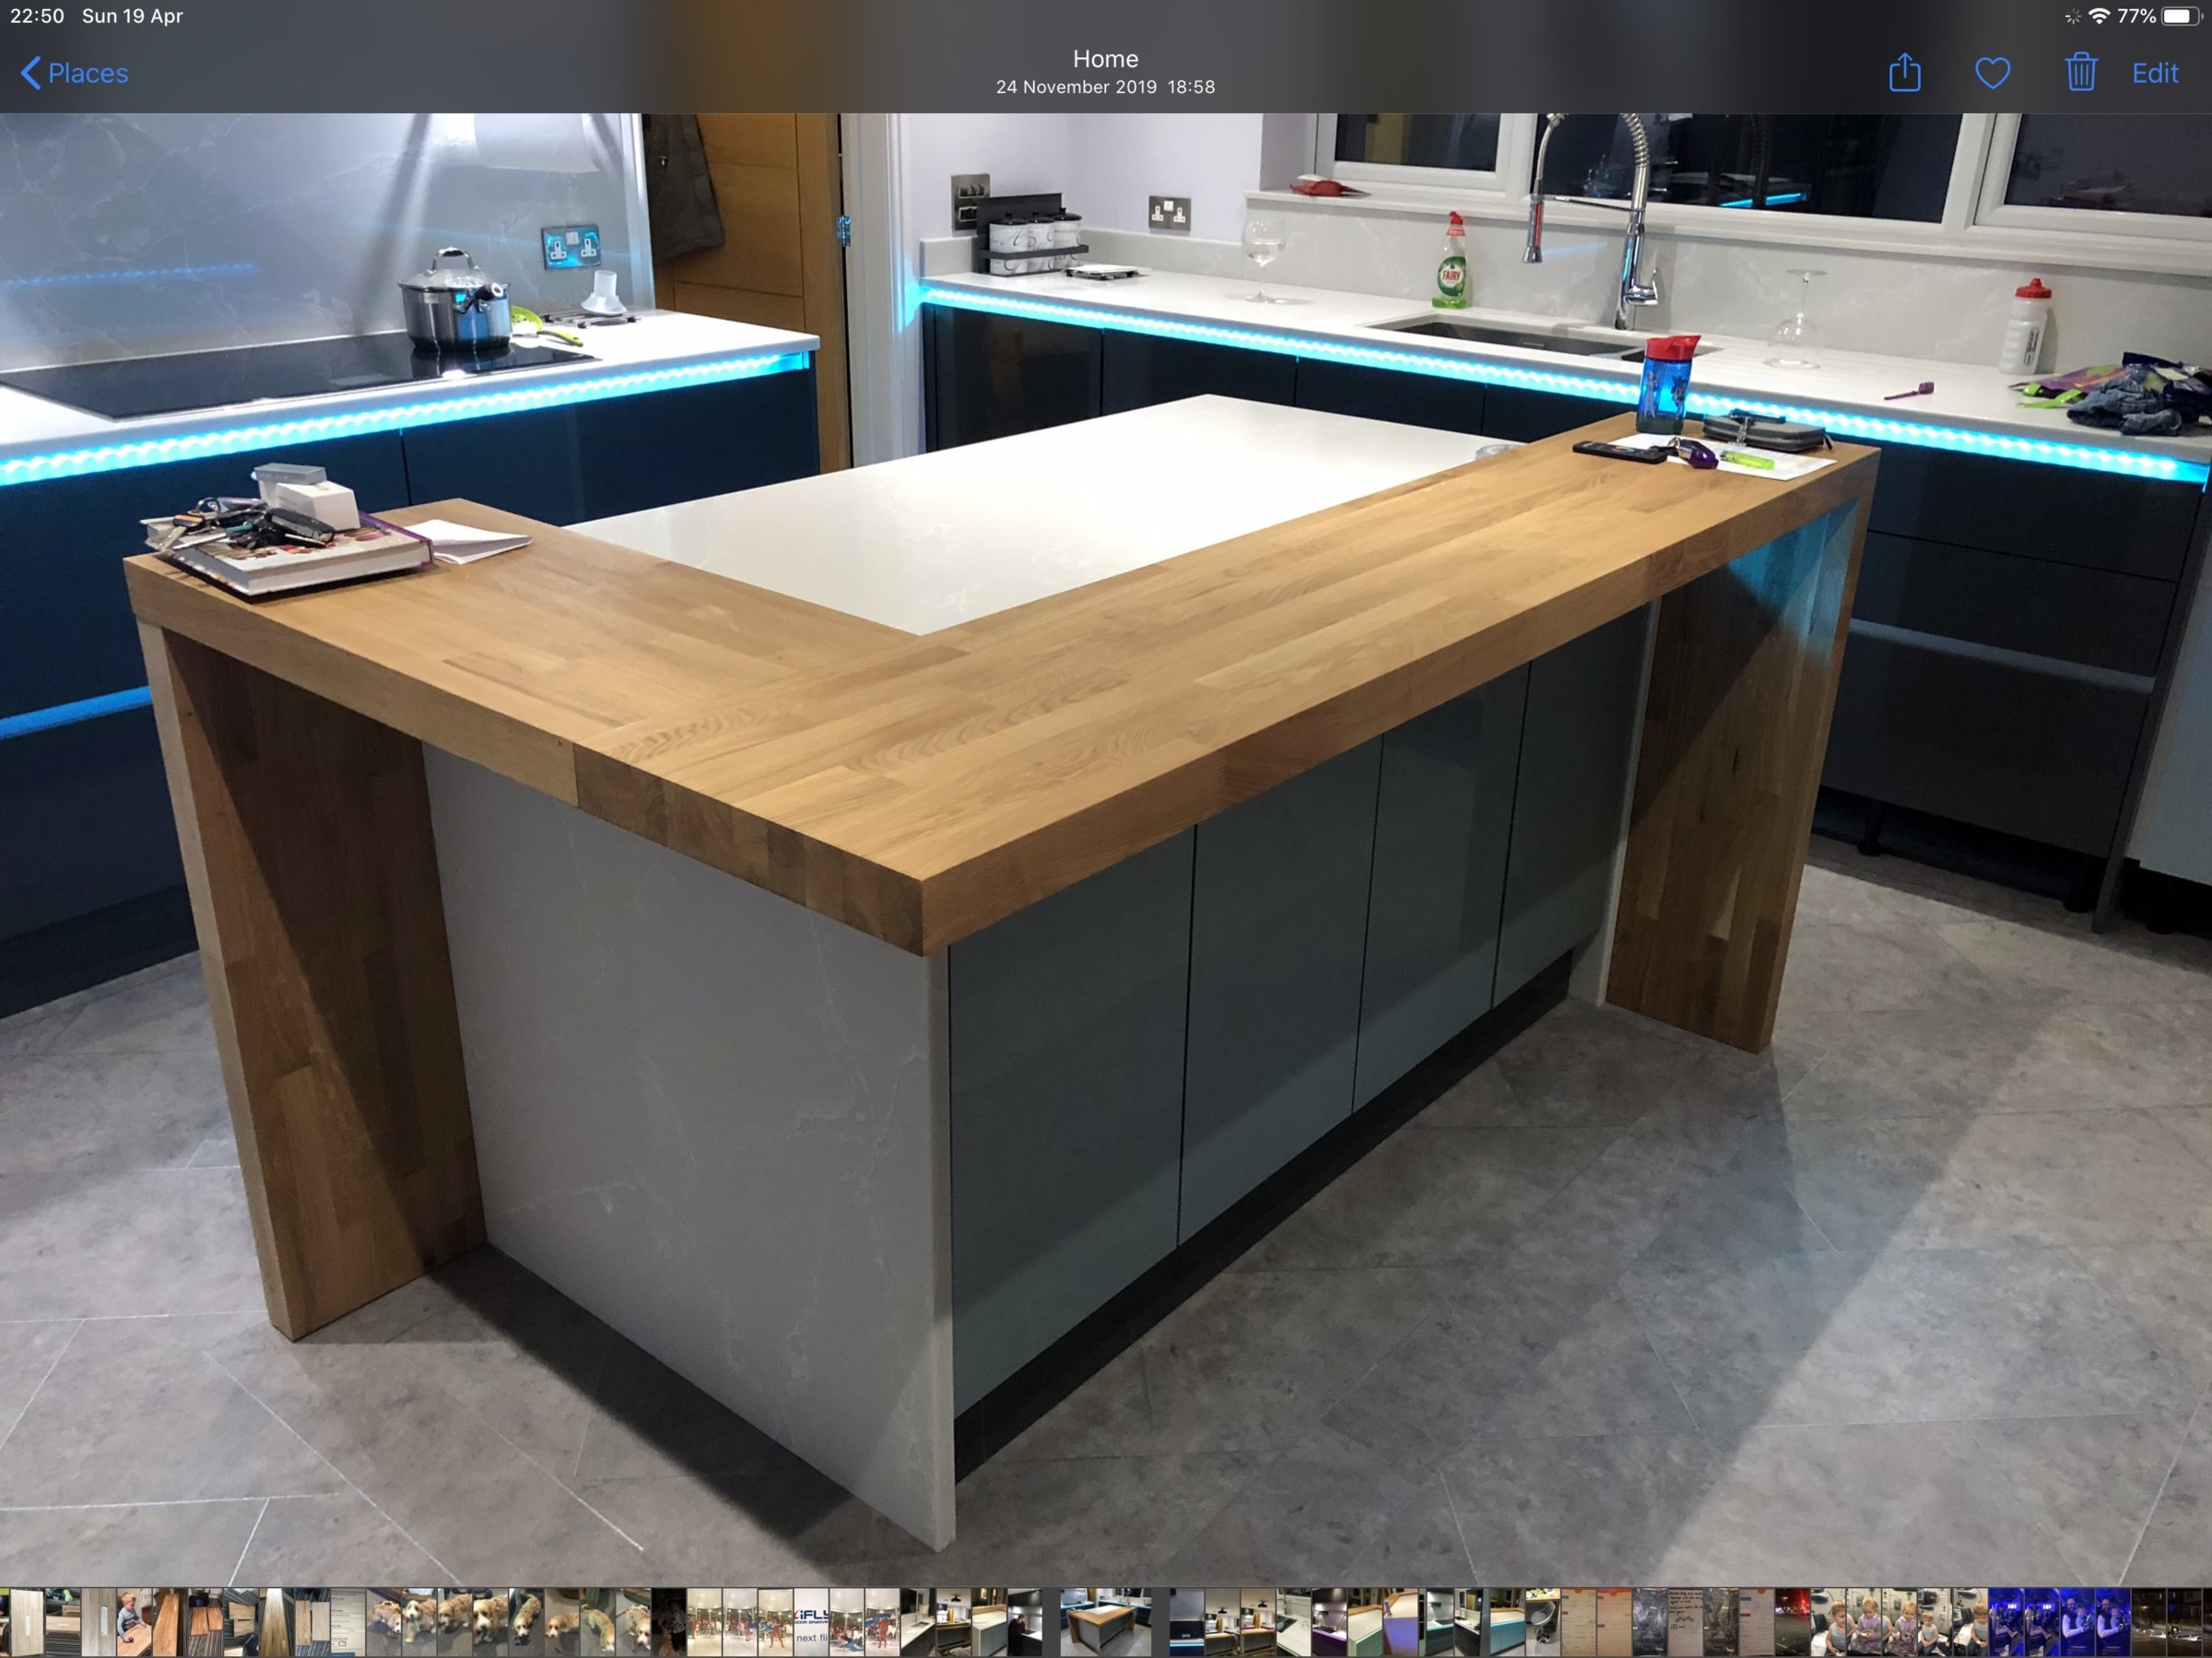
The kitchen for us always had 1 big issue. We never knew where we would sit to eat. The problem we had was that if we included a table it would encroach too far into the lounge area which would then make it look a little small. The only o-toon I could see was to have a breakfast bar we could eat at.

Whilst doing my usual “look at other houses on Rightmove” I came across a really cool breakfast bar. We have 4 of us in the house so a straight run just wouldn’t work. This was a “floating” design. If I’m honest I had looked at how we could make one but wasn’t sure if the support would be sufficient until we actually made it. I concluded it wouldn’t work with quartz and wanted something to soften up kitchen a little. I was originally looking at making it from laminate as wanted a breakfast bar which was 10cm thick.

I realised pretty quickly that finding thick laminate worktop is actually really hard. The only place which had lots of it, in really nice colours was wren. The problem is Wren won’t sell their worktops - you have to buy a kitchen from them. I managed to convince them to do it after a lot of calls and a couple of visits however the quote for a laminate breakfast bar was over £2000. Crazy money and we were back to square 1.

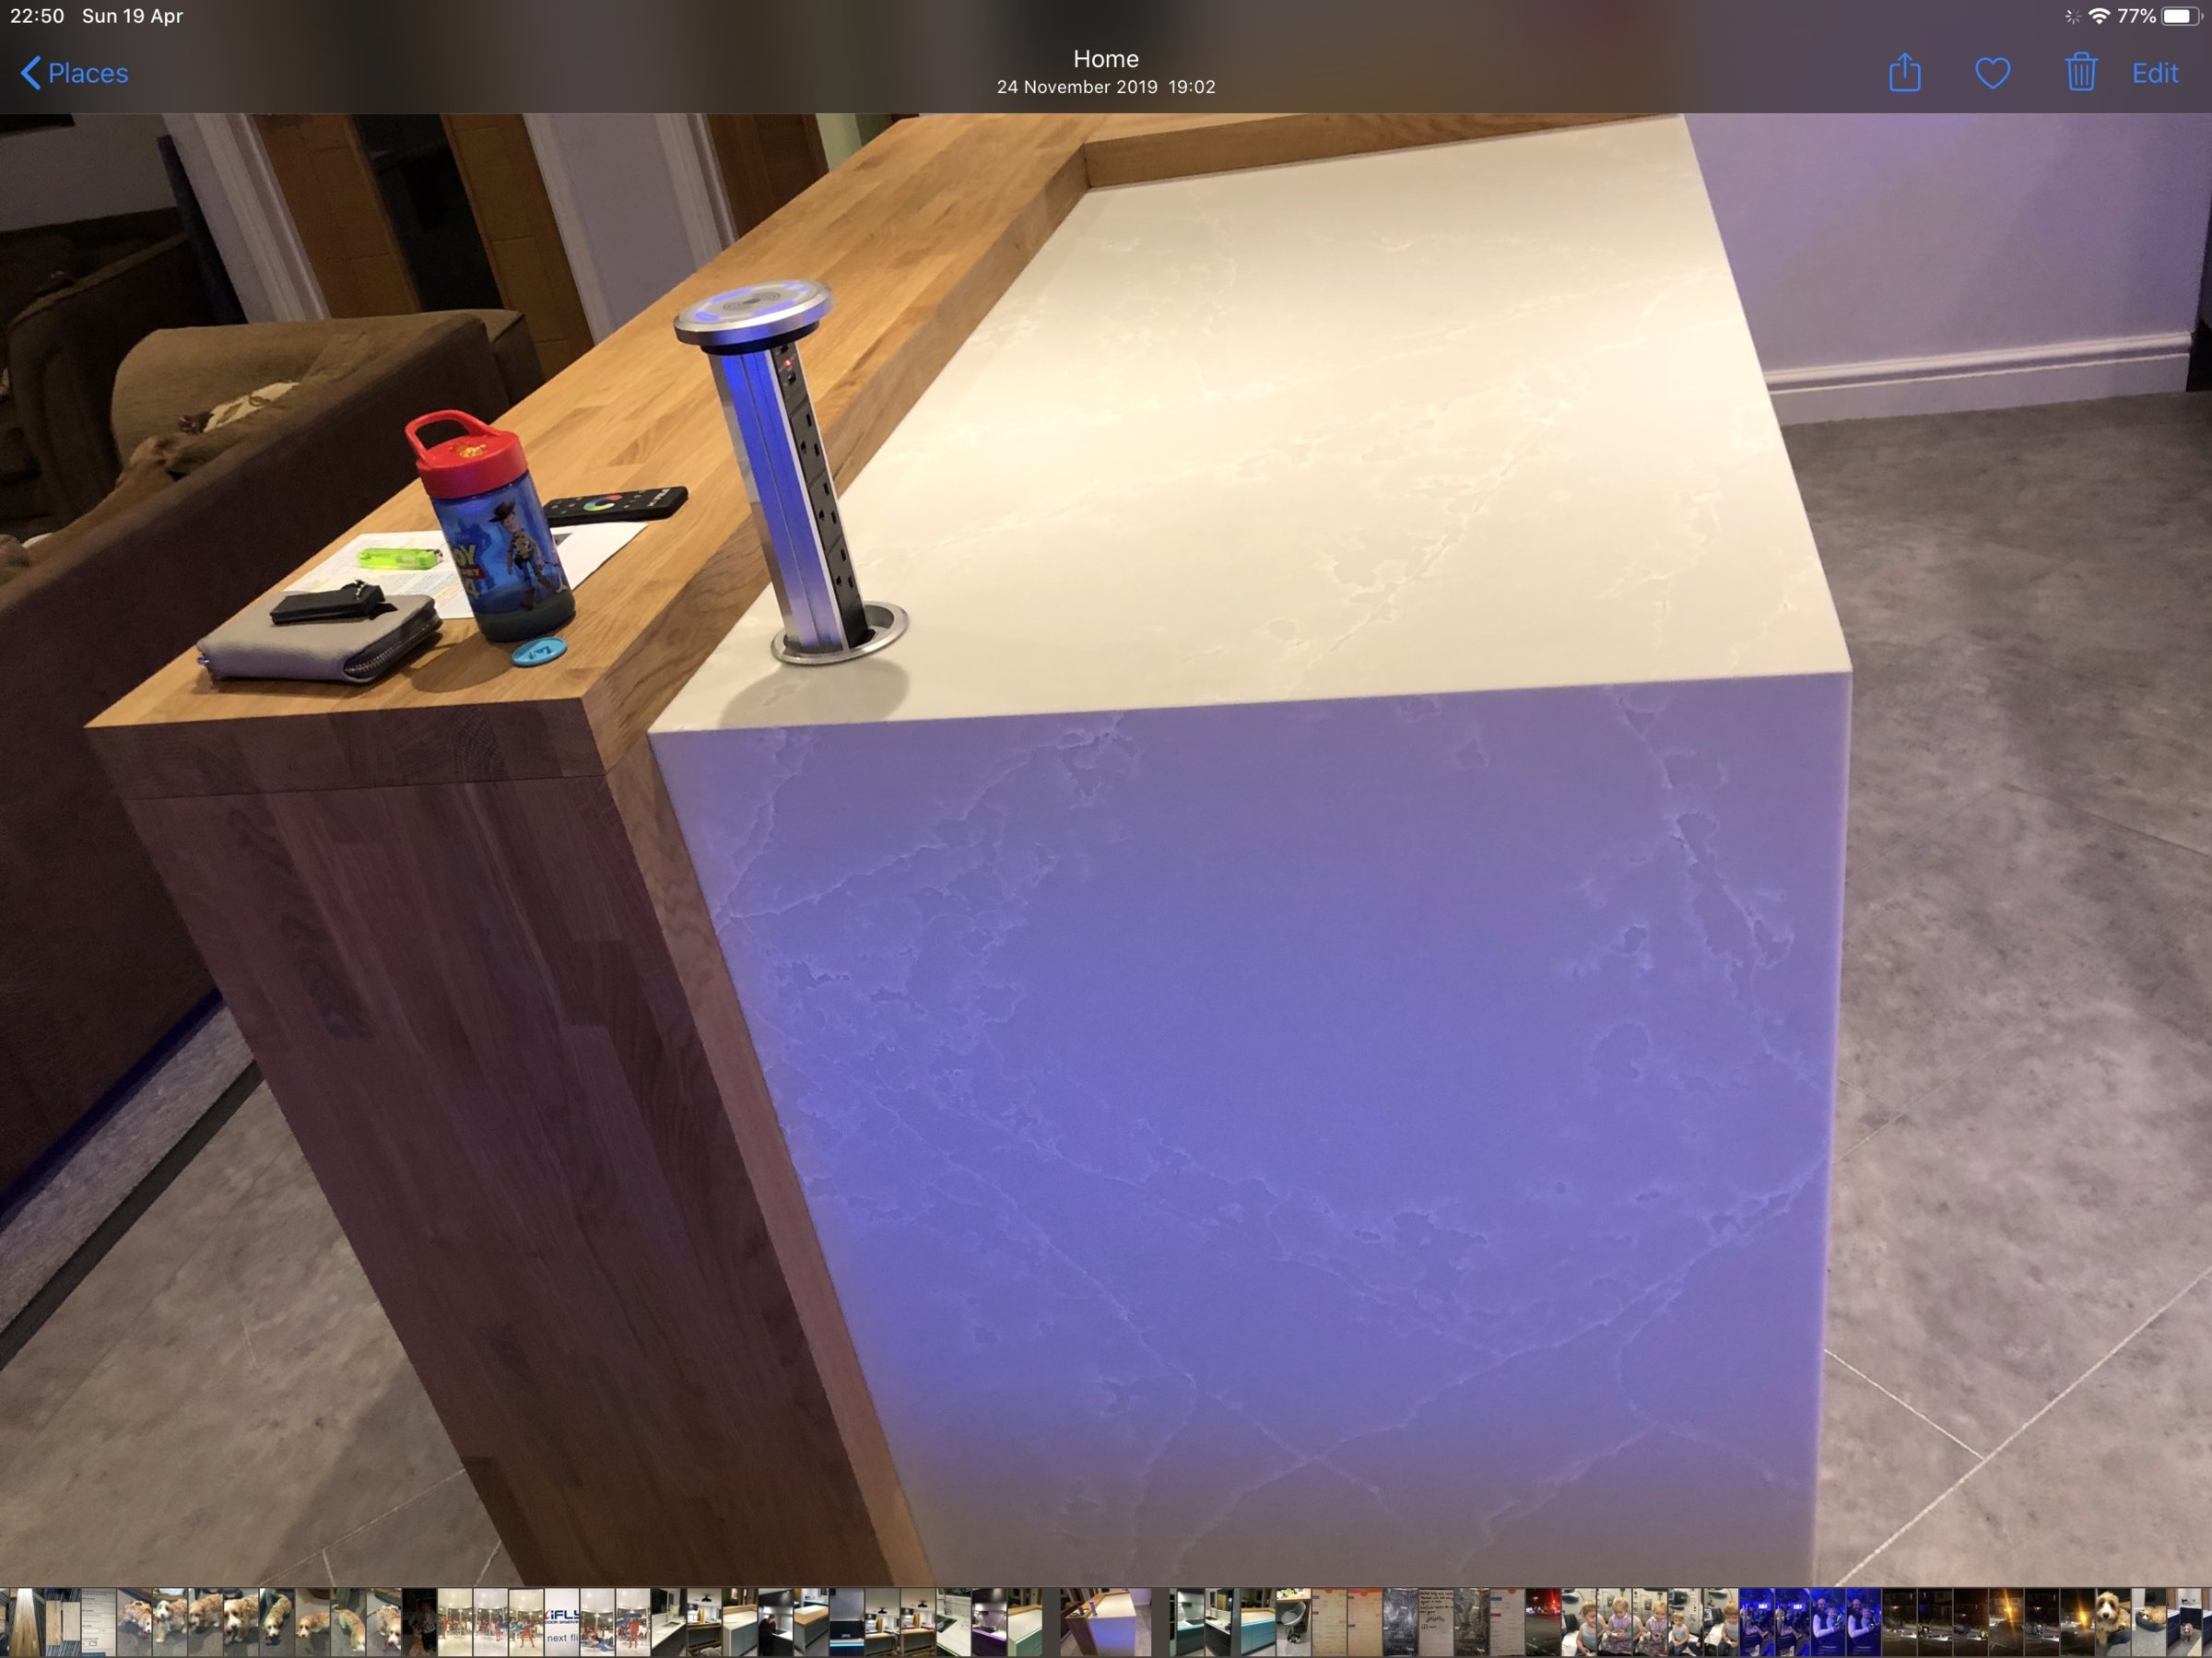
I ended up buying some thick butchers block (I think it’s 60 or 80mm) and it was really good value at around £500. I cut it to size and it worked a treat. Anyway enough rambling - here are the pictures.

So that’s where we are up to. Another fun project ticked off the list. Please let me know your thoughts - we are really happy with the finished result.

Next on the list is to start on the garden wall. I will be sure to come back and update when it’s finished.

take care and stay safe
Greg
 
Looks absolutely spot on Greg. I've enjoyed following your build throughout, so it's great to see you back and updating! :)
 
Kitchen looks great!

How is the floating design butchers block supported? Also can you show how you did the led lights in detail, might just have to steal that off you
 
Hi Apacheuk

thanks for your message and sorry for the delay in getting back to you. The butchers block worktop is supported mainly by the two uprights at each end. We cloaked it over the quartz by around 5cm and that was glued into place so the whole unit can’t move forward or backward. Where the worktop joins we just used standard kitchen worktop bolts underneath and it has worked well.

For the LED’s we used a standard Hafele set which excluding the power are wireless. This made them great for connecting up to 1 remote. You can just stick the strip under the worktop but often see these come unstuck and we wanted the light to be more uniform. The other issue with this (if you’re being really picky) is that if you bend down slightly your looking straight at an LED. I ended up getting a light diffusing profile for the LED’s to sit in. These are a band new profile from Sensio and they are perfect. https://www.sensio.co.uk/Kitchen-Lighting/profiles/ContourProfile.html
23EE5C38-0881-4F74-88B2-2521D93AA96C.jpeg


I’ve attached a photo which is probably easier than explaining the benefits. Firstly it’s not a clunky rectangular profile which you hit your fingers on every time you open a drawer. Secondly the front of it is blacked out so no light shining straight in your eyes if you bend down. It angles the light straight into the handless rail, just where you want it. Ps. No I don’t work for Sensio ;)

I hope that helps and good luck with your project.
 
Hi All

Some exciting news. Summer is here so I decided to get on with the next project, the garden. It’s a pretty big project so wasn’t sure if I should keep it on this thread or create a new one. I know quite a few people follow this one so decided to keep it here.

The garden has been a Little unloved for the past 4 or so years and is essentially a rectangle with a load of weeds, broken fence panels and garage which has seen better days.

0B07913E-5468-408A-831D-A82BE7718E6A.jpeg
47F05B07-A54A-4009-8BAC-2D228EFF0CCE.jpeg


This is what I’m working with. You will see in the background of the second picture there is a small makeshift fence. This is just to enclose the garden so the crazy silly dog doesn’t escape. The other side of this is a reasonable bit of land I intend to use as part of the garden. The garden is higher than the paving so this will involve a reasonable size retaining wall (phase 2).

We made the decision to get some outside help in for the design of the garden. For all the work (and money) invested into getting the garden done we thought it would be worthwhile at least making sure we had a design which would incorporate everything we wanted but also include a bit of “style”. The lady we went with is local to us. Her name is Jo and she runs Plan Ahead Garden Design. Her website is https://planaheadgardens.co.uk/ and she is worth checking out as I have been really impressed with her approach the whole way through. She offers a remote design service for £250 for gardens up to 250sqm and is really thorough in understanding what you want from your garden. We had quite a big list of “wants” and she captured everything really well. In particular we didn’t want a rectangular garden. We asked for lots of curves and she delivered. There were a few revisions but this is what we agreed upon.

FCFC623B-2D3E-4BE2-8E1A-F02AF7FF7D13.jpeg


I’m sure as we progress there will be some minor amendments but for them moment we are happy with everything. We are now about 4 weeks into the garden (evenings and weekends) with the help of a skilled friend who is laying the paving.

marking out with my little boy. If you have read the blog from the beginning he was not even born when we were ripping down the original house. Crazy how fast they grow up.

69165048-73FF-4FBD-86A0-8422D897AE4D.jpeg


We dug the first trench by hand but then quickly realised a digger was a good idea. You will also see in the background we replaced all the fence with some heavier duty panels. We also got them lower with a trellis for the side with our neighbour as we get in really well with her and thought it would be nice to say hi when we are in the garden.

FBD1768A-ADD3-43E0-B6DB-F582068E8DC9.jpeg
1D51E8C9-7123-4ECA-970A-0C4B8AE0A6A0.jpeg
BADB19DD-9718-4094-96E0-55A3B0FA9F5E.jpeg
8D6D5D2F-66BF-4446-8654-BECA47B5D0D6.jpeg


A giant hole for the trampoline

AC91813E-2364-4890-926E-77626F0C5D65.jpeg
59D9280C-77D7-4C0B-A1F1-AB1102F1827C.jpeg
 
Last edited:

DIYnot Local

Staff member

If you need to find a tradesperson to get your job done, please try our local search below, or if you are doing it yourself you can find suppliers local to you.

Select the supplier or trade you require, enter your location to begin your search.


Are you a trade or supplier? You can create your listing free at DIYnot Local

 
Sponsored Links
Back
Top