

As the evenings grow lighter and temperatures begin to rise, you might be considering getting back into the garden – and what better way to attract wildlife and give your back yard a fresh look than with a pond.
 And it’s not as difficult to install as you might expect – at least according to the team at Wyevale Garden Centres, who have compiled this guide for DIYnot. All they suggest is due consideration to things such as where it will be and what kind of plants will surround it.
What you’ll need
Some string or non-toxic spray paint; a spade; a half-moon lawn edger; pond underlay; pond liner; heavy stones or bricks; scissors; paving slabs; aquatic plants
1. Mark the shape of your pond
Using the string or non-toxic paint we mentioned above, make an outline of the pond on your lawn. There are a number of things you need to consider when you do this: where you’ll put it, how big it will be, and what kind of shape it will have.
According to World of Water, you should position your pond where it will receive sunlight for at least half of the day, and avoid overhanging trees where possible. Alternatively, if your garden often becomes waterlogged, this tips article from Wyevale Garden Centres recommends that you build a pond at the lowest point to help water drain away. The shape and size of your pond, however, is entirely down to what’s best for you and your garden.
2. Mark out any shelves
If you would like your pond to play home to a variety of different plants — some of which work in shallower water and others that will thrive in deeper water — you’ll need to provide shelves. As a general guide, your shallowest shelf should be around 15cm deep, your middle shelf could be around 35cm deep, and the centre of your pond should be at least 70cm deep.
3. Begin digging
Now that you’ve done all of the necessary preparations, you’re ready to start digging. Start by going down to the depth of your first shelf. Next, move on to the depth of your second shelf and so on until you’ve reached what will be the bottom of your pond. All the while, you should save the cut-out turf, as we’ll repurpose it later.
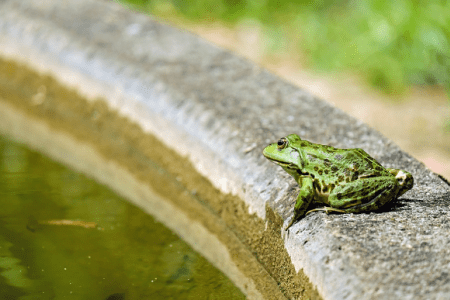
4. Give wildlife easy access
As we’ve mentioned, your new pond will attract new creatures and critters to your garden, and it’s important that you give them safe and easy access. For example, you should ensure that one side of your pond is sloping, as this will help the likes of hedgehogs and frogs to get in and out.
5. Add the underlay
Now you have the bare bones of your pond and it’s time to start creating the finished product. First, you need to remove and sharp stones that might be lurking in the hole you’ve just created. Then, add a layer of sand before introducing a pond underlay, which will protect the main liner from being pierced.
6. Add the lining
Now you’re ready to add the main liner, which will create the bottom of your pond. You should carefully layer it over the hole you’ve created, and secure it at the corners with heavy stones or bricks.
7. Add water
Once the lining is in place, you can partly fill your pond with water. This will allow you to readjust the liner so it fits the hole you’ve dug snugly. Once you’re happy with how it is filling the space, you can finish filling the pond with water.
Once your pond is full, you can cut off any excess lining, leaving around 30cm around the sides.
8. Finish up
Now you’ve got a basic pond and can decide how you want it to look. This include whether you’ll edge it with grass or paving slabs. You can also choose which kind of aquatic plants you would like to add and whether there’s any particular greenery you would like to grow around it.
Once you’ve finished all of these steps, you’ll have a brand-new garden pond that you’ll be able to admire for years to come.