Inset log burner plaster

Joined
14 Dec 2008
Messages
77
Reaction score
1
Country
United Kingdom
Hi,
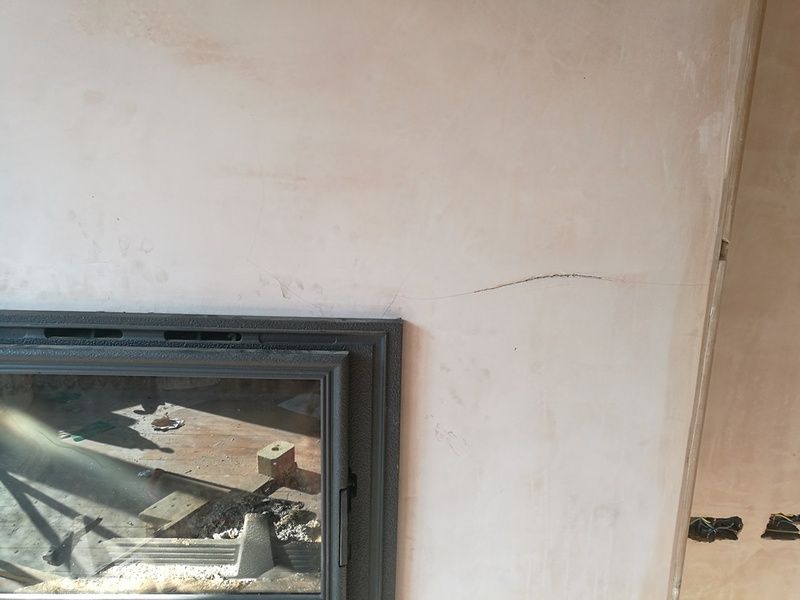
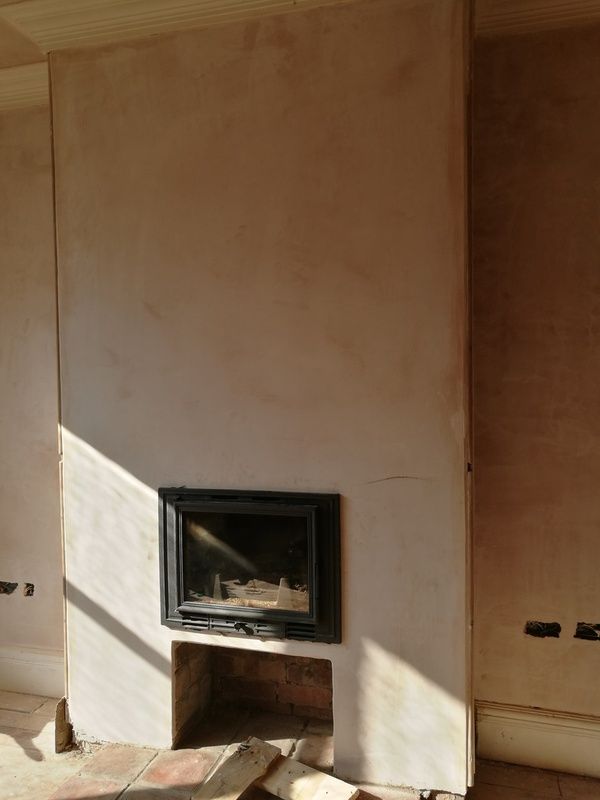
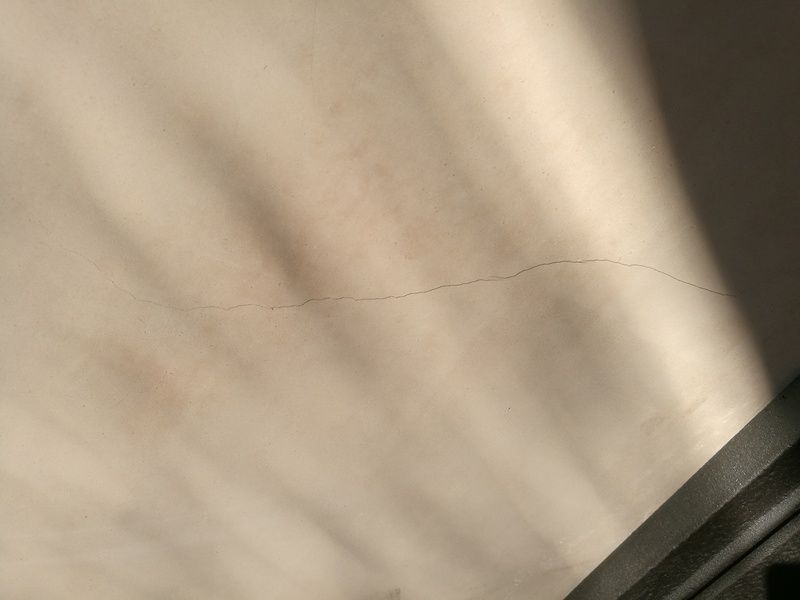
I have just had an inset log burner fitted. I had made the hole and had it plastered before fitting the stove. We did consider that the plaster might crack and my plasterer suggested using a repair plaster strengthened with fibers. This was skimmed with normal gypsum multifinish. When I lit the stove for the first time (1 month after plastering) hairline cracks began to appear quite quickly.

It seems that the cracks are in both the bonding and the skim, so I am going to take the whole lot off and start again.
I realise that I definitely do not want a gypsum based plaster this time around!

What are the options?

The guy that fitted the log burner mentioned using some kind of cement board? Has anyone used this? what do you fix it with - presumably normal drywall adhesive would be off limits?

I have read about using lime mortar, however the plasterer doesn't see why this wouldn't crack as he is not sure it is any more flexible than the gypsum plaster. Could anyone elaborate on this?

I have also seen this:
http://shop.vitcas.com/vitcas-heat-resistant-plaster-16-p.asp?gclid=CJ3N1vW_lNMCFQ0R0wodq1IETg

This looks like it could be the business for the finish, but what do you put behind it? Is this just branded lime mortar at four times the price??!

Sorry for all the questions. I can find various threads on the internet about this, but nothing definitive!

Here are some photos:

log%20burner%20plaster1_zpscyy4ldgn.jpg


crack is cleaned out in this picture to determine if the backing is cracked - it was!

log%20burner%20plaster2_zpsuukpur8v.jpg


log%20burner%20plaster3_zpssk2scgma.jpg


log%20burner%20plaster4_zpsipv7xe0l.jpg
 
Sponsored Links
You have a common problem. Cracks appearing in the plaster surrounding the appliance is often reported.
I suspect, though I dont know, that inset burners create much higher temps than other types.

Vitcas, Everbuild & similar heat resistant plasters do work, or so I'm told.
I've never used them but they seem to need a plasterer to apply them.
Applying them properly the installation is spread over a few days (not a few hours).

I suspect that the trades know very little about the combined effects of burner types, flues, liners and everything else in the mix. So often the Mfr's & installers put problems down to "natural thermal expansion"

Instead of using gypsum plaster I've often recommended using a 3:1 sand & lime mix render - its good for preventing soot & salt bleed but what it does for "thermal expansion" I dont really know.

OP, perhaps live with the cracks for say 12 months and then go back & review the situation?
 
OP, perhaps live with the cracks for say 12 months and then go back & review the situation?

Thanks for your reply. The thing is that I have carpets up, the room isnt painted etc. So it would be better to sort it out now. There is a chance the small cracks wont get any worse, but if I chance it and they do get worse then it will be a much messyer job to try and correct it once the room is finished.
 
But how to correct it is the question? There's no straightforward, foolproof method of dealing with the cracks issue. There are many suggestions, including my own, but nothing definitive as far as I can see.

Another approach, thats been used, is to remove the plaster back to brick in a square around the appliance and
fix brick slips or granite pieces as a trim.
But do you want such a "framing" around your burner?
Cement backer board or vermiculite board can be screwed on eliminating the adhesive risk - the boards then have to be finished to match or contrast.
 
Sponsored Links
The pictures probably don't show the cracks too well, but as well as the ones around the burner, which could be covered by trim, there are also 3 horizontal cracks across the whole breast, the highest one is only about 18" below the ceiling. I've pretty much come to the conclusion that everything on there needs to come off back to brick.

Looking on the Vitcas website they seem to sell everything - boards, scrim tape, skim, drywall adhesive so I think the safest bet will be to use their whole system and see how it goes. It would be interesting to hear from anyone that has done this.
 
Fair enough - you are on site and best positioned to make the calls.

When you've hacked off perhaps post a pic of the brickwork - I'd be looking for cracks, dark smudges and/or crumbling mortar beds.

Who fitted the burner (a HETAS?) - was it a comprehensive job or simply installing the appliance?
Was the flue swept & smoke tested?
Was a liner used?

FWIW: just me but I dont think that its a good idea storing wood fuel below in proximity to the burner - some insets can cause ferociously high temps to their surroundings.
 
Hi. The funny (or not!) thing about this is that I was very concious of cracks forming, so I hacked it back to brick before fitting the stove. (the bottom half was already badly damaged after removing a 1960's fireplace. Its a victorian house, so the original mortar is crumbly, but there was no evidence of smoke having leaked. The 1960's fireplace seemed to have replaced the victorian original, they had made the builders opening really big and taken out the brick arch, so there was no lintel. Even though there had been no lintel for 40 years the bricks were all firmly in place.

The stove was fitted by a hetas engineer. It is lined - not because it failed a smoke test - we didn't do one. The fitters advice was that it was certain to fail, due to the criteria of the test. I was told the test would involve blocking the chimney pot for several hours and would also need access to next doors loft etc. So we jumped straight to a liner.

I take on board your comments regarding the log storage. I will be cautious. The stove is sitting on three concrete lintels to form a shelf and with heat rising I don't expect it to get too hot in there. If you google image search "inset log burner" it seems to be a pretty common way to store your logs.
 

DIYnot Local

Staff member

If you need to find a tradesperson to get your job done, please try our local search below, or if you are doing it yourself you can find suppliers local to you.

Select the supplier or trade you require, enter your location to begin your search.


Are you a trade or supplier? You can create your listing free at DIYnot Local

 
Back
Top