Decking and deck stairs, advice please

Joined
13 Oct 2003
Messages
53
Reaction score
0
Country
United Kingdom
Hi all,

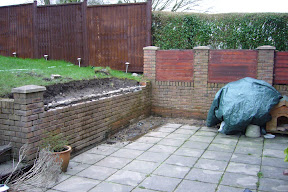
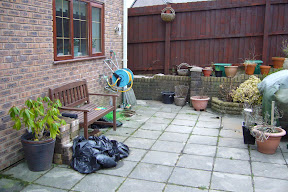
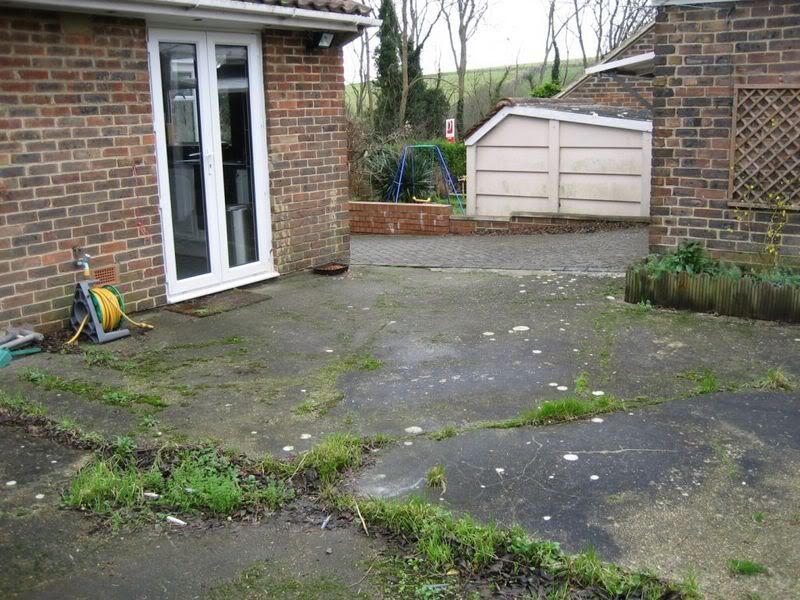
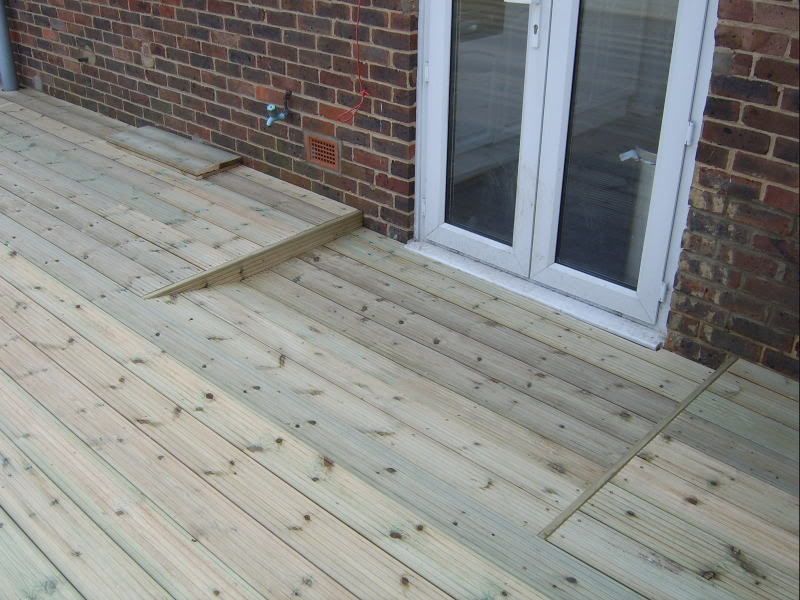
I have a couple of questions I'd really appreciate some answers to. Here's what I'm doing. I currently have a patio eyesore that I want to completely deck over. It's 8.5m x 3.8m and I have 135mm of height below the doors that open onto it. I've added some pics to set the scene.
P1000249.JPG
P1000250.JPG
P1000251.JPG
P1000252.JPG


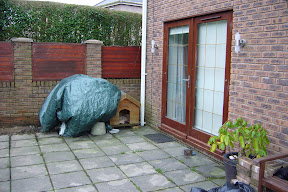
Can the joists sit on the slabs or do they need to be raised off of the patio away from moisture? If they need to be raised then 3x2 joists is probably all I can fit in once you take into account the thickness of the deck boards, would that be okay?
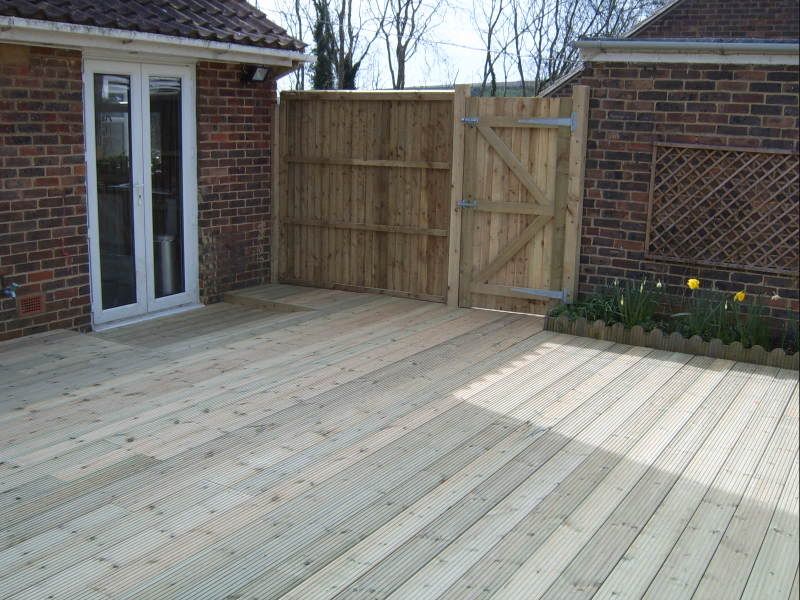
I would prefer to use smooth deck boards and was thinking of finishing them with Cuprinol Anti-slip decking treatment. Would this be okay or would it still be very slippery in the wet? I live in South Wales so do have a fair share of the wet stuff.

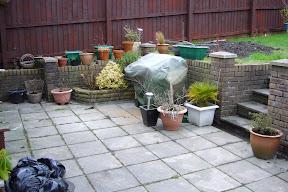
I also plan to create some wide (about 3.6m) steps from this area into the garden.
P1000253.JPG
P1000254.JPG

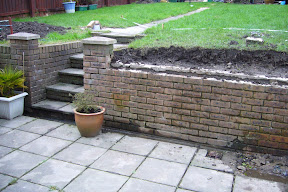
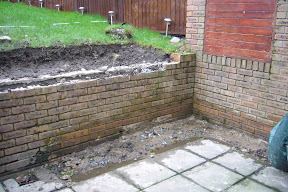
I was thinking of about 6 steps @ 200mm high and 400mm deep each (to double as a casual sitting area). I was going to use new railway sleepers but on working out the cost was thinking of just using the same deck boards. I am cutting out the current retaining wall to accomodate this. I am also going to extend the wall over where the current steps are and fill this with earth. If I make steps using the deck boards, can I just cut out the land into a slope and run the steps over that or will I need to cut steps into the land and retain?
How many joists (strings?) will I need to support steps that wide?
These steps are going up to the next decked area of 3m x 3m.
 
Sponsored Links
if we were doing this as a job we secure a perimeter members to the masonry, with rawl bolts at 1m centres. They would be set at a level so that the decking ends up flush with the door cill. The joists are then placed across the rea to infill it and support the decking. If the slabs are stable then we would support these with small legs to support the joists. The legs bear directly off of the slabs. When you secure the legs lift the joist slightly so that the weight of the joist firmly pushes down on the leg, stopping any rocking. Try to keep the actual joists clear of the ground if possible, as the patio will still collect water and drain in the normal way.

As for the steps, it depends on the look you want. Looking at the height of the wall, you should be fine with no retention, you can just abtter the soil back, under the upper deck level. WE would build the top and the bottom first and then you can work out your riser heights from there. For steps we tend to use the purpose made richard burbidge stair stringers. they come in a couple of sizes and you can adapt them to suit most circumstances. providing you are using a decent thickness of decking you could use them at about every 600mm apart.

As for the decking, i would personally avoid using the smooth stuff. It will be very slippy in the wet, even the grooved stuff can be if not maintained.

Hope that helps and heres one we did earlier!

yard_towards_garage.jpg


SV500577.jpg


SV500574.jpg
 
One thing i was warned of when i did it was to make sure there was a gap between the house and the deck as the DPC more than likely does come that high but that is just what i was told.
 
not normally a problem as the deck provides plenty of drainage, however you can set the wall plate away from the wall with packers
 
Sponsored Links
Wow, what a transformation Thermo, looks a million times better. What's the gap measurement between the boards? looks nice and tight. When you say 'perimeter members' do you mean the deck boards around the edge of the main deck?
What do I use to make the 'small legs' for the joist? Is it off cuts of 3x2?
 
no i mean a timber plate rawlbolted to the wall, which the joists run off of.

The gaps really depend on the look you are after, the decking itself (longer memebrs tend to be a bit more wavy than short ones and they take a bit of moving in and out to gte the right gap), and how wet the timber is. We do the gaps by eye, as we are used to it, but you can make up some spacers around 3-5mm.

The legs can simply be made of offcuts of 3 x 2 as you say. The weight of the deck will bear down on them and hold them in place. Just lift the joist slightly as you secure them, so when released it is exerting pressure on the leg and stopping any bounce

Wish id taken some pictures today, weve just finished of another one, would have explained things a lot more easily!
 
Thanks for explaning that, I understand what you mean now. I intend to take pics as I progress the project and I'll post on here just in case it helps others.
 
yes i keep intending to do a guide, forget every time we do one!
 
Thats a lovely job Thermo. Just finished doin my own decked area. i too layed the decking on slabs that were already there. I used legs as well. I did wrap them them in DPC. But i dont think this would have mattered with such a small area being on the ground as the wood is pressure treated. However (to the originator of the thread) it is worth remembering that if using offcuts for legs and no DPC, then treat the sawed end of the offcuts first before laying them on the ground. Just a precaution.........
 
ill stick some more on of others when i get a chance, and the update of that one too with all the lights in it
 
I've done a few decking jobs in my time. Nice clean and well finished job there mate. ;)
 
Just checking again, and refering to the DPC comment, my existing patio is 90mm below the DPC material so my finished deck is going to be about 40mm above the DPC. Is this a problem?

I will step the wall plate off the wall to allow drainage (not sure how far off it needs to be though).
 
Thermo, your pics look fantastic! Out of interest, what did you do to the cracked concrete underneath to stop the weeds from growing once the decking was down?
 

DIYnot Local

Staff member

If you need to find a tradesperson to get your job done, please try our local search below, or if you are doing it yourself you can find suppliers local to you.

Select the supplier or trade you require, enter your location to begin your search.


Are you a trade or supplier? You can create your listing free at DIYnot Local

 
Sponsored Links
Back
Top