rendering a fireplace

Joined
22 Apr 2009
Messages
857
Reaction score
83
Location
Oxfordshire
Country
United Kingdom
hi chaps,

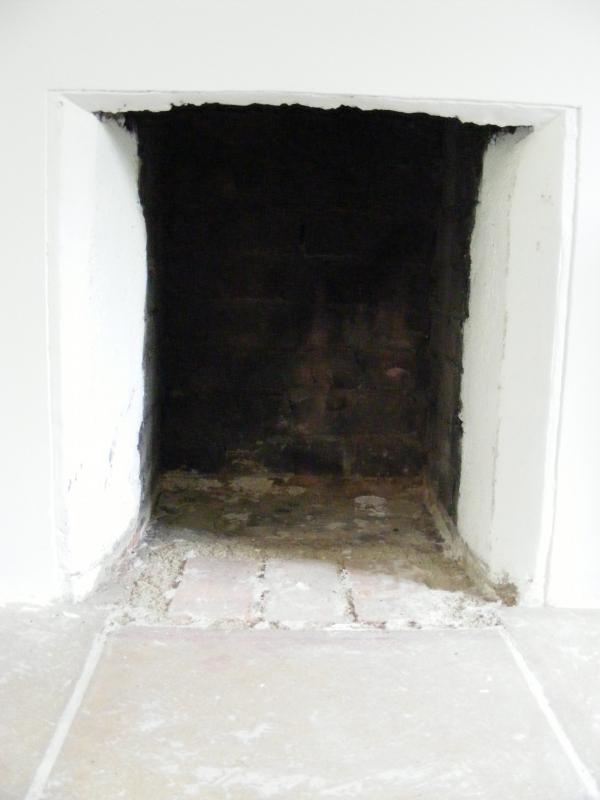
doing a bathroom for a customer at the moment and he's asked me to 'tidy up' his fireplace, he has a grate inside a chimney of brick construction which he uses for open fires and therefore has black sooty brickwork inside the fireplace.

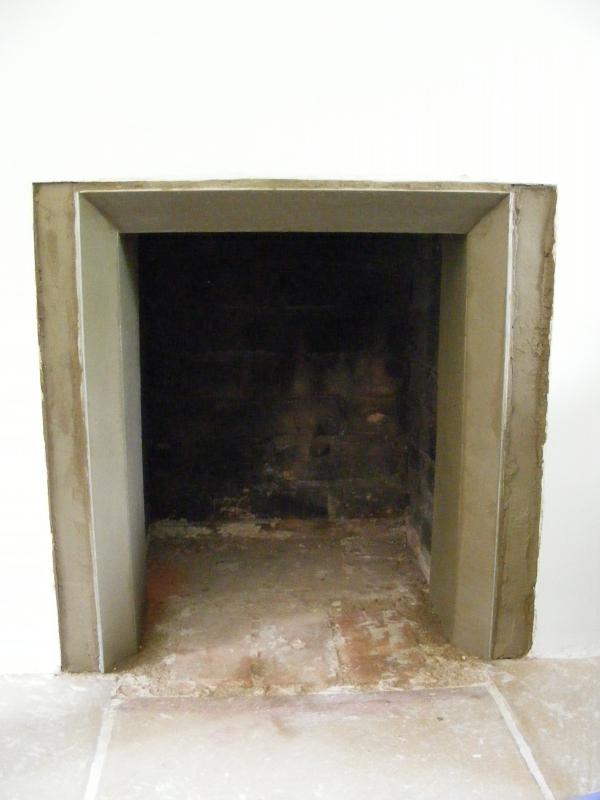
it currently has a beveled frame effect on the front which is a bit of a mess and he wants it making nice and tidy, so questions are:

1) mix of render? is standard 5:1 ok or does it need some lime too?

2) guessing i'll need to clean sooty bricks down with something? sugar soap?

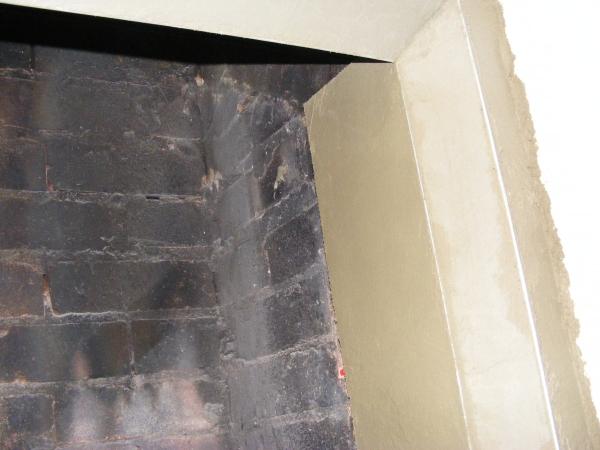
3) how is best to form a nice new bevelled frame? (from face of fireplace 45 degrees back into the fireplace)

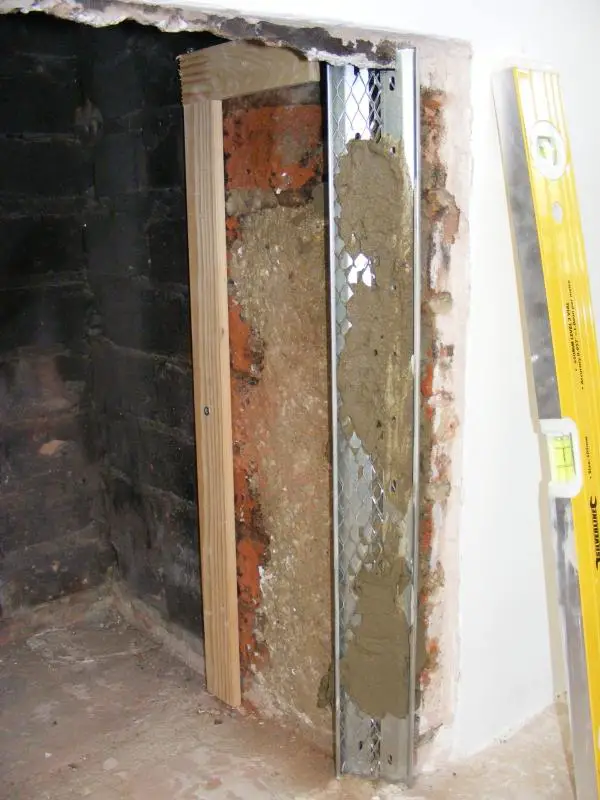
4) current render is painted so how best to bond new render to painted stuff?

sorry for the amount of questions chaps, new one for me this type of job.

will attempt a diagram to help explain what i mean by 'frame'
 
Sponsored Links
Hi TM,
Here's one for you to have a look at,,, quite a lot of info, cleaning soot etc,,, //www.diynot.com/forums/viewtopic.php?t=159375
Still draw the "frame" diagram though if poss. I think roughing up the old painted render overall, giving a good/strong mechanical key would be your best bet before re-rendering, especially as a lot of heat will be involved.

Roughcaster.
 
Thanks RC! :D plenty of good advice there, i did search before posting but obviously not using the correct keywords.
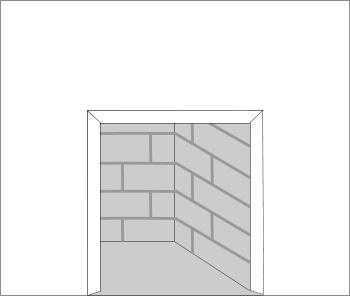
just working on the diagram now, will then attempt to post my first pic!
 

hope this helps RC? all the white in the diagram is painted render, the 45 degree agnles of the fram are currently...RUBBISH and he wants render to go back a little further into fireplace, was thinking of fixing vertical battens halfway inside to render up to and bring it out 10-15mm which should give me room for forming a new beveled frame, just wondered how best to 'hand-form' this with sharp, straight lines...GULP!
 
Sponsored Links
Hi TM,
Been looking at your diagram, (any chance of a pic?) and reading your plan of attack., I hope i'm reading you correctly. I like the sound of the thicker batten, deeper into the fireplace to render up to. Can you not use temporary battens front left/right/top, to help give you your sharp straight lines? I understand what you're trying to acheive, and thought working off of the battens inside the fireplace, the beveled frame, and front of the fireplace would give you sharp corners, then re-render the front. This would be done all in one go, returning the wet rendered corners. Tricky to do, but it would look a neat job in the end. You are in effect rendering the inside of the fireplace, the new beveled frame,, and the front of the fireplace,,, all in one go using temporary straightedges to return all the corners. Hope you understand the idea. "Thorough prep" on the front painted render would be one of the main parts of the job, and i would scratch coat "everything" first.

Roughcaster.
 
Hi RC!

late clocking in last night? busy day at the office i'm sure, gotta pay for the holiday somehow ;)

read your reply and it makes perfect sense, hadn't expected to render the front of the chimney breast but it does sound like the right thing to do in order to make the frame, but i'm not sure customer is expecting to hear that, the way he asked me was almost like 'if you've got 5 minutes while doing the bathroom can you tidy this up?' anyway will put it to him and see what happens, probably decide it's not that untidy after all. :evil:

can't live with them, can't live without them, personally i think the latter is more true!

Thanks for taking the time to look at this for me, not a quick easy one i know.
 
If it's just a "tidy up" as you say, then you don't want to make a meal of it, but for future reference. ;)

Roughcaster.
 
is just a tidy up mate, put your suggestion to him today, should have seen his face!! :eek:

anyway he only wants a quick fix and i now have an idea thanks to your earlier advice, will let you know how i get on.

Thanks again!
 
That's an extremely good fix - not just a tidy up. That's high class work. Well done.
 
thanks chaps! :D have to say i'm very pleased with myself over that one, just hope it stays in tact after a few fires...GULP!

i used sand, cement and lime in the mix, nothing else on it at present, it was render to begin with so render is what i've left him with, going to use a filler to fill the face around the frame so that i can sand it off flush and hopefully make it a seamless join with the existing.
 

DIYnot Local

Staff member

If you need to find a tradesperson to get your job done, please try our local search below, or if you are doing it yourself you can find suppliers local to you.

Select the supplier or trade you require, enter your location to begin your search.


Are you a trade or supplier? You can create your listing free at DIYnot Local

 
Sponsored Links
Back
Top