
I posted some pictures during my en-suite bathroom conversion into a wet-room, showing what I had done with the floor and walls by way of preparation and some people asked if I would show the finished project and provide a ‘guide’ to how to tackle such a job.
Let me state here that I am a DIYer and NOT a professional bathroom fitter, but I have spent many months researching the ‘how to’ before spending as many months ‘doing’! So here is my guide to making a wet room.
It starts off with EXTENSIVE research, this site being a good place to start and to ask questions. Many hours on the Internet will reveal lots of sources for materials and finishes and a wide variance in prices, coupled with plenty of ‘how to’ guidance. You could do a ‘cheap’ wetroom, but I personally decided to pull out the stops and spend as much on materials and fittings as I was quoted by my local bathroom showroom for the full conversion, doing the work myself and therefore being able to fit much better than ‘trade’ fittings.
With plenty of research completed I then started to rip out the old bathroom. It had a corner ‘quadrant’ shower cubicle, which was too small to stand in and lather yourself up without being under the stream from the shower! This was something I disliked and wanted to rectify. It had also leaked around the waste and base-to-wall tile joints and the house builders had literally just ‘thrown’ it in. The house is circa 1990 and just about every bathroom in our close has leaked. Pulling out the tiles revealed water damaged plasterboard (no sign of any tanking). It was easier to pull the walls off than try to get the tiles off….which were 4 layers thick!!! The room was about 4” wider once all the tiles were removed. The floor was chipboard T&G and the ‘bodgers’ contracted by Jones Homes had just hammered a 1ft rough circle out to site the waste trap! With all the walls removed more short cuts were revealed, such as partition wall sole plate barely attached to the joists and pipe work unsupported and able to ‘clang’ together. The plumbing would need extensive re-working as the plan was for a back-to-wall WC, waterspout basin tap and a concealed shower control repositioned and feeding a rose that was to emerge directly from the ceiling.
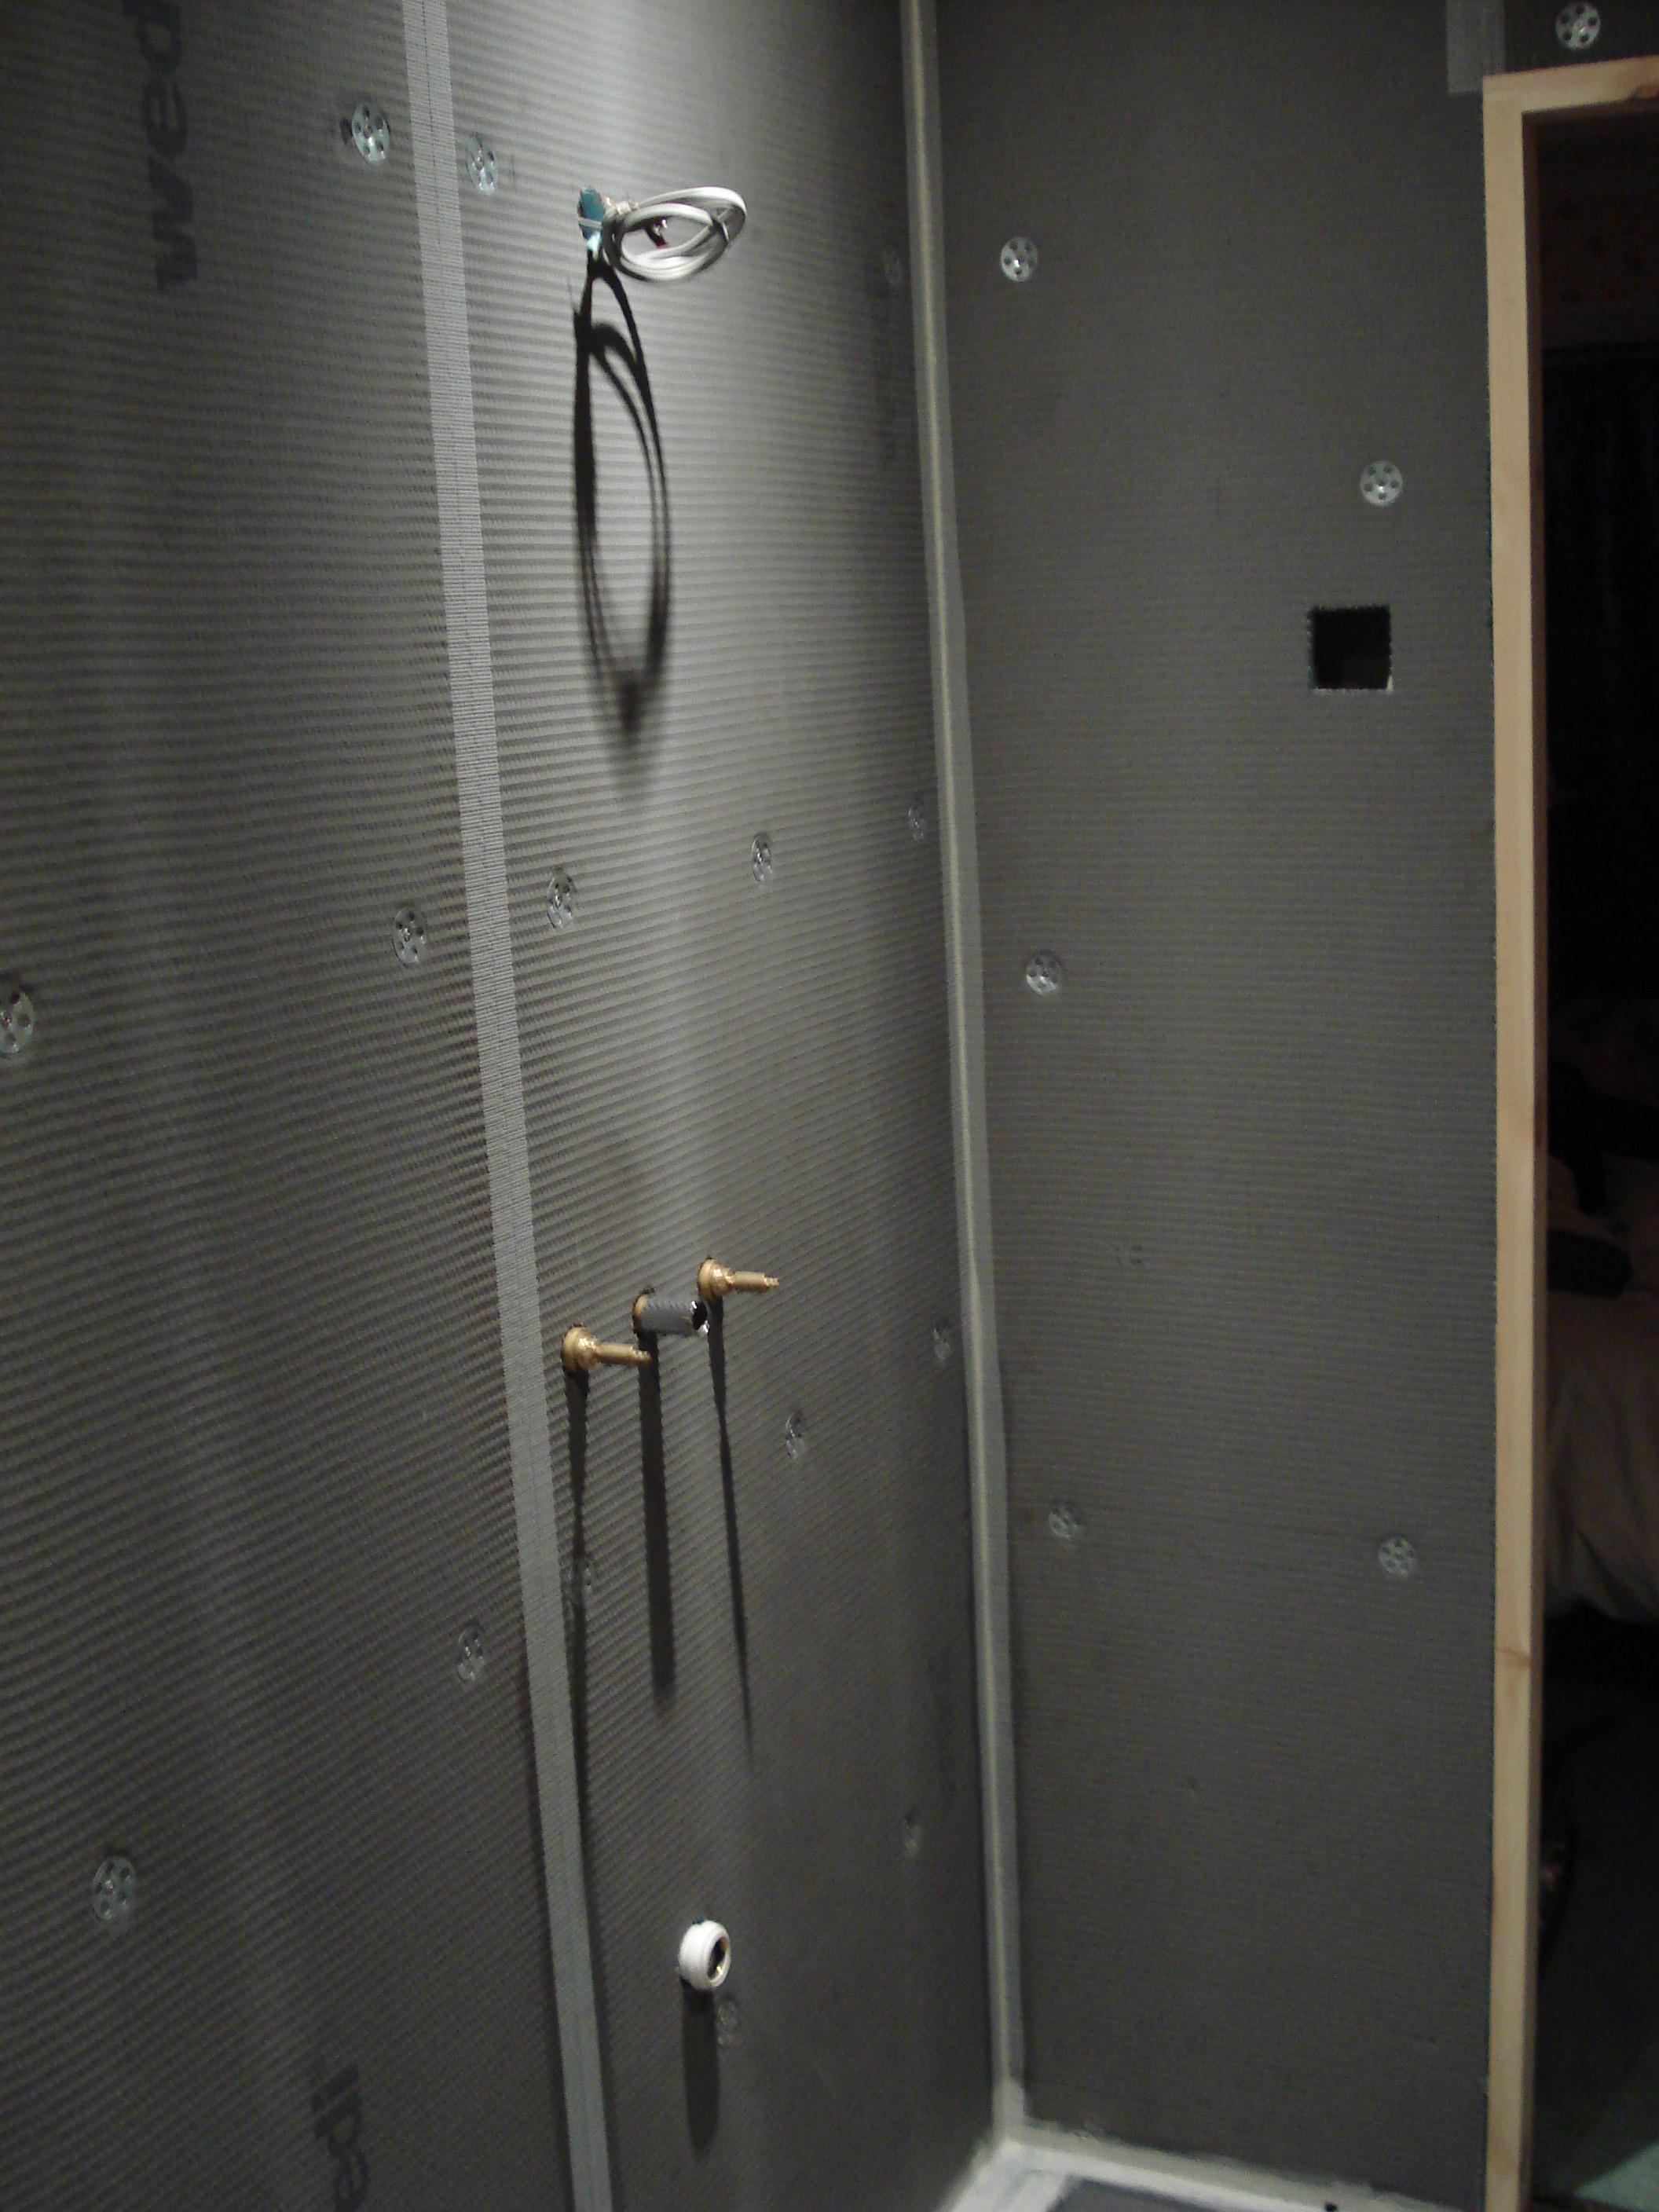
From the start I had wanted natural stone as the finish for the walls and floor, so removing the walls was required as the stone is so heavy I needed to strengthen the walls to be able to support its weight. Extra battening was required in the stud walling and plenty of ‘dabs’ on the block walls to ensure enough anchor points for the wall boards. Material choices for the walls ranged from plasterboard through tile backer boards, to the ultimate Wedi Board, which I chose for the whole room even though just the wet areas would have been sufficient. At the time they didn’t do a 12mm board to match plasterboard, so I chose the 20mm board for the whole room.

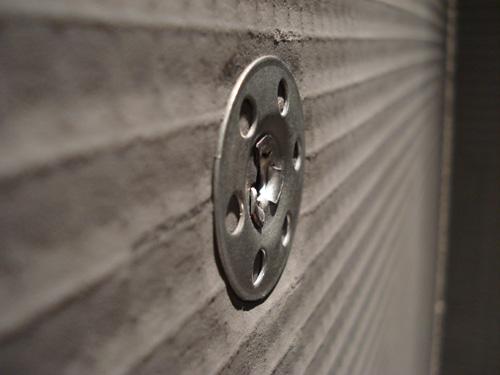
Once I had worked out what size stone I was going to have I could then find out the weight, add in weight of adhesive and grout and then call Wedi to find out how many fixings the wall boards would require per sqm. to support the weight. It came out at approximately 35kg per sqm and Wedi advised 8 fixings per sqm. The fixings for solid walls are hammer-in expandable ‘pegs’ with a dished washer attached to one end to spread the load across the board face. For the battened walls I sourced stainless screws and ‘penny’ washers, but found them not suitable and had to buy Wedi washers. Wedi products are superb but VERY expensive. The washers crush into the surface of the board as you tighten the screws and produce a flush board surface finish. The penny washers crushed in too much and that shortcut was not really suitable.
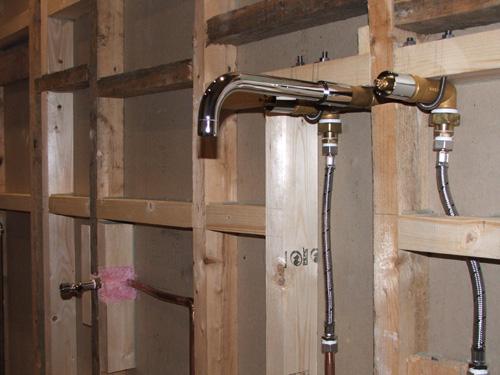
Before the walling could be put up I needed to re-route all the plumbing, which took a lot of planning and then chasing into the block wall at the far end for the shower. I did this using an angle grinder with a diamond wheel disc, followed by a hammer and bolster. I had chosen a Hansgrohe shower rose and a Universal I-Box for the shower control and this took a lot of thinking about before ultimate siting and therefore plumbing.
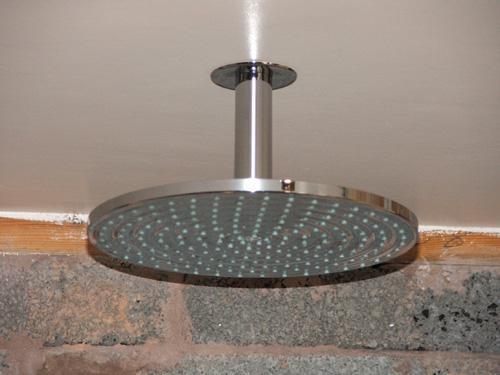

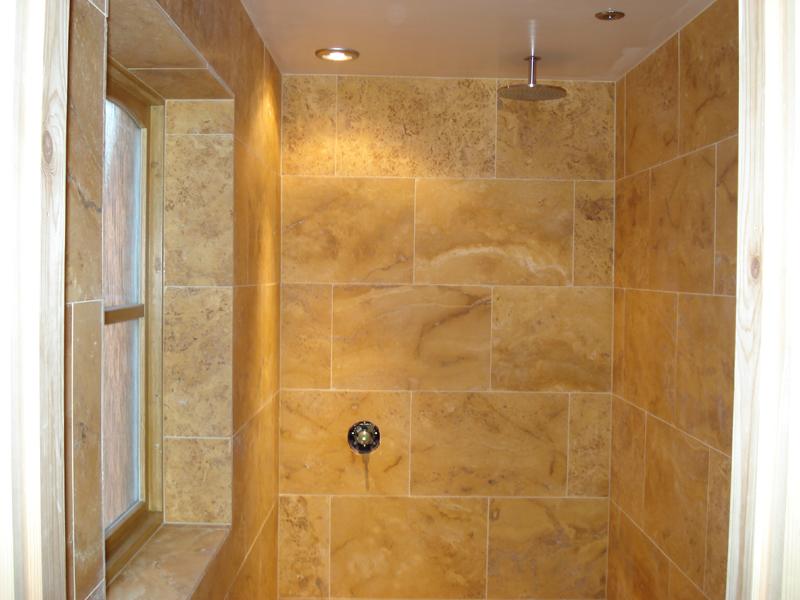
Everything needed to be hidden in the walls, which is extra work, but will give the required finish. Soldered 15mm joints were chosen for their longevity, as I have never used plastic or pushfit but have heard stories of them not lasting as long. Once this room was done I did not want to have to go back and rectify leaks. Having said that, the final fixing was a nightmare as the I-Box and waterspout tap (Cifial) don’t have threads that match UK plumbing. Several attempts and copious amounts of PTFE tape were needed to get watertight joints. This was a nightmare for a DIYer with little plumbing knowledge. I have since learnt that you can get a sort of ‘string’ that you can wrap around the threads, which seals these joints better. The showerhead was to protrude directly through the ceiling and an awful lot of work was required re-routing plumbing into the loft. All the pipes up there were insulated and a timber frame mounted between the rafters to securely support the (quite heavy) 24cm showerhead.
One thing I found tricky was the positioning of the down-pipe to the head. This screwed into a chrome extension piece, which was mounted onto a 15mm angle joint with mounting holes on a backplate. A small chrome shroud covers the hole in the ceiling, BUT the shroud fits onto the end of the chrome downpipe and is tightened as you screw the downpipe into the extension piece. This means that the extension which passes through the hole in the ceiling had to be supported millimetre perfect or the shroud would either not touch the ceiling or would distort if too close! Took a lot of work to mount the backplate joint in exactly the right place on my fabricated timber support work to ensure the shroud would be positioned perfectly. Why the shroud does not have an internal diameter that is an ‘interference’ fit over the chrome down pipe I will never know! That way you could mount the downpipe just ensuring it passed into the hole in the ceiling and slide the shroud up to the ceiling surface.
Lots and lots of battening went into the stud wall and the sole plate was screwed to every joist with 4” Spax screws. The floor/walls will never creak again in this room!

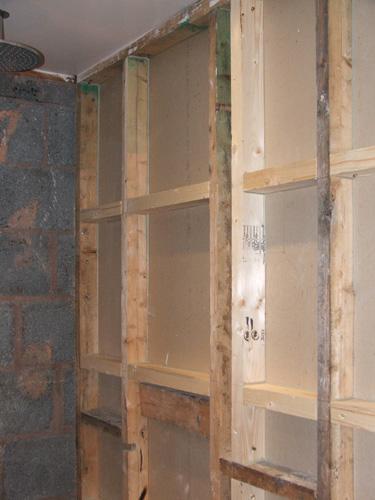
Each batten that was added was glued with Gripfill and screwed to enable the overboarding ply to be screwed down at 150mm centres. The re-routed plumbing came up through the sole plate into the stud wall void and the tap, cistern supply and shower control all had to be sited and securely mounted before the walls and floor could be fixed. The cistern internals are all Gerberit, with a little chrome isolator, which protrudes through the wall. The Villeroy & Boch WC comes with drawings and measurements to site the isolator. You have to remember to allow for the height of your finished floor surface when measuring up the wall. A combination of pipe clips and expanding foam were used to secure the feed and isolator. Another thing I learnt was that even when you spend £300+ on a tap you get no mounting kit! You get a manifold that doesn’t even have any lugs, so you have to fabricate something to adequately support the tap. This took quite some time; I added battening into the partition wall and then fabricated ‘U’ bolts from a length of threaded rod to clamp the manifold to the battening with nuts and washers.
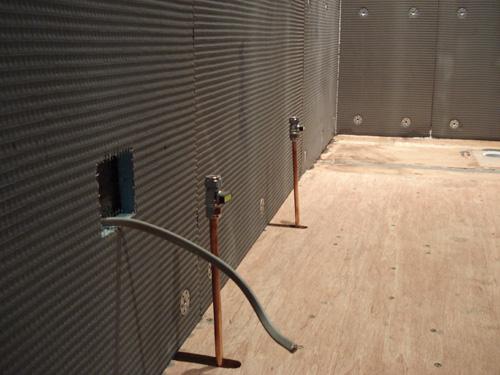
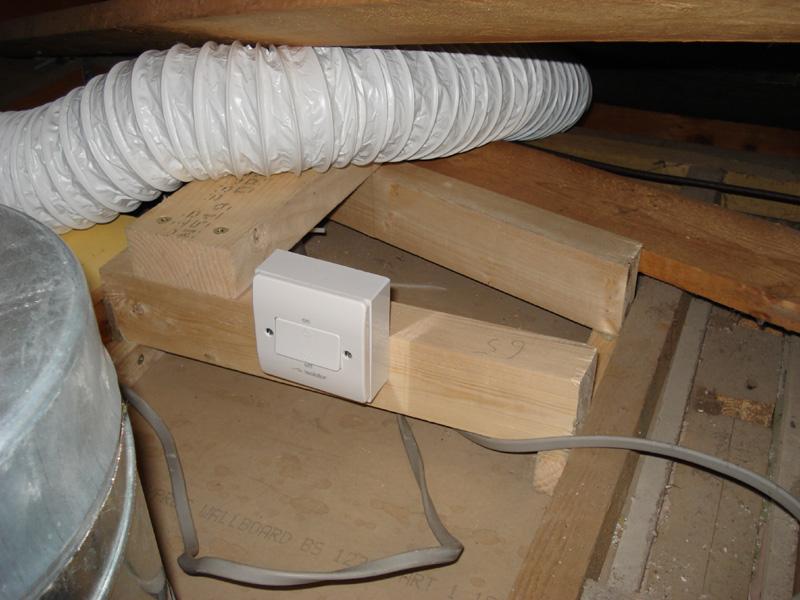
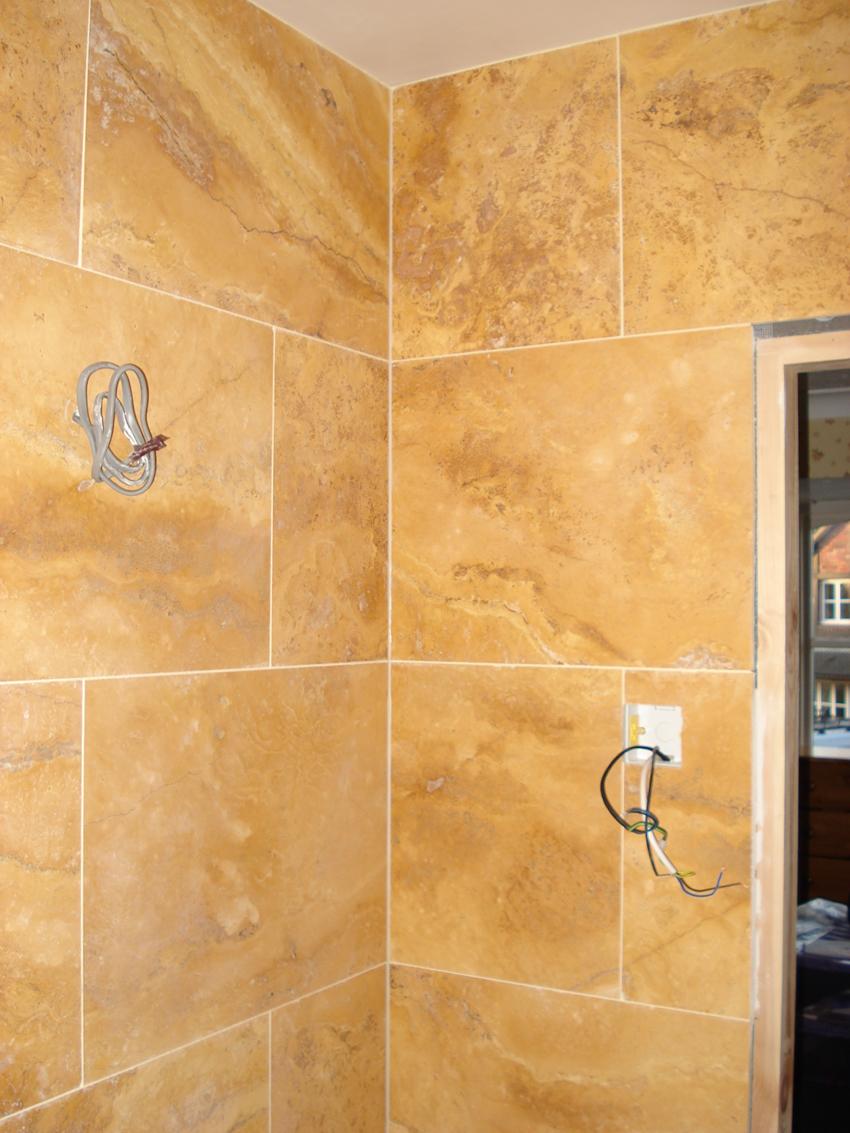
On the opposite wall under the window I needed to adjust the microbore central heating pipework to fit a stainless steel towel rad. I opted for a ‘dual fuel’ rad, which allows you to heat it electrically when the central heating is off, so this required a power supply and spur to be sited suitable close for a neat finish. Electrics are not an area that I feel qualified to mess with (and it is not allowed for an unqualified person to do electrics in the vicinity of water), so I called an electrician friend who came in to do this, a power supply for the new cabinet (just a re-route of the old electric shaver point which I was removing) and to wire up for downlighters and an inline extractor fan for the shower.

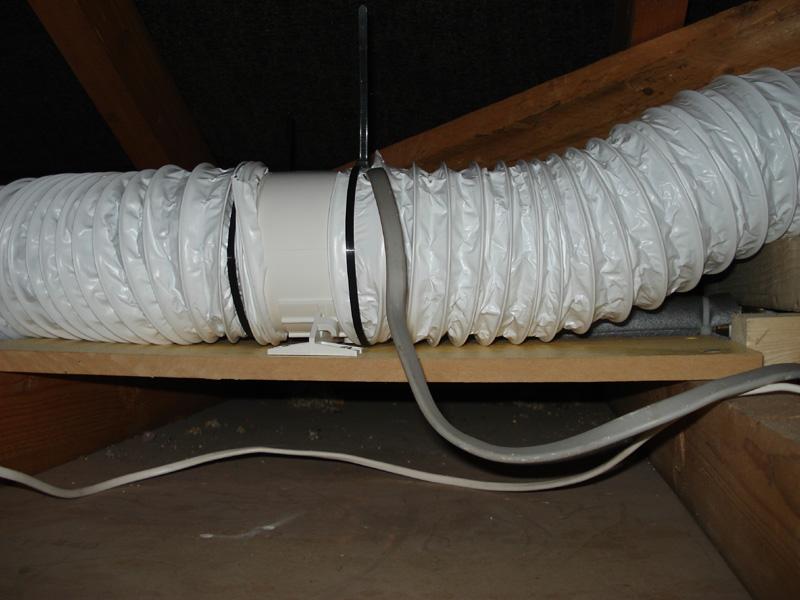

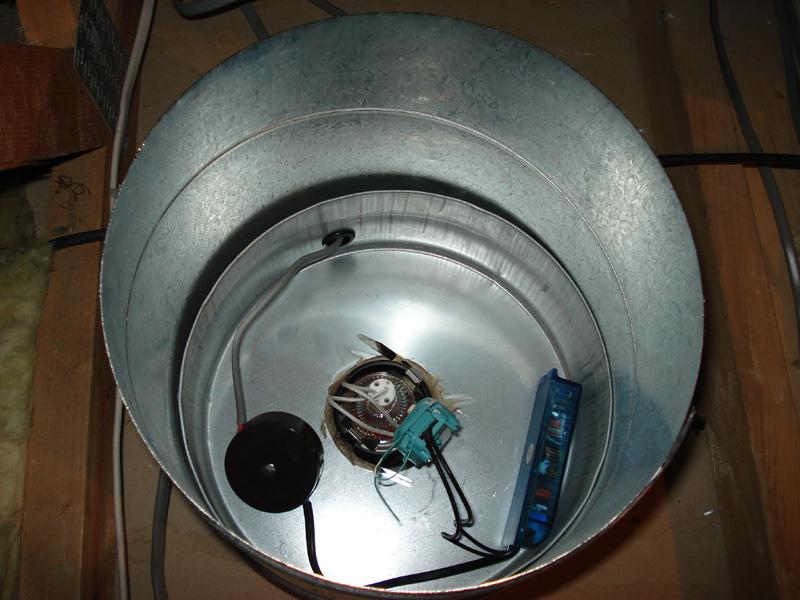
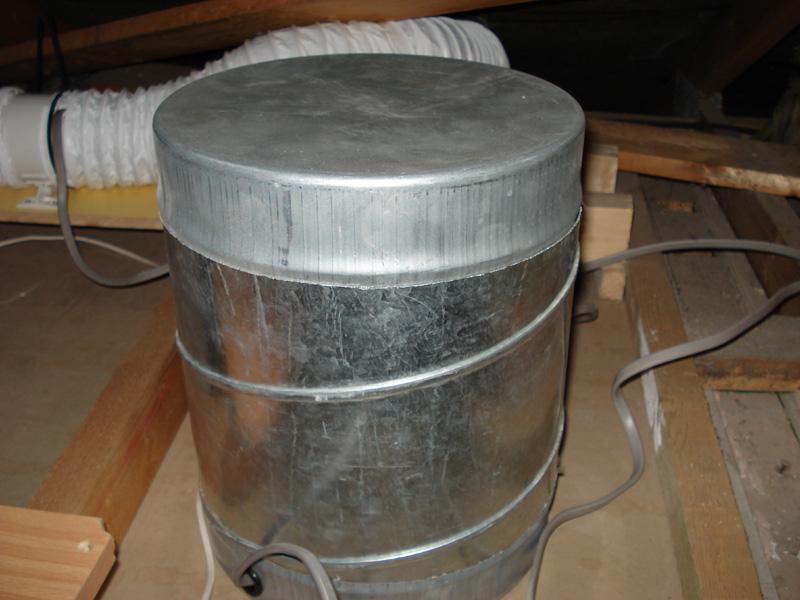
The downlighters were all suitably IP rated and the fan was going in the loft. When the house was built there was no requirement for an extractor as there was a bathroom window, but from my research it appeared that mould was best prevented by increased ventilation so the inline fan would do this and would be very neat and tidy, there just being an inlet in the ceiling which contained a shower light. He also put in a supply for the underfloor heating, which came from the adjoining bedroom.
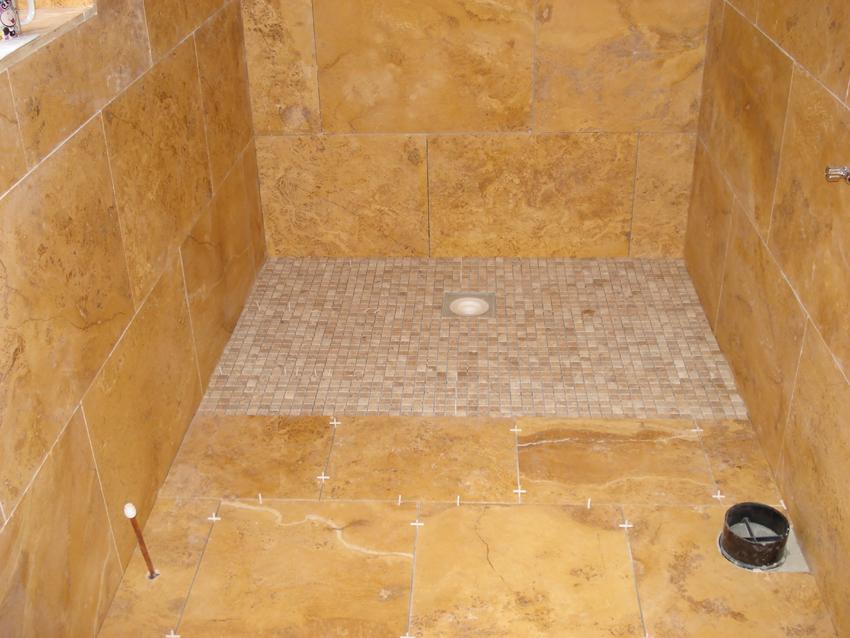
The flooring ply was put down in two pieces after priming with acrylic primer. The shower base, which would be the far end of the room (full width) was a manufactured ‘former’, 20mm thick at the edge with falls in each direction towards a central drain aperture. It was made from very dense expanded foam with a fibreglass mesh back and front set in a screed, just like Wedi board. In retrospect I wouldn’t use a former again; I would just use ply and then build up round all the edges to make the required falls. Dunlop Tile on Wood bagged adhesive mixed with latex additive can be used for this and it is also what I used to stick down the former, and 6mm Marmox boards (again, just like Wedi board) to insulate the ply in the rest of the room before putting down underfloor heating. Prior to sticking down the former though, plenty of preparation was required. A diagram was needed to work out the heights between the two distinctly separate areas of floor; The shower base, which would be 20mm former with 12mm tiles set in a bed of adhesive. The ‘non-shower’ area of the room was going to be 18mm WPB ply, with 6mm Marmox boards plus the depth of adhesive, then 3mm underfloor heating cable set in levelling compound with the same 12mm floor tiles and adhesive on top of that! It really did take a picture for me to visualize the various levels to work out how to get the finished floor a constant height. What resulted was that I needed to raise the shower base area. However, the joists throughout the room were not perfectly level and I wanted to keep any finished floor height gain as small as possible. What I needed to do was plane the joists back in the shower area and gradually raise the battening (relative to the joist tops) throughout the rest of the room running away from the shower area back towards the door.
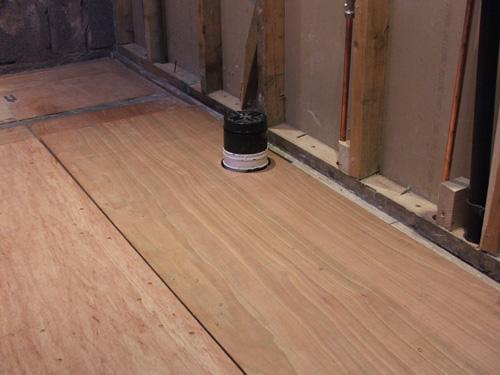
Another task to be tackled at this stage was to site the shower drain. The ‘kit’ for the shower base came with a Dallmer plastic drain and stainless steel grate. The drain comes in several parts, a lower part which needs to be ‘set’ at the correct height for the pre-formed tray to be placed onto it, then an ‘upper’ insert screws into the lower part through the aperture in the tray. As the floor drain needs to be weight bearing it is vitally important that the lower part is set in a sand/cement mix. This necessitated building a ‘box’ between the joists, attaching the waste pipe to the drain and then supporting the drain in exactly the right position 3 dimensionally before setting it in the concrete! This was quite a job and required careful thought. If the drain is set too high or low the pre-formed tray will not butt up to it correctly, if it is out laterally then the preformed tray aperture will not line up! What I did was measure/ trial fit/ measure again/ cut the waste pipe to size/ trial fit/ measure again/ plastic weld the waste pipe/ refit/ measure again and so on until I eventually gingerly filled the box with the sand/cement mix…………! The hardest part was supporting the drain/waste in the right position.
 Once the ply flooring was trial fitted it was then lifted and marked to ensure that all screws would be sited into joists/ battens and then the holes pre-drilled and countersunk and then Spax screws were used to pull it all down tight. After this the pre-formed shower tray and 6mm Marmox boards were laid using the Dunlop Tile on Wood adhesive with flexible latex additive. This really is sticky stuff and when set is very flexible.
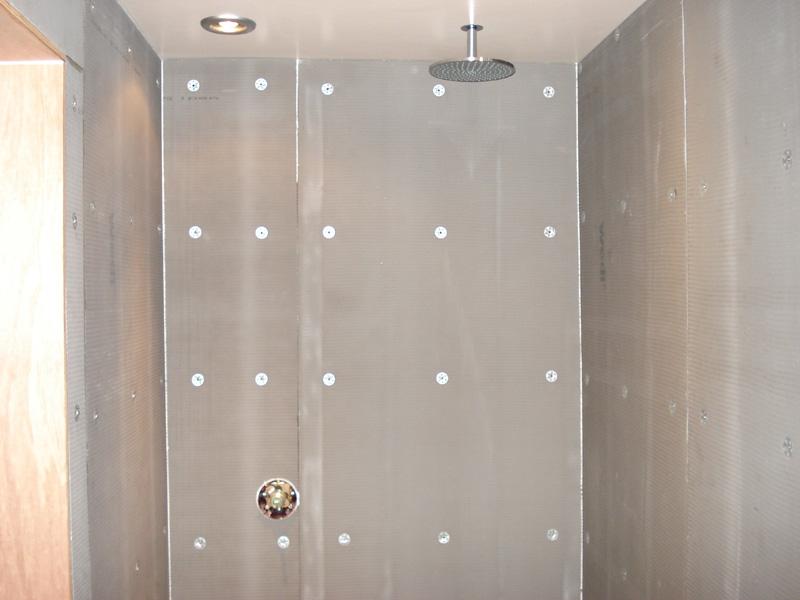 The walls were then put up, stainless steel screws used into the battens of the partition walls and ‘dot and dabbed’ onto the block walls. It is important to mark the positions of fixings by poking a hole through the board and then putting your dabs behind the holes, which means when set you can hammer in the fixings through the board and set adhesive into the block work. If you don’t do this the fixings will just hammer right through the Wedi board, which is structurally strong when fixed, but very lightweight and easily damaged/ crushed if you are not careful with it.
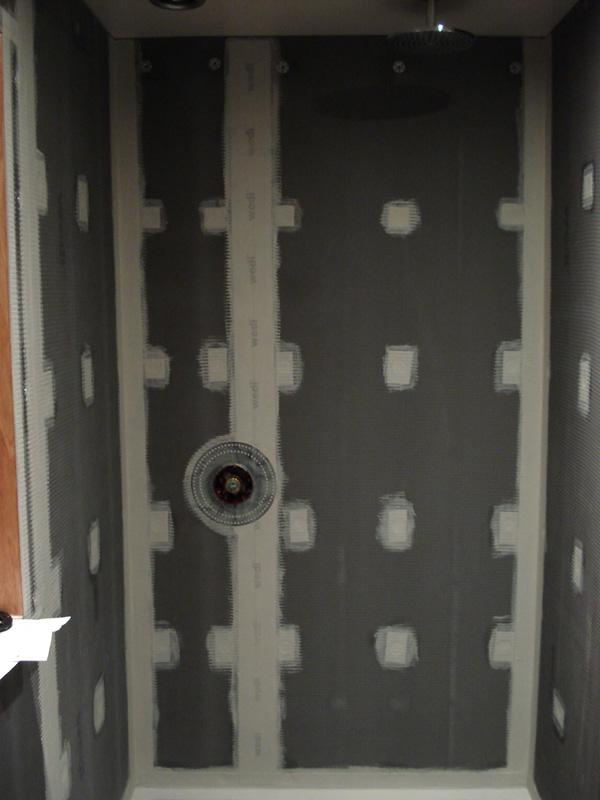
Once the walls and floor were up the next job was to tank the wet area. As any decent tiler will tell you it is vitally important to tank any wet area, even when using ‘waterproof’ adhesive and grout. Why? Because waterproof means it is not affected by water, not that it prevents water ingress. So you WILL get moisture behind your tiles in a shower/ wetroom and if you want to prevent tile failure you MUST tank. The shower base ‘kit’ came with tanking material in the shape of bitumen ‘tape’, like roofing tape and pre-formed corners. If I were to do another wetroom I would not buy one of these wetroom kits. After further research I elected not to use the bitumen tape and bought a Dunlop Tanking kit, which is a tub of a sort of rubberised solution and a reel of fabric tape. I also had some Wedi tape, which is incredibly expensive and I personally think you can do the same with the Dunlop or Bal kit. All the board joints of the wall and floor need to be taped by applying some of the ‘gloop’ and then bedding the tape into it, applying more ‘gloop’ over the tape. I also cut squares of tape and tanked all the board fixings as obviously the board had been breached by the fixings that could allow water passage. Once this was done the whole room started to look like it was ‘getting there’.
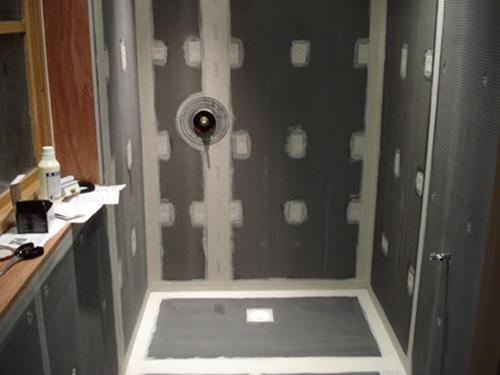
An internal window surround was made from WBP ply and fixed securely into place to provide a stable background for the tiling, which was to be the complete room.

The underfloor heating was laid in accordance with the manufacturers instructions. It is important to measure the floor area that is to be heated and buy a suitable sized kit. I opted for a single wire kit as opposed to a ‘mesh roll’ type kit as the area was so small that it would be more difficult to utilize a full roll rather than to just lay the single wire. Once installed my spark checked everything and ensured it was all going to work before being buried in self levelling compound. This is trickier than you would think as it doesn’t really ‘self level’ much at all! A pal who uses it all the time helped and made it much runnier than I thought it would be (according to the bag instructions) but it went down a treat and trowelled out well just deep enough to hide the cable. The instructions with the kit way you don’t have to bury the cable, but I reckon it is better this way as there is no chance of any floor tile bedding down through the tile adhesive onto the cable.
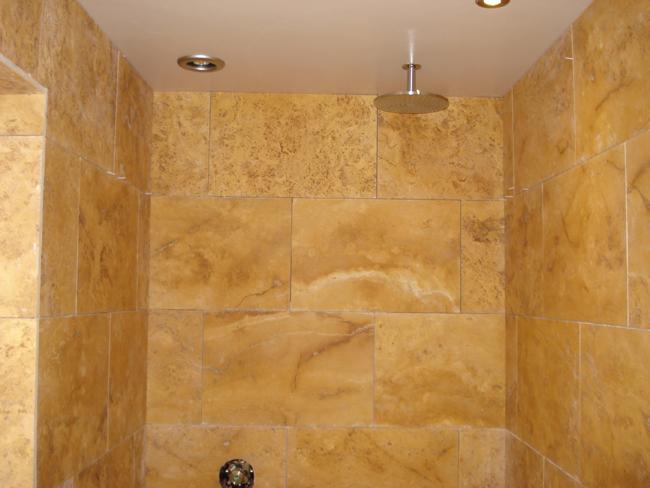
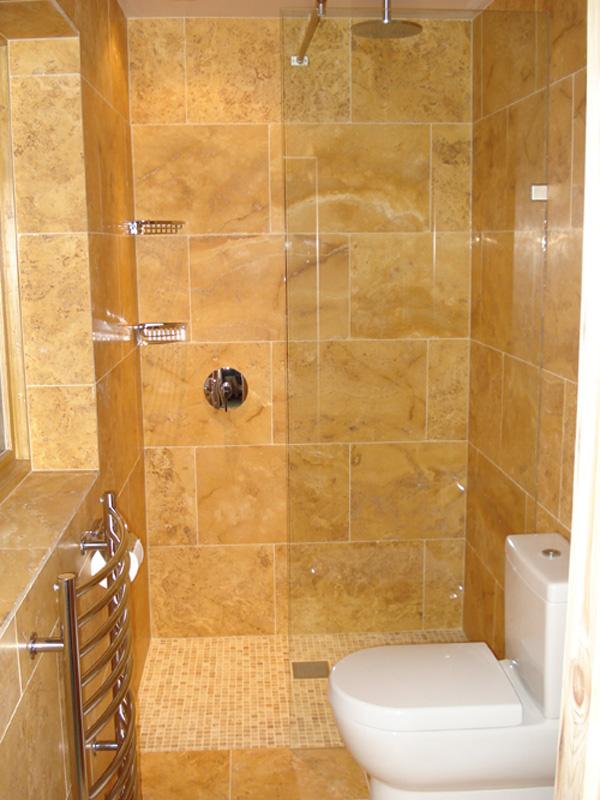
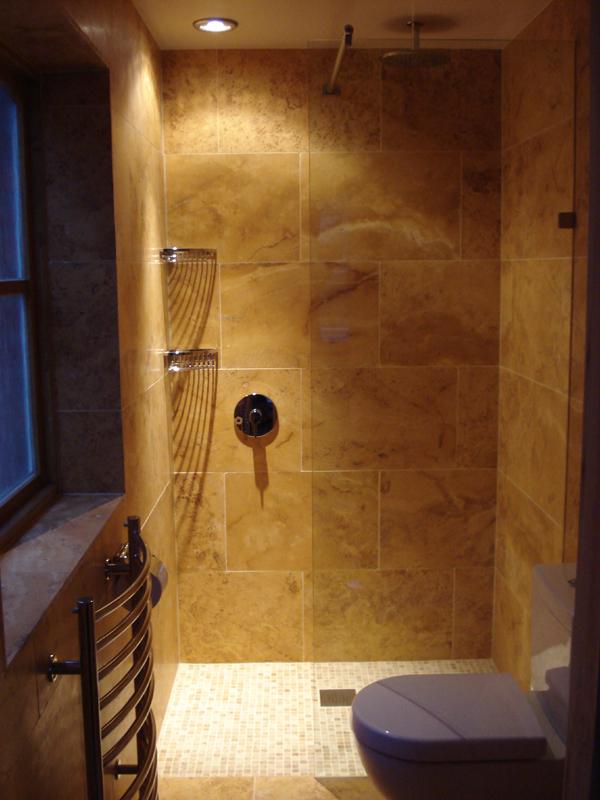
 I had picked a yellow Iranian Travertine stone after much research and numerous visits to various tile and stone suppliers. This was one of the more expensive options, but having seen it originally and then trying to source a cheaper alternative I just kept coming back to it. In the end I decided that it was the final finish and if the room was going to live up to the quality materials and prep work underneath then I really needed to not scrimp on the tiles. I negotiated the price down from £1200 to £800, which required my bathroom supplies company to negotiate with their stone supplier! The walls were to be 600 x 400 and the floor 400 x 400 all laid in a brick bond pattern. I’d seen wetroom floors with the drain central, and one square tile cut diagonally, with a drain size aperture cut from the resulting pieces of that tile. Then the tiling pattern worked outwards from this tile. After humming and arring over this I eventually decided that would be too difficult and mosaics would be the way to go for the shower floor area. This meant that my wonderfully worked out floor height was now going to be wrong as the mosaics were thinner than the rest of the stone, argghhh! There is a couple of mm drop down into the shower area which although not perfect, it quite acceptable on reflection.
I discovered Trades-Direct on the internet for tiling products and found them to be associated with PITT the tile training company. They were just down the road from me so I popped down to get a quote for all the adhesive, grout, sealers etc that I would need. I have done a bit of tiling before, but this was a big leap to natural stone and large format. The chaps down at PITT are exceptional when it comes to customer service. I am a DIYer, who has just popped in, I am not paying for a tiling course from them and I know little about the products that I require. They made me a cuppa, took me through to the tiling school and then onto the storeroom from where they supply their trade customers. I was armed with a stone tile and asked ‘how do I put that up?’ It ended up with 3 or 4 of their trainers all debating the best/ most suitable products for me and grout colours etc. They even demonstrated the various sealers to show me the available finishes. I left with my quote to supply all the required items and needless to say went back a day or two later to purchase having realised that their price was some £200 cheaper than a certain large chain tiling supplier. A few days later when I was struggling to get clean cuts they even lent me their radial arm tile-cutting machine for nothing (some £800 worth)! I cannot praise them enough for their exceptional service.
I did my setting out and marked a line all around the walls. I laid two rows of stone on one wall but was getting lipping between adjacent tiles. This was much harder than I thought it was going to be. After removing, back buttering, adjusting and relaying I just couldn’t get a good enough finish and made the disappointing decision to pull the tiles off and clean them up and call in a pro. I am not someone who likes defeat and I still think with a bit of instruction and practice that I would be able to do it, so I will be looking for my missus to buy me a course down at PITT for Christmas!
I had to wait a couple of months for a tiler who came recommended from PITT, but that is a good sign really as a tiler who can turn up tomorrow probably hasn’t got a lot of work on and that should raise questions! Everything had come to a standstill and all I could do was wait, but it turned out to be well worth it as he has done a top job. Again, this is going to be the bit that everyone sees, so my good prep work would have been a waste of time if the final finish had looked rubbish.
So the tiling was planned for 5 days, but took a couple more to finish off. The tiler hadn’t thought he would have to wet cut every tile, but he did, hence the over-run on estimate. No extra charge though, which was fair and much appreciated, so I gave him all the left-over bagged adhesive, which he will be able to use and have recommended him to several contacts, so I think he is going to get a lot more work!

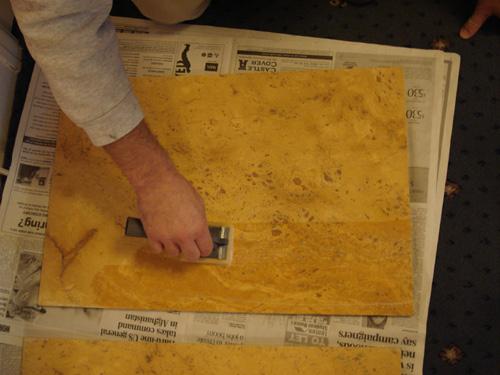
 With the tiles all up the room really started to take shape, after two coats of Sealers’ Choice Gold stone sealer, the next job was to fit a new door case as I planned to make the door open into the bedroom rather than into the ensuite to achieve a couple of things; firstly to make the floor area seem bigger in what is quite a small room and secondly to allow me to stand at the basin having a shave without being bumped by the door if the missus comes in! The door case was easy to fit, just requiring cutting down to size and securing to the wall battens. I used Gripfill and a few nails to make it very secure. New architrave was fitted to both sides, the inner being a ‘bespoke’ profile made by my local timber yard as the standard width would mean that one side would butt up against the outer wall. The smaller profile looks neater, leaving a gap that is tiled.
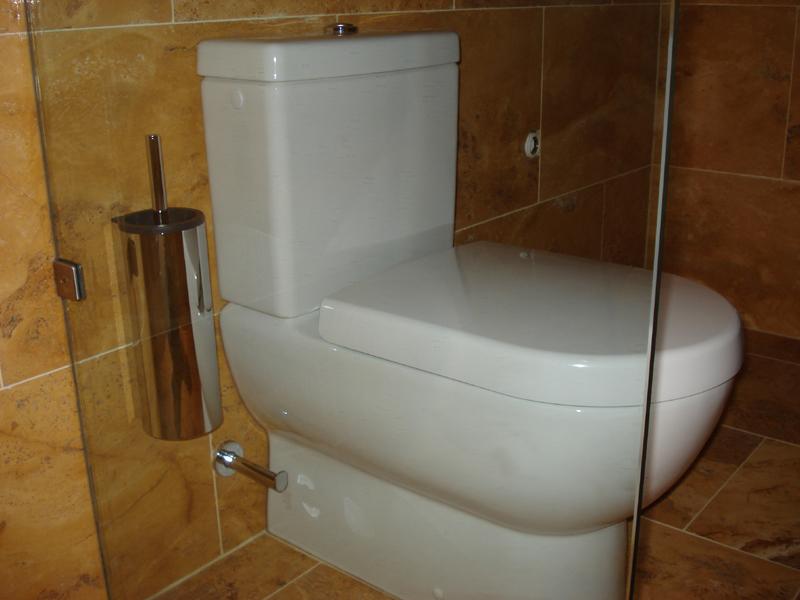
Next job was to start fitting all the furniture and fixtures. Toilet pan and cistern went in first, straight-forward enough, but they needed attaching together first before positioning having marked the mount positions and then drilled and fixed them. The problem with the final fit is that together, the pan and cistern were VERY heavy. Travertine stone is very soft and I did make a small scratch as I pushed the pan back to the wall onto the Vario Drain Bend waste pipe. It is only noticeable to me, but annoying all the same. If I were to do it again I would put some tough plastic sheet down to slide the pan over, then remove it after the pan is in its final position.
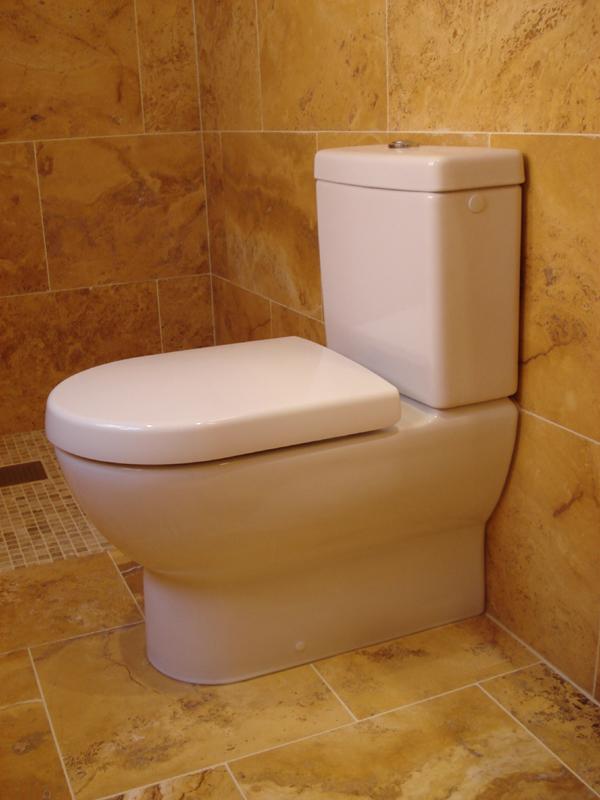 Cistern ‘innards’ were fitted and the push flush button and lid, together with soft close seat and lid. I ran a bead of clear Dow Corning 785 silicone around the pan base, which finished it off nicely. Then the shower panel was to be fitted. Once again, a bloody heavy piece of kit which requires 2, but I did it by myself, sliding it across the floor on cardboard. Trial fit first to mark the mount positions on the wall for height, then remove, drill and fit panel mounts; 2 on the wall and one on the floor. Reposition glass panel and fix. The 785 was then run around both sides of the panel (the fixings allowing for the panel to be set a couple of mm away from the wall and floor, which I did with plastic packing shims, which were removed once the panel clamps were tightened). This meant the silicone beads were ‘in’ the gap as opposed to just sitting on the panel/ wall surfaces, creating a neater finish. Whilst on the subject you cannot beat a thin bead that is then smoothed with a finger dipped in washing up liquid/H2O mix! I say thin bead, because if you put too much on you will need to keep removing your finger and the excess and it will also ‘spread’ across the joint surfaces.
Shower mixer ‘disk’ and handle were fitted and then corner wire baskets, towel loop, toilet brush holder, toilet roll holder, spare toilet roll holder, robe hook and soap dispenser. Main thing is to mark carefully, check and re-check. Use a small level to ensure everything is true and the drill. My tip, if the fixing requires more than one screw, mark and drill ONE hole, fix and then mark the other hole(s) as drilling them both at the same time and fitting plugs can amplify any small errors with each hole. A decent (sharp) masonry bit, with the drill on a slow speed and NO hammer action works well. Be sure to let the drill do the work and don’t put all your body weight behind the drill!
The bathroom cabinet was fitted, the most helpful thing being a sketch I did of the walls before the boards went up, which I could refer to showing where all the battens and plumbing/ electrical wiring were. I had positioned battens so that the cabinet mountings would be screwed directly into wood battens as opposed to just plugged and screwed into tile/ Wedi board.

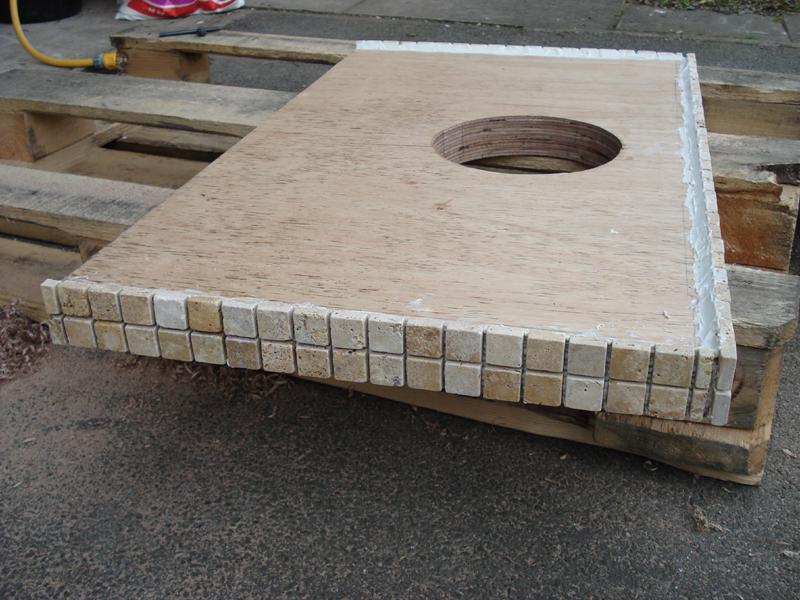
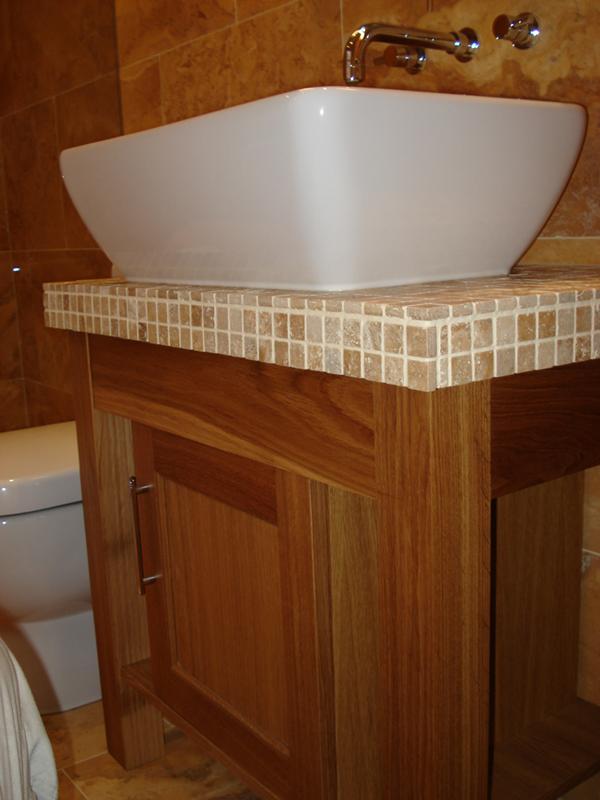
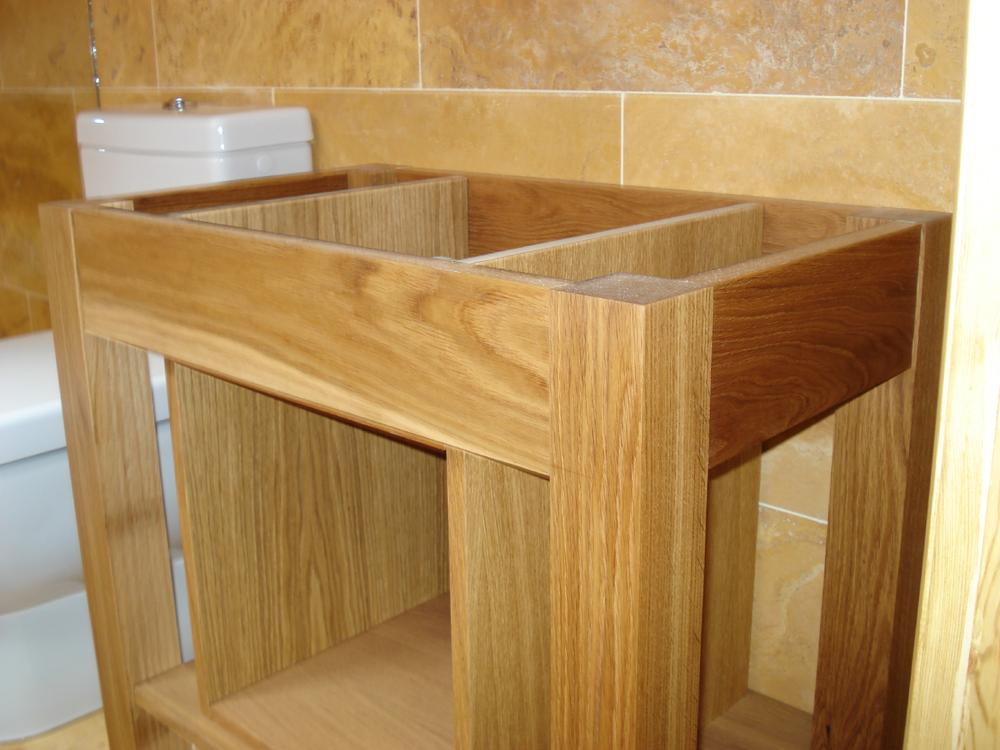 The oak washstand, which I had made, now presented a problem. It needed a top, which I had planned to be a piece of cut stone, the same as the wall tiles, but I could not find a supplier. I looked at alternatives including an oak top, a contrasting stone top and so on, but none really did it for me. I decided that the best option would be a top that was tiled in the same mosaics as the shower floor area. I used some of the left over mosaics to design the top with a depth of 2 mosaics. This could be done in a few different ways, I elected to make it very solid by cutting four pieces of WBP ply to size and then gluing them and clamping them together to get an overall thickness of 48mm. An alternative would be one piece with a pelmet. I like the heaviness that my method has produced; a very solid top to sit my basin on! The ply was primed on the back and then the mosaics fixed using Bal Mosaic Fix and finished with Bal Microcolour Champagne grout (as was the shower floor). 2 coats of Sealers’ Choice Gold stone sealer was applied and then the top was fixed to the washstand.
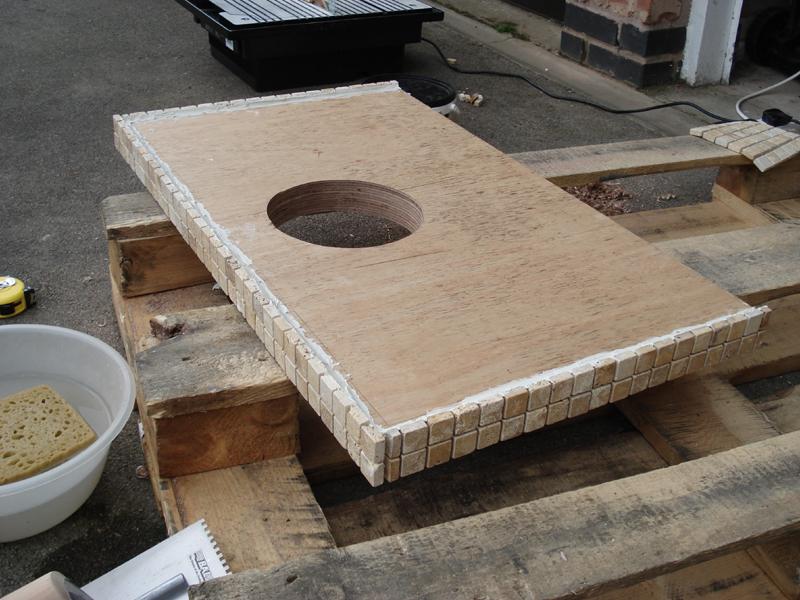
The basin was trial fitted and I found that my thick base meant that the three mounting ‘hooked’ bolts were not long enough. This required me to fabricate longer ones using a length of studding. I marked the position of the front corners with masking tape so that I could position the basin in one go (with silicone on its underside) to prevent having to drag it across the surface into position. The waste inlet and adapter were fitted to the basin and then it was siliconed into position, tightened into place with the fabricated bolts from the underside. The Geberit chrome finish waste trap was fitted (incorrectly at first with a washer in the wrong place – no diagram or instructions for us DIYers) and my positioning of the basin on the worktop required me to lengthen the waste trap outlet pipe to reach the wall mounted spigot! My positioning wasn’t in error; I wanted to be able to lean over the basin and splash my face when shaving without banging my head on the cabinet and without the water running over the front edge of the basin, hence I positioned the basin towards the front edge of the washstand top. Don’t know how the pros do it; I get the ergonomics aren’t that much of an issue and they just fit things as the diagrams show. Maybe because it is a Keuco cabinet, Villeroy & Boch basin with a Geberit waste means not everything was designed to function together correctly?! A bead of 785 around the basin base finished off the installation neatly.

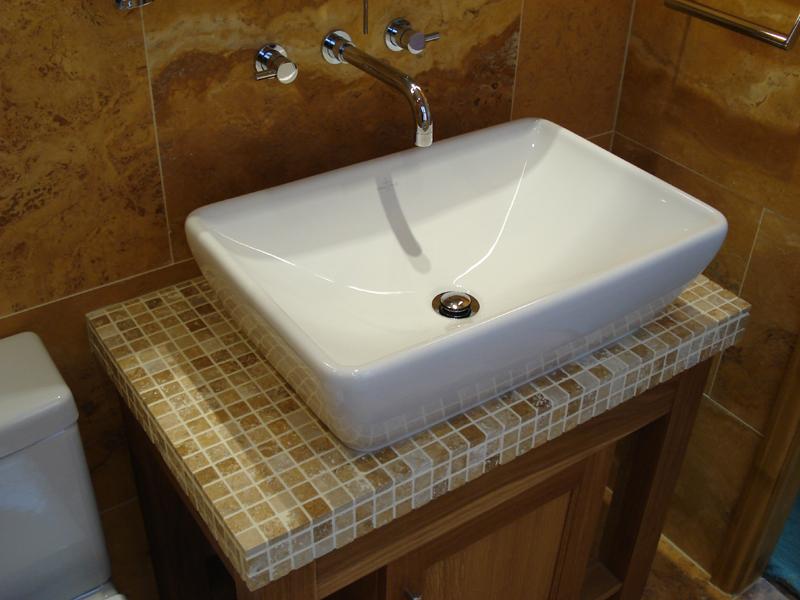


The Cifial waterspout tap proved a little more difficult than planned. The spout was pushed into the mount, which has two rubber sealing rings within. The grub screw was tightened from underneath to prevent the spout firing out of the mount under mains pressure! I must have been over zealous with my Allen key though as when I turned the tap on the spout squirted a fine jet of water out between the bottom of the mount and the spout! I think I had ‘flat spotted’ the spout thus preventing a seal. Removal and re-fitment with silicone applied should sort the problem. Failing that I will have to remove and then shorten the spout ½” and then refit, but I want to avoid that if I can as the ‘reach’ on the spout is perfect at the moment.
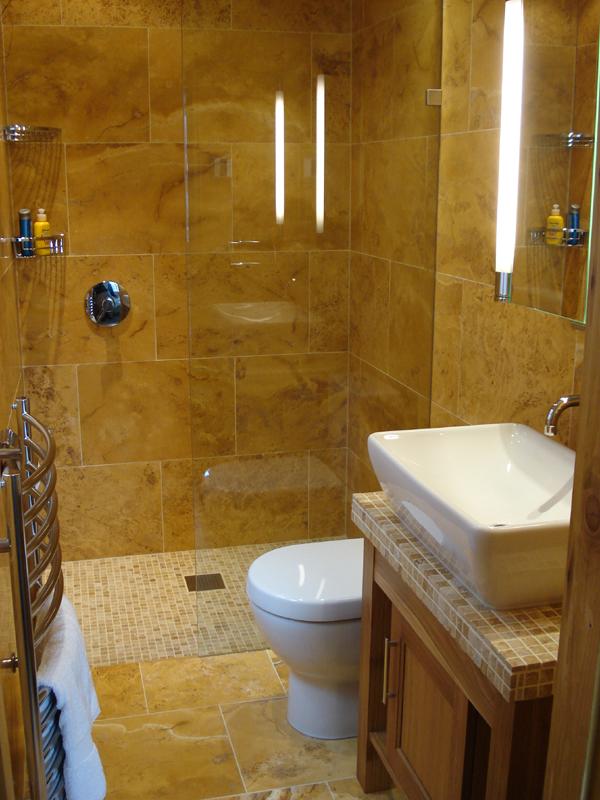
And that is just about it really. Just awaiting a door which is being made (together with doors for the rest of the upstairs rooms) and new door and window furniture from the Frank Allart range (not cheap, but good quality). The project seems to have taken forever, mainly because it has been a learning process, has needed as much research as labour, I have worked full time on a variable shift pattern and my summers are spent pretty much ‘at work’, with the winter being the easier time to get jobs done. I am very proud of the finish, as the effort expended has yielded the result I wanted. The rest of the house now looks like a ruin, so time to start on the main bathroom!
It has not been ‘easy’, but if you do your homework and plan everything very carefully it is not beyond the DIYer, but you do need a fair selection of tools and deep pockets; wet rooms done properly are not cheap. I have been told that a room of that quality would cost me about £15k for the work I have done. I haven’t added up all my receipts yet, but I think it is getting on for £8-9k that I have spent. Some neighbours have had quotes for their two bathrooms that have come in at around £24k, and that’s not even to make them into wet-rooms, just to fit quality gear! I am very happy with the outcome, but I don’t think it will add the money spent on it to the value of my property, but it was never done for that reason, merely to make my living space the best I could make it. Would I do anything differently? Not really, but I think going and getting some quality training in the skills of plumbing and tiling would make it much easier. Oh, and I would get a power mitre saw to do all that floor strengthening!
PilotPete 2007/05/24 23:56