Best solution to a new ceiling?

Joined
2 Mar 2011
Messages
7
Reaction score
0
Location
Devon
Country
United Kingdom
Hello all!

I am rather new to this forum, although I have lurked and used many threads to help me in my DIY-ing. At the moment I am trying to get the ceiling done in my living room and am wondering what the best (quickest and cheapest hopefully) way of getting this sorted would be.

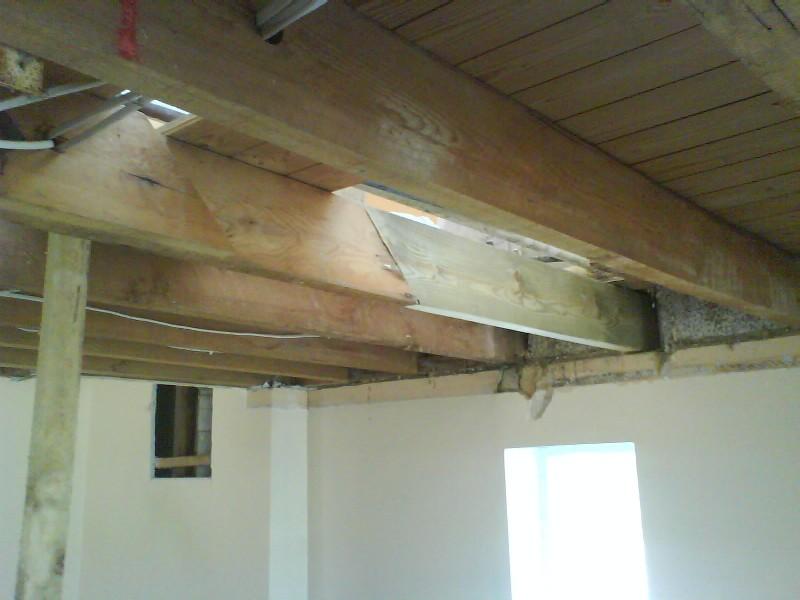
This was all covered over with those polestyrine tiles, no surprise. The story is something along the lines of "the bath fell through".

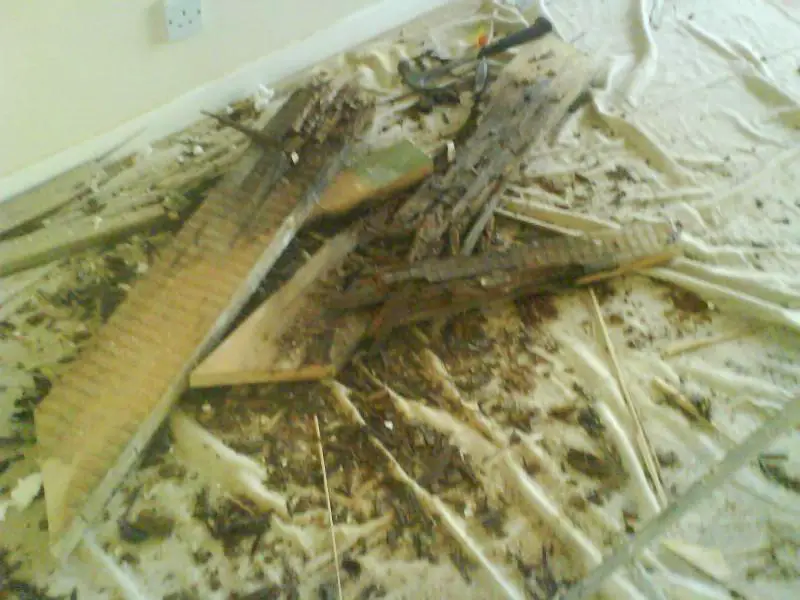
There are some bits that are warped - I think that this will just be knocked down so that the new boards sit straight.

Also there is a corner (see below pic) at the edge of the ceiling, how would I go about getting this to look flush if I put up new board?

imag0181z.jpg

imag0183h.jpg

imag0182.jpg


All advice appreciated, and there'll be more where this little project came from!

Cheers.
 
Sponsored Links
just over board the whole ceilin, bring the boards flush with the corner then before you skim fit a 3mm skim angle bead, then you can plaster the ceilin and either feather out the bead on the return or easy fill the bead on the return.
does this make sense?
 
just over board the whole ceilin, bring the boards flush with the corner then before you skim fit a 3mm skim angle bead, then you can plaster the ceilin and either feather out the bead on the return or easy fill the bead on the return.
does this make sense?

I'd agree with that JR,, best way to do it.
 
just over board the whole ceilin, bring the boards flush with the corner then before you skim fit a 3mm skim angle bead, then you can plaster the ceilin and either feather out the bead on the return or easy fill the bead on the return.
does this make sense?

I should have mentioned I'm not a plasterer. There are too many technical terms I'm not used to there. Elaborate if you can? I do get the main idea though, and was thinking along the same lines.

Cheers.
 
Sponsored Links
Existing 9mm plasterboard was spongy throughout, so I took the lot down. Did the same in kitchen. This exposed joists allowing repair but also enabled me to add sockets and install central heating.

Used a prop to hold new 12.5mm plasterboard in place while fixing. Used tape-and-fill on joints plus a coat of drywall primer followed by coat of emulsion. You don't HAVE to skim.

 
There is the option. Try tape-and-fill yourself. Skim if not happy.

As a novice, I used ordinary Easi-fill rather than quick-setting Easi-fill 45. I chose paper tape rather than webbing as it's supposed to be stronger.
 
I agree with your thinking on the paper tape AJ,, it is much stronger for taping.
 
being a plasterer im afraid i will always stand by a skim will give you a better finish, but as i said i spose thats because im a plasterer.
OP locate the joists in the ceilin and mark on the wall then get a chaulk line and a friend stand at either end of the room line up and ping the line, you now have a map of where your joists are.
to find yours joists without makeing a mess buy a stud locator or use an old screwdriver and a hammer, from the corner of the room try to find the first one by just punching the screwdriver through the ceilin, then once you have one measure 400 centres and your nex one should be somewhere round there use the screwdriver and hammer to help find them, make sure you mark them as you go.
meausre and work out the area of the ceilin then divide it by 3 if youve done it in meters or 32 if youve done it in feet, this will give you the amount of plasterboards you need alow one or 2 more just to be safe (better to be safe than sorry). you will want 12.5mm boards 8ft by 4ft.

when your boarding youll proberly want a mate to help you, when you get to the edge (corner) just measure the board tight to the edge and screw into place, once the boards are up measure the length of the external corner you have just made and buy a 3mm skim angle bead.
http://cgi.ebay.co.uk/ws/eBayISAPI.dll?VISuperSize&item=230513124972
theres a link.
you can put this up with either a staple gun, small nails or some plaster which ever you prefer.
then (if your goin to plaster which i would but thats just me) you need.
some skirm (joint tape) to put over the joints then have the ceilin plasterd.

you will then have the other side of the bead that you have put on the corner (on the up standing side) showing still with this you can either put some PVA onto the wall bout 400 to 500mm strip from the bead up and plaster this feathering down the raw edge to blend it in or as a diyer you can apply easy fill over the area over 2 coats sanding back to make it blend in perfectly, if you do the easy fill make sure you buy the bagged un-mixed stuff its much better to use and does not shrink as much as the premixed stuff, if you buy premixed you could be refilling several more times than you should be due to the exsesive shrinkage.

i hope thats made more sense for ya took flipping ages to type that, let us know how it goes or if you have any more questions you know where to come. ;) good luck
 
Links in this post may contain affiliate links for which DIYnot may be compensated.
Thank you for the replies, I now have somewhere to start from!

I'll measure up and head off to get the materials soon. I will post progress pictures, and probably more questions while WIP'ing it up.

Cheers.
 
haha i know you are RC was just trying to get it skimmed rather than tape and jointed haha, the way i see it is anything thats tape and jointed is work that a plasterer does not get haha
 
haha i know you are RC was just trying to get it skimmed rather than tape and jointed haha, the way i see it is anything thats tape and jointed is work that a plasterer does not get haha

You will get the work, just in about 5 years when the tape peels. The paper tape ALWAYS peels eventually and the external corner beads will get knocked and when the metal starts ripping it will never stop and you can not repair it without removal. Then I think that most people will get a plasterer in rather than spend a few days sanding the finest powder know to man into their home.

Skimming is easier than tape and join.
 
Skimming is easier than tape and join.
Do you have to tape joins before skim?

Pros and cons for DIYer:
  • good skim is nice and flat without sanding
    bad skim cannot be sanded
    skim is harder than PB surface (important for walls)
    I've read that skim is one of the easier plastering techniques
    tape-and-fill allows you to 'fiddle and fix' until you are happy
    tape-and-fill needs sanding so makes mess
    tape-and-fill is ready for decorating in 24 hours
 
You apply self adhesive fibre glass scrim tape to the joins, the same stuff that should be used in the tapers on TE board.

If you arn't happy with the finish on skim you can just pva it and have another crack at it (as I have done)

An average ceiling will take 3 hours to plaster and the materials cost about £6

I am not a plasterer but I can skim and picked it up quickly, I would urge anyone to have a go if you are quite handy. Skimming on plasterboards is the easiers form of plastering in my opinion, when other backgrounds and different undercoats comes into play then knowlegde, ability and a shed load of experience are required. There is nothing more satisfying that admiring a freshly skimmed room that you have done yourself.
 

DIYnot Local

Staff member

If you need to find a tradesperson to get your job done, please try our local search below, or if you are doing it yourself you can find suppliers local to you.

Select the supplier or trade you require, enter your location to begin your search.


Are you a trade or supplier? You can create your listing free at DIYnot Local

 
Sponsored Links
Back
Top