Floor Is Sinking Under Toilet, Help please.

Joined
15 Oct 2013
Messages
78
Reaction score
2
Location
Manchester
Country
United Kingdom
Hi everyone.

I think one of our upstairs toilet floors is sinking :(

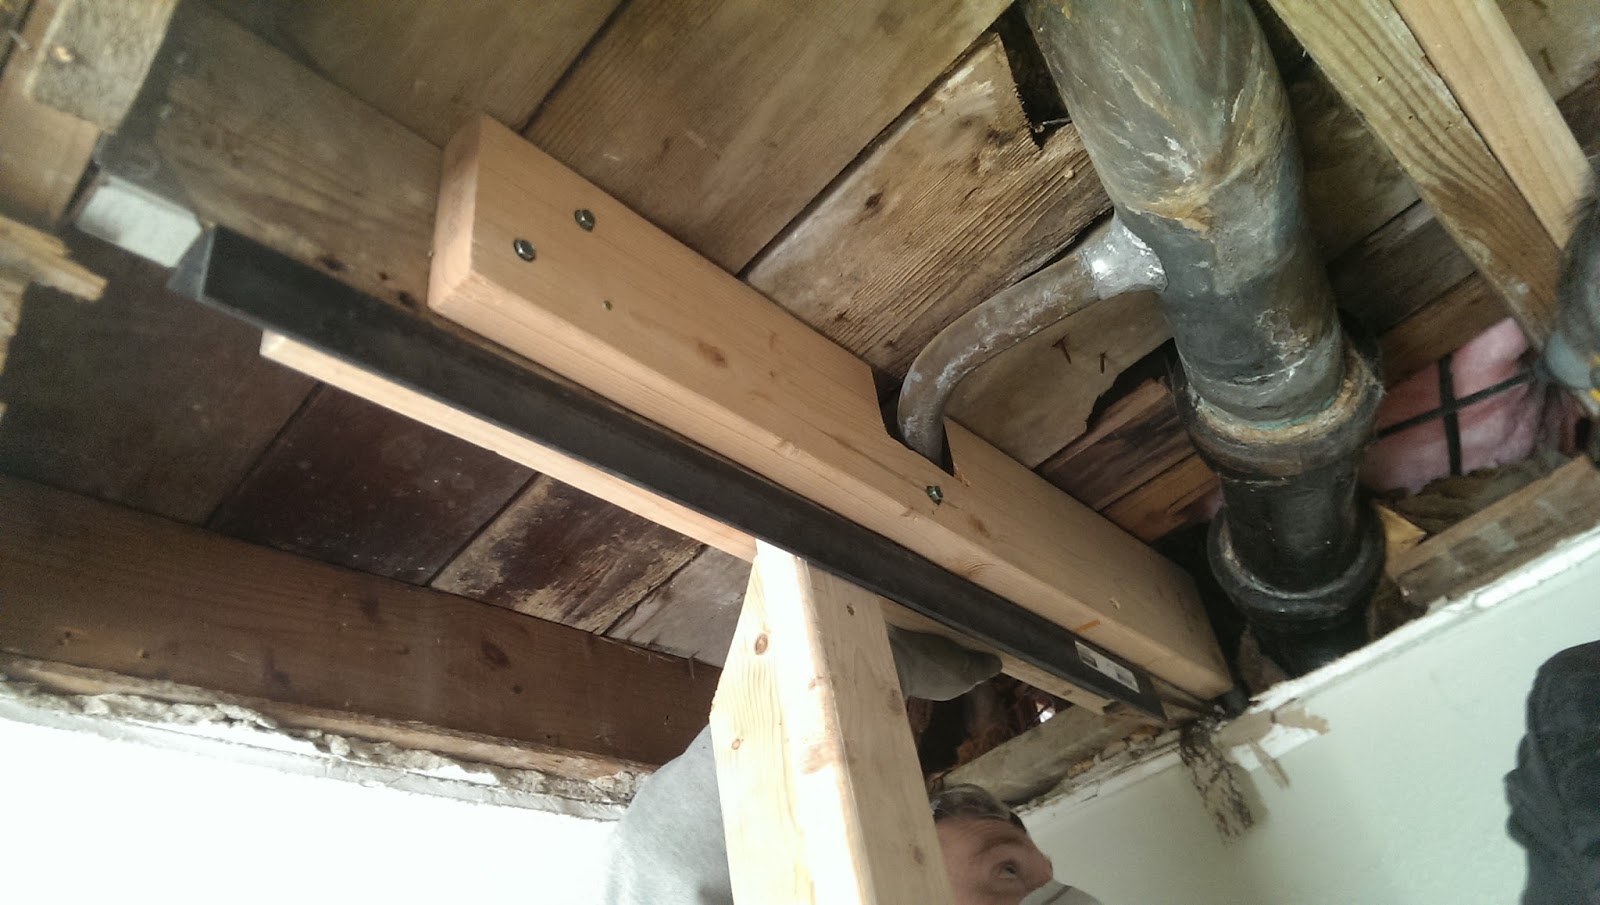
We have three toilets in our house (luckily now), and our children's bathroom floor is sinking slightly (I think) underneath the toilet.

You can see this here:

52ncqe.jpg


The above pic is with the bowl pushed firmly back so that the tank is firmly against the wall, as the tank has now started to be pulled away from the wall:

11jr768.jpg


It looks like the floor underneath has sunk slightly doesn't it?

I am hoping to do this, and fix it myself, because history (recent history as well) tells me that getting a tradesman to do anything these days is a serious can of worms (I have been waiting for a roof valley fix for almost a month, but that's another story).

So this is what I am thinking:

1) I turn the water off, and remove the toilet - should be straight forward.

2) I then rip up all the laminate (as it will need replacing anyway), and then see what type of damage there is; which HOPEFULLY, is just on the subfloor (terminology I have learned through research, I am no expert by any means!).

3) Cut section of the rotten subfloor away, and HOPEFULLY no damage to joists underneath.

4) Clean joists and treat them anyway, and if any damage I will look at sistering them - again terminology I have learned - with another joist (hopefully don't have to do that, and it is just the subfloor that is damaged).

5) Then I buy a sheet of thick marine plywood (same thickness as what is being cut away - maybe 25mm), and fill the gap, and screw it all back down.

6) Refit toilet, bolt it down, fix any leaks around bowl connected to waste pipe (where the leak has been gradually dripping from , but only really noticed it a few weeks ago).

7) Re-laminate floor, and fit new bath surround, as that will need ripping off as well to remove the laminate.

Am I on the right track? If not, then I would appreciate any advice you can give.

Thank you in advance.

Steven
 
Sponsored Links
almost typical off wet chipboard letting go but could be many things
how old is the building
what is the floor made off
does the floor bounce at all in that area
 
almost typical off wet chipboard letting go but could be many things
how old is the building
what is the floor made off
does the floor bounce at all in that area

Thanks for the reply.

House is around 1945 approx, this is it:


This is the front bathroom with the toilet here:

2442jwl.jpg


I wouldn't say the floors are bouncy, and I have not pulled the laminates up yet, but I suspect it is just boarded out.

If it is just the board have let go due to moisture, it is something I should be able to fix based on my first post plan?
 
what you show doesnt prove anythin. get a level on the floor an across the wc bowl rim.
as above, get your weight into that corner an look for sinking or bounce.
any staining on the ceilin below?

i dont see any fixings at the base of the wc bowl fixing the bowl to the floor?
was the cistern screwed to the wall or only siliconed to the tile?
the only soil stack i can see is left rear - where is the SVP for the wc in the pic?
i can see an overflow pipe from the cistern - its in two different materials. so i guess thats the external side wall?
check the level of water in the cistern when it finishes refillin.
 
Sponsored Links
what you show doesnt prove anythin. get a level on the floor an across the wc bowl rim.
as above, get your weight into that corner an look for sinking or bounce.
any staining on the ceilin below?

i dont see any fixings at the base of the wc bowl fixing the bowl to the floor?
was the cistern screwed to the wall or only siliconed to the tile?
the only soil stack i can see is left rear - where is the SVP for the wc in the pic?
i can see an overflow pipe from the cistern - its in two different materials. so i guess thats the external side wall?
check the level of water in the cistern when it finishes refillin.

Thanks for the reply.

I'll get a level sorted tomorrow when I start the work.

The cistern was indeed screwed to the wall, but the movement, over time has pulled the screws out, and now it is loose.

The base of the bowl is now loose, and it was (still is) bolted down but the bolts are loose, rusted and not holding anymore, and the lamite is lifting/peeling upwards, so it has definitely had a gradual water damage, which is coming from the bowl/waste connection it seems:

5y52mw.jpg


Here is a picture from behind:

mj4f1f.jpg


And a front view:

35mi25d.jpg


I have stood all around it and bounced, and it does not move that much, but that could maybe be the laminate holding it in place, plus the fact that the boards underneath and currently dry, then get wet, then central heating dries them again, so over time it is a gradual gradient being created?

Plus the gap at the bottom of the tile area on the back wall and next to the bowl looks consistent with a gradient that has happened over time.

Its only when I push the bowl right back does the cistern go flat against the wall in it's original position, and then there is almost an inch gap at the front of the bowl, until I stop pushing it back, and it goes almost flat, but with the cistern almost hanging off the wall, some something has definitely dropped.

Everything used to be flush, the bowl, and the cistern was screwed in tight against the wall. It is only the last few months that has moved, well only the last week we noticed it, as we don't use the bath much, as we have a shower in another room (en suite), so we would not notice the gap, or gradual movement, only that the toilet did feel loose.

Yes it is the external outside wall that the overflow connects to.
 
Last edited:
OK. isolate the wc an flush then sponge out the cistern and bowl. remove or cut the cistern wall screws.
slip a hacksaw blade under the bowl to cut the floor screws if they wont lift out with the fixture.
remove the WC out ofthe room or onto a blanket in the bath.
if its to heavy then split it into bowl an cistern.
the two old wc connectors an piece of black soil pipe can be binned - replace with a new wc connector an say a floplast 250mm extension piece cut to suit.

remove skirtin from bath panel but leave bath panel alone. new floorin can be run under the skirtin.
if you have a circular saw set it at laminate thickness plus 3mm an rip a couple of lengths of laminate.
or if no saw then split a board with a chisel, lift it out an the rest will follow - careful if boards go under the tile.

then come back with pics of what youve got.
 
Lol, the plumber has probably notched the bath waste through the joists and carefully (saw and hammer) smashed 3/4 of the joist away, leaving the ceiling and the chipboard to hold the floor up.

Don't sneeze on the loo.:p
 
Lol, the plumber has probably notched the bath waste through the joists and carefully (saw and hammer) smashed 3/4 of the joist away, leaving the ceiling and the chipboard to hold the floor up.

Don't sneeze on the loo.:p

Well, it's lasted 15 years until now, but let's hope not, eh! We'll soon find out. :unsure:
 
Last edited:
I have taken the cistern and bowl out, etc. and removed the whole bath panel, and because as I suspected the previous bathroom fitter has laminated right under the bath, so I will have to rip all the laminate up tomorrow:

15hh3xj.jpg


Although why they would tile over the laminate is beyond me, so that will be a delicate operation when I get to that bit.
 
Hopefully you have a thick laminate underlay that’s failed.
 
Hopefully you have a thick laminate underlay that’s failed.
Thanks Ian, that's what I am hoping as well. Under the bath where there is no laminiate, I can see that thick green underlay has been using, so it could be that under the rest that has just become sodden.

I'll know later today when I have taken it up hopefully.
 
Hi everyone, OK, I have pulled the laminate up, the underlay and the floor boards.

There was a bit of white mold on the plasterboard ceiling, which just brushed off easily enough, and on initial inspection the joists did not look too bad, and fixable, although there does appear to have been some wood worm at some stage on the joists at the top of the joists.

I stood on them and apart from maybe an inch at the top, then all feel sound, but please take a look for yourself and see what you think:

33xzi2f.jpg

erfywi.jpg


2vvox8l.jpg


3468fi1.jpg


k4jwq0.jpg


2vmenq1.jpg

2uyltab.jpg


Please be kind with what you think.

I am thinking:

1) Cut all the bad top bits off, and build them up with glued plywood, or marine ply.

2) Spray everywhere multiple times with: https://www.amazon.co.uk/Everbuild-LJUN05-Lumberjack-Triple-Treatment/dp/B006SZXN1E/ to make sure everything that moves is neutralised.

3) Maybe sister those two joists with another joist right up to the corners, and then add corner support like this:

simpson_huc210-2.jpg


Sistering like this:

IMAG2907.jpg


4) And maybe some cross noggin supports between them all.

I am no expert by any means, but I would genuinely like some supportive advice from those that know if possible.

The upstairs of the house is like a bomb site at the moment, so I could do with getting what needs doing sooner rather than later to keep the missus off my back.

Thank you :notworthy:
 
Last edited:

DIYnot Local

Staff member

If you need to find a tradesperson to get your job done, please try our local search below, or if you are doing it yourself you can find suppliers local to you.

Select the supplier or trade you require, enter your location to begin your search.


Are you a trade or supplier? You can create your listing free at DIYnot Local

 
Sponsored Links
Back
Top