Hanging magnetic board on concrete wall

Joined
11 Jan 2009
Messages
1,049
Reaction score
5
Country
United Kingdom
Hi

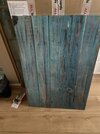
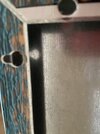
Never put one of these up before. Positioning the board against the wall with a spirit level and marking corners is easy bit. However, you then have to ensure screw holes in right place and level. (Also taking slight drop in board when fitted to screw)

How would you tackle the job?

Thanks


Thanks
 

Attachments

  • IMG_4686.jpeg
    IMG_4686.jpeg
    288.6 KB · Views: 28
  • IMG_4687.jpeg
    IMG_4687.jpeg
    227.5 KB · Views: 28
  • IMG_4689.jpeg
    IMG_4689.jpeg
    298.7 KB · Views: 27
Sponsored Links
Masking tape all the way along. Push pencil through holes.
Now pull masking tape off and stick to wall.
Drill through the holes you have made in the tape.

I use low tack masking like masq purple.
If you have a higher tac masking tape stick it to carpet or a t shirt or something and pull off. The fibers will stick to masking tape and create a much lower tac masking tape that won't pull off or damage paint.

When the screws are in knock with a hammer to fine adjust. Basically bend a bit
 
Hi

Thanks for this. V ingenious. However, would I need to apply the making tape equally to cover the bottom two screws? Also, how would you ensure level line when sticking tape to wall?
 
Sponsored Links
I use blu tack; dob on the wall roughly roughly where it needs to be to catch the screw holes, level up and press the pic against the wall leaving an impression of the screw holes in the blu tack, then take the picture away and you can poke through the impression to dent the wall, take away the tack and fit the screws where the dents are

Wetting the blu tack surface will help stop the picture sticking to it but it will only need a light pressure to make an impression
 
Spirit of level.
Pencil marks
Masking along pencil marks so its level.

Other way is lay spirit level on the holes and mark the spirit level.
Then hold spirit level against wall and mark the wall
 
All you need to do is make a small pencil mark at the top and one edge.

Then put a screw in to one of the fittings and measure down from the top of the frame. Take that measurement and measure down from your first pencil line. Now use a spirit level to mark the height at which you will drill.

Left to right- measure from the other (vertical) pencil mark to the centre of the fixing hole, mark it, and then measure the distance to the centre of the next hole.

It really isn't difficult.

As per @Wayners post if you are out by a couple of mm, you can hit the head of the screw slightly (up/down/left/right).

It may take you a while to workout how far to leave the screws projecting out of the wall though.
Thanks. I wondered how long it would take for the first sideswipe, lecture.
 
It may take you a while to workout how far to leave the screws projecting out of the wall though.
Fit all 4 screws to the wall somewhere near right. Take a fifth screw and put it into a hole in the painting as it would be in service. Grip it with your fingers as if your fingers were the wall and the. remove the screw from the painting. It is now sticking out of your fingers as much as the others need to stick out of the wall. Wind them til they are thus, offering up the fifth screw to check; when its head is touching the wall, your finger nails/tips will be aligned with the head of the screw that is in the wall. You're essentially using the fifth screw as a simple ruler/depth probe
 
Thanks. I wondered how long it would take for the first sideswipe, lecture.

I wan't attempting to be condescending. When I said it really isn't difficult I was trying to reassure you. My response may well have been lengthy but I was trying to explain the process in detail.

Most other tradesmen that I work with use the same technique.
 
I really do apologise if I came across as condescending, it really wasn't intentional. If you look through my previous posts, I hope that I don't come across as being one of those "kind of people" that insist that there is only one way to skin the proverbial cat.

I post here because other contributors helped me previously, and I feel honour bound to help others.
 
Hi

No probs. I understand and appreciate your explanation. If we go any further, you’ll have me wanting to apologise.

Many thanks
 

DIYnot Local

Staff member

If you need to find a tradesperson to get your job done, please try our local search below, or if you are doing it yourself you can find suppliers local to you.

Select the supplier or trade you require, enter your location to begin your search.


Are you a trade or supplier? You can create your listing free at DIYnot Local

 
Sponsored Links
Back
Top