- Joined
- 26 Nov 2015
- Messages
- 7
- Reaction score
- 0
- Country

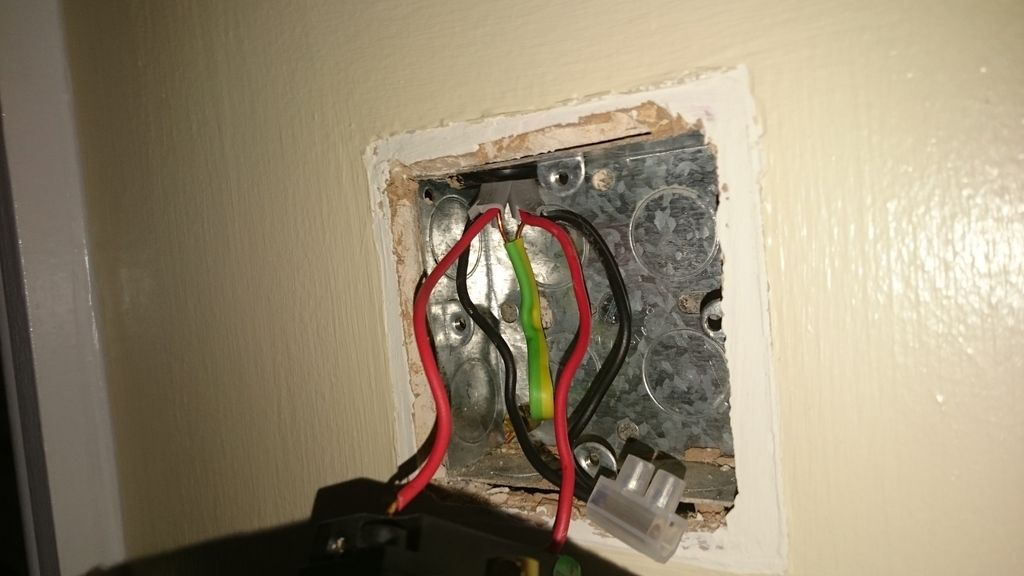
Hello,
I'm having a bit of a problem in fitting a dimmer switch and would very much appreciate some guidance.
In my lounge I have 2 ceiling lights which are controlled by a single on/off switch on one wall - there are no other switches in the lounge (or elsewhere) that controls these lights.
The house is circa 1993 and there is a steel-box in the plaster wall where the light switch is mounted.
When I open the light switch box, I see that there is the following:
1 - an Earth wire, yellow/green, that is terminated onto the steel box via a brass screw.
2 - a grey, 2-core cable, with black and red wire inside it.
3 - ANOTHER grey, 2-core cable, also with black and red wire inside it.
The wiring to the on/off switch is as follows:
- BOTH of the black wires from the 2 grey cables are joined and in a connector block, they are not wired into any part of the on/off switch.
- BOTH of the RED wires from the 2 grey cables are connected to the on/off switch connection points.
So, now I am trying to fit a 400w"2-way dimmer". This has the standard 3 connection points 'Common', 'L1' and 'L2'.
I have tried what I thought would be the logical way to connect this dimmer, and then every other way that I could think of, and nothing works! To make matters worse, now I cannot seem to connect the two red wire back correctly either.
What am I doing wrong?!?