How do I replace my blinking thermostatic shower cartridge?

Joined
29 Nov 2013
Messages
4
Reaction score
0
Location
London
Country
United Kingdom
Hi,
The thermostatic cartridge / valve on my concealed shower unit seized and it needs replacing, I had a go and then got disastrously stuck... any hints on what to do would be great!
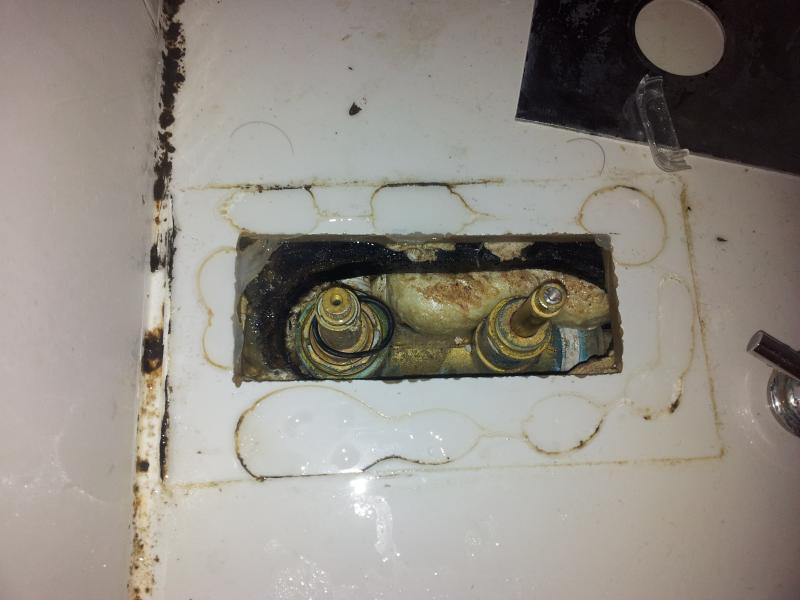
Basically, I couldn't work out how to remove the cartridge from the unit, I got as far as picture 1 shows, I'm replacing the valve on the left.
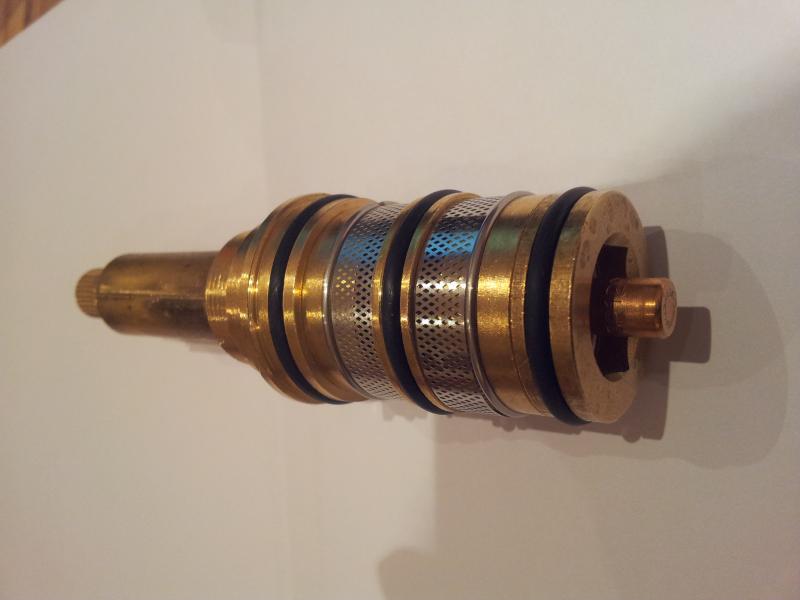
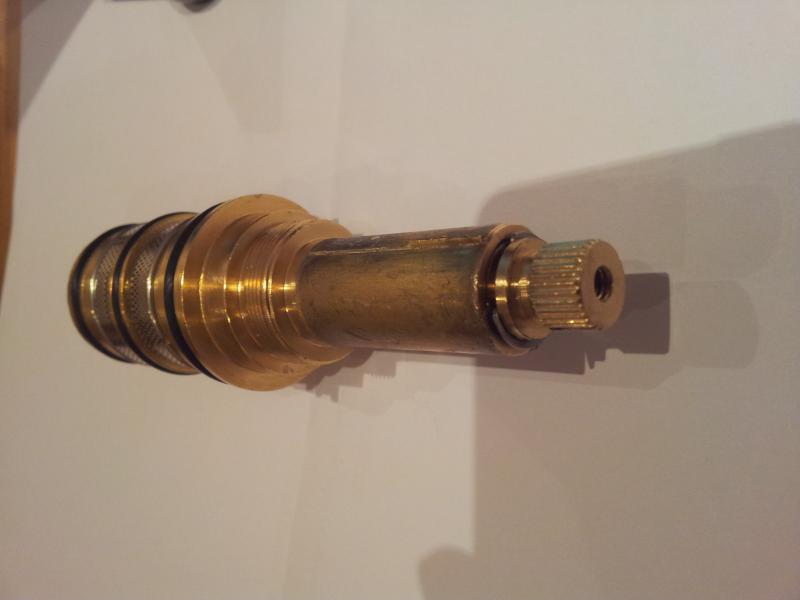
I have the replacement cartridge, shown in pictures 2 and 3.
Any advice with regards how I get the old one out and then stick the new one in and set the temperature correctly would be very much appreciated.
Thanks!
P.s. I did ask for some instructions from the shower supplier (Pura) when I ordered the new valve but the instructions appear to be for a different valve and give details for how to disassemble the valve itself rather than how to fit it.
 
Sponsored Links
Looks like a case of getting grips onto the outer casing of the shaft and pulling like bu**ery. Refitting is a smear of vaseline on the 0-rings and a gently push.
 
Just yank it out, i wouldn't use Vaseline though, as it will cause the o-rings to deteriorate pretty quickly.

Please strip the silicone before all that though :mrgreen:
 
I would have thought there must be some kind of retaining ring/circlip/nut holding the whole thing in the assembly or have you removed that already? Plus what fits to the threaded part shown on the new cartridge?

Brute force won't be any good until you are sure there isn't anything else holding it in. For sure it will probably be tough especially if it's well scaled up.
 
Sponsored Links
Thanks for you help. I'm not sure just pulling will remove it, as I haven't actually removed anything that is keeping it in place really, just the chrome cross head taps and a decorative chrome cylindrical thing. I could well be wrong though.
To get the valves to that state I only removed the cross head taps from the top, the chrome cylindrical thing that goes between the cross head tap and the face plate and removed the face plate.
I think the screw thread on the replacement valve is where the chrome cylindrical thing that is between the actual cross head tap part and the face plate goes.
Thanks again
 
I would assume the thread on the thermostat unit is what holds all the components together - filters, brass waterways, o-rings etc?
I would also guess that there is a locking nut that screws into the body of the valve, as KB mentions, to hold it in.
In your 1st picture I presume the thermostat is the one on the right? Looks like there are 2 flat edges on the bronze at the outside edge of the body. I would think that getting an adjustable onto that would then allow you to unscrew the locking/retaining nut that holds the thermostat in.
I would also suggest that you use silicone grease on the O-Rings, anything petroleum based can rot the rubber that the seals are made out of IMHO.
 
Thanks for your answer.
I'm pretty sure the thread on the thermostat unit is for the chrome decorative thing, that is visible once everything is fitted, to screw on to. Both ends of the screw thread are visible, if you know what I mean, the thread doesn't dissappear into the thermostatic valve itself. I have just attached another image of the valve, in case you can zoom in enough to see what I mean.
This link is very similar to the thermostatic unit http://www.purabathrooms.com/product/index.php?q2=XL222

The thermostatic valve is the one on the left, but I think you may be right, there does appear to be some sort of hexagonal locking nut, which may be keeping the thermostatic unit in place.

Thanks again!
 
Yep, looks like the hex nut lands onto the flange face just to the right of the first o-ring, so, undo nut then pull.

No disrespect, but it looks like your shower cleaning programme could do with revising. There have been questions asked in the past on how to stop black mould in a shower. There is only one answer - dry it out after use and leave the door slightly open for ventilation.
 
Thanks, I think you are right, will have a go this evening!

The shower is in a flat I let out, the tenants don't seem to be the best for following simple instructions when it comes to ventilation...

Does anyone know what the repercussions are on not rubbing silicone grease on the o rings is?
 
Thanks, I think you are right, will have a go this evening!

The shower is in a flat I let out, the tenants don't seem to be the best for following simple instructions when it comes to ventilation...

Does anyone know what the repercussions are on not rubbing silicone grease on the o rings is?

Imagine putting mr winky into a very dry mrs foofoo,not good.
 
.....the tenants don't seem to be the best for following simple instructions when it comes to ventilation...
Wrong/cheap silicone and badly done job will be a bigger factor.

If you are renting this place out then you should not be causing the tenants to be without a shower for any length of time, for you to figure out how to maintain let properties.

You should either phone a plumber or contact your insurance, ridiculous.
 
The way to remove the thermostatic valve is to 1. remove the 1.25 inch retaining nut, then 2. pull out the valve. There is the combined resistance of 3 rubber O-rings to overcome. So ... pull out the valve as follows: clamp a mole wrench to the outer stem, and use the claw of a hammer between the wall (care not to damage tiles) and the mole wrench, to gently prise the valve outwards. On reassembly, be sure to use silicon grease on the O-rings before you insert the valve into its receptacle.
 
I realise that of course, but other people may have the same problem all these years on! Thread is up and running, so it's still being viewed .
 

DIYnot Local

Staff member

If you need to find a tradesperson to get your job done, please try our local search below, or if you are doing it yourself you can find suppliers local to you.

Select the supplier or trade you require, enter your location to begin your search.


Are you a trade or supplier? You can create your listing free at DIYnot Local

 
Sponsored Links
Back
Top