
You are using an out of date browser. It may not display this or other websites correctly.
You should upgrade or use an alternative browser.
You should upgrade or use an alternative browser.
plastering training
- Thread starter danielrobson
- Start date

Sponsored Links
Would you like to contact me, please? I am looking for a plasterer. Tried to put my email address in my profile but can't see it myself, not sure it works. So if you send a message to vv2806 at yahoo dot co dot uk, I'll write back to you and explain what I want. Best regards
Oh, and I am a woman")
Oh, and I am a woman
Sponsored Links
brist its a real shame mate - thanks for the thought unfortunately im stuck working in b&q trade point until i finish my course and get myself a few jobs
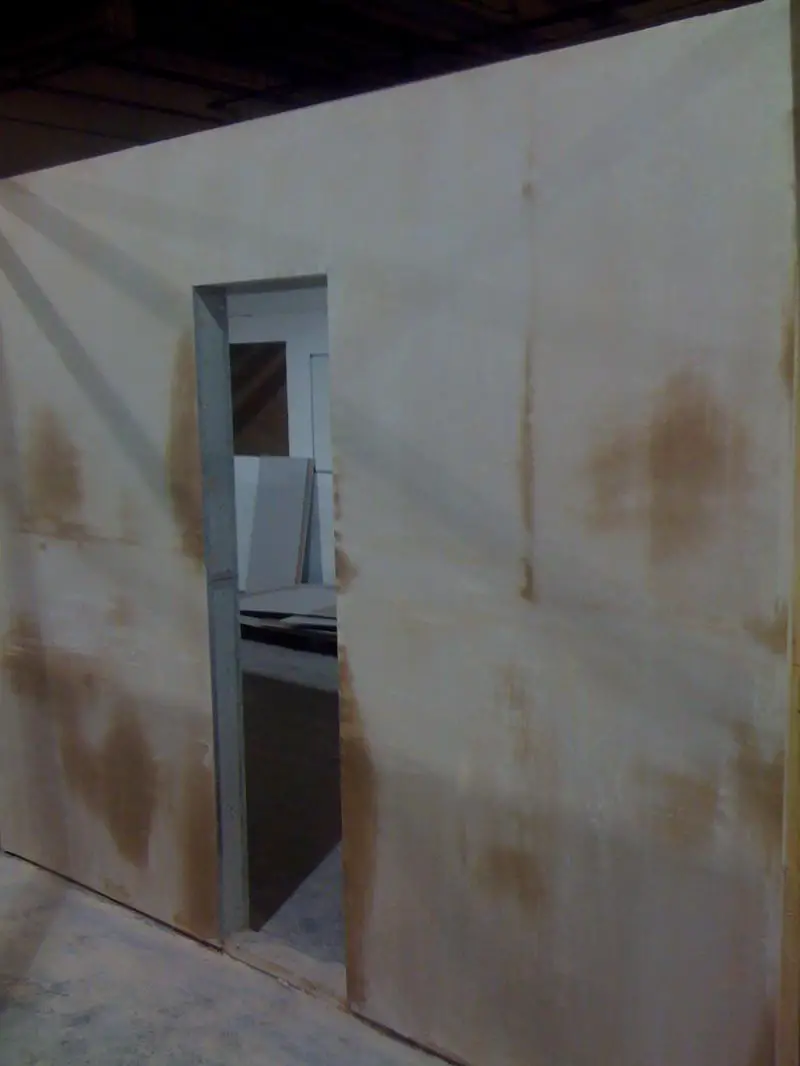
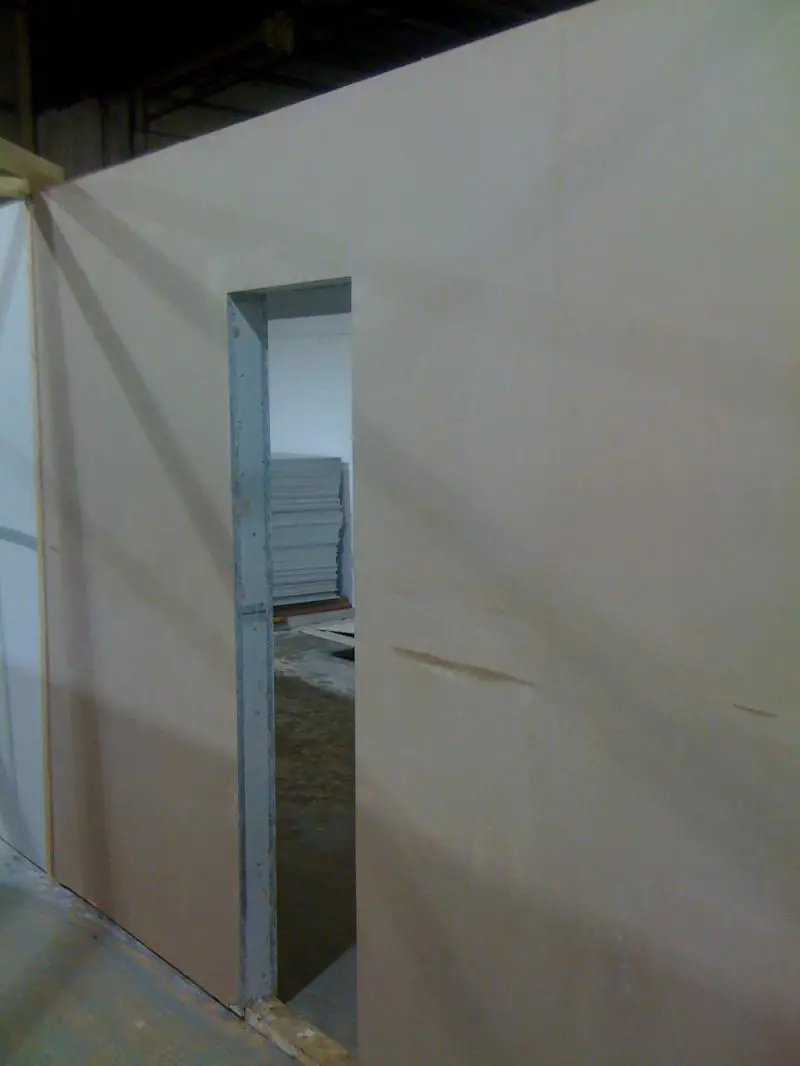
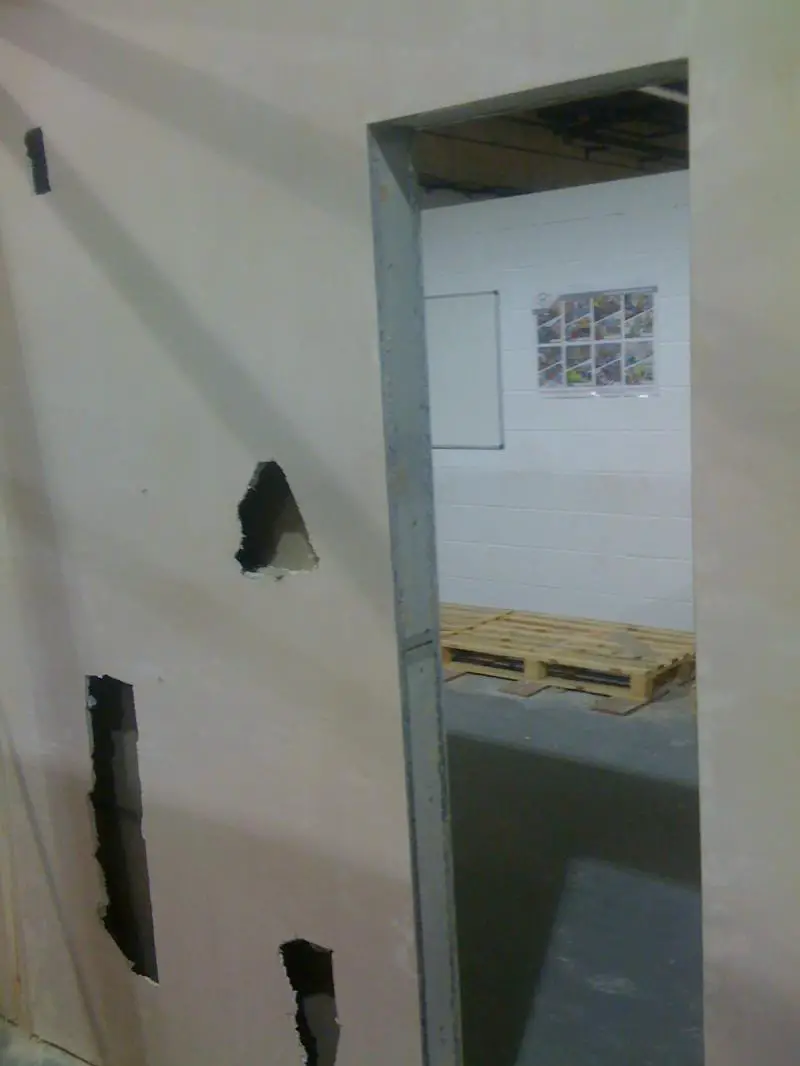
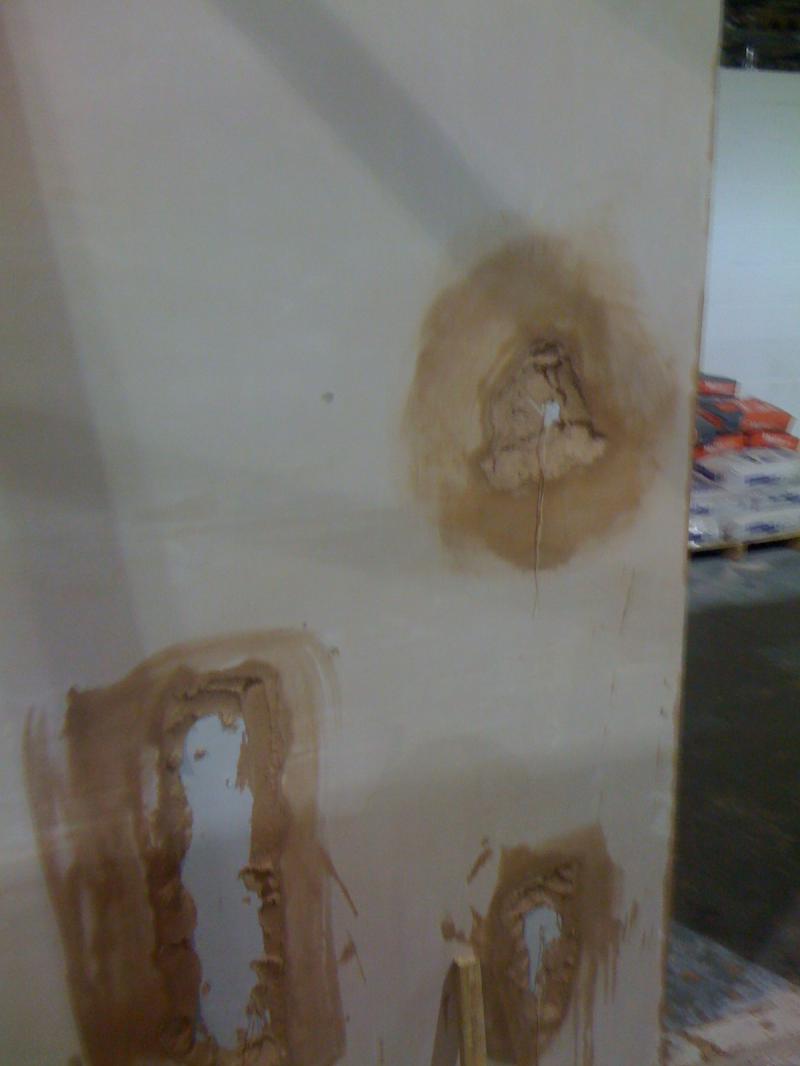
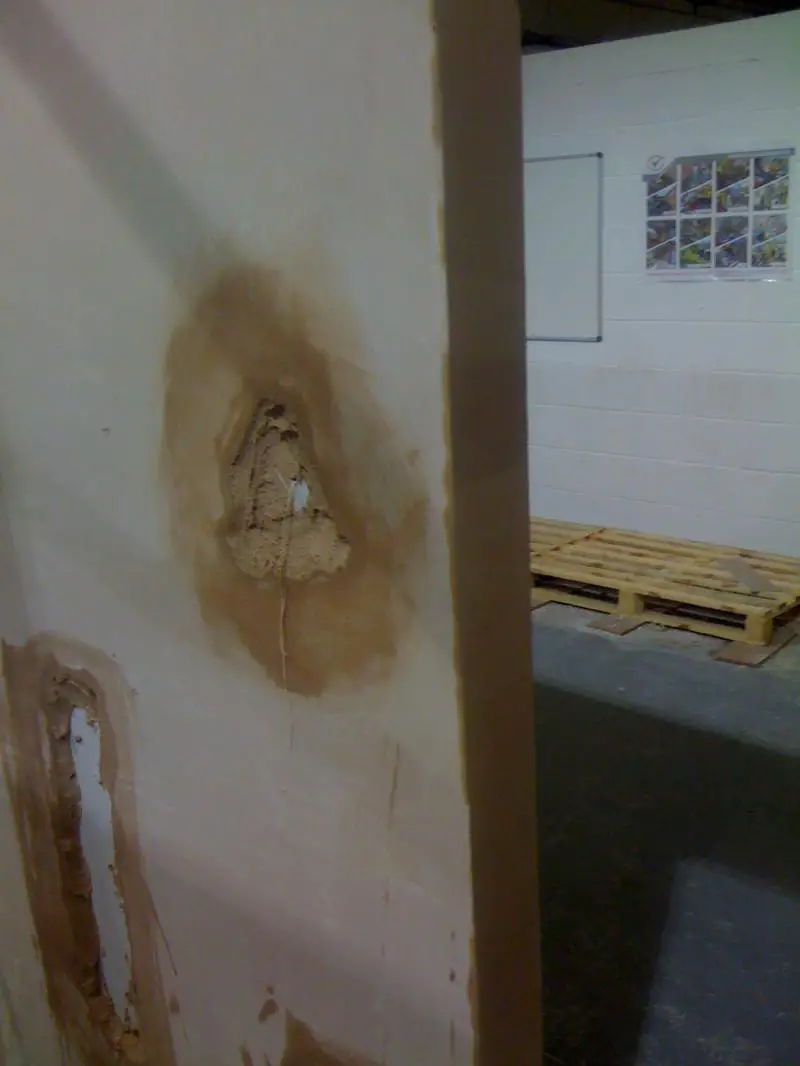
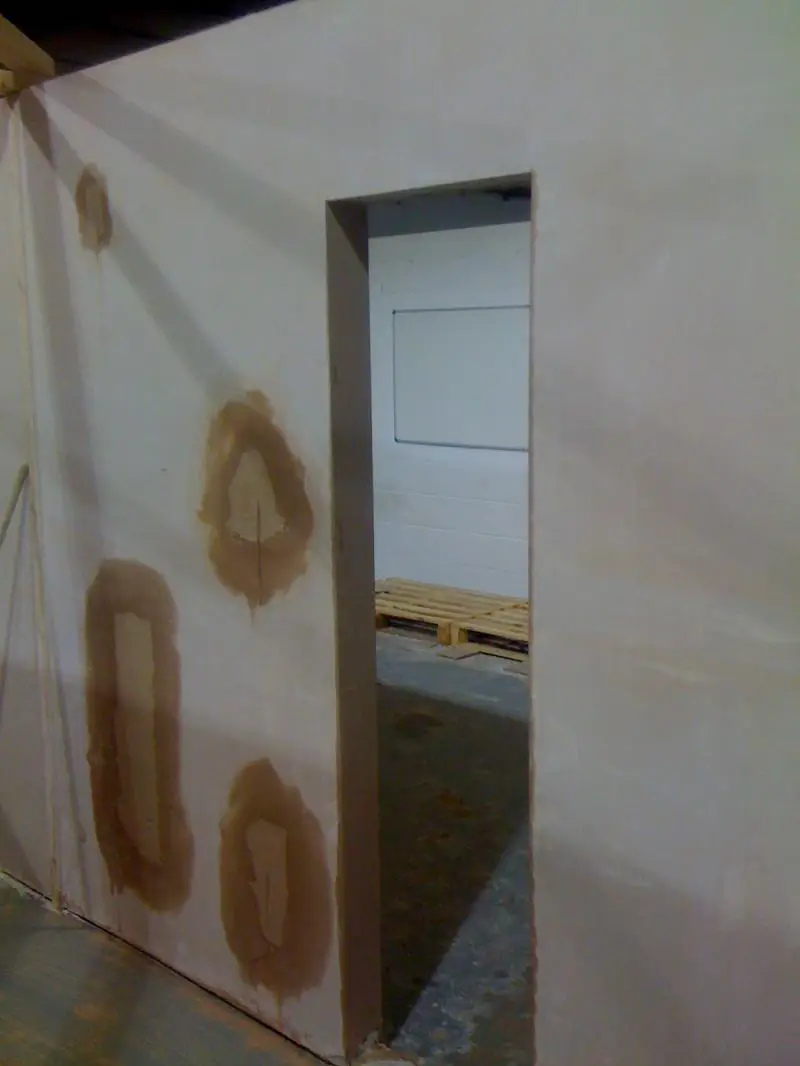
Heres a few pics from when I was boarding and beading this week at college. After I got a nice finish on my wall the week after my tutor put a hammer through it ... i was devastated haha but it was to show me how to do patch repair work. On monday i will be skimming it so i will upload some more pics as soon as possible.

Oh, and I am a woman
Heres a few pics from when I was boarding and beading this week at college. After I got a nice finish on my wall the week after my tutor put a hammer through it ... i was devastated haha but it was to show me how to do patch repair work. On monday i will be skimming it so i will upload some more pics as soon as possible.
Dan,, I'm surprised at the way your tutor has taught you how to repair holes in plasterboard. I know it can be done the way he's shown you, and i've done it that way myself, but if that was me teaching you, (and i'm not wanting to sound smart here), but the first thing i would have made you do, is to neaten up/re-shape the holes with a padsaw or a board knife,, to square them up. Then, instead of using the string and plasterboard, and plaster method, (the old fashioned way),, i'd show you how to insert pieces of timber into the p/board cavity, and then fix the timber with 35mm screws,,, screwed through the plasterboard, and into the timber,, (this gives you a solid timber backing),, then you can measure and cut appropriate sized pieces of plasterboard (of suitable thickness), then screw it onto the timber that has been inserted into the studwall cavity. As all it requires then, is to tape over the the joints of the patch, and you're ready to fill over it and sand down,,, or skim. It's a far cleaner/neater/stronger and easier method of repairing holes in plasterboard, than the way your tutor has shown you,,, it dries far quicker too,, much better than having a lot of deep, irregular shaped patches in a plasterboard wall, all filled up with a half inch thickness of bonding coat.
Thanks Roughcaster thats a great reply your way sounds a lot tidier to me as i was up to the eyeballs in bonding. My tutor explained and i got on with it, i was starting to tidy up by cutting it with a padsaw - as u can see on the top left 1 is quite square and the bottom left on the right hand side. When my tutor saw me doing it he just said tidy the edges because time would be money on site but your idea sound best to me Roughcaster mate and i will defo be using your option.
Are they teaching you to nail plasterboard and not screw it? Nice work btw !!
yeah john we just nail it on we will probably screw the board when it comes to doing the ceilings. And thanks for the feedback mate
I can't agree anymore Scob mate i only want to pay for it once ha
I can't agree anymore Scob mate i only want to pay for it once ha
Just a general comment on the 'time is money' comment.
Your tutor is right, but I would add -
- the right way is often the quickest in the long run
- quality means no come backs .
- some times the best way is slower just because you are not used to doing it.
The 'wrong' way is often quicker because you have had no practice at doing it correctly, rather than the correct way being a slower method in itself.
Sort it once properly when plastering the first time, even if it takes a little longer. This is cheaper than going back when the place is decorated, carpeted etc
Patching /making good properly (like labouring on a plasterer) is practically a trade in itself. I know plenty of men who can knock out acres of big work perfectly that don't have the patience or knack of making good properly.
Even on a simple example, try this -
Working on your own plastering, it is quicker not to clean out your mixing bucket as you can carry on throwing on and trowelling up. Those couple of minutes cleaning take you away from plastering. However, it will take ages to get the bucket clean when you need to mix again, and so your next guage is held up for much longer than a couple of minutes while you sort out your bucket, and you may have lumps in the mix.
Bit of a lecture, I know, but thought I'd chuck it in!!!!
DIYnot Local
Staff member
If you need to find a tradesperson to get your job done, please try our local search below, or if you are doing it yourself you can find suppliers local to you.
Select the supplier or trade you require, enter your location to begin your search.
Please select a service and enter a location to continue...
Are you a trade or supplier? You can create your listing free at DIYnot Local
Sponsored Links
Similar threads
- Replies
- 7
- Views
- 995
- Replies
- 8
- Views
- 2K
- Replies
- 4
- Views
- 1K
