Replacing a rotten joist supported in a stone wall.

Joined
12 Aug 2008
Messages
54
Reaction score
0
Location
Dorset
Country
United Kingdom
Hi,

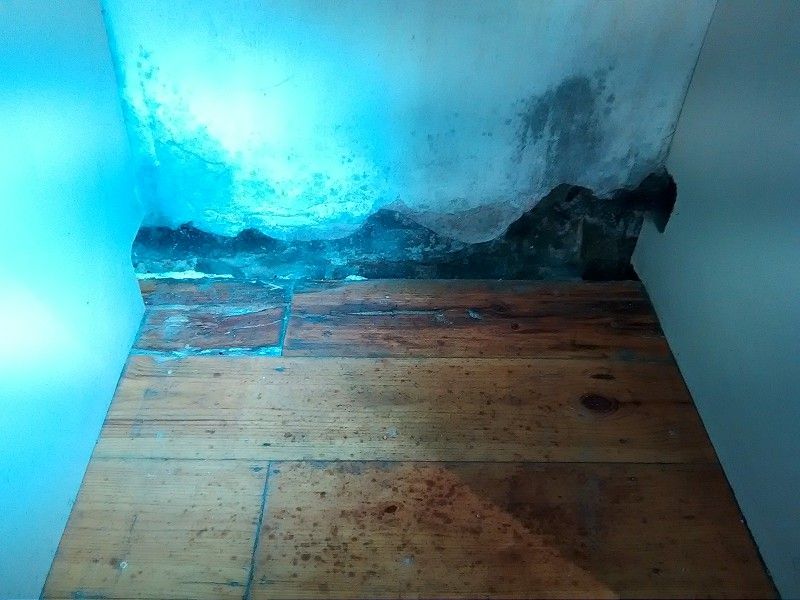
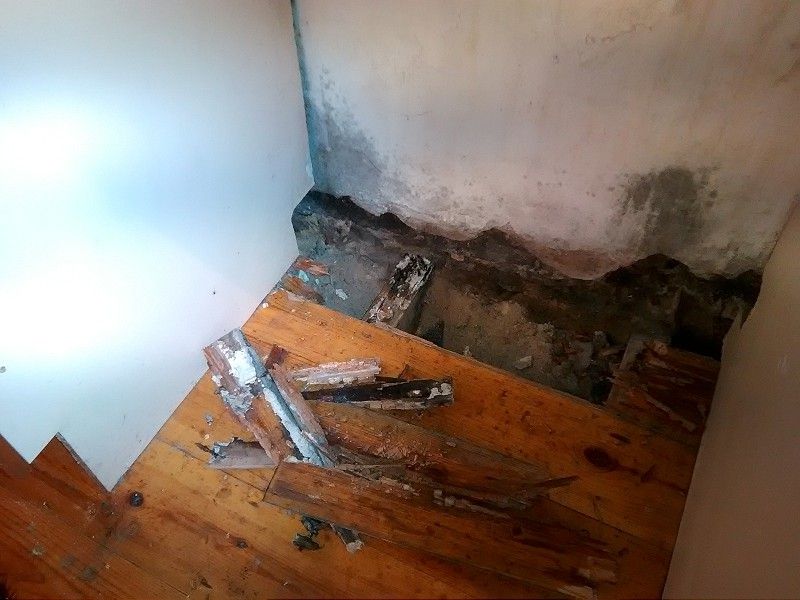
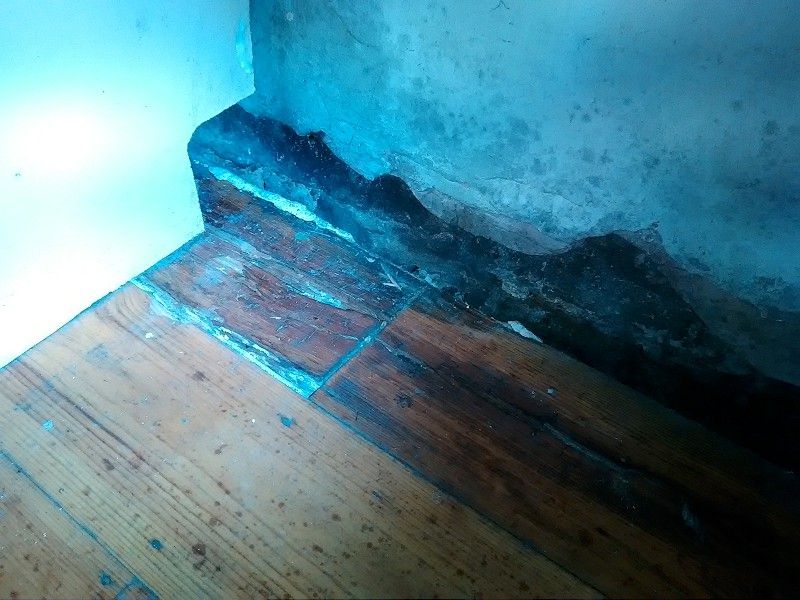
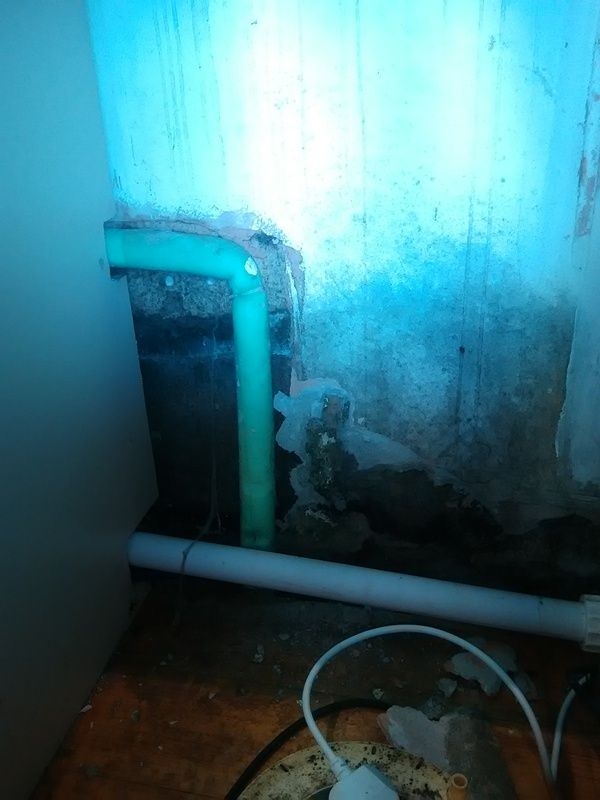
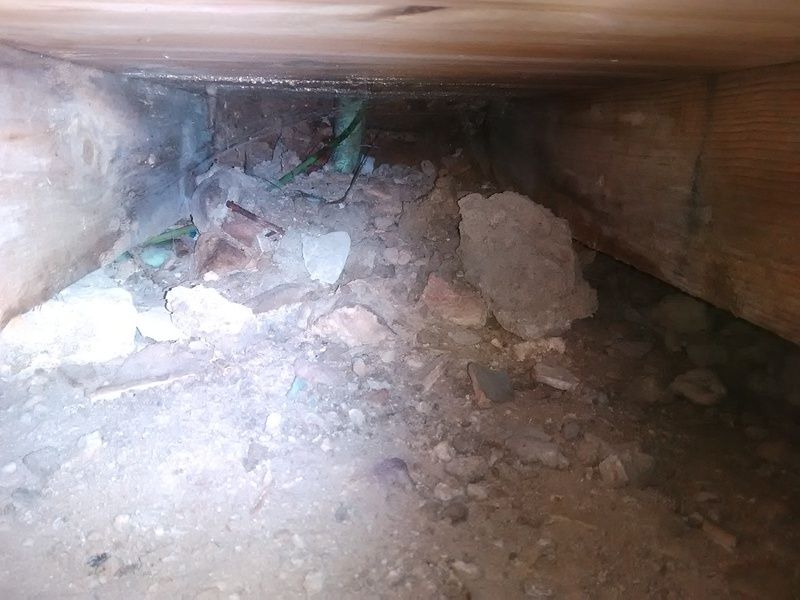
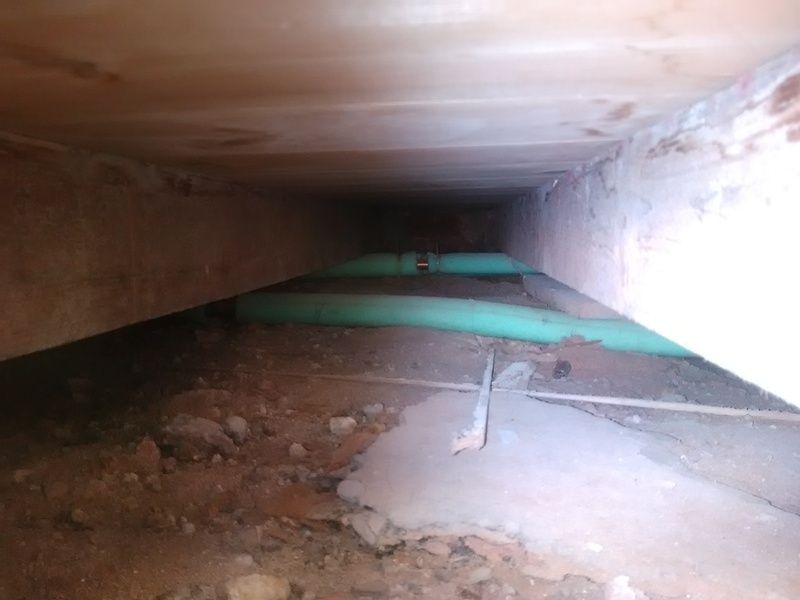
My house is about 200 years old and the kitchen floor joists are supported in a solid stone wall. I`m replacing the kitchen, but unfortunately the previous owner had leaks from both the dishwasher and washing machine on the back wall which she never bothered to sort :(

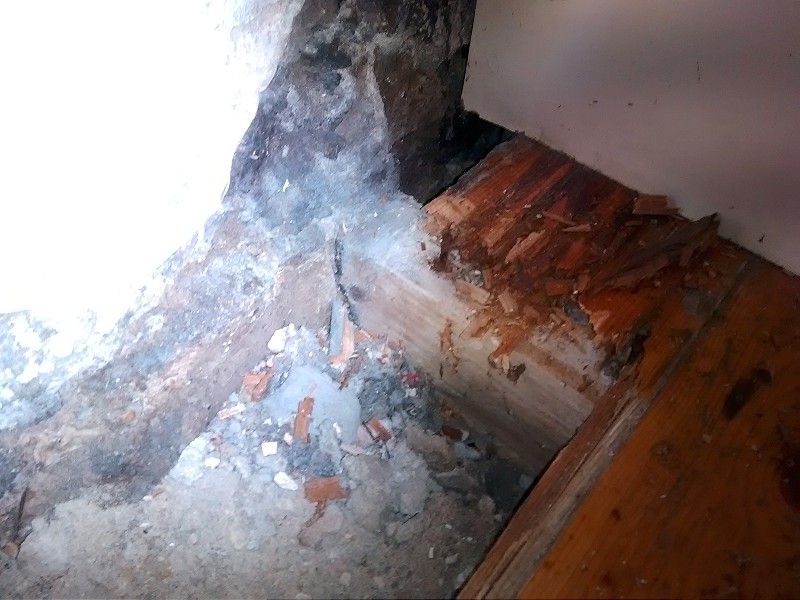
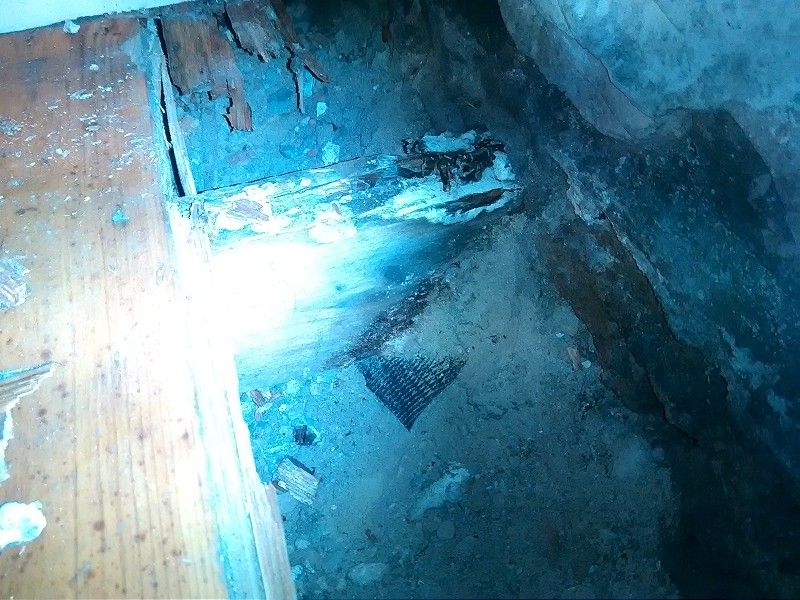
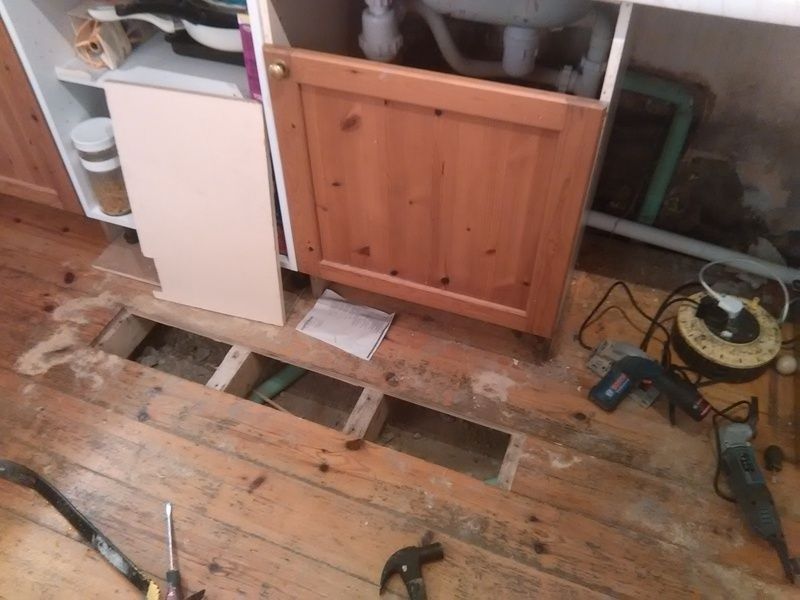
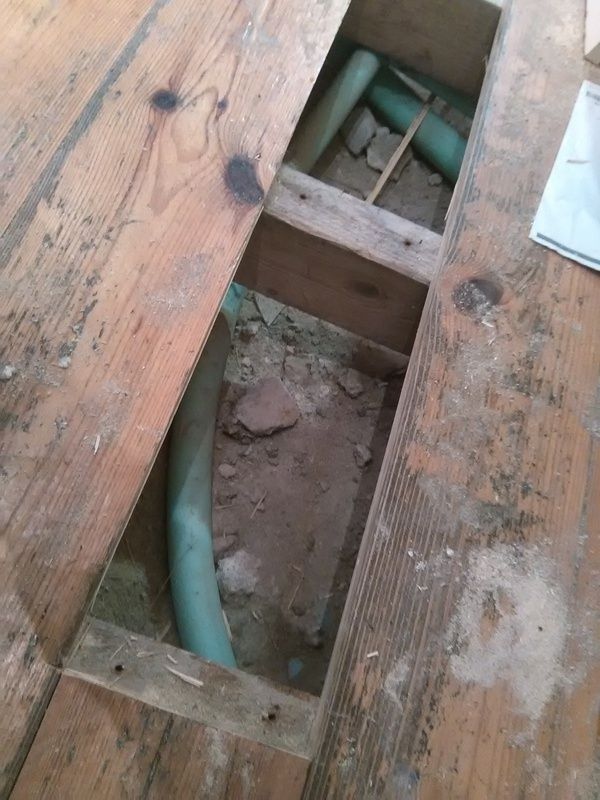
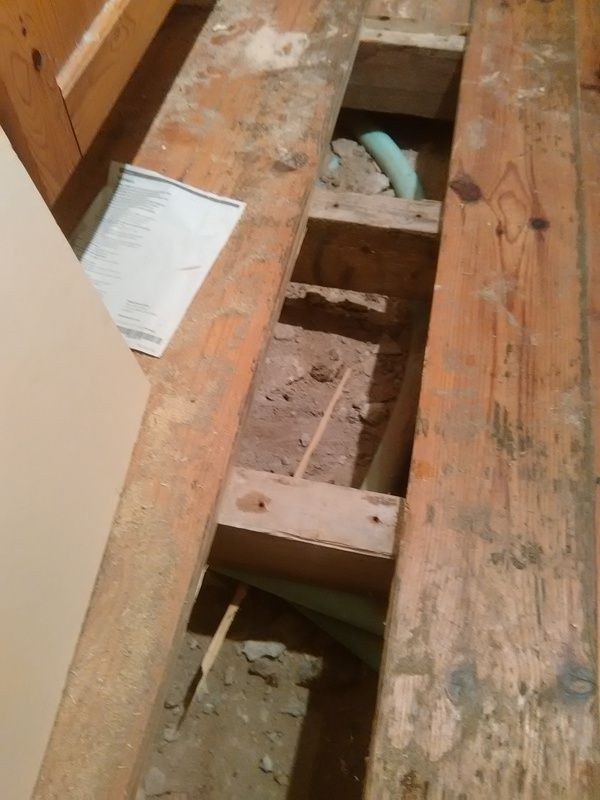
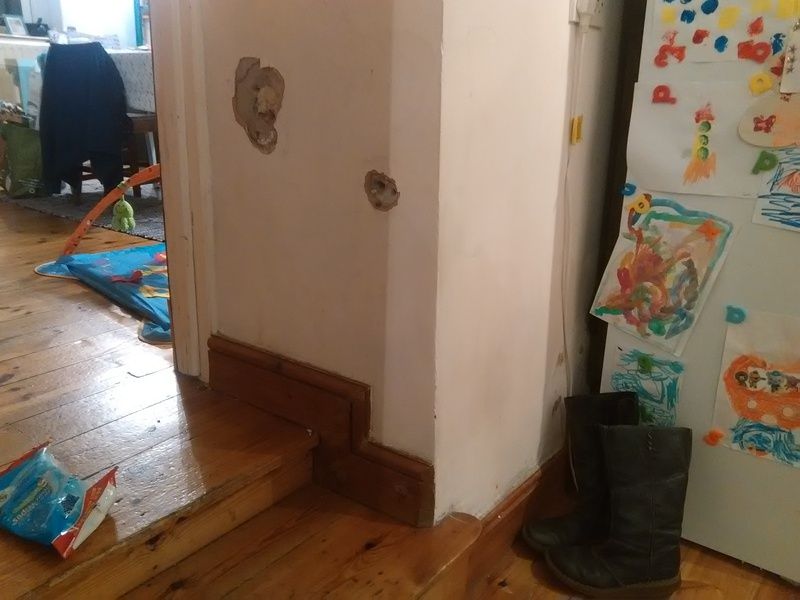
Now i`ve fixed the leaks and its dried out a bit, some of the floorboards are obviously rotten (the washing machine on spin made sure it had pummeled its way through them!). On further inspection , it looks like the some of the joists in this area are rotten where they enter the wall - they feel spongy as if you could stick a screwdriver in there.

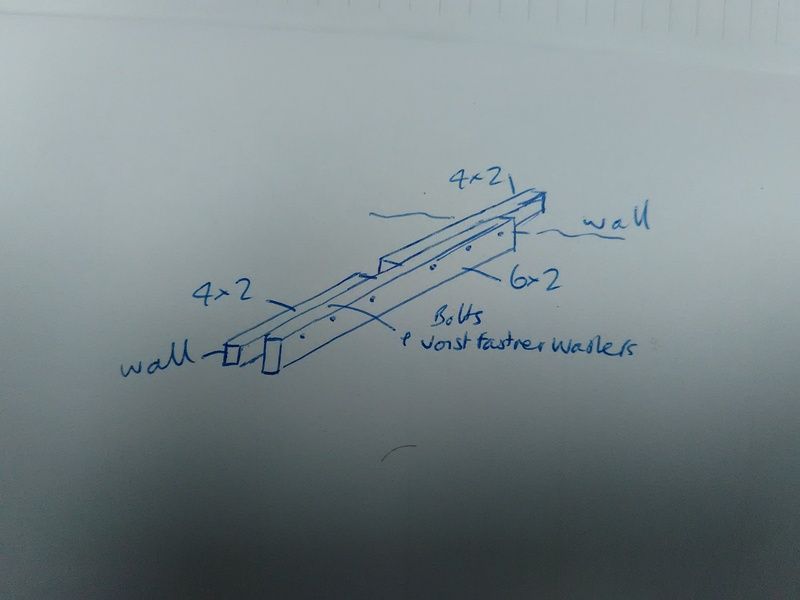
Whats the best way to repair them? Ideally, i would replace the entire joist, but the other end is also supported in another stone wall - i have no idea how i would manouvre the new joist into place once the old is removed. If thats not an option, can i repair the end of the joist somehow? In my head, i feel the joist would lose alot of its strength though by somehow splicing a new end onto it?

Cheers, Mike
 
Sponsored Links
Your best bet is to post some photos of the kitchen and details of the damaged floor area, also pics of the external wall esp at ground level.

By replacing the kitchen do you mean removing all the units and doing a new floor covering?

Are the walls stone or brick?

Whats the span of the joists - from wall to wall?
 
Hi,

Yes, we`re replacing the whole kitchen - didn`t really want to have to touch the floor, but it`ll need repairing - we will keep it exposed floorboards even if we have to use new ones. The current ones are nailed tongue and groove boards which are right pain to get up!

Here`s some pics anyway. I had a closer look - you can see the rotten boards which i just pulled up with my hands to get a closer look. They are 4 x 2 joists at 35mm centres over a 2.7m span so under spec'd really, but nevermind!

The one on the left is rotten about 30cm out from the wall, then it feels solid when i put my hand round under the floor. The joist on the right seems ok. There is another joist behind the washing machine which seemed a little similar when i had the washing machine out.

You can see the wall is damp, but this mainly comes from a combination of the previous leak, the solid stone walls rendered in gypsum plaster instead of lime and no extractor fan in the kitchen and no real ventilation at the mo. Outside, the wall is pretty dry. The stone walls are rough stone, not brick.

IMG_20161221_194100.jpg


IMG_20160721_200606.jpg


IMG_20161221_194624.jpg


IMG_20161221_194544.jpg


IMG_20161221_194517.jpg


IMG_20161221_194505.jpg


IMG_20161221_194122.jpg
 
I`ve been reading some previous posts and seems a possibility may be that i can cut away from the end the rotten bit and then lap another joist timber along the good bit 1.2m of the existing joist. I can then bolt it together with some timber connectors between them. I `ll have to make a new pocket in the wall alongside the existing one, but it sounds doable.

Does that sounds about right?
 
Sponsored Links
Whats on the other side of the internal wall?

I replaced a rotten joist and managed to push one side far enough into one wall that I could then lower it and push it back into the other.

I just had to take out 1 brick above it to help push it through.


image.jpeg
 
Yep, I see what you mean, the opposite wall has another room on the side, but the wall is solid stone and 80cm thick. I'd have to make the pocket very deep, which isn't out of the question I guess..... I'd really have to remove some of the floor boards on that side to take a look though.
 
The joist must be bigger on the other side (you would think), so that could give you more room and make it a bit easier.

I'm no expert though. You probably could replace it by cutting out the rotten bit, bolting on a new bit and adding some noggins.
 
First things first, & your first thing would be to remove the remaining units from the wall and out of the kitchen.

Second, you should lift the next two boards after the obviously damaged boards - carefully prying & prising off the joist from below the board will bring them up.
The board next to the opposite wall should also be lifted and joists & joist tails examined.

There's evidence of previous remedial work and the joists appear to be sitting, or almost sitting, on the earth oversite - no ventilation air bricks are apparent in the external pic.
9" x 6" air bricks should be installed.
The rot appears to be of long standing - not the result of a recent leak.

Depending on what you expose, and please post pics on here, it might be necessary to lift the whole floor to provide through ventilation, remove all traces of fungal infection, & maybe lower the whole of the sub-soil and cover it with a membrane (to prevent oversite condensation).

The stained plaster behind the units is gypsum plaster - it should be a sand and lime render over a stone rubble wall. Is any surface cover really needed behind the units?

The external plinth is probably irrelevant and possibly causing moisture difficulties - at a minimum the render should be cut back 50mm from ground contact. FWIW: the render was probably applied in hope of preventing damp difficulties.

FWIW: whats the purpose of the tower?
 
Hi, thanks for all the advice - that's not a bad shout about leaving the render off behind the units to get rid of the gypsum - the whole house is plastered in it over the the stone and really need replacing with a Lyme based plaster - suffer terrible condensation at the mo combining that with lack of any ventilation in the kitchen and bathroom - but that's another conversation!

It'll be the new year beforei start to tackle any of this, but I'll post some more pics then.

I reckon I might install an airbrick aswell - the front of the house has a couple, but the rear had none. As you say, really need to lift a few more board to get a decent look really.

The tower someone at work lent me for when I repaired and painted all the top floor windows - made it much easier than off a ladder!!
 
Had a bit of time tonight to pull out another cupboard and lift one of the floorboards which being tongue and groove are a right pain!

The wall is really damp and has been rendered in various coats over the years! I knocked some of the gypsum off which revealed cement ( i think) underneath and then once that was off, the wall below was soaking with moisture. What i think is the lime mortar in the wall (possibly!) is soft and damp.

I think the best thing here is going to be just knock all the top renders off and leave the wall to dry out. Given that the outside floor is the same level, i`m going to install a couple of telescopic air bricks which will pass thorugh the wall and then drop into the sub floor behind the units. I`ll also remove that external render too.

The subfloor itself is pretty dry actually - which is nice for once! There are a few inches gap under the joists aswell - at the wall there is bits of rubble, etc coming up to meet the joist at the wall which probably isn`t helping matters. Where the wall is damp, the ends of the joists look on their way out and quite a few will need repairing. The other side where the end is in the internal wall seems dry and ok. I `m considering bolting 6 x 2s to the current 4 x 2 joists to strengthen them and then bedding the end in a new hole in the external wall.

Here `s a few pics - you can see the internal wall is about 80cm thick and solid stone aswell.

My next plan now that i know i can re-route the drain and water supply to the sink under the current joists is to move the sink, oven, etc to the other end of the kitchen so i can get good access to the floor to repair it.

Cheers, Mike

IMG_20161229_201723.jpg


IMG_20161229_190401.jpg


IMG_20161229_190341.jpg


IMG_20161229_201739.jpg


IMG_20161229_201845.jpg


IMG_20161229_201858.jpg


IMG_20161229_201933.jpg


IMG_20161229_204248.jpg
 
Do the joists really have to be supported by the wall? If the wall is making them damp, consider building a sleeper wall on something solid and stopping them short of the damp wall.
Agreed with the ventilation needed and the clearing all the rubble away from the joists.
 
Thanks - if i were to create a sleeper wall, what sort of foundation would i need? Dig a trench and create a concrete base for it?
 
Depends on the ground underneath, theoretically (if you ask an SE) you need to dig down to get to stable ground, but with ours it was in the middle of the house where the chimney used to be so I just scraped the over site and built it directly.
 
Would something like this possibly work?

Drawing obviously not to scale! But effectively lapping a 6 x 2 timber alongside a new 4 x 2 and the other 4 x2 end. This would be connected with bolts and timber dog teeth washer fasteners. I could then use the existing pocket once the wall had dried out with damp course membrance wrapped round the end.

IMG_20161230_135447.jpg
 
OP,
1. If you use bolt-on's then keep to the same section: 6" x 2" (no 4" x 2") - the thing is you've not indicated any damage on the far wall of the kitchen - have you lifted any boards against that wall or seen damaged joist tails?
2. Is the water mains in a modern plastic pipe - it should not have a sharp ninety degree bend.
3. There are two steps down to the kitchen - is the house on a hill?
4. Typically, remove all units and apps from the floor to give work room - messing about with sink positions will waste time.
5. Is the wall 800mm solid?
6. Your rear elevation will need a few air bricks.
7. Photo #5 shows what appears to be dry rot tendrils - is that a vegetation?
8. All plaster/render should be removed back to stone - note the render is running down below the FFL to the sub soil: knock it all off.

FWIW:
What do the holes in the wall in the last pic mean?
The horizontal soil pipe needs clipping - does the vertical stack also require clips?
At present, how are the sink and any apps in the kitchen drained?
 

DIYnot Local

Staff member

If you need to find a tradesperson to get your job done, please try our local search below, or if you are doing it yourself you can find suppliers local to you.

Select the supplier or trade you require, enter your location to begin your search.


Are you a trade or supplier? You can create your listing free at DIYnot Local

 
Sponsored Links
Back
Top