Should have updated this a while ago...!
It was easy to take out - The pipes had already been disconnected which probably contributed to the smashed brickwork - Cowboys!
It lifted out fairly easily.
Once removed, a friend of a friend put in the lintle for about £100 including the lintle.
Once that was set, he then chopped out the excess brickwork and tidied up the remaining brickwork, making the opening wider:
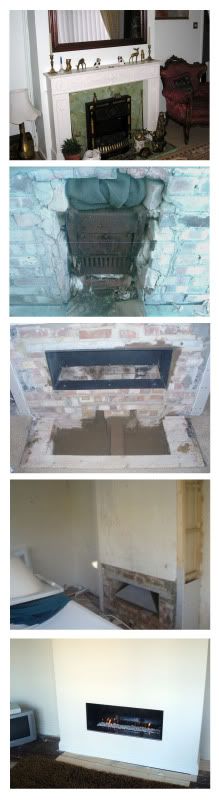
Pic 1 was existing decoration - Elton John would have been proud of it!
- When we bought the house, most of the stuff in this picture came with it! (apart from the ornaments!!!) - Soon was eBayed or skipped.
I tidied up under the floor, adding a brick mid-support for boards. This wasn't absolutely essential but neatens things up (even though you don't see it). I removed a load of builders rubbish and old cement that had previously been discarded at the foot of the fire.
I installed the metal gatherer and the framework for the Gas Fire. This was an absolute nightmare, fixing this in place and I had to get into shapes that I didn't think my spine could! The worse part was cementing around the top of the gatherer to seal it to the clay chimney liner. Wet concrete and gravity don't mix and I had untold face-fulls of slop fall back on to me, whilst my torso was inside this metal box looking up the chimney! Nasty job, wouldn't want to repeat.
I extended the sides of the chimney stack by approx 2 inches, by dry-lining it and boarding it prior to having the room skimmed. This conceals the hot-water pipes that form part of the central heating loop.
A Corgi-registered friend installed the gas pipework and we connected up the fire.
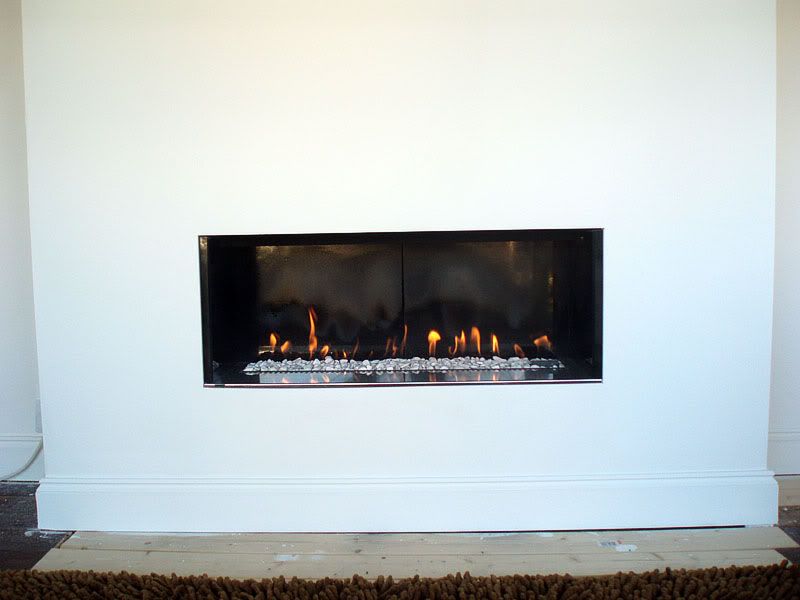
After the room was plastered, prepped and painted we fitted the granite and chrome trims.
The fire looks great - A vast improvement from original starting point and lots learned!
")