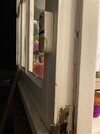
It's difficult - normal advice would be to pull the old door frame out and replace with a new rebated door frame, but in this case that is not feasible. I'll offer you three alternatives:
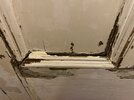
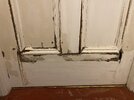
ONE - you scrape the inside face of the frame clean (to get a wood surface, not a painted one), then measure the new door against the existing rebate. You may find that the rebate is 38mm vs. a 44mm or even a 50mm exterior door, so the difference is 44-38+1 =7mm. You need to allow about 1mm for paint thickness. Get some timber strip machined to be 7mm thick and the same width as the frame legs and head. Unfill the existing hinge recesses with a Dutchman and plane in flush (Google Dutchman - there are references to these on this site). Glue and pin the timber strip to the faces of the frame, increasing the depth of the rebate. Recut the hinge recesses. Rehang door. Adjust keep position (may also require filling-in with timber and recutting from scratch.
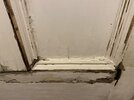
TWO - set-up an auxilliary sub base and fence for a router which will ride in the rebate. Recut the rebate to the required depth (45mm for a 44mm door), This will stop 150mm or so from the top and bottom ends of the jambs and either end of the head. These last six areas need to be cut with a chisel and worked out with a rebate plane, bullnose plane and finally a chisel. Not at all easy to get an acceptably clean end result, even for a pro
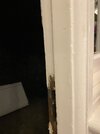
THREE - scrape-out the whole of the rebate (to remove paint), infill the rebate with strips of machined timber, fill and sand to get a smooth surface. Plant-on a new fire door stop lath in the required position. Swing the new door into the new, slightly smaller, opening.
I'm sure there are other strategies, but those are three I've used