Hi fellow members
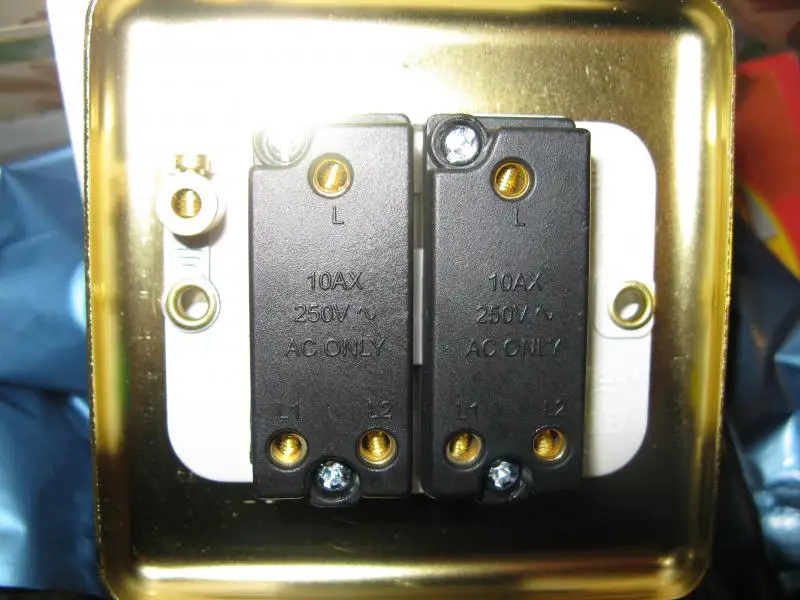
Hope you can assist bought new 2 way 2 Gang switch unclear as to wire the new one.
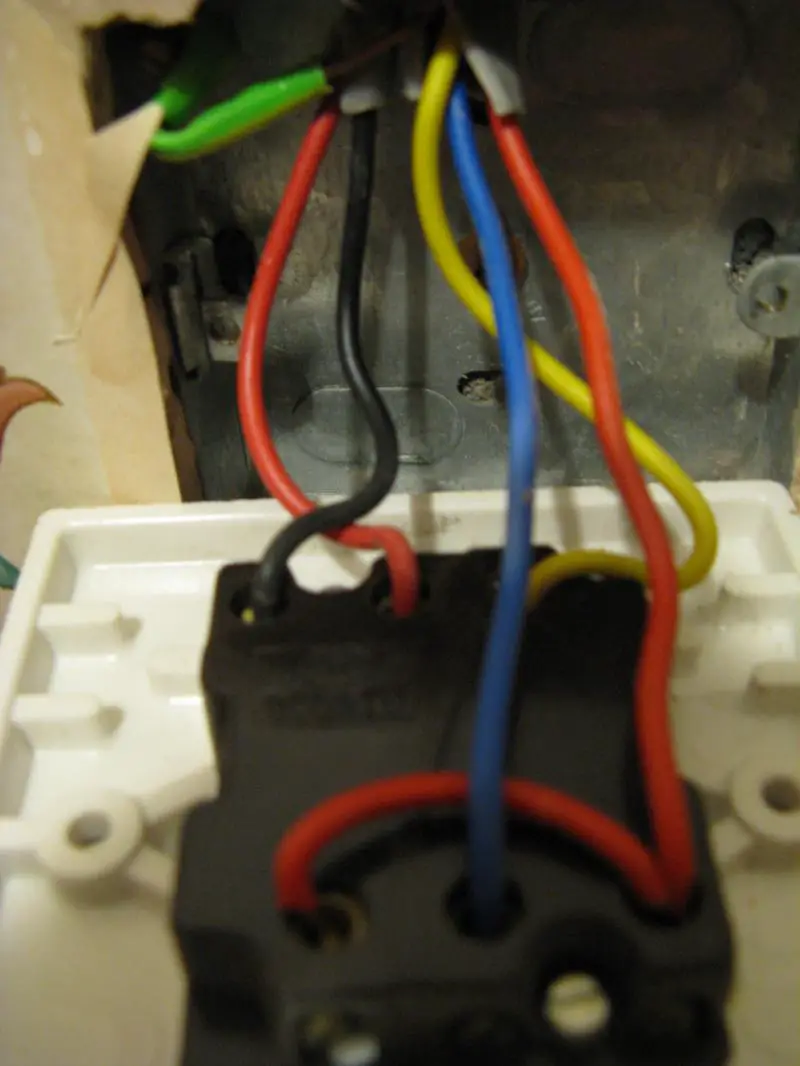
Old switch controls one hall light and two other lights top and bottom of stairs but as you can from picture of existing switch a link wire is used.
Advice on how to wire new switch please. Thanks in advance.
J
new one
old one[/url]
Hope you can assist bought new 2 way 2 Gang switch unclear as to wire the new one.
Old switch controls one hall light and two other lights top and bottom of stairs but as you can from picture of existing switch a link wire is used.
Advice on how to wire new switch please. Thanks in advance.
J
new one
old one[/url]