Corner of building - brick missing?

Joined
29 Oct 2009
Messages
59
Reaction score
0
Location
Bedfordshire
Country
United Kingdom
Hi,

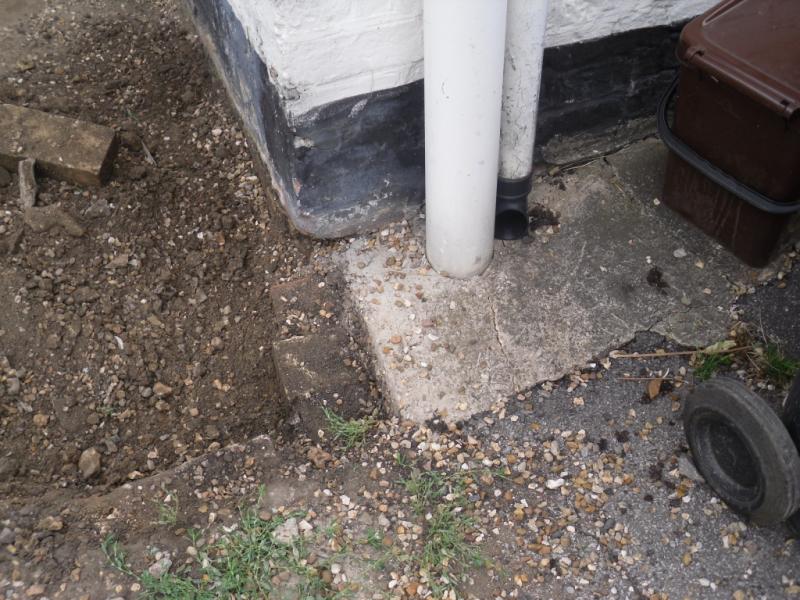
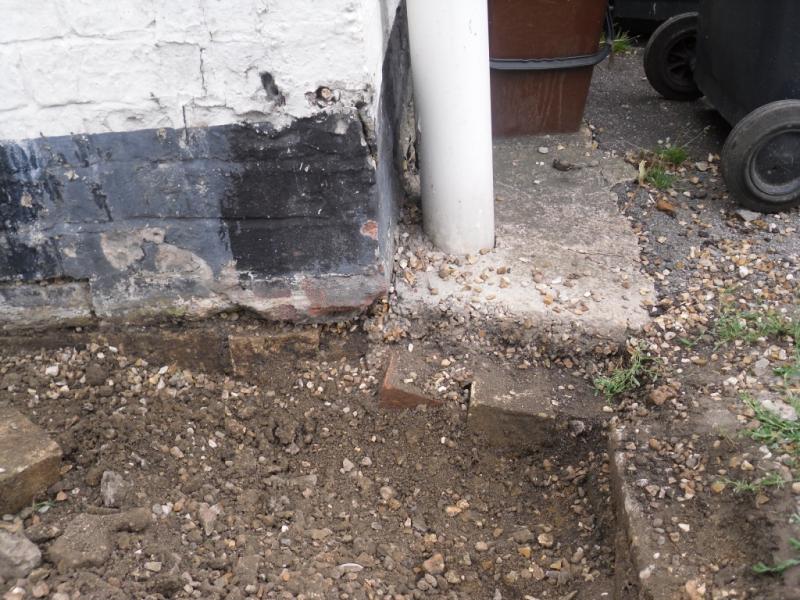
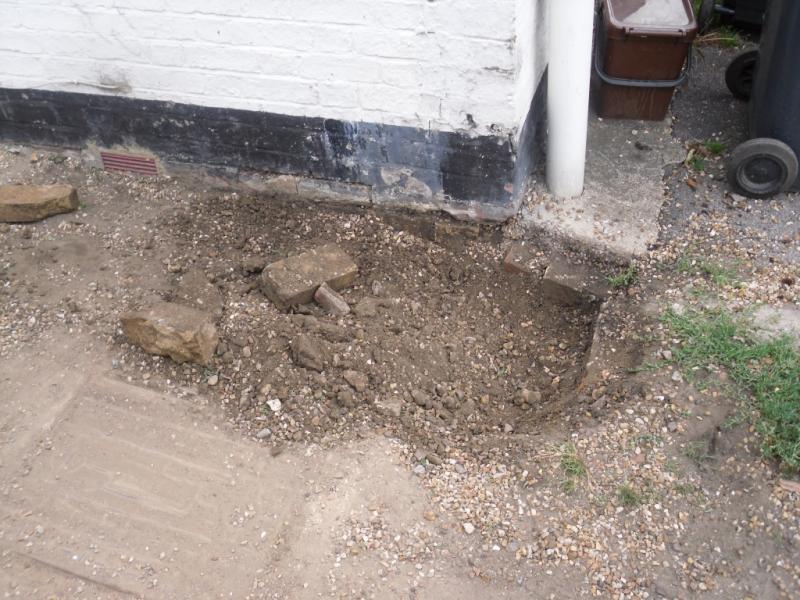
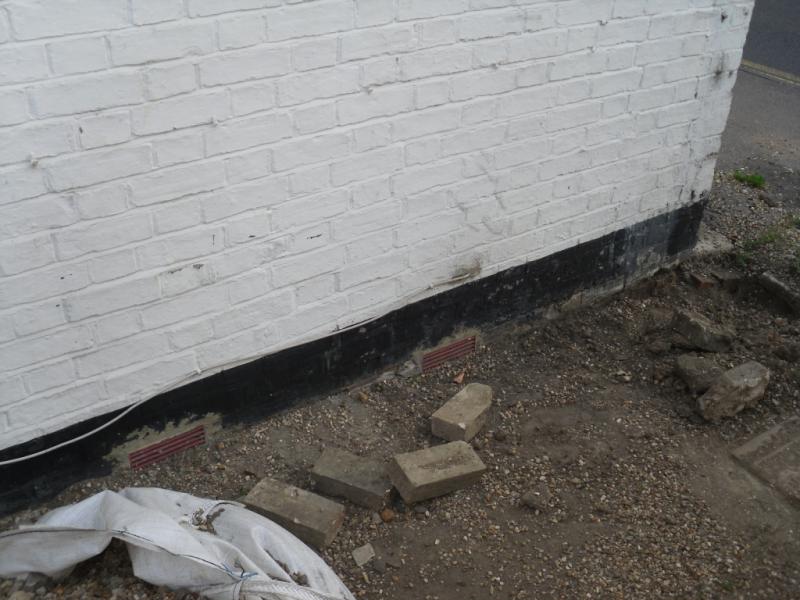
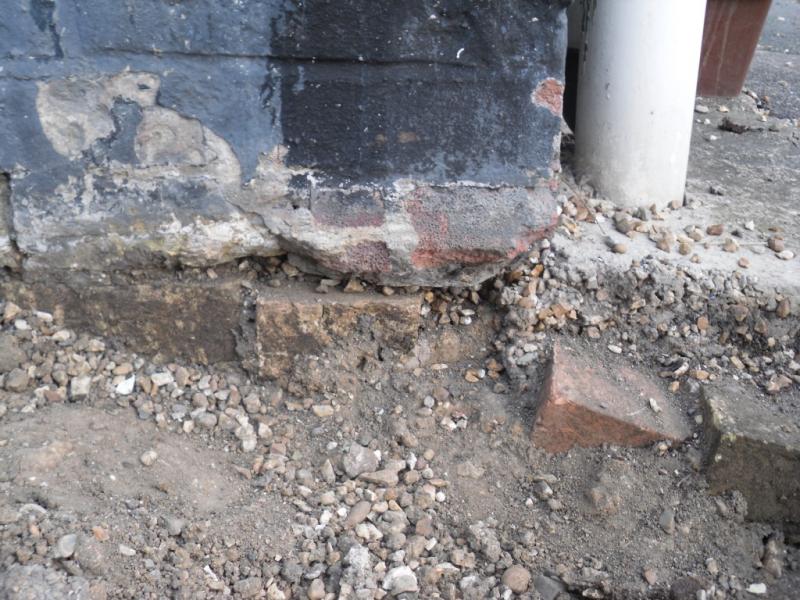
When clearing the front of the driveway by the front of the house I found that there is a gap in the brick work under the corner. Is this a problem? Do I need to do anything about it?

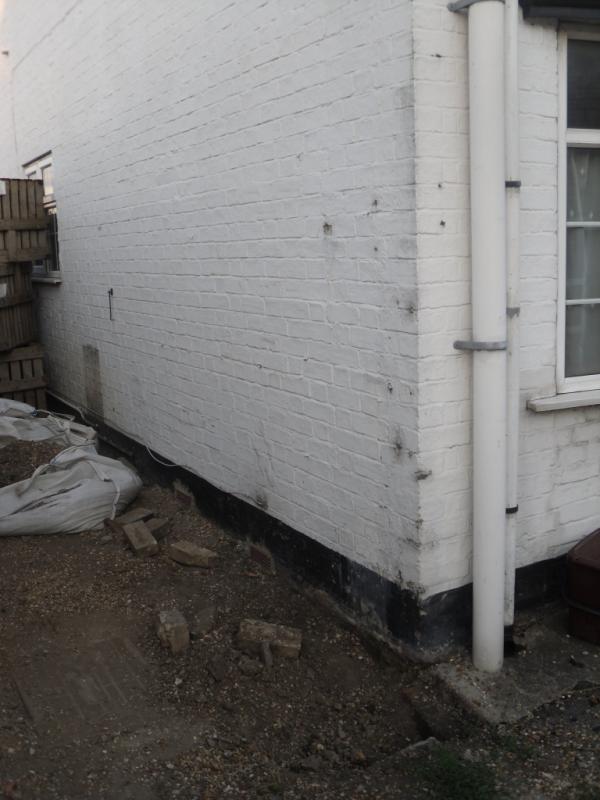
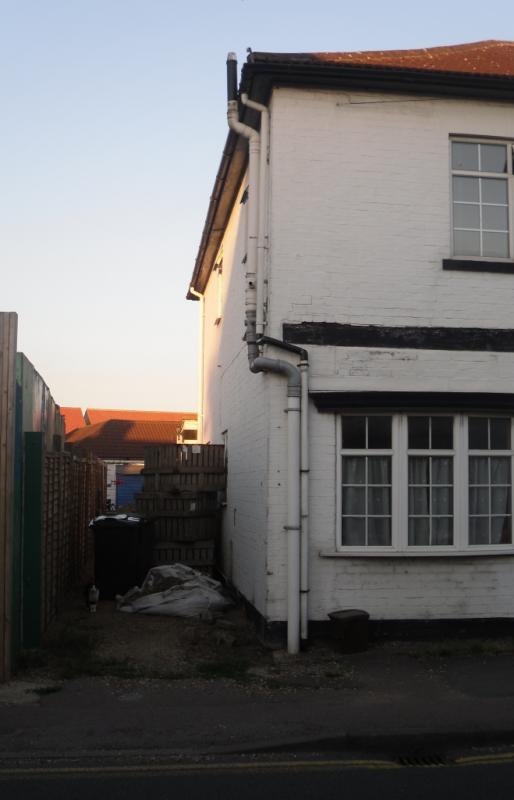
Over the years the previous owners built up the level of the driveway. I have been clearing this as I am planning on block paving it. There is a mains drain that runs down the length of the driveway with a couple of inspection covers.

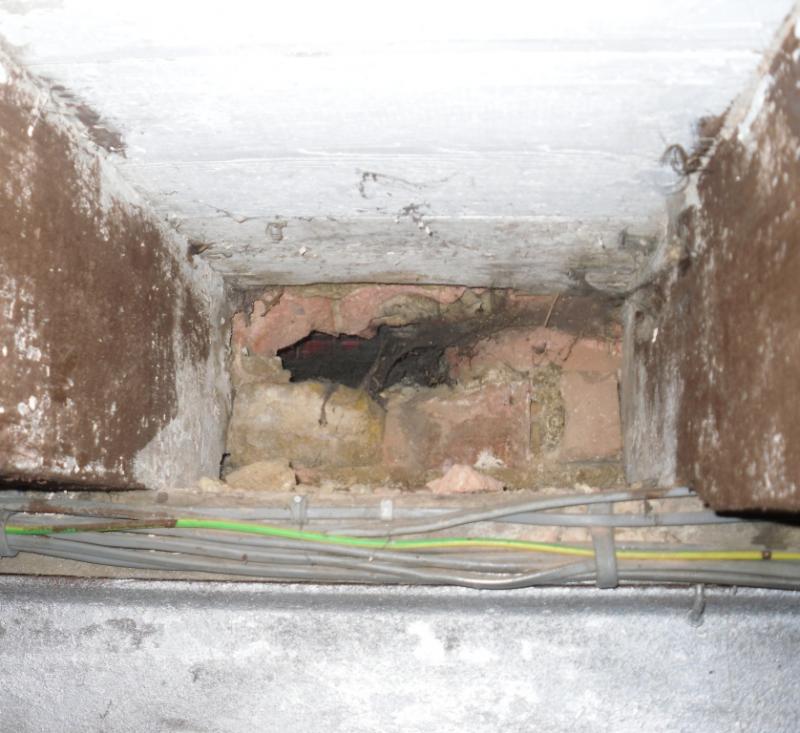
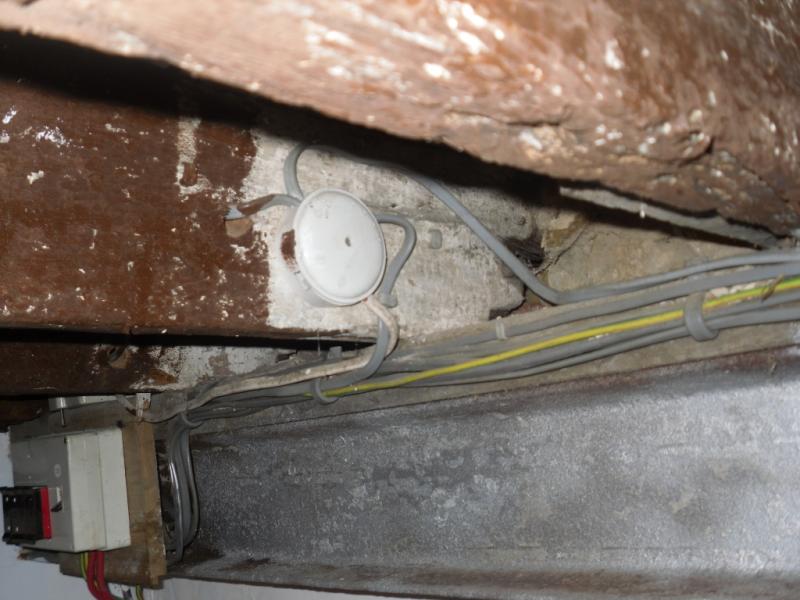
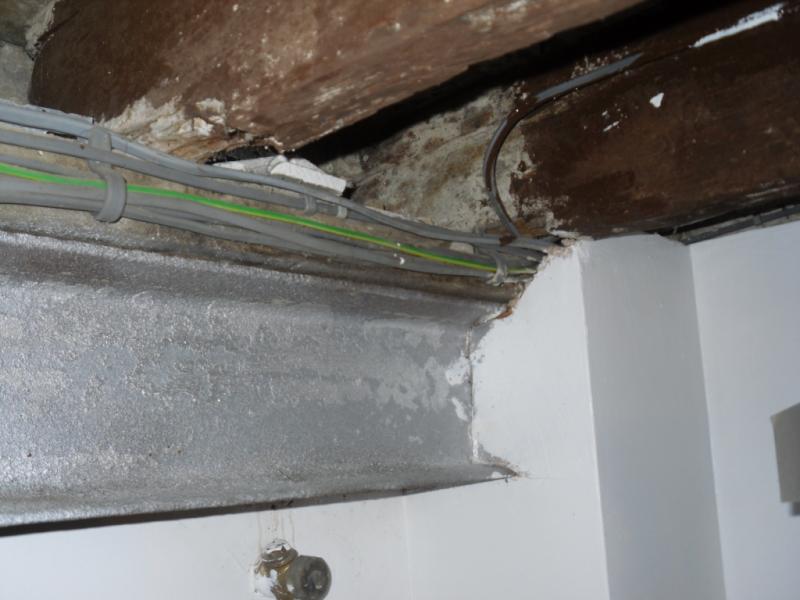
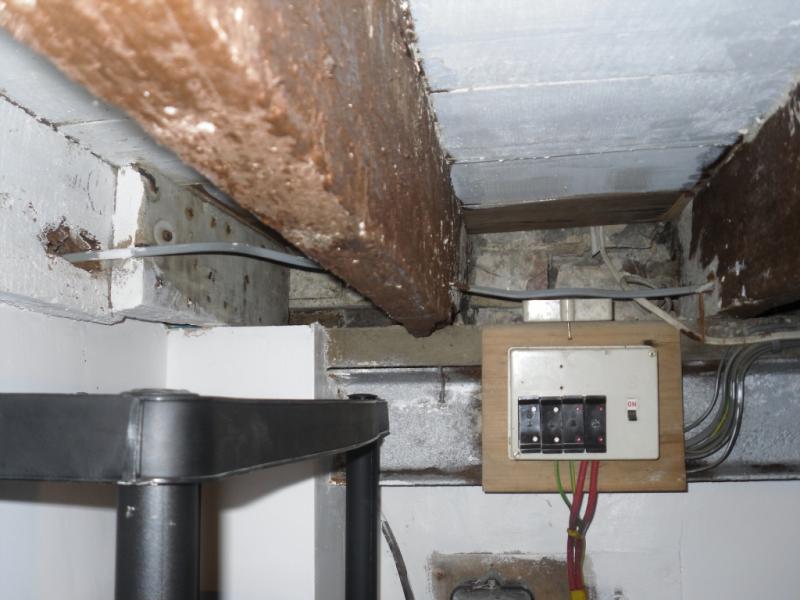
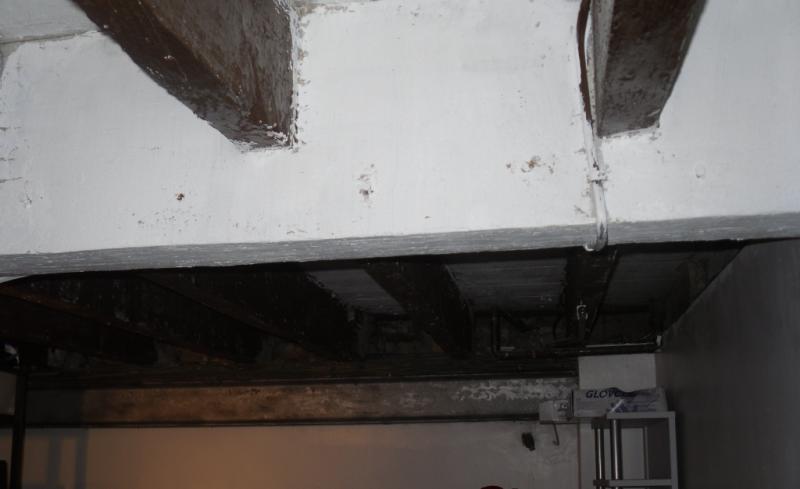
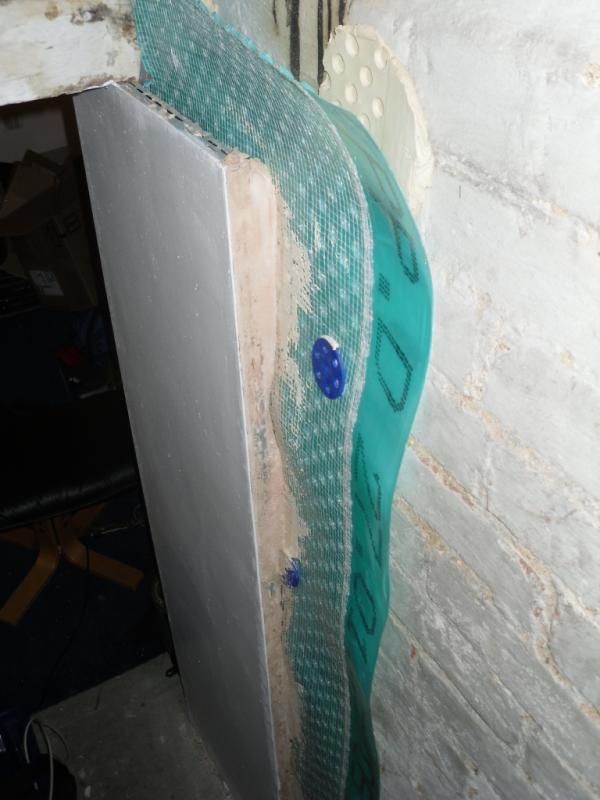
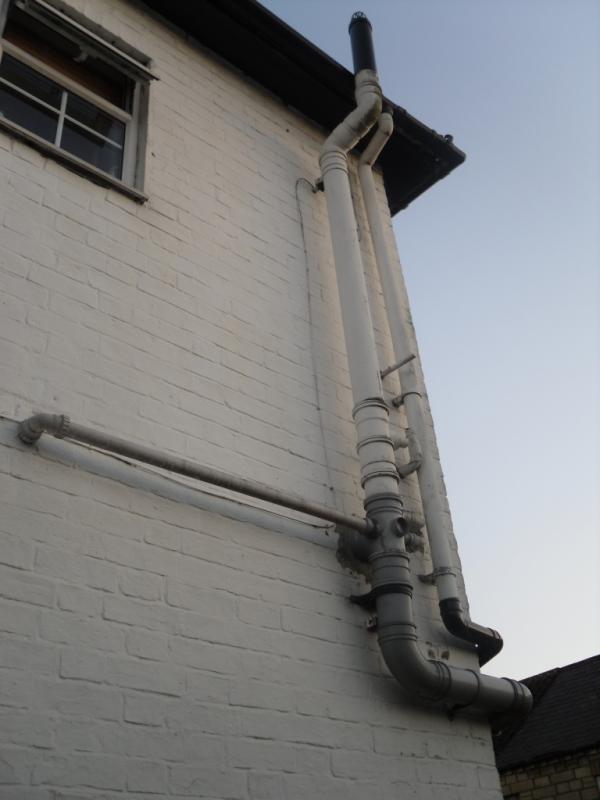
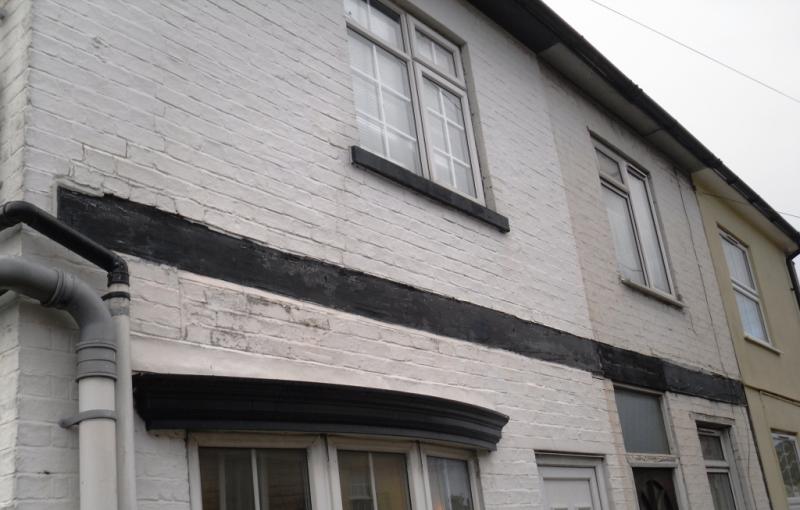
In case it is relevant there is a basement underneath (hence the air bricks) which I think the previous owners had some work done to (including inserting an RSG). The joists obviously had wood worm at some stage but this appears to have been killed off (although parts are now a bit crumbly). Also there is the soil pipe which presumably connects to the mains and a gutter that just flows onto the pavement.

Thanks.


Sponsored Links
I can't see any problems regarding the brick work, it's a drain pipe, not a soil pipe (that would be messy).
But it should really either go in to a gully or be diverted in to the soil pipe.

The drains running down your drive, may need to dropped. depending how deep your drains are and how deep you need to dig, to lay sub-base and blocks.
If you need some tips and advice on laying block paving visit the paving expert site, some useful info.
http://www.pavingexpert.com/blocks2.htm
 
1. The corner should be carefully dug out. This is a point load area, (replace any perished brickwork). Below you might find the remains of an old gulley and a 6" Terra-Cotta drain - if its leaking it's undermining your corner. Note: there is a crack in photo two, 1.5no bricks in, and 4no bricks up. Are there any cracks in the basement or the corner rooms?

2. main drains IC's can be lifted to determine depth and activity. With respect to the Derry man: the in pipe photo's are a RWP and a soil pipe. Building Control do not approve of tieing in rain water to soil water.

3. The black plinth line: is it black paint or bitumen?

4. The visible vent is a retrofit, and being below grade is almost useless - a cross vent six feet in on the return corner would help. Vents typically go into the joist bays, hence your ground level is way too high, and damage to the joist tails will continue to result from the excessive moisture, perhaps multiplied by broken drainage. Where was the RSJ installed? Were the "new" joist tails capped with dpc material? Is there a "damp problem " in the living areas?

5. Given your proposal for future work, you might lower the ground level all around the property (6" below DPC level) - first determine your DPC and floor level - or merely trench around and fill with gravel.

6. Note there is a tv ariel or an elec. cable above the vent - what is it?

7. Any Q's or further help just come back.
 
mnb - thanks, very helpful.

Here are some more photos which I hope will explain the situation a bit better and answer some of the points that you raised.

1. No cracks inside, although there is a bit of a slope in that corner of the living room. There was previously before out time, a gate attached to that wall. Not sure if that explains the crack. Will do as you say, carefully excavate and look to replace the bricks. Although wondering if it would be better to get a builder in....

3. Looks like bitumen to me. What does this mean?

4. No damp at all, either in the living areas or basement. I think the previous owner got the basement tanked. And I presume at the same time they put the rsg and air vents in (why they didn't dig it out an extra foot so I could stand up straight I don't know!). It looks as though the joists had wood worm. They were painted in brown paint. They are not "too" bad, but a few parts near the edges are a bit crumbly. One on the end has been repaired (see photo).

5. This will sound stupid, but I can't find the dpc. As it is around 100 years old will it definitely have one? Annoyingly it is just too narrow for a car (208cm). So my plan was to put a block brick path down the middle and either turf or gravel/pebbles down both edges. Does this sound OK? Would I still need to reduce the depth?

6. Yes, just a tv ariel.

7. Just put the higher up pictures of the soil pipe in to make you smile. Really don't know where to start with that lot!

7. Thanks again!


Sponsored Links
mnb seems to have it covered

to my eye, that soil pipe that has been cased in concrete had previously been leaking, it would have washed away the soil and the mortar out of the wall at the corner. This might have been due to salt glazed clay pipe or bend or gulley breaking. I am suspicious of what has been hidden inside that concrete

You are going to have to dig it out, repair the brickwork, possibly underpin it and replace or repair the drainage. I would go for backfilling with pebbles ("french drain") possibly capped with paving slabs, with a slight fall away from the house, and with a weed membrane to prevent soil falling into the pebbles and clogging the drainage

the joists have probably rotted due to damp from the wall as a result of the drain leaking over a long period.

The floorboards standing on the rotten ends are likely to have sunk because the joist has crumbled.

The black paint was probably a futile attempt to prevent damp penetrating the wall. It is no good protecting the side of a wall if water can get in from underneath. The house looks as if it ought to have a slate DPC.
 
John has answered most of your Q's, but for two pence more:

1. There might be no DPC. dont sweat it, but stay well away from all damp proofing "treatments".
In theory, the joist tails are supposed to sit on the DPC, and the GL be 6" below the DPC. How often do we see that.

2. Your vents should be cleaned out - all of them.

3. The last joist by the C/U is a bolt-on ie. the damaged part of the tail has been trimmed away and a piece bolted/screwed on.
There is evidence - probably ancient - of beetle attack, ignore it.
However, you should probe, with a screwdriver, all the joist ends as they enter their wall pockets. You are looking for decay.
The brown paint is simply brown gloss.

4. The pipework photos: leave well alone unless it's leaking. The original CI soil pipe was not routed that way, presumably the bathroom layout has changed.

5. As John said, be extremely cautious when breaking out the concrete at the base of the stack.

6. Thats a good section view of recent tanking with dot and dab.
 
Forgot: Your main drainage probably runs down the centre of your house side passage, however i dont see a M/H or I/C cover. Are any present?

There is a band of black above the "Oriel bay" window, is this just decorative?
 
Thanks mnb & JohnD,

1. Have probed the joist ends. Looks like they were damaged in the past but seem dry now. Edges of most of the joists are crumbly (presumably as you say a beetle attack) but all the cores seem solid.

2. Messy soil pipes. Yes, by the looks of it the bathroom was changed. Is making this look better something to consider doing when we get round to re-doing the bathroom? Or I suppose I could just paint it all white to blend in?

3. Yes there is a mains drain down the centre of the passage - there is a cover a meter off from that house corner (not sure what the difference between an inspection or manhole is).

4. No the black band is a painted wooden beam. Could it be an old lintel?

5. Do you think it is worth opening up the concrete to explore or can I just repair the brick work? What do you mean by pinning - this sounds scary!

6. Like the idea of a French drain. Where should I connect the end of the pipe to (or just into a soak-away)?

Thanks again.

Jim
 
When you dig out that soil pipe from its concrete cover, you may find old broken pipes and poor repairs. You really need to find and fix whatever is wrong.

You can lead a french drain downhill, if you have a hill. the thing they really do is stop damp soil or stagnant water against the house wall, as it just runs down between the stones. it will tend to soak away unless you are on clay subsoil which is impervious. You can put paving slabs on top of the stones, with a slight fall away from the house. They will tend to settle in the first year or so; or you can put gravel on top for neatness. Use a membrane above the pebbles ant to the garden side. I am not up to date with modern membranes, but if nothing else, you can use anti-weed membrane as used on gravel paths. The fibrous membrane allows water through but prevents soil particles/mud which would silt up the pebbly drain if they got in.

you can lay a special slotted drainpipe at the bottom of a french drain to collect the water and make it easier to pipe away. I know someone whose cellar gets flooded and they have a sump pit (it should be lined with no-fines concrete) with a pump in it. You are not supposed to pump ground water into a sewer
 
As John says, you must open up the conc. and then reveal whats what. Pinning is way down the line ,
first reveal the drainage. Also lift the MH cover and observe the condition, depth and flow.

The lintel/beam: how far does it extend (photo's of elevation and interior beam position would help), how old is the property? Was it ever a shop? Perhaps the lintel has something to do with the Oriel Bay installation? Brickwork above and below the lintel is showing deep shadow lines. It almost runs to the arris corner. Examine it with a probe.

Painting plastic is a thankless task, but it will pull it all together.
 
Thank you both again,

Will be digging out the concrete this weekend. Lifted the manhole - all seems to be flowing well.

Picture of the whole beam below. Building is circa 1900, no knowledge if it was ever a shop but a possibility given the area.


Going with the French drain idea. Getting a mini digger in this weekend to lower the pathway level. I know I will then probably have to lower the manhole level by a couple of courses....

Jim
 

DIYnot Local

Staff member

If you need to find a tradesperson to get your job done, please try our local search below, or if you are doing it yourself you can find suppliers local to you.

Select the supplier or trade you require, enter your location to begin your search.


Are you a trade or supplier? You can create your listing free at DIYnot Local

 
Sponsored Links
Back
Top