Hi,
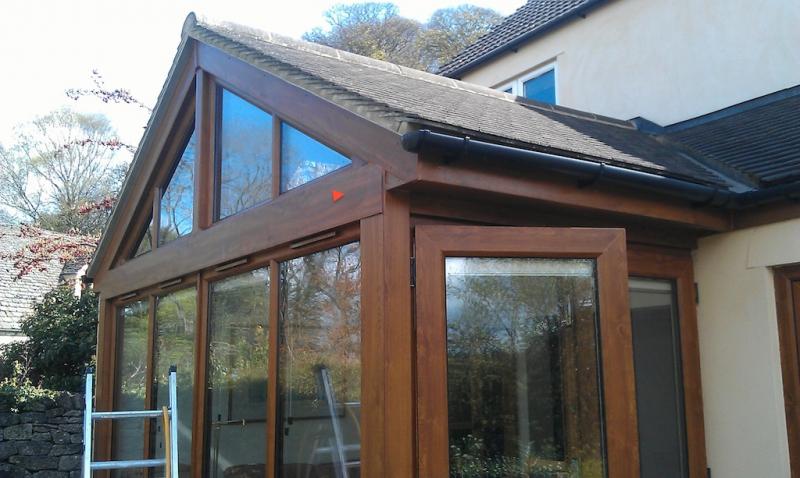
Our back room is leaking again from the horizontal cladding between lower rectangular glazing and upper glazing at the gable end.
Externally it appears built using all uPVC with a tiled roof. Docs suggest a steel frame was used (there is one glazed end, one part glazed and one solid wall):
Same problem was "fixed" end of last year under warranty (8 years old) by replacing horizontal external strips that are just below the upper glazing. Looked like the sealant was no longer working long most of the length, so the guy stripped it all off, cleaned a resealed.
It still looks good to me - had a good look and pressed on various bits.
The company has gone bust between last Dec and now, so non-insurance based warranty is of no use and will have to a) diagnose the problem myself whilst b) hunting around for a reliable fixer.
Experience has shown hunting for leaks is hard - I think I need to employ two techniques:
i) Get the hosepipe on squirt mode and test the whole structure bit by bit, methodically. We are not in a hosepipe ban area")
ii) Given the leak is just below the horizontal transom, it could be from anywhere above this line, including I suppose anywhere back from the gable end
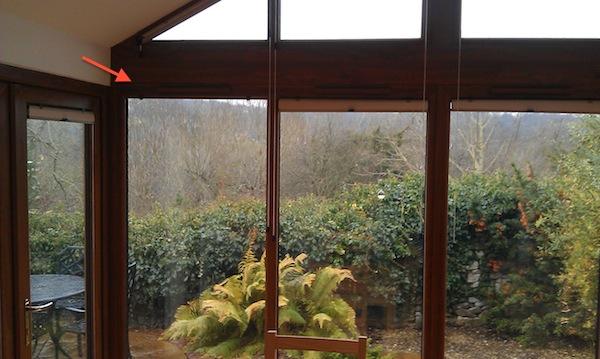
The leak is from the point marked by the arrow. If I can get the cladding above off, then I should be able to see the path of the incoming water much more easily.
I cannot see how this piece is fixed - both ends are in plaster, but does appear to be attached somehow along its length.
What is the standard way of fixing this piece? If I apply some force with e.g. paint scraper, is it likely to come off without breaking and bend enough to clear the plaster at each end?
I don't really want to start taking off outside pieces of uPVC this time of year...
Any helpful suggestions gratefully received! [/img]
Our back room is leaking again from the horizontal cladding between lower rectangular glazing and upper glazing at the gable end.
Externally it appears built using all uPVC with a tiled roof. Docs suggest a steel frame was used (there is one glazed end, one part glazed and one solid wall):
Same problem was "fixed" end of last year under warranty (8 years old) by replacing horizontal external strips that are just below the upper glazing. Looked like the sealant was no longer working long most of the length, so the guy stripped it all off, cleaned a resealed.
It still looks good to me - had a good look and pressed on various bits.
The company has gone bust between last Dec and now, so non-insurance based warranty is of no use and will have to a) diagnose the problem myself whilst b) hunting around for a reliable fixer.
Experience has shown hunting for leaks is hard - I think I need to employ two techniques:
i) Get the hosepipe on squirt mode and test the whole structure bit by bit, methodically. We are not in a hosepipe ban area
ii) Given the leak is just below the horizontal transom, it could be from anywhere above this line, including I suppose anywhere back from the gable end
The leak is from the point marked by the arrow. If I can get the cladding above off, then I should be able to see the path of the incoming water much more easily.
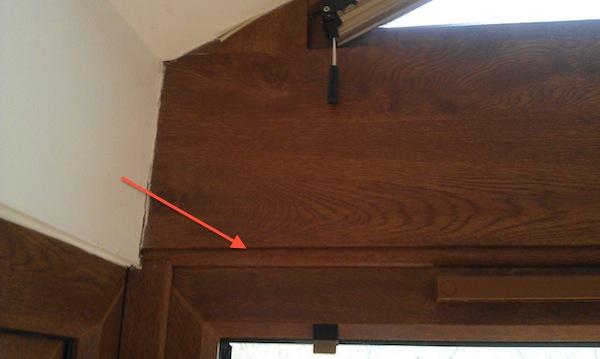
I cannot see how this piece is fixed - both ends are in plaster, but does appear to be attached somehow along its length.
What is the standard way of fixing this piece? If I apply some force with e.g. paint scraper, is it likely to come off without breaking and bend enough to clear the plaster at each end?
I don't really want to start taking off outside pieces of uPVC this time of year...
Any helpful suggestions gratefully received! [/img]