Oak beam fixing help

Joined
8 Jun 2020
Messages
4
Reaction score
0
Country
United Kingdom
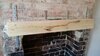
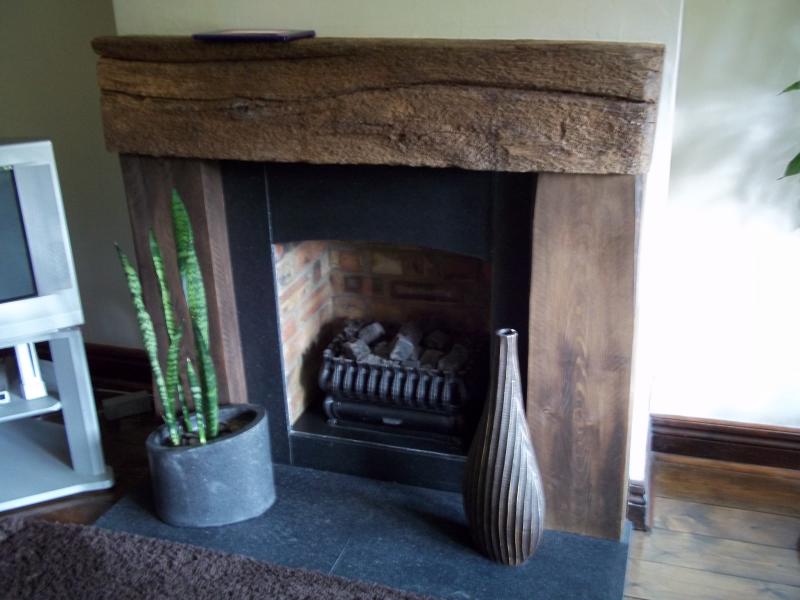
Hello all first post, really hoping someone can help me. I have a 50” by 5” oak beam to fix above my open fireplace. I have decided to go the resin filled anchor route for a good solid fixing. The beam is about 10kg so not the heaviest.

my biggest issue is how do I keep 5 rods level and straight while curing. If the cure time is as little as 8 minutes it doesn’t seem long enough to make sure the threaded M12 bolts haven’t begun to droop.

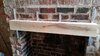
I was considering buying the nylon sleeves but they seem to be for hollow walls. Mine is a solid brick chimney breast with about 16mm of render. Would the sleeves be as effective as I’ve noticed they hold the rods nice and level but require a larger hole to be drilled.

sorry for the rambling, I’m scaring myself off from starting this project!
 
Sponsored Links
I supported mine with corbels with sliding dovetails.
 
Good morning, the beam is going to be slotted onto the m12 rods so it kinda floats. Hence why I’m using 5 threaded rods.

as I say my biggest fear is I insert the 12mm rods into a 16mm hole they will droop while I am tending to the other holes while the resin is still curing. I can’t do one hole at a time as I only have a limited amount of time.
 
Last edited:
Sponsored Links
Drill 5 holes in a length of timber such that the rods when pushed into the holes are exactly how you want them to be when the resin has cured. If necessary set up a temporary support for this while the resin cures.

Ensure the rods when in the jig all fit into the drilled holes. Then put the resin into the holes and push the rods in the jig into the holes.
 
Thanks I was thinking of making a jig like this but just checking to make sure I wasn’t over complicating things by overthinking.
 
a big beam like that is liable to twist or warp as it dries out over the fireplace.

It may be safer to use a bracket arrangement supporting it from below or, if you want to use rods, have them in oversized drilled holes in the timber so there is room for it to move.
 
This method is rock solid and an easy way to ensure your levels are correct. It all depends on how much making good you are willing to do afterwards.
 

Attachments

  • 20190524_124223.jpg
    20190524_124223.jpg
    272 KB · Views: 327
  • 20190524_120154.jpg
    20190524_120154.jpg
    281 KB · Views: 259
Thanks everyone for the suggestions, going to go with the rod method as I have already drilled the holes but if it fails I’ll try the above method and replaster the wall.
 

DIYnot Local

Staff member

If you need to find a tradesperson to get your job done, please try our local search below, or if you are doing it yourself you can find suppliers local to you.

Select the supplier or trade you require, enter your location to begin your search.


Are you a trade or supplier? You can create your listing free at DIYnot Local

 
Sponsored Links
Back
Top