Tape and Jointing

Joined
7 Apr 2009
Messages
79
Reaction score
0
Location
West Midlands
Country
United Kingdom
Hi guys, looking to do a small amount of Tape and Jointing in a bedroom.

A quick few questions.

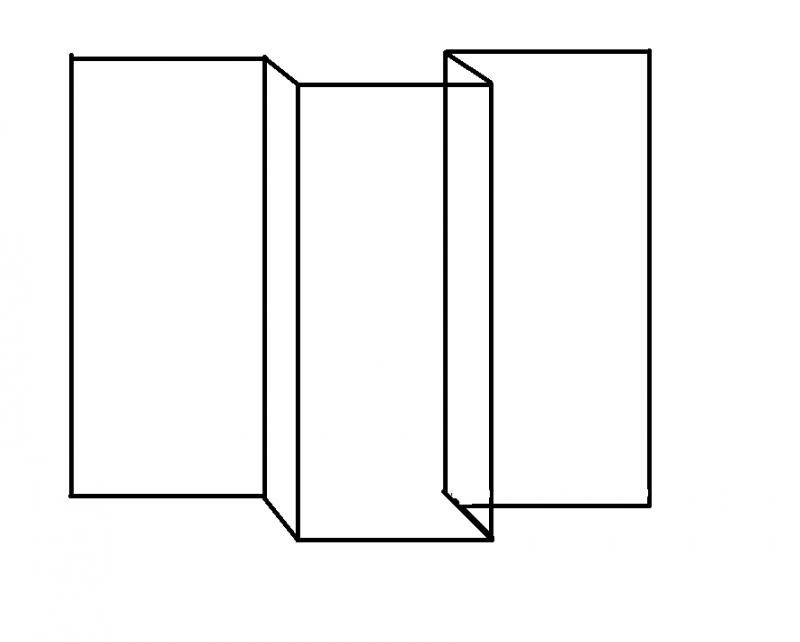
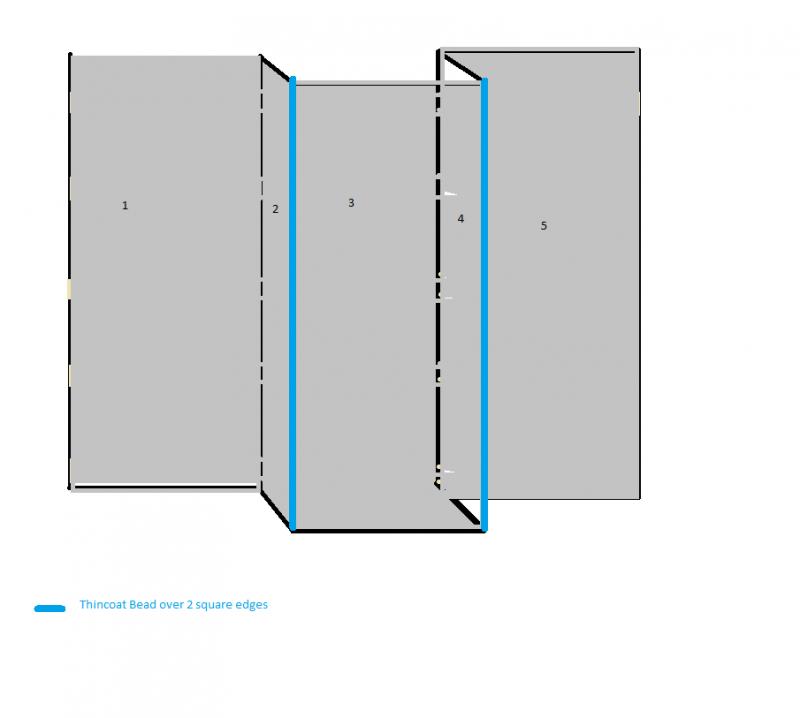
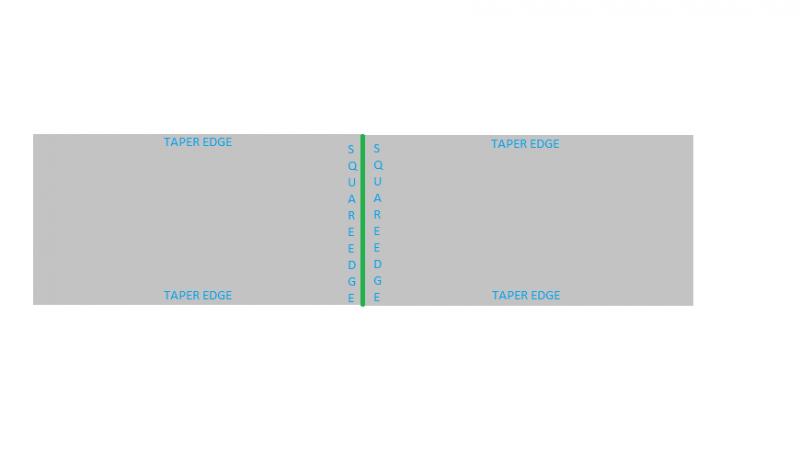
I will be using tapered edge boards, but there will obviously be joins where a tapered edge meets a square edge where a board has being cut, I was wondering if I still go the same way about taping and jointing this join? As I would have thought it would be harder to feather out?

Also,
Should I make tapers meet in the internal corners?
Should I use thin coat beat for the internal corners or scrim?
Can I have square edges for external corners and use thin coat beads?

Any advice much appreciated

Cheers
Adam
 
Sponsored Links
Hello Adam,
ideally you try to avoid square edge joints, but sometimes this in not practical.
If your stud work is designed and built right there should be no reason for square edges to but up. I would firstly try to get that corrected if you can.
You can but the square edge in to both internal and external angles, with very little notice.
The best tape to use is the self adhesive nylon type tape and these can be used in internal corners, thin coat angle beads are best used on the external angles of walls and around window reveals, only.
When you really need to, you can feather a square edge joint out, I have in the past chamfered the edges of the board down to form a taper edge.
Hope this helps
 
Hmm, let me test my MS paint skills! :LOL:

This is the layout of the wall I plan to stud and plasterboard, it is a wall with a chimney breast in the centre.


I planned to stud it out like this:

and then plasterboard over, and use thin coat beads like this:


but board 1 will have a cut square edge where it meets board 2, which will have a tapered edge. So will board 4 where it meets board 5.

How do I go about tape and jointing this?

Is it just a matter of using scrim tape or paper tape in the corner, and just feathering it out?

Excuse my poor paint skills :oops: :LOL:

EDIT: Just realised I drew the studs horizontal, I will be putting them up vertical at 400mm centres.

Cheers
Adam
 
You should be fine with that, as all the joints are within angles and not along any flat straight wall surfaces.
I would use the thin coot beads for the external angles on boards 2 and 3, and 3 and 4.
I prefer to use the self adhesive nylon tape
http://www.wickes.co.uk/Plasterboard-Jointing-and-Repair-Tape/invt/163566
It's much easier to use, than the paper tape and does not blister or double with dry spots.
If you apply these tapes over your joints, then apply your jointing compound ( I use easifill) but there are others and some come ready mixed.
Making sure the tape is flat, I prefer to use a broad blade like this
http://www.dry-lining.co.uk/product/Broad_Knife_Blade_15165
but you can use a small plasterers trowel.
The object of the first application of joint compound is to lay the tape flat and stick it to the wall, so this only needs a thin coat, covering the tape and about 10-20 mm either side of the the tape.
This can then be sanded when dried, two more application are then recommend both these will fill the joint out and need sanding after each application has dried, the final application and sanding should leave you with an level, even and smooth surface. This is then ready to be primed prior to painting.
Hope this made sense, if not do not hesitate to reply.
 
Sponsored Links
Cheers for the help mate!

I have afew other parts in the room to do, but I will try and make sure taper edge meets another taper edge.

If one meets a square edge, should I just surform it down at an angle?

Cheers
Adam
 
i have editted my previous post with a bit more info.
if you keep to the 400mm vertical centres with your stud work it should not be an issue. Planning is the key.
But if you do at anytime end up with a square having to be on a joint, If it is in a critical spot, I have in the past tapered that edge in using a block planer.
You do need to careful when doing this, as it will break the skin of the plasterboard which can then become quite delicate and fragile to screw up.
 
If you are doing joints on straight walls, where you have joints butted up together. I would go for a broader knife (10 or even 12 inch), so you can cover the joint in one swoop or use a platerers trowel, this will help reduce the chances of application lines.. The narrow blades will be okay for the internal angles though.
 
Thanks.

Do you know where I could buy jointing knifes from other that Screwfix? As they only sell 4" and 6" blades, and I can't find any on the Wickes website.

I plan on doing this in the next few days, so don't really want to order one online and wait to receive it, especially with christmas postage delays lol.

EDIT: nvm, b&q sell them in different sizes.

Cheers
Adam
 
Another quick question mate!

When I join boards horizontally, do I just make a chamfer on both boards where the square edge is? Or do I just leave about 2-3mm between the boards? Then scrim and fill as normal?

I'm on about where the green line is.


Cheers
Adam
 
It is best to fix the boards so they stand up long side vertical when using tapered edge this will prevent the square edge joint.
The ideal board size for standard room size to use would be 2400x1200x12.5mm. This will reduce number of joints and prevent any square edged joints, as they normally do for the height of the average room.
When it's a ceilng and square edges can't be avoided, it tend to leave the board sa it is on the square edge cut and feather the joint compond application out a little more than I would if the joint be tapered.
If it was an absolute that I need to board the wall as your diagram, with square edged joints. I would again feather the joint out, but I would also stagger the joints, so there was not one long square edge joint from top to bottom.
This may help you understand if you consider this a wall rather than a ceiling:
http://www.zurich.co.uk/NR/rdonlyre...DE0F7CFBC0/0/PlasterboardCeiling107782A02.pdf
Screwfix do a taping knife at both 10 and 12 inch
http://www.screwfix.com/prods/37721...e-Jointing-Tools/Marshalltown-Taping-Knife-12
 
Thanks.

This part which I am on about having to join 2 square edges will be for the bottom of a pelmet around the outside of the ceiling, which will house down lights. The joins will only be about 20"s at max, not the entire board.

You said to teather the join out, so I am assuming I will have to leave afew mm gap between the joint for me to scrim over? So that my easifill has somewhere to sink into?

Cheers
Adam
 
There is no need to leave a gap between the boards, I always fix them up tight, never had a problem.
remember to use the dry wall type screws as these have a protective coating and will stop them from rusting or poping if they get moisture to them, also it is best to screw them, rather than fix the boards using clout head nails, if you space your screws out about every 6-8 inch when fixing to stud work, it will give you a good sound, secure fix.
the screws want to be slightly countersunk, but not breaking the paper of the board, you will need to spot fill the screw heads with the joint compound too, usually two application will do.
 
Ok thanks, I just didn't think that butting up 2 square edges would be that easy to tether out, as I thought it would help with a little gap.

Yep I will be using proper drywall screws I have got from on site!

Thanks for all your help mate, no doubt I will find more questions to ask you! lol

Cheers
Adam
 

DIYnot Local

Staff member

If you need to find a tradesperson to get your job done, please try our local search below, or if you are doing it yourself you can find suppliers local to you.

Select the supplier or trade you require, enter your location to begin your search.


Are you a trade or supplier? You can create your listing free at DIYnot Local

 
Sponsored Links
Back
Top