
A homeowner with 12v MR16 downlights set into plasterboard ceilings needed to get at the transformer after the low-voltage lead to the bulb failed. The fittings – fire-rated JCC types with twin-tong spring clips – refused to budge despite compressing the visible clips inward. Every pull just flexed the plasterboard and started chewing up the edges of the hole. They wanted to get the fitting out cleanly, replace the failed lead, and ideally upgrade the whole lot to mains-voltage GU10 fittings.
What’s likely going on
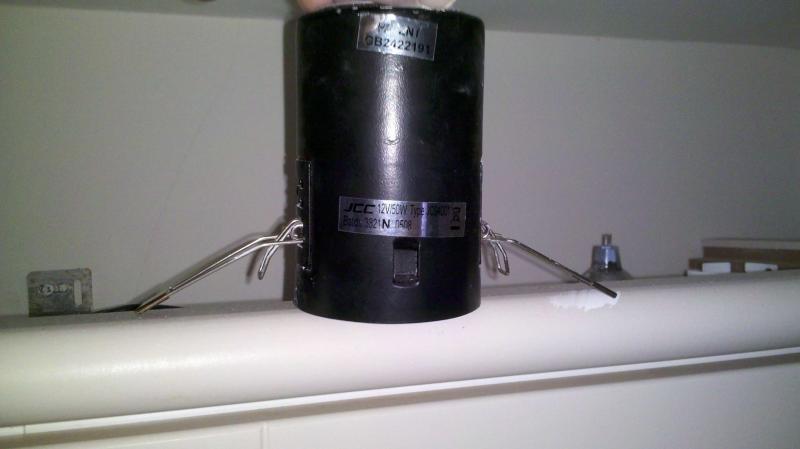
This is a common one in UK houses, particularly where fire-rated downlights were fitted in the mid-2000s. The fittings use a retention clip system with two spring-loaded “tongs” per side rather than a single one. The short inner arms wedge outward against the edge of the hole in the plasterboard, while the longer outer arms grip behind the board. The tighter the hole was cut, the harder they grip – and JCC fittings are known for having almost no rim overhang, so there’s nothing to hide minor plaster damage if you scuff things up.
The reason compressing the clips doesn’t free the fitting is that you’re only dealing with the inner arms. The outer arms are still locked behind the board. The fitting is designed so that you pull the whole body downward, the inner arms gradually release their wedging force, which in turn lets the outer arms fold inward enough to pass through the hole. It’s counter-intuitive – you feel resistance and think something is jammed, but the mechanism needs a steady, even pulling force on the fitting body itself.
The failed lamp lead, incidentally, is often caused by heat. If dichroic (glass-backed) lamps were used instead of aluminium reflector types, the heat gets thrown backward into the can and cooks the wiring and lampholder over time. That’s worth checking before you refit anything.
Simple checks first
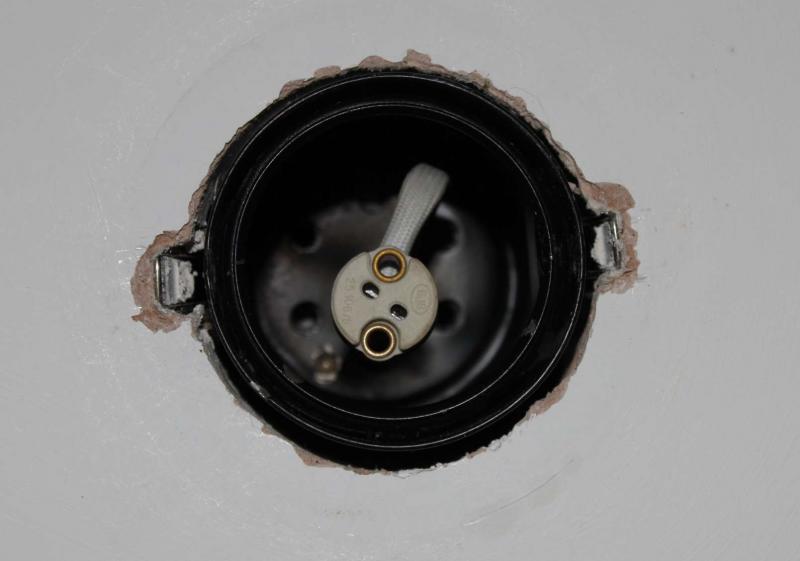
Look at the fitting from below and identify the clip type. If you can see two small metal tabs poking inward on opposite sides, those are the inner arms of a twin-tong clip. Don’t try to prise these out with pliers – that just damages the plasterboard edge and doesn’t address the outer arms behind the ceiling.
- Check whether the fitting has a removable bezel or trim ring. Some have a bayonet-fit front ring that twists off. Removing it can give you a slightly better grip on the main body and sometimes reveals a fractionally wider gap to work with.
- Measure the hole diameter if you can. JCC fire-rated fittings typically use a 63–65mm cutout. If someone cut the hole tight, you’ve got almost no clearance, which explains why the springs bite so hard. Knowing the hole size also matters if you end up replacing the fittings with something more forgiving.
- Check for access from above – lifted floorboards or a loft hatch. If you can get above the ceiling, you can push the fitting down from the back, compress the clips manually, and at least see whether anything else is holding it (cable ties or pipes, insulation packed tight around the can, that sort of thing).
The proper approach: good, better, best
The good option is to work the fitting out through the existing hole. Grip the body of the fitting firmly – not the clips – and pull straight down with steady pressure. If it won’t come, try rocking it gently side to side: pull one edge down a centimetre, then the other. This loads the springs one at a time rather than fighting both together, and it’s much kinder to the plasterboard. Refit the trim ring first if you removed it, as it gives more to grab onto. Some people have had success sliding a thin plastic card (an old loyalty card works) between the spring arm and the plasterboard edge to act as a shield and reduce the grip. Be prepared – when it releases, the springs can snap back sharply, so keep your fingers clear.
The better option, if pulling from below is clearly going to damage the ceiling, is to push the fitting upward into the ceiling void. Use a flat tool or even your thumbs to press the body up past the clips. Once it’s loose above the ceiling, you can fold the clips flat, pull it back down through the hole, and deal with the wiring from below. This is slightly unorthodox but actually works well on the stubborn twin-tong types.
The best option – and the one I’d go with if the fittings are old and the lamp leads have already failed – is to replace the lot. Pull the old fittings out (accepting some minor plaster damage), and fit modern downlights with a larger cutout diameter, typically around 70–74mm. The bigger hole covers any scarring left by the old fitting, and modern fittings tend to use single-tong clips that are far easier to remove in future. You can get fire-rated GU10 types with open backs that accept any lamp, and many are available as Class II (double insulated) so they don’t need an earth connection – useful if your existing circuit is just twin-and-earth without a spare conductor.
Bodges and mistakes to avoid
Don’t grab the spring clips with long-nose pliers and yank. You’ll tear the plasterboard edge away and end up with a ragged hole that the trim ring won’t cover. Don’t use dichroic lamps in a closed-back fire-rated can – the heat goes backward, cooks the lampholder, and kills the lead. Always use aluminium reflector “cool fit” lamps in these fittings, or better yet, switch to LED GU10s which run far cooler.
If you’re enlarging the hole for a replacement fitting, don’t just hack at it with a knife. Use a plasterboard saw or hole cutter, and go carefully – there will be cables above, and you won’t see them until you’ve cut into one. Don’t assume you can swap from 12v MR16 to mains GU10 just by changing the lampholder and removing the transformer. If the existing circuit feeds the transformer with twin-core flex (no earth), you’ll need to check whether the new fitting requires earth. If it does, you’ll need twin-and-earth back to the junction box, which may mean re-running cable.
When to bring in a specialist
If you want to convert from 12v to mains voltage and you’re not confident about the wiring – particularly around earthing, junction boxes, and how the circuit is configured above the ceiling – get a qualified electrician to do it. Swapping like-for-like lampholders or pulling a fitting out to replace a lead is straightforward DIY, but altering the circuit from low voltage to mains is a different matter. If there’s any doubt about the cable type feeding the fitting, or you can’t trace the circuit back to a junction box, that’s one for a spark.
Reality check
These fittings come out. If they went in, they’ll come out – it’s just a question of how much plasterboard comes with them. Budget for a bit of making good around each hole: some fine filler, a light sand, and a dab of paint. If you’re replacing multiple fittings, do them all in one go so you only have to touch up the ceiling once. Allow a day for the filler to dry before painting. Keep the power off at the consumer unit for the lighting circuit while you’re working – not just the wall switch – and confirm it’s dead with a voltage tester before you touch any wiring. If you’re working from a stepladder, get someone to foot it. Ceiling work with your arms above your head is tiring, and tired people wobble.