
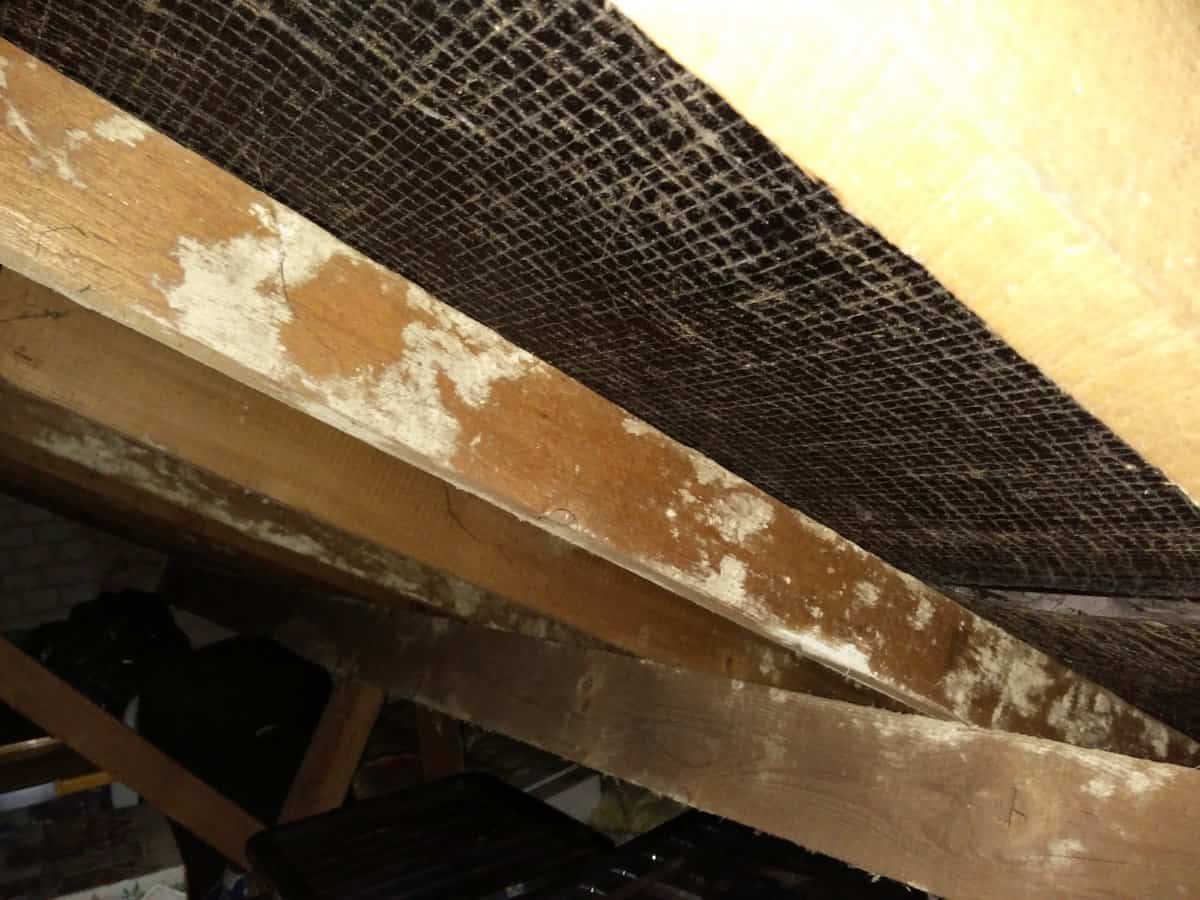
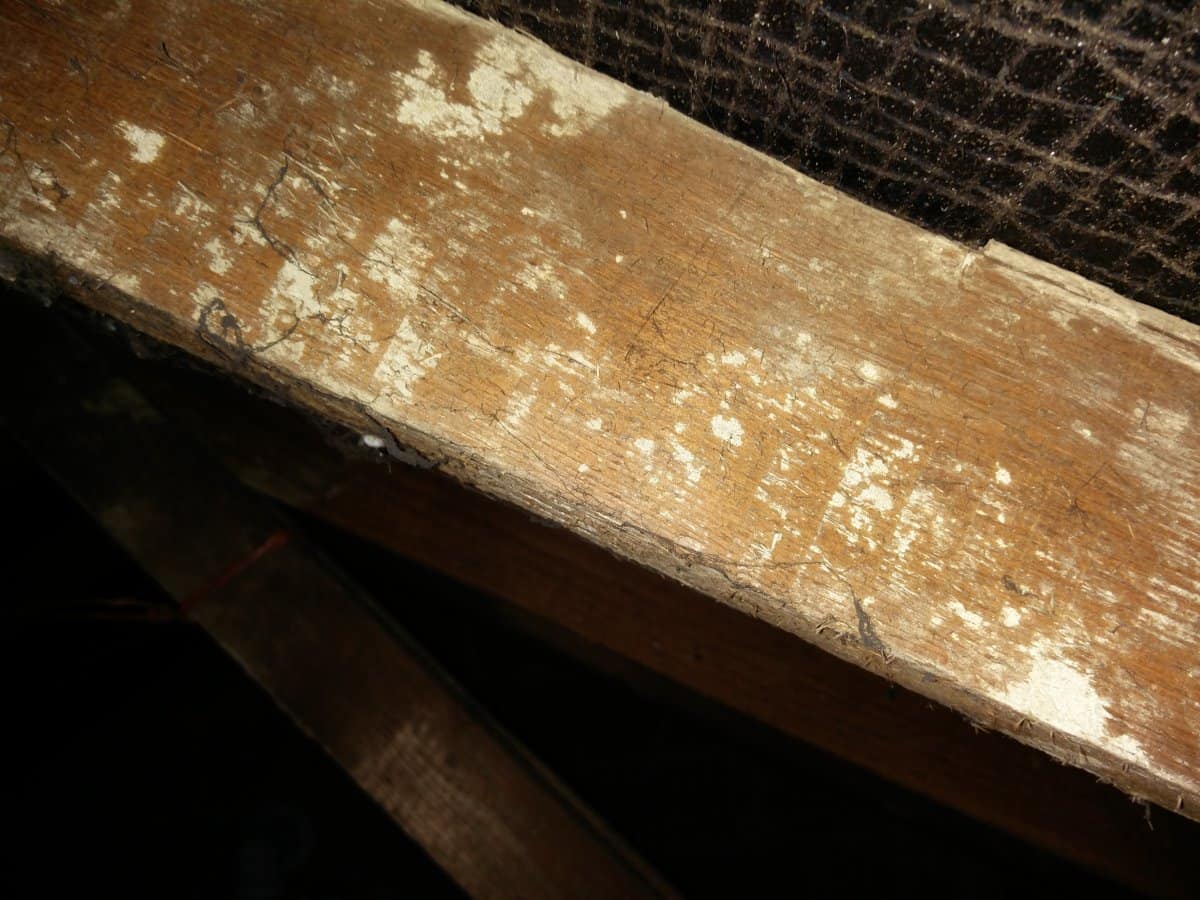
A homeowner in a 1960s house has spotted odd white patches on the roof rafters up in the loft. They don't stand proud of the timber like fluffy mould would – they look like dry, bleached areas, and if you scratch them a fine dust comes off. The loft is part-boarded, has fairly new insulation, an old black bitumen (non-breathable) felt under the tiles, and a boiler has recently been installed up there. The question is simple enough: what are these marks, do the timbers need chemical treatment, or is it really just a ventilation problem?
This is a common one in UK houses of that era. Before you start spending money on timber treatments or full re-roofs, do a couple of simple checks so you're fixing the cause, not the symptom. I'll run through what's likely happening, what you can safely check yourself, and what a proper fix looks like, plus the usual bodges that don't last.
What's likely going on
Nine times out of ten, white spotting on loft rafters in a 1960s house with old black felt is down to condensation. Not a roof leak, and not woodworm. The chain of events goes like this: warm, moist air from the house (kitchens, bathrooms, breathing, drying clothes, and now a boiler flueing or venting warmth up there) rises into the loft. The old bitumen felt is non-breathable, so that moisture can't pass out through the roof. It hits the cold underside of the tiles and the felt, condenses, and drips or wicks back onto the timbers. Over time you get repeated wetting and drying cycles on the rafters.
The white patches are usually one of two things: a surface mould or mildew (often called white spot mould) that grows in that damp microclimate, or bleached timber where moisture has drawn salts and lignin to the surface. Both point at the same underlying issue: the loft is too damp because it isn't ventilated properly. Adding a boiler and topping up insulation often makes it worse, because you've trapped more warmth and moisture below and reduced the airflow around the eaves.
Simple checks first (safe)
Before anyone starts talking about re-felting or spraying chemicals, go up on a dry day with a torch and have a proper look. Don't guess, prove it.
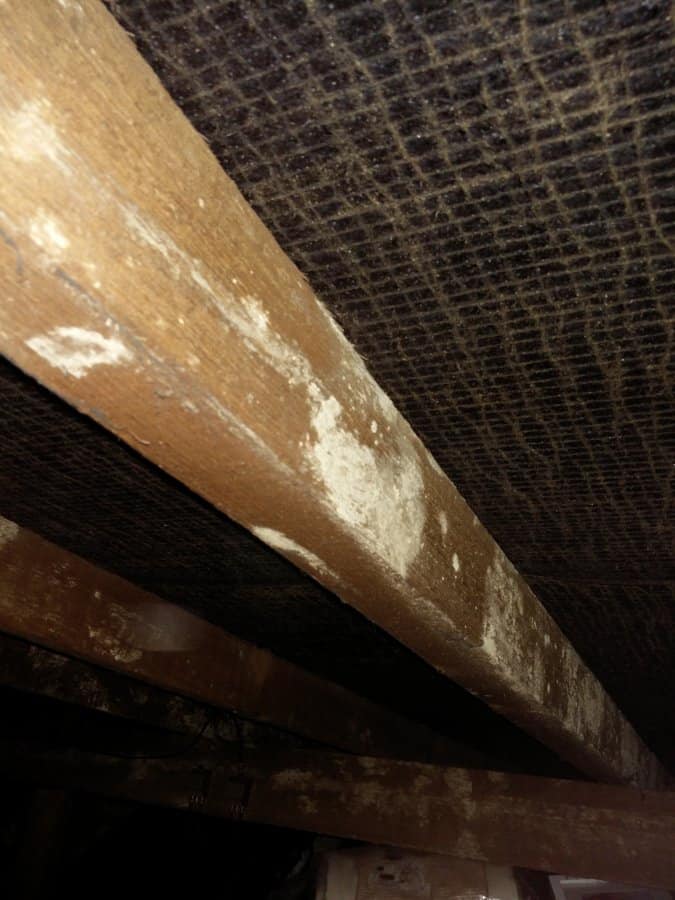
- Look at the felt itself. Any black staining, sagging pockets holding water, or damp patches directly under tile laps? Wet felt with clean rafters points to a leak. Dry felt with patchy rafters points to condensation.
- Check the eaves. Can you see daylight at the edge where the insulation meets the wall plate, or is the insulation stuffed right up tight to the felt? If airflow is blocked at the eaves, the loft can't breathe.
- Feel the timbers. Are they actually damp, or just marked? Bone-dry timber with white patches usually means the problem has been intermittent: wet in winter, dry now.
- Scratch test. If a light scratch gives fine dust and clean timber underneath with no soft or crumbly wood, you're not looking at rot. Soft, spongy timber is a different conversation.
- Look for droppings or fine bore holes. Small round holes and dust piles could be woodworm, which is a separate issue. White patches without holes aren't woodworm.
- Check the boiler installation. Is the flue properly sealed where it passes through the roof? Any pipework or fittings sweating? A poorly sealed flue can dump moist air straight into the loft.
- Inside the house, look for signs of damp. Peeling paint on the ceiling below, staining round the loft hatch, or a hatch that isn't sealed and insulated. All of these let household moisture straight up.
If the timber is dry, structurally sound, and there's no obvious leak path, you're almost certainly looking at a condensation problem.
Proper fix – good, better, best
The principle is the same across all three: get air moving through the loft so moisture doesn't sit on cold surfaces. The differences are in how much work you're willing to do and how bad the problem is.
Good – basic ventilation upgrade
For a mild case in an average loft, adding vents is often enough. That typically means:
- Soffit vents or over-fascia vents front and back, so air can enter at the eaves.
- Roof tile vents higher up, so damp air can escape near the ridge.
- Making sure loft insulation isn't blocking the eaves; fit rigid eaves trays if needed to hold the insulation back and keep an airway open.
- Sealing and insulating the loft hatch properly so household air doesn't leak up.
This is a job a competent roofer can do in a day. It's where the second opinion in most cases will land, and it's usually enough.
Better – ventilation plus source control
If you've got a new boiler in the loft, drying clothes indoors, or a bathroom without a decent extractor, deal with the moisture at source as well:
- Fit or upgrade extractor fans in kitchens and bathrooms, ducted properly to outside, not just dumped into the loft.
- Make sure any soil vent or boiler flue passing through the loft is fully sealed at the ceiling and roof line.
- Insulate cold pipework in the loft to stop it sweating.
- Wipe the affected timbers down with a diluted bleach solution or a proprietary mould wash once things are ventilated, so you're starting from a clean baseline and can see if it comes back.
This combination, ventilation plus stopping the moisture getting up there in the first place, is what makes the fix last.
Best – full re-roof with breathable membrane (when the roof is due anyway)
If the roof is tired and coming up for replacement in the next few years, the proper long-term answer is to strip it, replace the old bitumen felt with a modern breathable membrane, and detail the eaves and ridge for ventilation as part of the job. Breathable membrane lets water vapour pass out through the roof instead of trapping it. It's a big spend, so I wouldn't do it just for this, but if the roof needs doing anyway, it solves the condensation issue at the same time.
Bodges and mistakes to avoid
- Spraying the rafters with fungicide and doing nothing else. Kills what's there today, but it'll be back within a year or two because the conditions haven't changed.
- Cutting random holes in the felt. Doesn't create proper airflow, lets wind-driven rain in, and can void any roof warranty.
- Stuffing more insulation right up to the felt. Blocks the eaves and makes condensation worse.
- Venting a bathroom or tumble dryer into the loft. I've seen this more times than I can count, and it's guaranteed to cause damp up there.
- Ignoring it because "the timber looks dry now." Lofts dry out in summer. Come November it'll be wet again.
When to bring in a specialist
A roofer can handle vent installation and any felt or membrane work. If you find soft, crumbly, or spongy timber, or the rafters are visibly sagging, get a structural assessment before anything else. Wet rot in a rafter is not a paint-on fix. Boiler flue queries in the loft are Gas Safe territory, not DIY. And if you're not sure whether it's condensation or an actual leak, get a roofer up on the tiles to check flashings, valleys and any mortar work while they're there.
Reality check
Loft work is dusty, awkward and hot in summer. Expect to shift boarding and insulation to get proper access to the eaves. Any bleach or mould wash needs the loft ventilated while you work and time to dry; don't seal everything back up wet. Once vents are in, don't expect the existing white marks to vanish overnight. They may stay as staining even after the cause is fixed. What you're watching for is whether new patches appear over the next winter. If the loft stays dry through a cold, wet January, you've cracked it.