
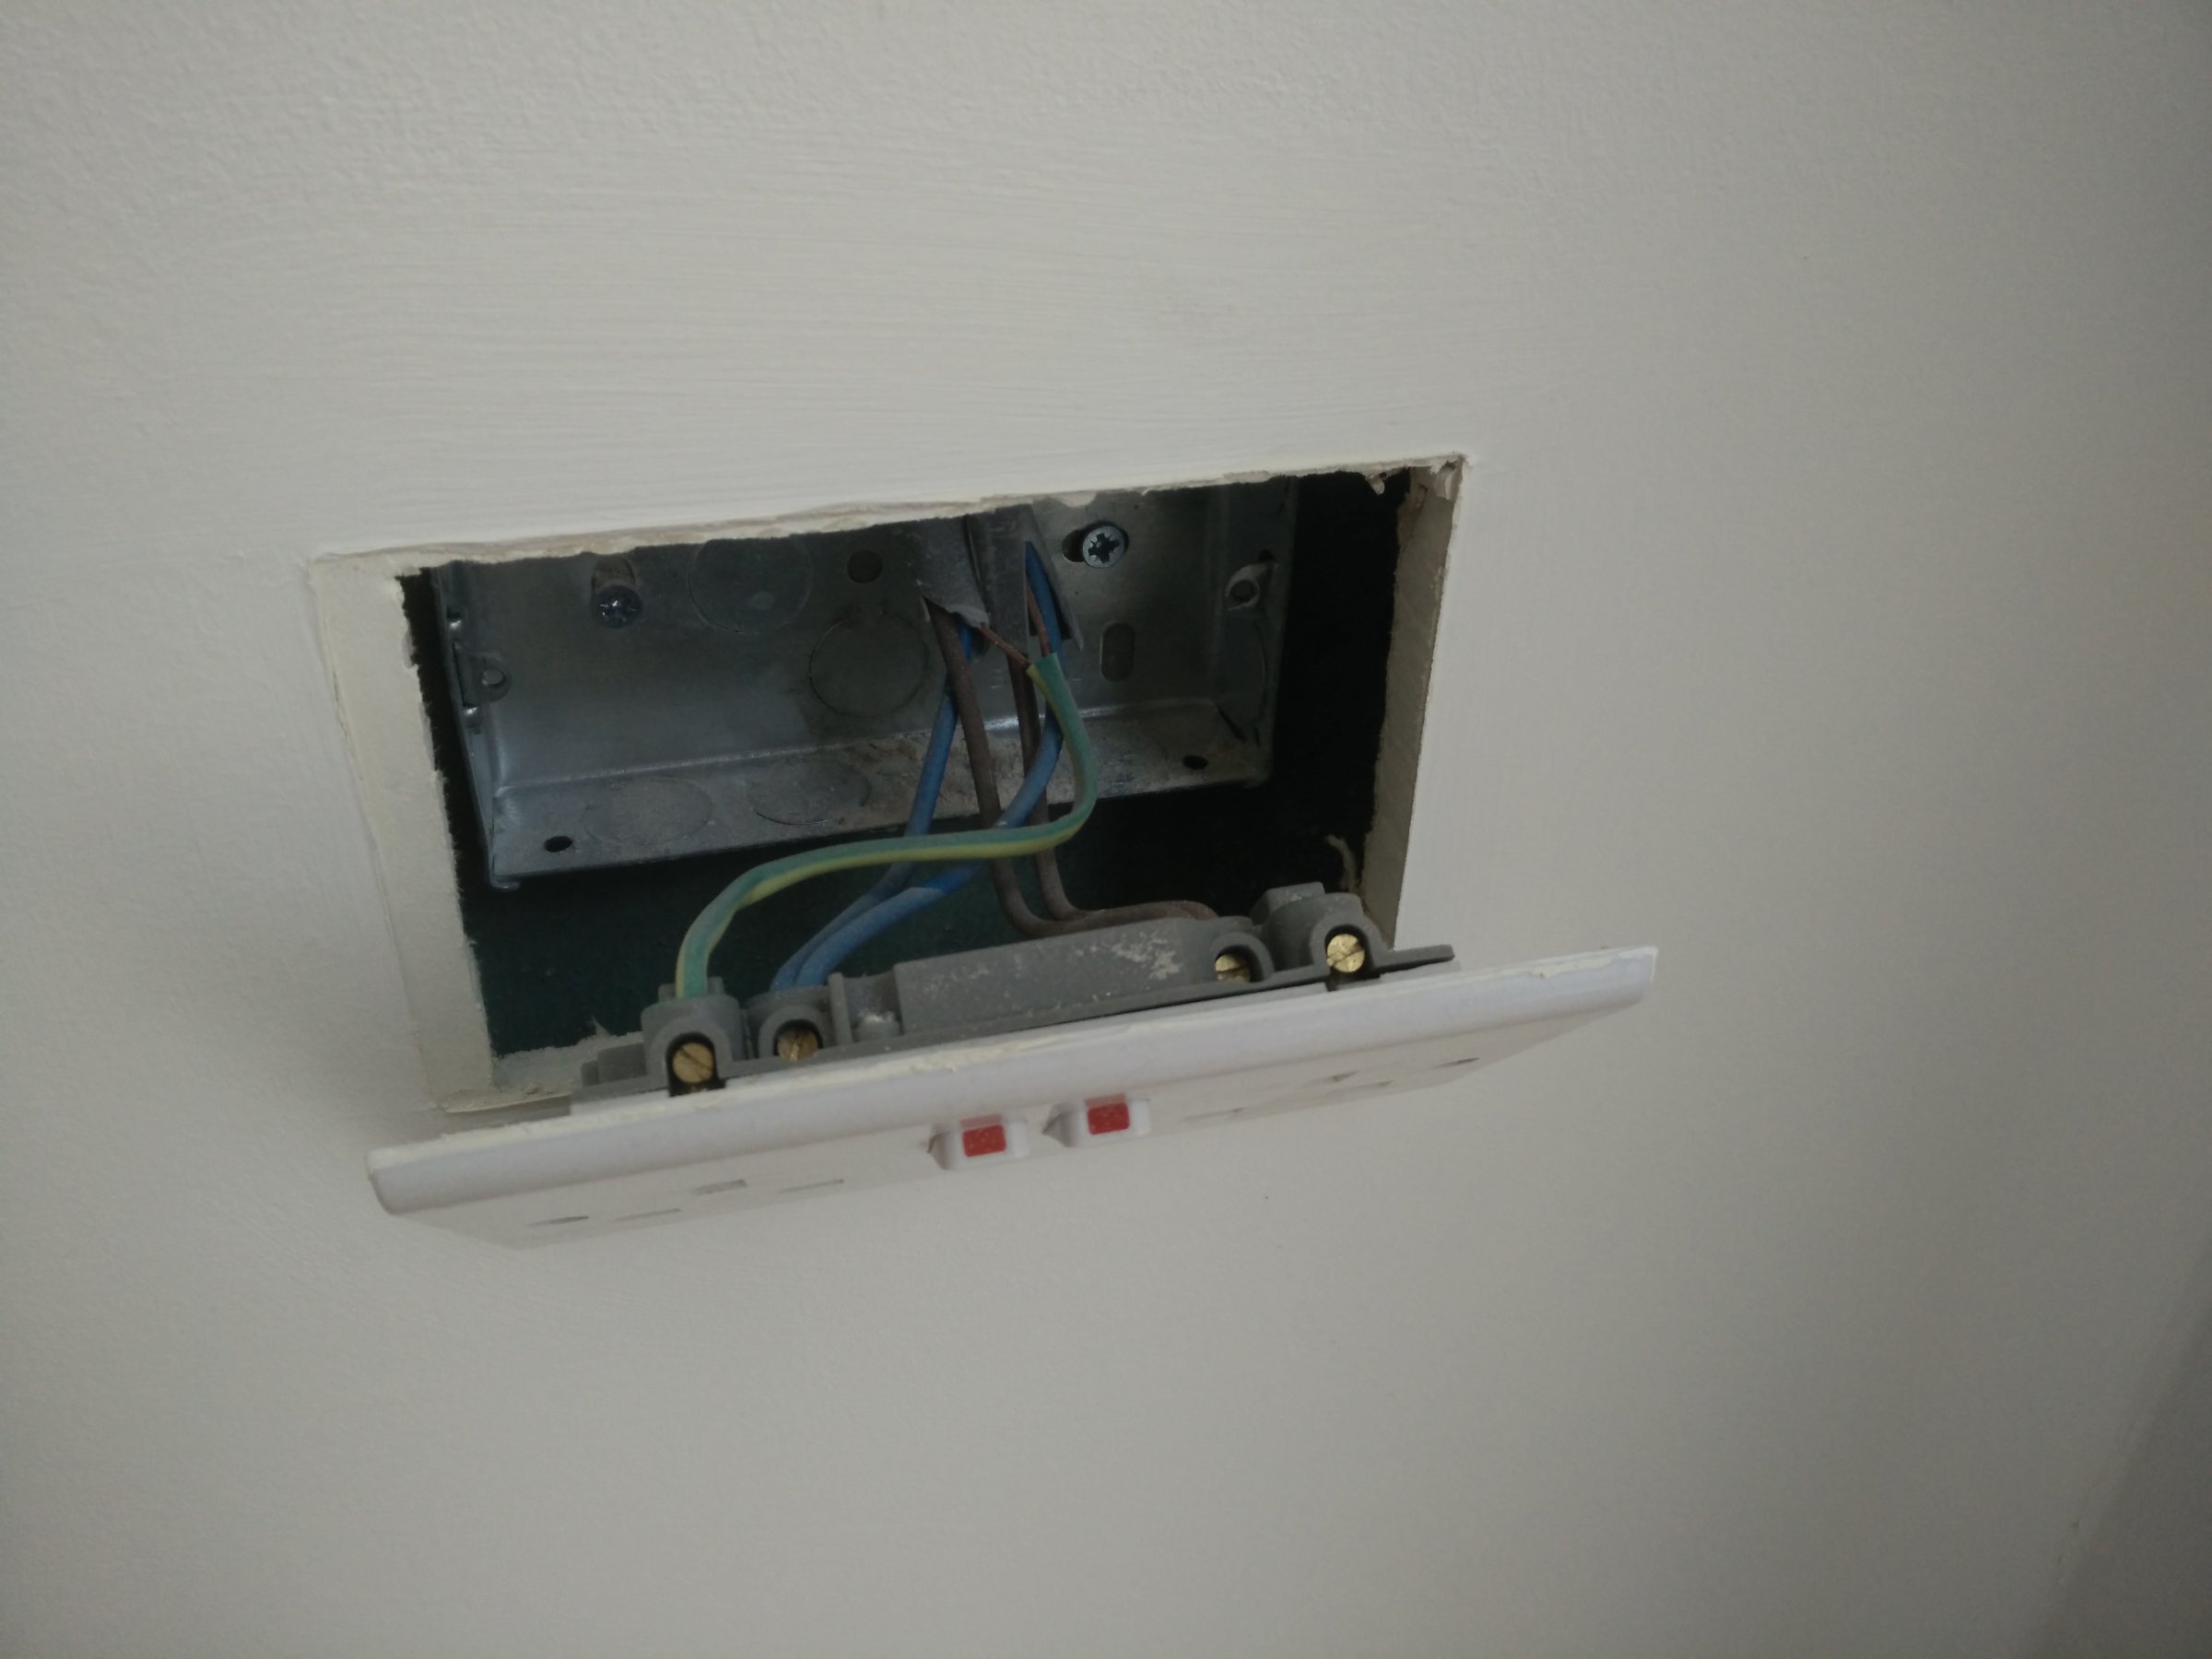
A homeowner in a 2009 new build has taken off a twin socket to spur off a fused connection unit and found the metal back box screwed straight to the blockwork behind, with a big gap between the front of the box and the face of the plasterboard. The face plate was being held on with extra-long screws bridging that void. The wall isn’t dot-and-dab, it’s plasterboard on metal vertical studs fixed off the block. On top of that, the earth terminal inside the back box has no fly lead fitted. The question is whether this is safe, whether it meets the regs, and what the tidy fix looks like.
This is a common one in UK houses, especially in newer builds where the first-fix electrician sets the back boxes before the plasterboard goes up, and then the boarding ends up sitting further off the wall than anyone planned for. Before you start pulling things apart, it’s worth understanding what’s actually going on, because the fix depends on it.
What’s likely going on
On a metal-stud plasterboard wall in front of blockwork, the sparks usually screws a standard galvanised back box (25mm or 35mm deep) to the block during first fix, aiming to get the front lip roughly flush with where the finished plasterboard face will be. If the boarders then pack out the studs to correct a bow or curve in the wall, which is exactly what’s happened here, the plasterboard ends up proud of where it was meant to be. Result: the back box is now recessed well behind the finished surface, and the socket front plate is being asked to bridge a gap it was never designed to bridge.
The practical problem isn’t that the socket won’t work. It will. The issues are:
- The terminals on the back of the accessory are effectively sitting in the stud void, not enclosed in the box.
- Anything living, or anyone later fishing a cable down that void, could touch live parts.
- The fixing lugs are taking load through long screws with very little support, so the plate can flex when you plug and unplug.
- Dust, debris and draughts can move in and out of the void through the accessory.
On the missing earth fly lead: if the back box has at least one fixed (non-adjustable) lug, the metal-to-metal contact between the accessory’s fixing lug and the back box is accepted as providing earth continuity. Only when both lugs are the adjustable or floating type do you strictly need a separate green-and-yellow fly lead between the accessory earth terminal and the earth stud in the box. So the sparks isn’t necessarily wrong there, but a fly lead is cheap belt-and-braces and never hurts.
Simple checks first
Before you decide what to do, isolate the circuit at the consumer unit, lock it off if you can, and prove dead at the socket with a tester you’ve just proved on a known live source. Then have a proper look:
- Measure the gap from the front lip of the back box to the face of the plasterboard. If it’s more than a few millimetres, the accessory isn’t really “in” the box. Anything over about 5mm and I’d want to sort it.
- Check the back box depth. Look at the side: 25mm, 35mm and 47mm are the common sizes. If it’s a 25mm, swapping to a deeper one may bring the lip forward enough to sit flush.
- Check how the box is fixed. Is it screwed to the block behind, or to the metal stud? That changes your options, because a box screwed to the block can’t just be pulled forward.
- Look at the hole in the plasterboard. Is it a neat cut-out sized for a dry-lining (plasterboard) box, or is it a rough opening bigger than that? A too-big hole rules out a standard plasterboard box with its spring lugs, because they’ve got nothing to grip.
- Check the earth arrangement. One fixed lug on the back box means the accessory earths through the lug. Two floating lugs means you want a fly lead from the accessory earth terminal to the earth stud in the box.
- Check the cable entry. Is the cable coming in through a grommeted knockout, or is it just dangling in through the open back? Unprotected cable running through a metal box edge needs a grommet.
Proper fix, good, better, best
Good, fit a plasterboard (dry-lining) box
If the hole in the board is the right size, or you can neatly trim it to suit, the cleanest answer is to remove the metal box from the block, transfer the cable through a grommet into a plastic dry-lining box, and clip that into the plasterboard. The spring lugs grip the back of the board and pull the box tight to the front face. The accessory then sits properly in the box, terminals enclosed, front plate flush. Job done.
This is the fix I’d go for nine times out of ten on a stud wall where the block is too far behind to be useful.
Better, deeper metal box with a packer
If you want to keep the metal box (some people prefer them for robustness, especially on sockets that get a hammering), swap the 25mm for a 35mm or 47mm and pack behind it with a timber or ply block cut to fit, screwed to the block. That brings the front lip of the box up to the plasterboard face. Grommet the cable entry, refit the accessory, and if you like, add a fly lead to the earth stud.
More work than the plastic box, but a solid, long-lasting result.
Best, open up and do it properly
If there are several sockets like this on the same wall, or the plasterboard is loose or bulging, the honest answer is to lift a board, sort the first-fix properly, and re-close. That’s a bigger job with making good and a bit of patch plastering, but if the wall is a mess behind the finish, you’re only kicking the can down the road otherwise.
Bodges and mistakes to avoid
- Just using longer screws and leaving the gap. The accessory isn’t enclosed, the plate flexes, and the terminals are open to the void. It’s what’s already been done here and it’s the reason you’re asking the question.
- Stuffing the void with insulation or filler foam around the box. Doesn’t enclose the terminals properly, can trap heat, and makes future work a nightmare.
- Packing the front of the box out with washers under the accessory lugs. You end up with the plate held on stalks with no support behind it, and it snaps the first time someone leans on it.
- Skipping the grommet where the cable enters a metal box. Vibration and pulling will nick the sheath on the metal edge over time.
- Assuming no fly lead is always fine. Check the lugs. If both are the moving or adjustable type, you need one.
When to bring in a specialist
Swapping a back box on an existing circuit, with the circuit isolated and proved dead, is within reach of a competent DIYer. But if any of the following apply, get a qualified electrician in:
- You’re not confident with safe isolation and proving dead.
- The cable is damaged, short on length, or you’re not sure what circuit it’s on.
- You’re adding a new spur and you don’t know whether the existing circuit can take it (ring vs radial, existing load, RCD protection).
- The consumer unit is old, or there’s no RCD protection on sockets used for general purposes.
Gas work must only be carried out by a Gas Safe registered engineer, and anything notifiable or involving the consumer unit is spark territory. Don’t chance it.
Reality check
This is a half-hour job if the hole in the board is the right size for a plasterboard box and the cable has enough slack. It becomes an hour or two if you’re packing out behind a metal box, and half a day if you’re lifting boards. Have a dust sheet down, turn the power off at the consumer unit (not just the switch), and have a torch handy, because stud voids swallow screws. The prep is what makes it last: get the box sitting flush, grommet the cable, make the earthing tidy, and the accessory will sit properly for the next twenty years without anyone thinking about it again.