Looking to re-board my loft space

Joined
5 Aug 2011
Messages
126
Reaction score
3
Location
Dorset
Country
United Kingdom
Hi all - first post so don't kill me ;)

Firstly, a little history. Skip down for the loft query.

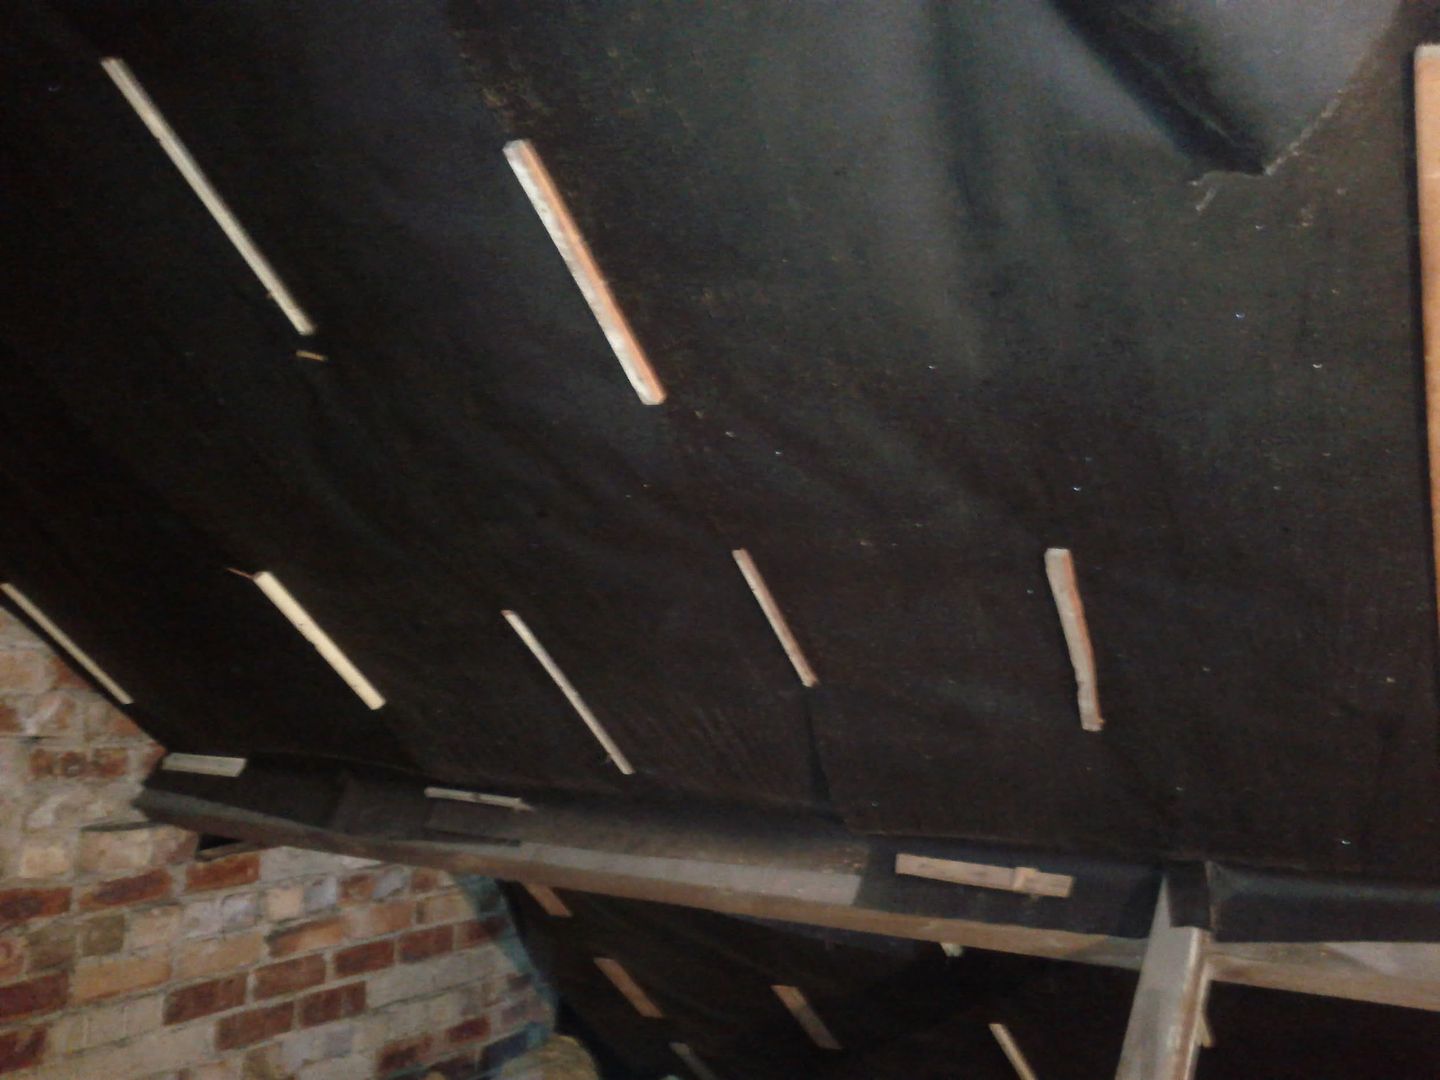
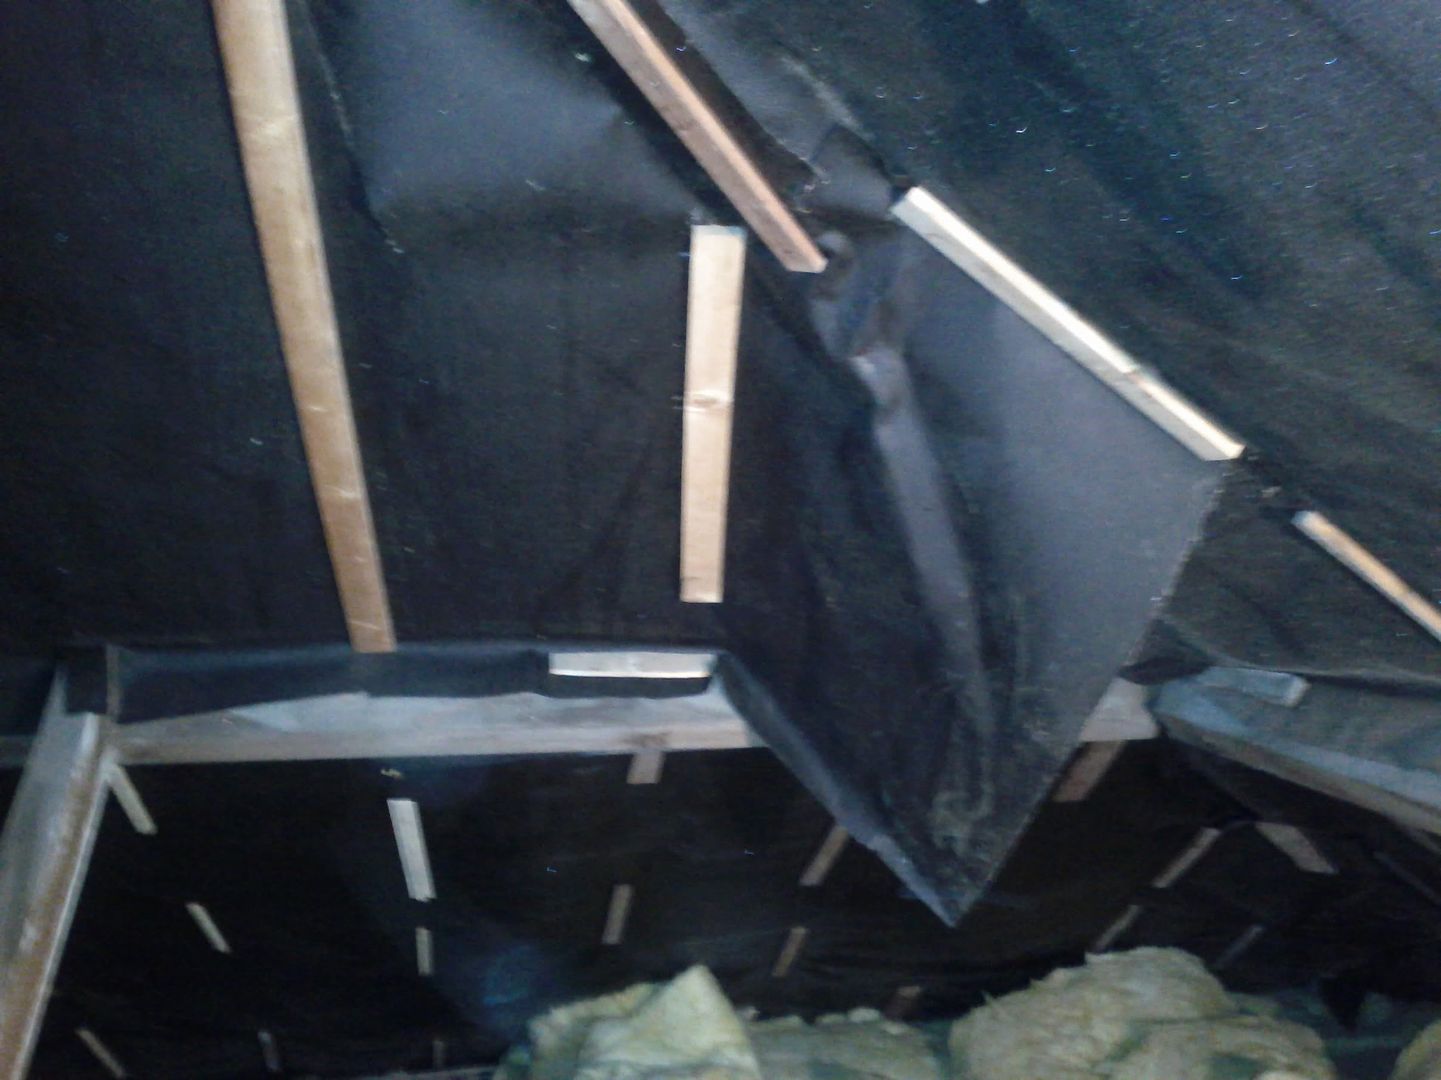
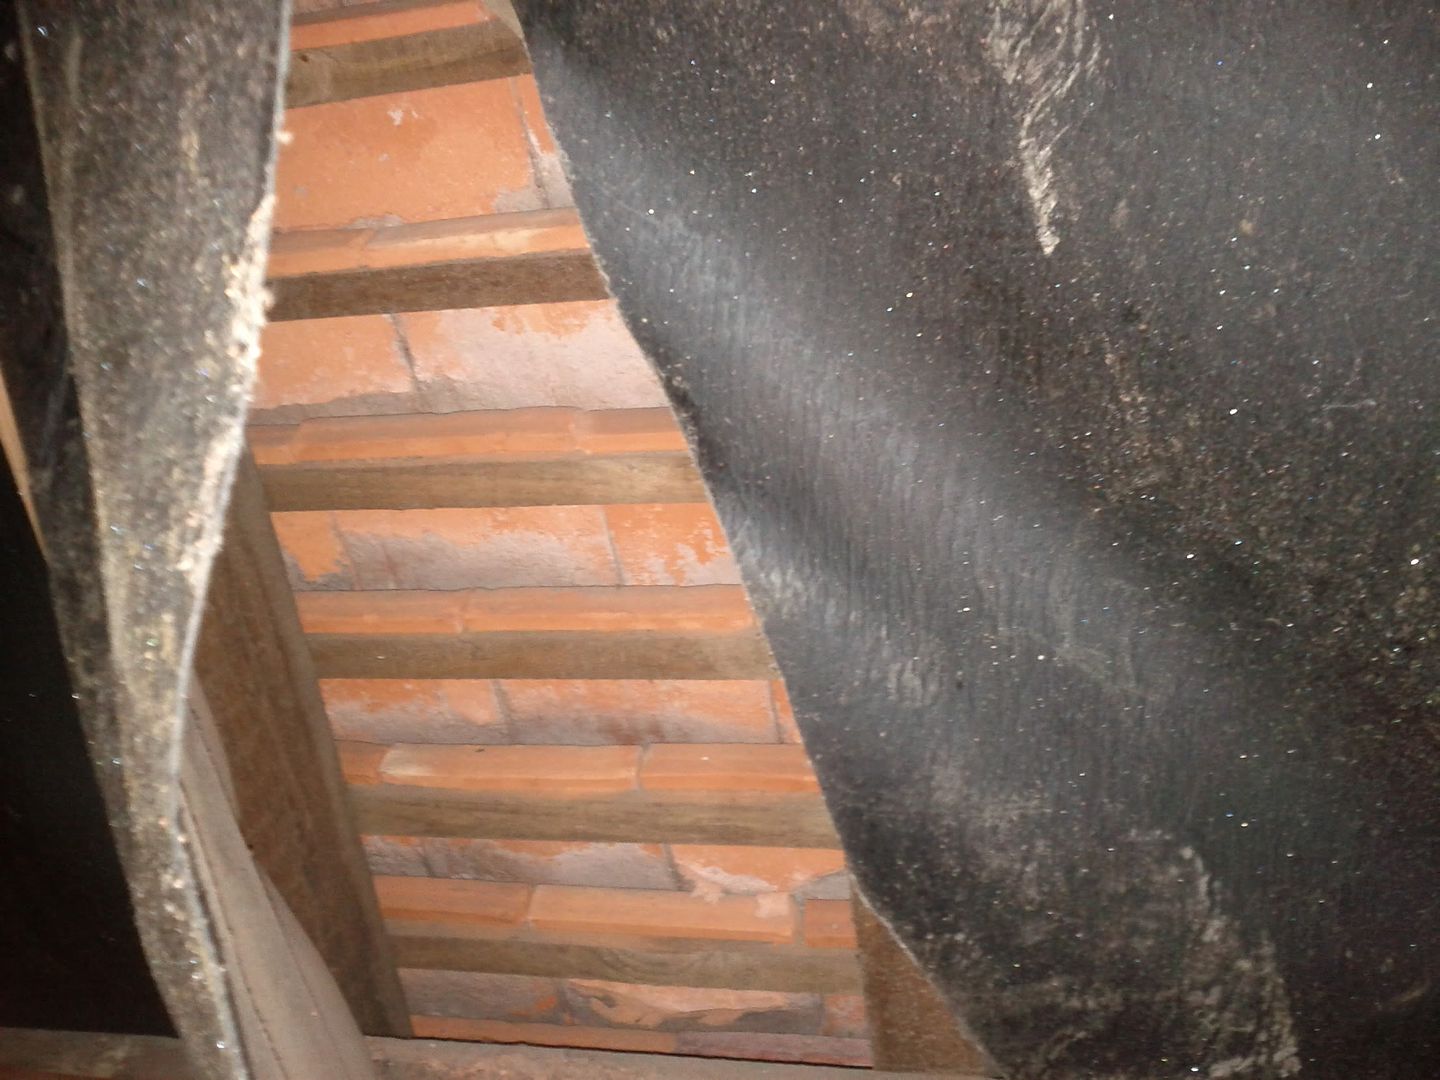
We bought our house 3 years ago (It was built in the 1930's), and the previous owners had had the loft insulated (with a government grant I think - they were elderly). Barring a little bit of chipboard around the inside of the hatch and the cold water tank, the rest of the loft was a sea of a yellowy colour insulation material. The inside of the roof has a black fabric type material all over it, held on with wooden battens nailed to it - I can only presume this is hiding more insulation.

I recently successfully installed a ceiling fan in my bedroom (what a difference that has made in this weather, phew). This involved firstly tracing the lighting wires. The light fitting was over by the window and not in the centre of the room, so rather than mess with the existing wiring, as I was moving the fixture to the centre of the room, I replaced the wires from the pendant with some twin+earth, leaving the ring main and switch feed/return untouched. I then reversed this back into the loft and capped the old light fitting, which is now basically a junction box.

Having measured roughly where I wanted the ceiling fan, I went back into the loft. Moving the insulation showed more of the loft was boarded than I previously thought (it had just been laid on the top), however some of the boards were a little dodgy underfoot. Taking great care I found where the wire to the light fitting was coming through, measured to roughly where I wanted the ceiling fan and drilled a small hole (for the wiring) next to one of the ceiling joists (this may be the wrong term, but I am not sure what else to call them) - using this as a reference, from the bedroom I then secured the ceiling fan into the selected "joist" and voila, one working ceiling fan. With the wiring in the loft I clipped the new wire along the side of the "joist" following the existing wires, so as to have a minimal amount of wiring running on the top of the "joists".

The loft bit

Because of the state of the existing boards I am planning to re-board, but I am also planning to cross-batten.

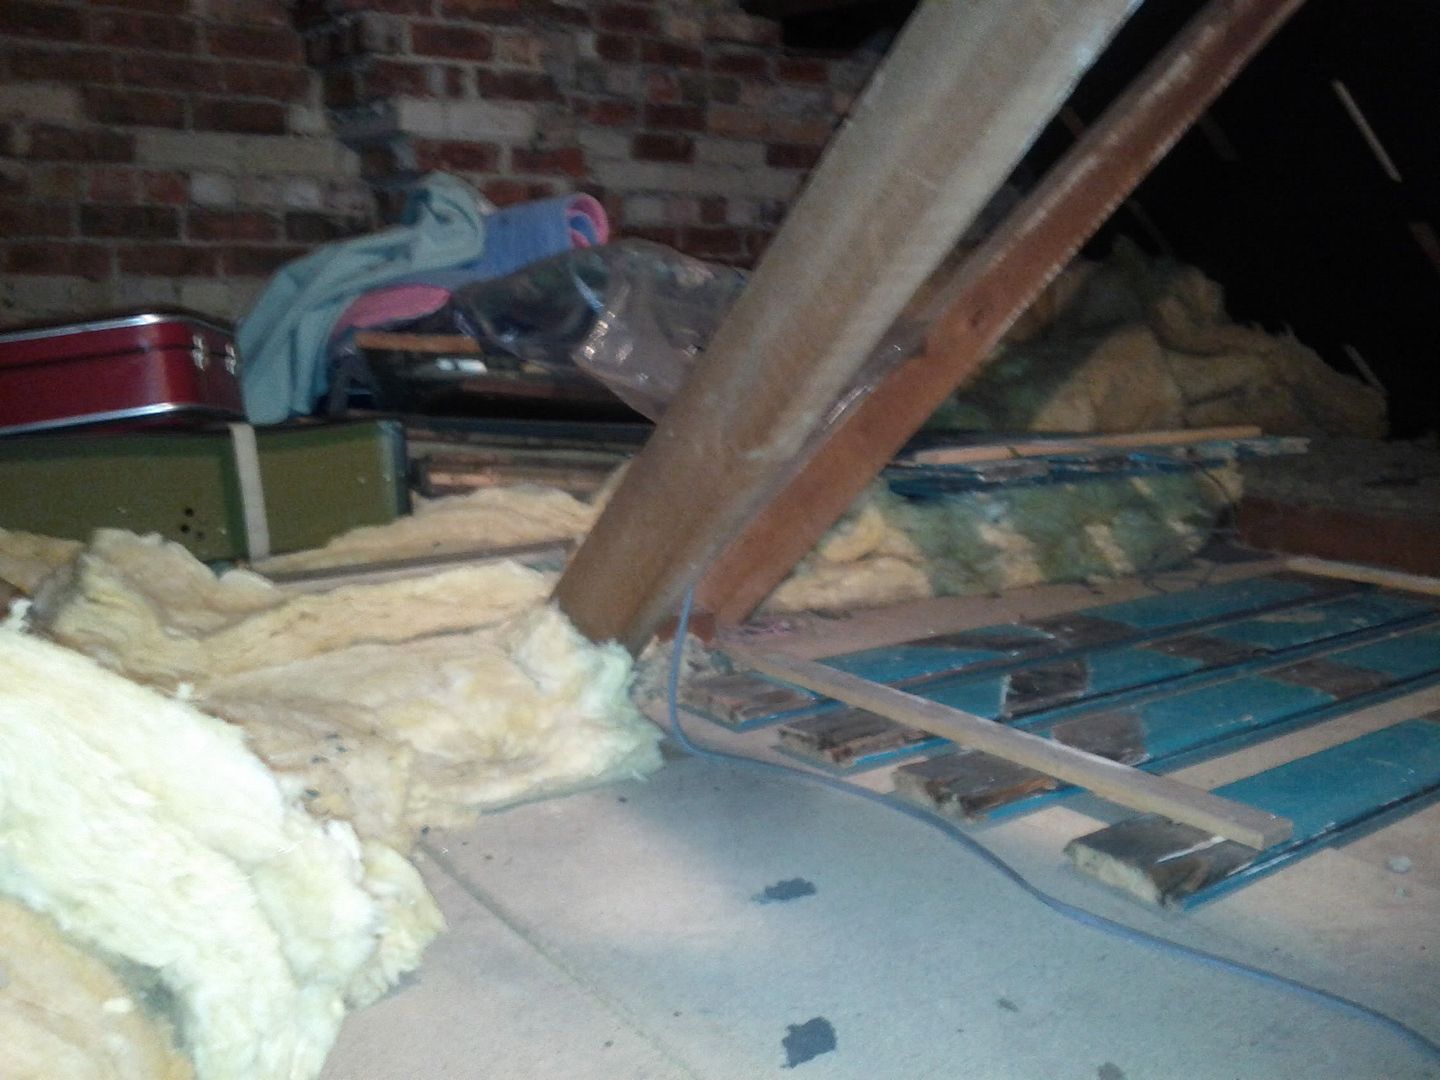
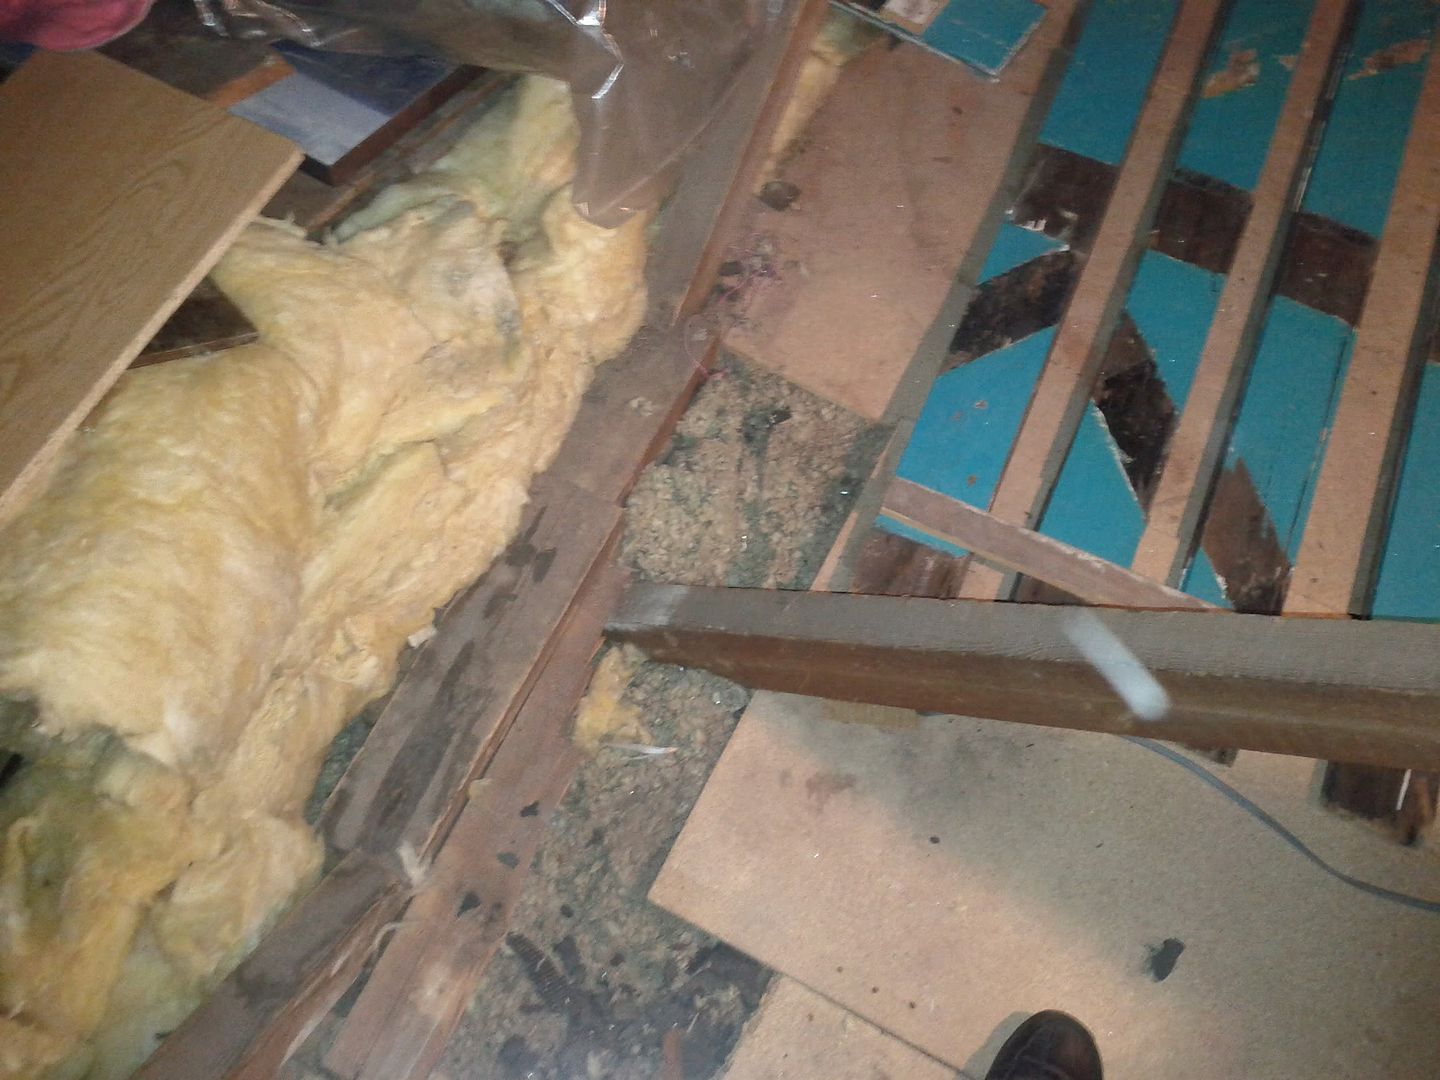
The ceiling "joists" I eluded to earlier are (from memory) either ~2"x2" or ~3"x2" (I think the latter - I am fairly sure they are deeper than wide and they are definitely ~2" wide). These are attached to what appear to be ~4" deep beams. - I think there are two of these running across the loft and one running down it. I haven't measured the width of these beams, but I would suggest they are ~3"-4" wide.

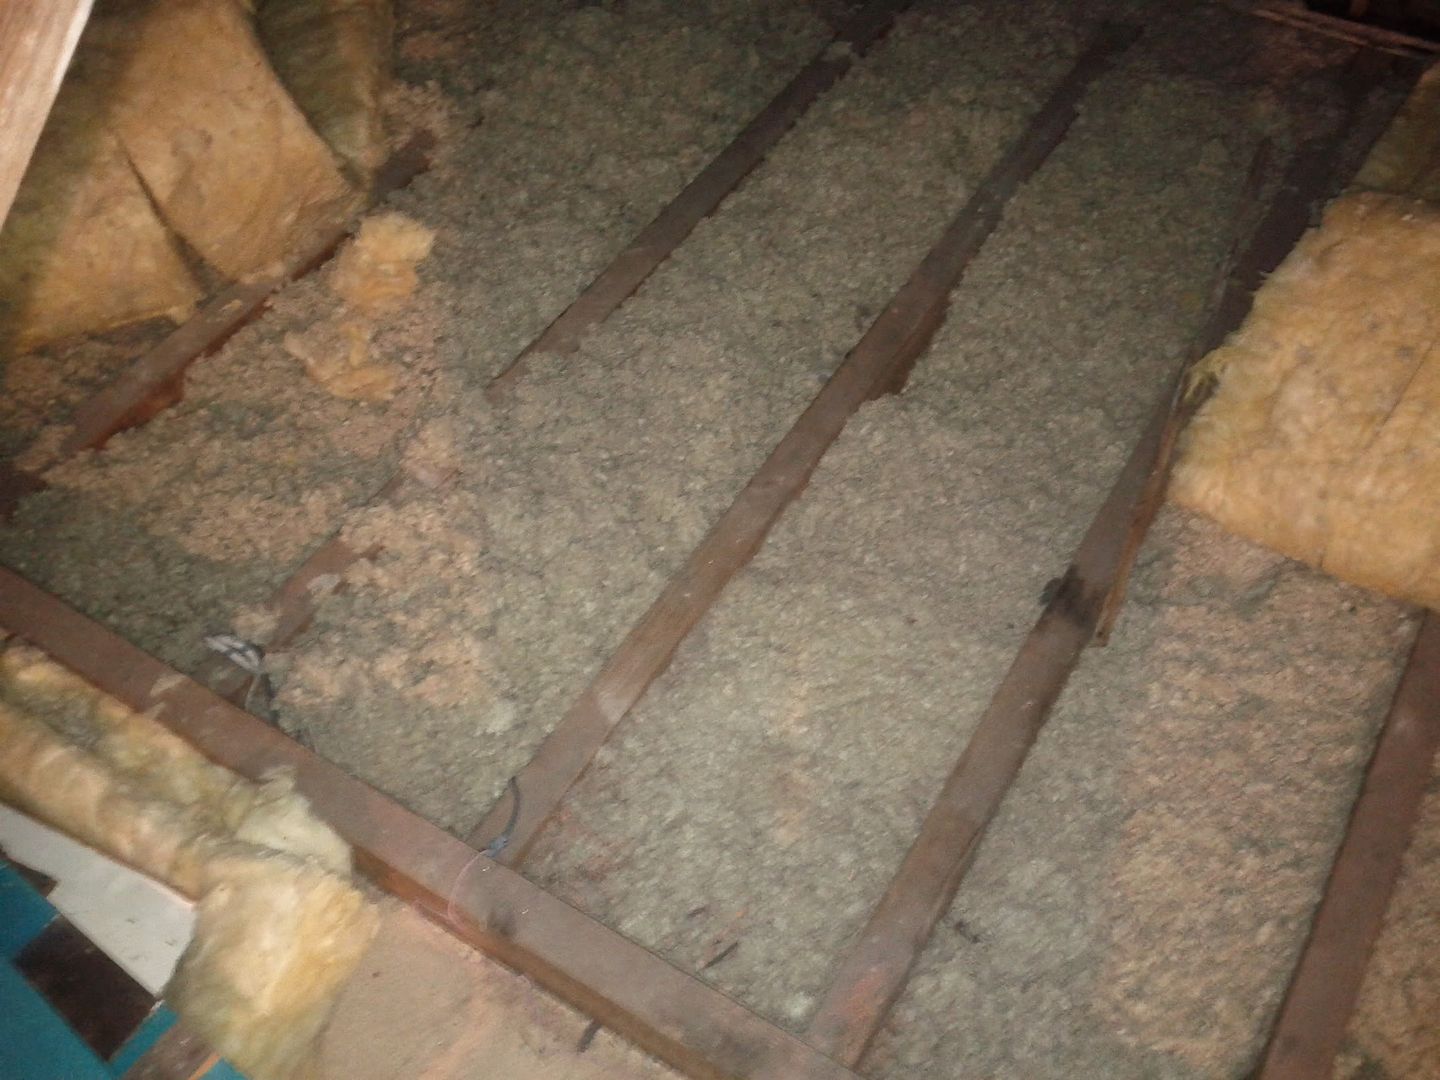
In between the ceiling "joists" is a loose fill greyish insulation - looks like shredded blankets (of the type removals companies use). Then above this are two layers of yellowish fibre type insulation.

My plan is as follows:
  1. Re-lay one layer or the yellow stuff between the existing "joists" - being careful not to bury any wiring.
  2. Cross batten with 100x47mm C16 treated timbers - edge on.
  3. Re-lay the second layer of insulation between the new timbers.
  4. Board with loft flooring packs (1220x320x18mm)

This is where my questions come in.

  1. How do I attach 100mm deep battens to the existing ceiling "joists"?
    • Brackets
    • Screw through the entire 100mm
    • Screw at a 45o angle near the base of the batten
    and if the latter, should I screw from both sides or will one be enough.
  2. Should I use self-cutting screws and if yes, should I still pilot hole and counter sink?
  3. Lastly, due to the insulation on the inner side of the roof itself (which I am loathed to remove), I cannot see any timbers at all, so I the only structural timbers I can see forms a sort of -H- pattern (althought there may be more - I haven't taken up all the insulation yet). The width of the loft is ~17', what length timbers should I look at getting? I am not going to board eight to the edge. I was planning to get the longest that I can get into the loft in one piece (will need to check what that length is) - but would it be better if I used two shorter length in place of one longer one?

I am planning on getting the timber from either a local merchant or B&Q - I looked at Wickes, but there were far to many complaints about warped, unusable timber.

please excuse me if this makes little sense, My eyes are eating matchsticks as I type.

Night all

. z Z . z Z . z Z . z Z . z Z . z Z . z Z . z Z . z Z . z Z
 
Sponsored Links
Hello and welcome Commander, sorry but I doubt anyone will be prepared to wade through that lot especially from a newbie. Try condensing your thread down a bit. ;)
 
Hello and welcome Commander, sorry but I doubt anyone will be prepared to wade through that lot especially from a newbie. Try condensing your thread down a bit. ;)

I was trying to give enough information for people to make an informed decision - from my personal experience, people who come onto a forum and ask a technical question do not usually provide enough background info and get ripped apart for that.

How about

...

...

  1. How do I attach 100mm deep battens to the existing ceiling "joists"?
    • Brackets
    • Screw through the entire 100mm
    • Screw at a 45o angle near the base of the batten
    and if the latter, should I screw from both sides or will one be enough.
  2. Should I use self-cutting screws and if yes, should I still pilot hole and counter sink?
  3. Lastly, due to the insulation on the inner side of the roof itself (which I am loathed to remove), I cannot see any timbers at all, so I the only structural timbers I can see forms a sort of -H- pattern (althought there may be more - I haven't taken up all the insulation yet). The width of the loft is ~17', what length timbers should I look at getting? I am not going to board eight to the edge. I was planning to get the longest that I can get into the loft in one piece (will need to check what that length is) - but would it be better if I used two shorter length in place of one longer one?

I am planning on getting the timber from either a local merchant or B&Q - I looked at Wickes, but there were far to many complaints about warped, unusable timber.

...
 
Sponsored Links
To be honest I'm not sure what you are trying to do. Are you on about strengthening the existing loft floor?

If so, simply place 6" x 2" timber over the top of the existing 2 x 2 (no fixing required) then chipboard over that (with screws at 300mm centres) leaving the joins half and half on the 2" timber (1" of each board on the new timbers). Just notch the bottoms where you come across any wiring.

If you are talking about the loft ceiling aka roof, you need to watch out as there are regulations regarding timber sizes and lengths (for example no span of 2 x 4" more than 1800mm).
 
Not sure I agree with any of davelowe1977's post although he does make the good point that your thread is not overly clear; the long and the short version.

Fix new 100x50 joists as long as is as practicable ensuring any joints between them bear on a ceiling joists. Fix with screws, diagonally into the existing joists. Fit one screw at each crossover but do them on opposites down the length of the new joists if you get my drift. Drill a pilot hole, no need to go mental with the fixings your new boards which should be screwed down will stop any turning of the new joists.

A merchant will be better than the likes of B&Q although shop around as some of the merchants can be expensive. Wickes are a glorified B&Q. Don't worry about getting structural grade timber its overkill for such a project.

Don't really understand your point 3 in your last post tbh.
 
The post is confusing hence my reply was too. What I was getting at was installing a basic structural floor. I see why you suggest 100 x 50 cross braced - it makes the total height up to around 6".

In the past I've run structural timber over the original ceiling joists as they are guaranteed to lie on wall tops and so are well supported. Probably overkill in hindsight....
 
Sorry for the confusion guys, I was half asleep when I posted all that and I probably should have waited - but it was fresh in my mind at the time.

Anywho

To be honest I'm not sure what you are trying to do. Are you on about strengthening the existing loft floor?

If so, simply place 6" x 2" timber over the top of the existing 2 x 2 (no fixing required) then chipboard over that (with screws at 300mm centres) leaving the joins half and half on the 2" timber (1" of each board on the new timbers). Just notch the bottoms where you come across any wiring.

If you are talking about the loft ceiling aka roof, you need to watch out as there are regulations regarding timber sizes and lengths (for example no span of 2 x 4" more than 1800mm).

Talking about the floor and not the ceiling/roof. Not happy with the idea of NOT fixing the timbers to the joists before laying the boards though.

...

Fix new 100x50 joists as long as is as practicable ensuring any joints between them bear on a ceiling joists. Fix with screws, diagonally into the existing joists. Fit one screw at each crossover but do them on opposites down the length of the new joists if you get my drift. Drill a pilot hole, no need to go mental with the fixings your new boards which should be screwed down will stop any turning of the new joists.

...

Re the fixing to the current joists, that was exactly the kind of answer I wanted, and it makes perfect sense, thank you. What size/length of screw would you recommend?

The reason for cross-battening and my choice of 100x47mm is 3 fold.

  1. To strengthen the existing floor - though it will NOT be used as a room.
  2. It brings the total height upto ~6"
  3. It will level the entire loft space as the top of the structural beams are 100mm above the ceiling joists.

Sorry for the confusion in point 3, having re-read it I am not sure what I was trying to ask - sorry.

1 last question - is there any need for noggins? and if so should i lay them on top of the ceiling joists or inbetween them?
 
I would use some noggins but not too many - probably one every 1m - 1.5m. They just add rigidity - but the screwed down chipboard floor will make it bullet proof. Use offcuts from the 100 x 47 and offset them so that you can hammer the nails in both sides. I would imagine that 4" nails would be adequate. I'm assuming you are laying the joists at 460mm (18") centres.

As for whether or not to lay them on the ceiling joists, it doesn't matter. It won't affect sound transmission since you are fixing the new timber to the ceiling joists anyhow.

EDIT. Don't bother with noggins on reflection. They will make fitting the insulation more difficult and the joists will be well fixed down. Also, subject to the size of your access to the loft, 2440 x 1220 x 18mm sheets of chipboard will work out way cheaper than flooring packs. Plus, you can use the standard 18" joist spacing and cut the sheets to size on the ground floor before you take them up the ladder.
 
Forget about the noggins, there is no need, you're not creating a structural floor just adding depth. Definitely do not use nails either you'll just bring the ceiling or bits of it down. Something like 100mm screws will be fine. Spread anything you do store up there around the space. Using 8x4 sheets of board is all well and good although getting them in the back of the car might prove tricky and messing around with a circular saw may be a pain.
 
Or through the hatch...

I will use the biggest sheets I can get, maybe have B&Q cut them down into more usuable sizes. Maybe cut an 8x4 into 3 pieces. (if I use B&Q that is).

I am a little confused on the recomendation for 18" centres, seeing as all the other posts I read recommend 400mm centres.
 
I am a little confused on the recomendation for 18" centres, seeing as all the other posts I read recommend 400mm centres.

That is entirely my mistake - 16" or 400mm is the correct figure.
 
Well I stuck my head up there to take some measurements.

Entire area is approx 5m x 7m, I got the measurements of the joists wrong, all the joists on the floor of the loft are 100mm x 47mm.

I took some photo's too (click to enlarge):


I looked behind that black fabric I was talking about, expecting to see insulation, and was shocked to see the back of the roof tiles.

As the width of the loft is ~5m, I will probably get 3m lengths of 2x4 and stagger the joins. As getting anything longer into the loft will be difficult.

I am still debating whether or not to use flooring packs or cut down 8x4 sheets of 18mm chip. I am leaning towards the sheets based on price and the fact that they don't have the tongue and groove - which would make it easier to lift an individual board rather than lift the lot, if something needs to be done.
 
... Using 8x4 sheets of board is all well and good although getting them in the back of the car might prove tricky and messing around with a circular saw may be a pain. ...

Now I am really confused with B&Q's pricing...

  1. Loft Panels Pack of 3 (L)1220 x (W)325 x (T)18mm - £5.80 = £4.88/sqm
  2. Standard Grade Chipboard (L)2440 x (W)1220 x (T)18mm - £13.95 = £4.69/sqm
  3. Chipboard (L)1819 x (W)607 x (T)18mm - £11.99 = £10.86/sqm
  4. Chipboard (L)1220 x (W)607 x (T)18mm - £11.95 = £16.14/sqm
  5. Tongue & Groove Chipboard Flooring (L)2400 x (W)600 x (T)18mm Unfinished - £7.99 = £5.55/sqm
  6. Tongue & Groove Chipboard Flooring (L)2400 x (W)600 x (T)18mm Waterproof Treated - £8.15 = £5.66/sqm

Price per sqm is OK - working with an area of say 2400x3600, how many packs/pieces would we require?

  1. 8 x Loft Panels Pack of 3 (L)1220 x (W)325 x (T)18mm - £5.80 = £46.40
  2. 3 x Standard Grade Chipboard (L)2440 x (W)1220 x (T)18mm - £13.95 = £41.85
  3. 8 x Chipboard (L)1819 x (W)607 x (T)18mm - £11.99 = £95.92
  4. 12 x Chipboard (L)1220 x (W)607 x (T)18mm - £11.95 = £143.40
  5. 6 x Tongue & Groove Chipboard Flooring (L)2400 x (W)600 x (T)18mm Unfinished - £7.99 = £47.94
  6. 6 x Tongue & Groove Chipboard Flooring (L)2400 x (W)600 x (T)18mm Waterproof Treated - £8.15 = £48.90


It is interesting that the treated timber is only marginally more expensive than the loft packs, yet the smaller sections of standard are twice or three times the price.
 
You should be able to get 8x4 sheets for around £10 from a local wood yard. I can't explain B&Q's pricing either. Very strange. Regarding the tongue and groove - there's nothing stopping you from removing a single board the old fashioned way - breaking the tongues with a chisel or saw should you need to remove one.

If you are only using the area for light storage, a total of 8" (100 + 100mm) should be plenty thick. After a while you start adding problems as the weight of the timber starts to count against you if you run the new joists across the old.

As regards the roof insulation - it looks as if someone has fitted plastic sheeting to prevent the odd drip. Ideally with a re-roof you would have plastic or felt between the rafters and the battens that retain the tiles. I.e. on the 'outside'. Personally I would rip all that out, put polystyrene foam panels in (or rock wool), then possibly plasterboard the inside (you could use 3mm ply instead) to retain it. What ever you use, fit it loosely - you want air circulation behind it to prevent rot.
 

DIYnot Local

Staff member

If you need to find a tradesperson to get your job done, please try our local search below, or if you are doing it yourself you can find suppliers local to you.

Select the supplier or trade you require, enter your location to begin your search.


Are you a trade or supplier? You can create your listing free at DIYnot Local

 
Sponsored Links
Back
Top