Damp on inner wall...

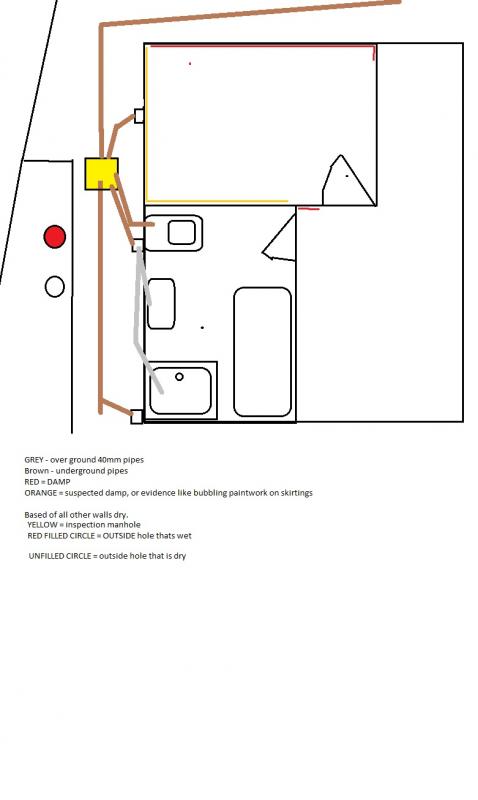
If you carefully levered off the architrave ( cut the paint with a utility knife ) nearest the damp, you could look to see if damp/moisture is present at a high level.

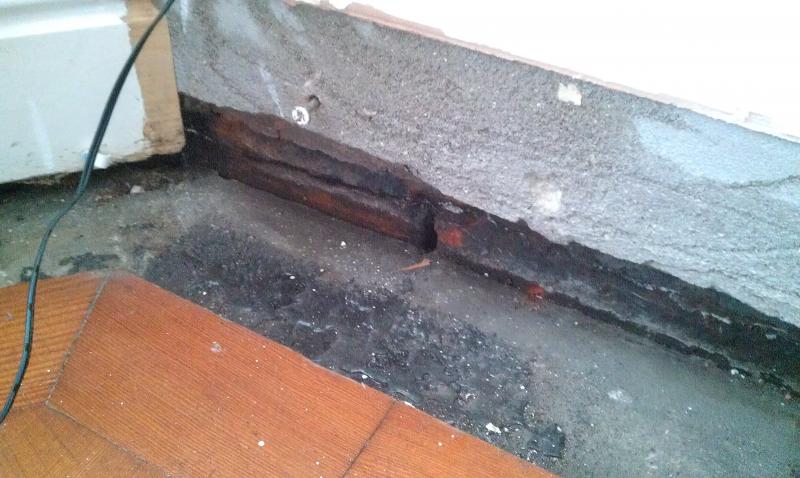
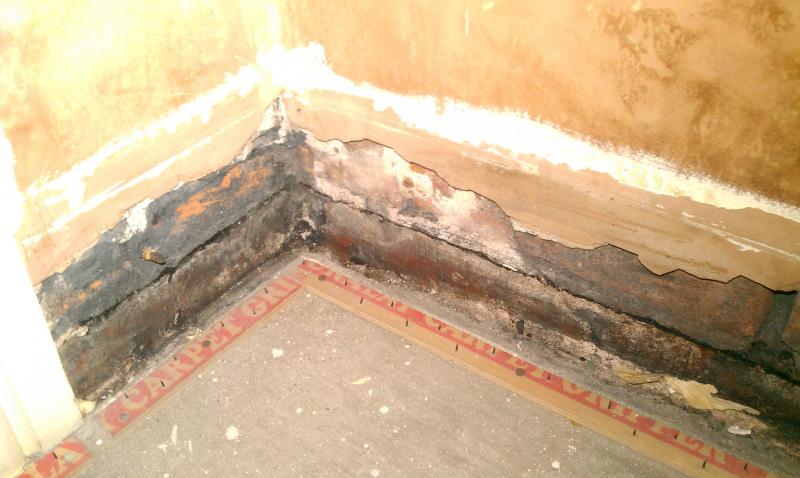
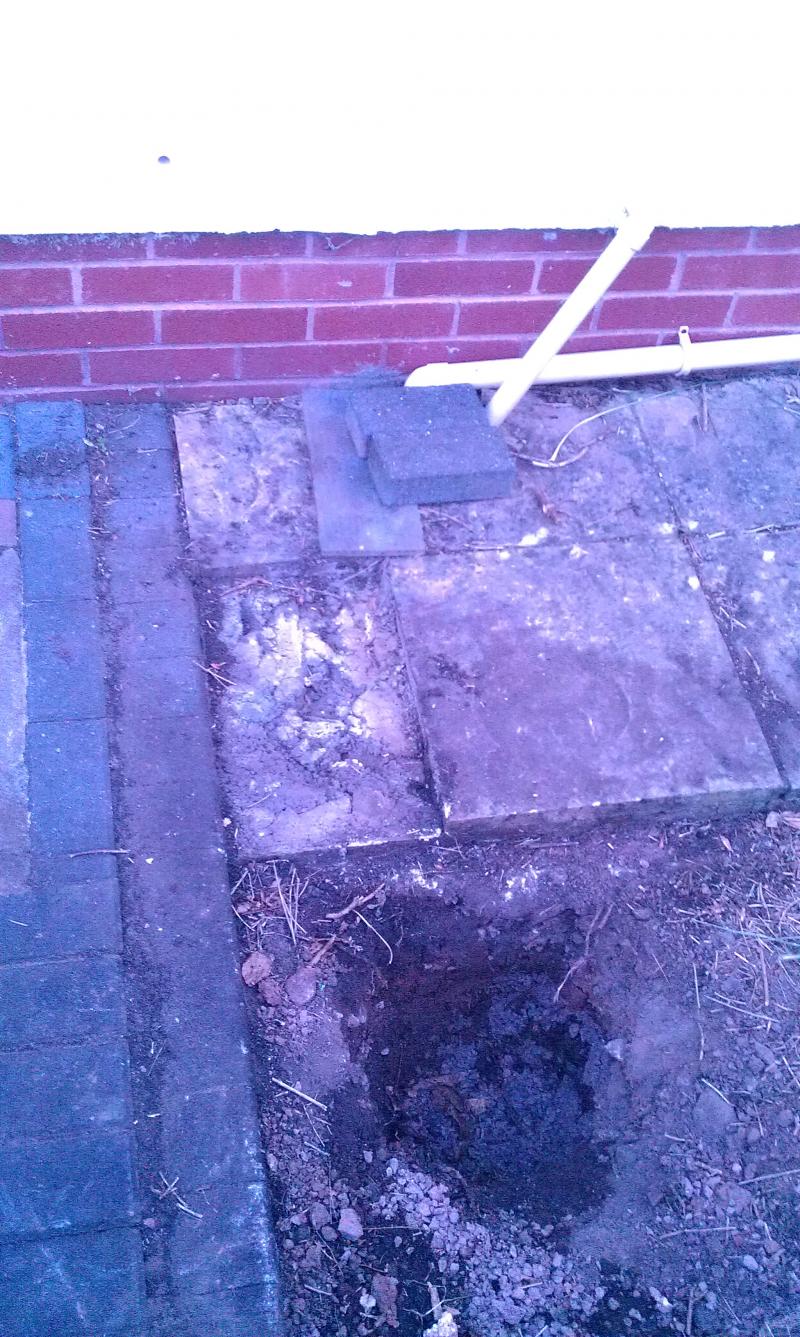
The main suspect is the solid floor: there's no evidence of a membrane, and you report damp in other floor wall area's, so damp may indeed be rising. Is the mortar in the brick/blockwork crumbly?

With a solid floor, the plaster/render should stop short of touching the concrete. Perhaps if you removed and examined short lengths of skirting in suspect area(s).

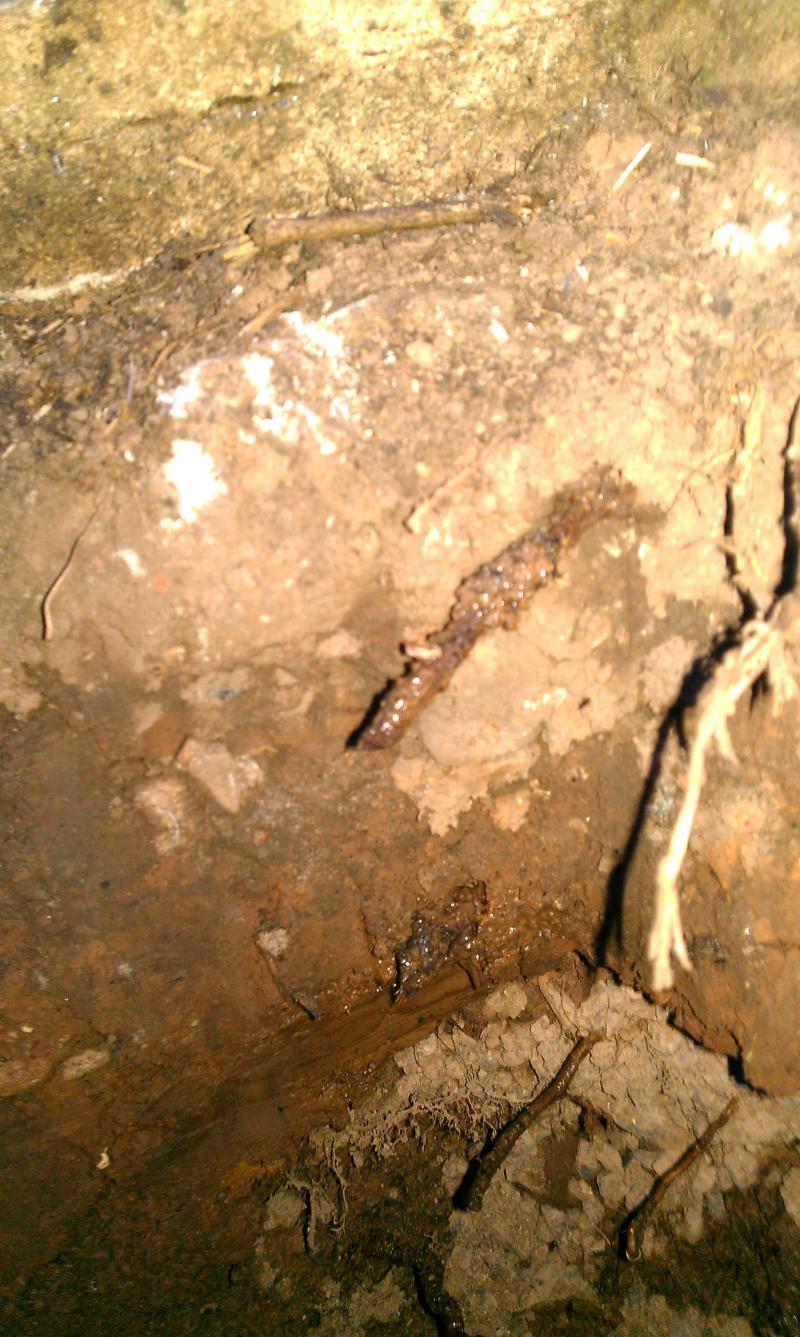
Test all your pipework and rad valves ( upstairs and down ) with paper towel to pick up any faint moisture traces.

Sometimes there's no clear course of long lasting action.

Thanks - this is what I was thinking too - I am going to hack back the plaster.

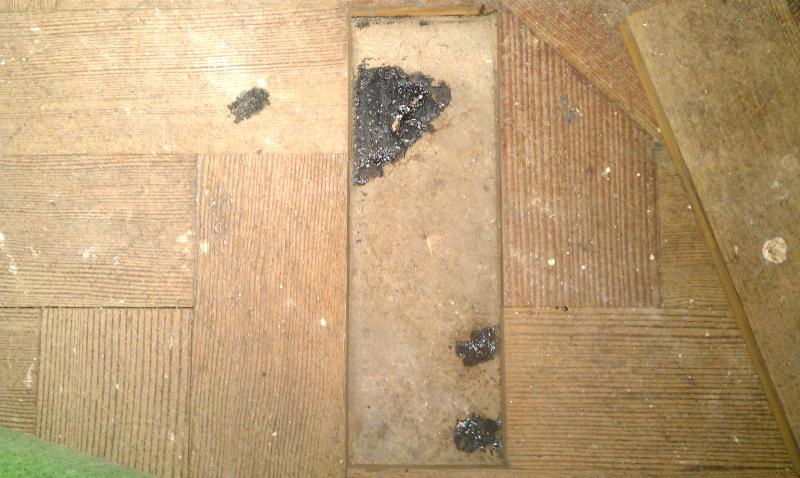
Any idea what the smell from the parquet could be? Short of ripping the lot up including floor I am not sure what to do.
 
Sponsored Links
The original suspended floor was replaced with poured floors, typically, because of damp and fungal issues - perhaps in conjunction with remedial DPC work.
Do you have any knowledge of any of this?
Check the door heads ( in the damp patch area ) for level.
Moisture affected wood blockwork would, typically, rise and swell or expand.

Good point - the block floor is fine. There are no swelling etc.

The door head is fine too - literally the only sign of damp in this area is in that corner, but its more focussed as if its coming from the bottom of the door frame than the actual corner (which could be condensation).

The floors are original - or at least pre-date the 1994 rebuild/extending, and have no reason not to think they are original 1930's?

Thanks
 
Hi

I've since hacked back the plaster so that its above the DPC and no longer touching the floor

Interestingly the damp patch is still tacky, i suspect the plaster has turned hygroscopic?

The bottom of the bricks are damp, below the DPC

Curiously removing a parquet block the original concrete floor appears bone dry (no rot on the block either). The "damp" appears elsewhere around the house but at the base of outer walls:

Bottom of front bay:

Bottom of interior wall as shown in diagram on earlier post, after hacking back plaster:

Pic showing the concrete floor - original 1930's, didn't get good coverage on bitumen layer (is that typical?) but seems dry.. (pic taken only about 10 inches away from the damp in above pic).


I have since noticed that at the back of that wall, though not directly behind this damp patch, the skirting is bubbling at the bottom.

Is this rising damp? The outside DPC is at least 6 inches above ground level all the way round the house.

The interior DPC (bitumen) is as you can see slightly above the concrete floor. It seems to be doing its job. I just wonder if i can stop the damp below that bitumen layer?

Thanks.
 
Sponsored Links
I have drilled holes through into the cavity (first pic) and put a 50w car bulb inside connected to a battery. The inside of the cavities appears dry from what I can see - next i plan to drop a camera down into the cavity to see the ground level (height, wetness i guess).

Any thoughts appreciated on this please.

In the meantime we are also not using the downstairs loo which is in the bathroom which is the door on the left of the damp pic (2nd pic). The soil pipe is original teracota, i guess if there is a leak it woud leak into the cavity potentially, and around the floor slabs.
 
1. I doubt that you have a "drain problem"

2. Perhaps remove the "bubbling skirting" and examine for rot.

3. The asphalt/bitumen layer might crack and crumble over time. Depending on conditions on site and how long it's been down. Does the asphalt extend across all floors?

I'm not familiar with 1930's full-house concrete raft/floors, except in special circumstances ref. ground conditions. Others might have more knowledge and experience of this 1930's construction?

4. The injected wall areas might have blocked cavities. Have you revealed a DPC on the inner skin of brickwork?

5. The lack of a membrane below the concrete floor would still be the main suspect.
 
Thanks

2. That's what I have done, see pics.

3. No, as per pic with block removed there is a clear view of clean concrete.

4. Yes, inner dpc is visible in pic, it is approx 2 inches ABOVE level of slab. It is the black layer between bricks.

Since unblocking a outside gully, the damp at front room floor has markedly improved. Could be coincidence of course. Have dug 2.5 foot hole in ground outside, doesn't yet have water in bottom... Suggests not a ground water level problem doesnt it?

Cheers.
 
1. OK, dont do anything that will disturb the brick just above or just below the Bitumen DPC - or you'll crack the DPC.

2. The "blocked gulley" -empty it and clean and dry it out so that you can search for any cracks.

3. What condition were the skirtings in?

4. Leave your test hole open for a day or two and observe - water table would appear pretty fast.

Nice one, thanks again.

Skirtings were rotten, to varying degrees. There was damp material, seemed to be saw dust and what not packed behind skirting which obviously would not have helped.

Test hole has been present for 2 days so far, soil (clay heavy) is damp/moist at bottom but no water collecting.

Next steps I plan to do as you say re gully. If it was draining into cavity that would certainly account for this, or can't help anyway.

Interstingly there is a large bush 1 metre to right of my test hole, the ground beneath that is very moist at surface. This bush is closer to the gully than the test hole. I think the gully was spilling over across the small path and emptying beneath the bush. I will dig up the bush and put another test hole there.

Thanks for your help, much appreciated. This is a problem I hav been observing for over a year. Never seemed to be a pattern with regards to rain etc. House was unoccupied for a week earlier this year, damp patch was looking good. Yet that week we had torrential rain. Within a few days, damp shows up. I thought condensation at first, but temps/ humidity do not faciltitate condensation.
 
1. I'd hold fire on digging up the bush - there's no need.

2. I doubt that you'll have a long term solution, so:
a. Research damp/dpc remedial work on this forum.

b. hack-off and render up in S&L, keep render just above bitumen dpc.

c. fit new, taller (5") skirtings, and fix above DPC, and keep just off the concrete. Pre-paint front and back and edges.

d. You might choose to remove, examine and/or replace all skirtings in the property?

e. Run a strip of dpc material behind the skirtings.

f. if you happen to reveal a blocked/bridged cavity, come back here.
 
I have dug up the bush. Wanted to get rid of it anyway. Curiously, beneath the roots was a load of gravel.. lots of it. Not sure if its some sort of dump following building work, to do with the path, or for drainage. I have dug down a couple of feet and will see what happens. If anything. I lifted a paving slab next to the gully and it was wet beneath. Standing water. Not sure if from the over flow earlier in the week or what.

Lifted a nearby inspection cover and noticed that the gully in question does not seem to drain easily and immediately, even though the run is less than a metre. In fact it seemed to dribble out of the nearest drain (inside inspection chamber) and a second later comes out of the toilet waste. Not sure what is going on there.
 
We've moved from the single interior damp spot to various other areas, and now this gulley and drainage business.

Perhaps you could post another scan of the whole house GF plan showing:
a. all damp areas in red.
b. positions of S&VP's and RWP's.
c. position of gulley in question and drainage run(s).

If i understand you: then poking a full blast hose pipe down the gulley and observing it emerge into the manhole/IC, ( and perhaps doing the same with the WC) might reveal more. Or working/hosing from the manhole back upstream a short distance.
 
Sorry tim00, I realise I am jumping around a bit but I think I might be getting somewhere.

I will get a scan done for you when I get time.

However, the hole I dug under the bush is showing water appearing from the side wall of the hole closest to the gully.

I have attached some pics.


You can see the gully in second pic. This is a clay gully, all others are plastic and were renewed when the building was extended. This one seemingly original. This is the one that drains oddly, a trickle then a second later flows from toilet soil into inspection chamber/drain.

The hole smells a bit too, and seems to be attracting more insect attention than the first hole I dug, which incidentally is dry and only about 1m away from the bush hole (wet one).

Since digging this hole, both damp areas significantly improved. Could be coincidence of course. I want to take scientific approach, not counting chickens etc just yet.

This gully is approx 2.5m from the internal wall damp spot btw, almost directly outside the building in direct line along an internal brick wall.

I will post a plan when I get a sec.
 
Hi

Does this image help:


The gully in question is the one with the grey pipes running to it, drains the sink and shower.

Am thinking of arranging for a CCTV survey before i dig up the gully in question.

Cheers
 

DIYnot Local

Staff member

If you need to find a tradesperson to get your job done, please try our local search below, or if you are doing it yourself you can find suppliers local to you.

Select the supplier or trade you require, enter your location to begin your search.


Are you a trade or supplier? You can create your listing free at DIYnot Local

 
Sponsored Links
Back
Top