Draughty New Windows

Joined
4 Feb 2016
Messages
7
Reaction score
0
Country
United Kingdom
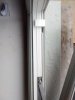
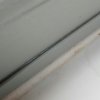
I've just had new double glazed units installed as part of an extension build. There is a noticeable draught at the base of the windows, and the internal windowsill is very cold. Looking at the outside, I can see a clear gap between the upstand on the sill, and the base of the window unit (in fact you can actually see light from the room coming through small gaps around the internal windowsill if you look into the gap from outside). It appears that cold air is just blowing straight through here and into the house. I have attached a photo, below, which I hope shows the problem.

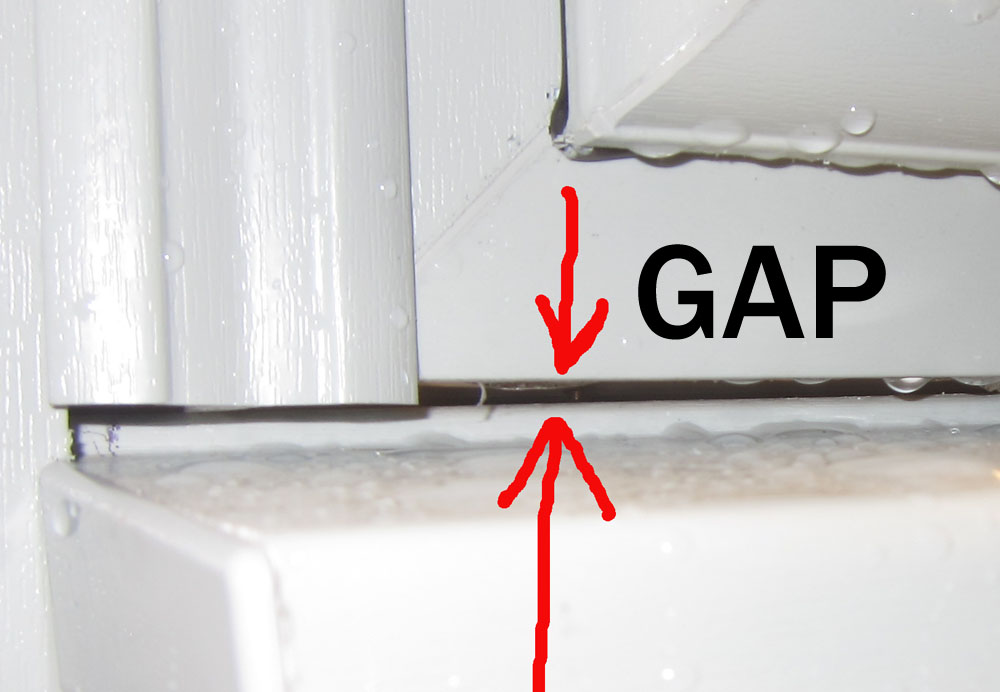
I discussed this with the builder, who advised me that the work is not finished, and he will be adding sealant to fill the gap. I want to make sure this is fitted correctly, so can someone advise what the correct installation method is for a double glazed unit like this? Am I correct to assume that the unit should butt up against the sill, rather than having such a large gap? Is it correct to just be filling the gap with sealant? The double glazing manufacturer has not been very helpful with installation advice, and says it is up to the builder!

Thanks in advance for any advice.


file.php
 
Sponsored Links
The sill should be attached to the frame [or visa versa] depending on fixing method, though there should be a gap between for the two at front for drainage channel to feed onto. Normally finished with sealant and expanding foam depending on gap size. You may get a draught under the sill as it has to be levelled sometimes with packers.
 
Yes the gap should be there for drainage. It should not be filled with silicone as this will block the drainage.
I hope he means the window still needs foaming/sealing around the edges!
And hopefully be has bedded the window down on silicone at the back edge of the cill and also the 2 ends of the cill.
 
that clearly isn't flush with the actual cill, as you can see the screw! As Gazman says , frame should have been bedded down on silicone on to the cill. Still shouldn't get a draught under the cill , regardless of levelling, as in an ideal world that should be bedded on silicone too as an extra layer ( cill should have been levelled before frame was put on , not level the frame once on the cill ). Looking at the picture ( and the screw visible ) , I would say the frame is not tight on the cill, and no sealant should be applied to the gap left at the front once the frame is fully seated , as Gazman says it needs the drainage
 
Sponsored Links
I'll stick my neck out and say the builders supplied and fitted this window, it would explain it all really
 
that clearly isn't flush with the actual cill, as you can see the screw! As Gazman says , frame should have been bedded down on silicone on to the cill. Still shouldn't get a draught under the cill , regardless of levelling, as in an ideal world that should be bedded on silicone too as an extra layer ( cill should have been levelled before frame was put on , not level the frame once on the cill ). Looking at the picture ( and the screw visible ) , I would say the frame is not tight on the cill, and no sealant should be applied to the gap left at the front once the frame is fully seated , as Gazman says it needs the drainage

Good eyes there I didn't spot the screw.
Some windows do sit on the cill with a gap that looks about that size. Yours however should not.
I cant see anyway around it but to remove and refit the window.
If! they did seal along the back and the edges of the cill (Its not looking promising) it would have gone off by now. It will need cleaning off, New sealant on the cill and then the window fitting properly back on the cill.

If this isn't done you will end up with leaks and most likely wet plaster reveals later on down the line. It could take years for the rain to be in the right direction but it will happen.
Have a look at this guys thread here //www.diynot.com/diy/threads/water-getting-in-around-window-fix.451537/
Its taken 8 years for it to cause problems
 
Thanks for the replies. That's very useful.
You're absolutely correct, that faint line just between the points of the arrows is a screw sticking down into the cavity. There's clear space between the glazing unit and the cill.

I purchased the windows direct from the manufacturer. I tried getting them to advise me on the recommended installation method after finding this problem, but they've been pretty useless and obviously don't want to commit themselves, saying "every job is different and without actually seeing it cannot comment further I’m afraid as every installer has their own preferred method". Not very helpful when I've spent a lot of money on their product, which leaves me trying to get some independent advice from forums like this!

There's currently no sealant at the bottom. When I queried the draught coming into the room and the gap, the builder informed me that they hadn't finished sealing the window because of the wet weather (this is part of an extension project, so they are still working on finishing off various bits and pieces). I just want to get as clear a view as possible of how they should be installed, so I don't get fobbed off with an inadequate fix.
 
I think they are manufactured with Veka profile.
Looking at your linked image, the green area in my installation is a void, and there is clear gap between the bottom of the window unit and the top of the cill; they don't butt up against each other as shown in your image.
It looks like they've tried to screw the window and cill together (unsuccessfully) but I can see no evidence of sealant in there. In fact, just to the right of my photo, I can see what looks like plastic sheet in the gap, possibly protective film left on the bottom of the frame?
 
Who ever installed it needs to take it out and do it again. The frame is not sat properly on the call and will cause you problems. It is their responsibility to sort it out. You paid them for a job and they need to do it properly
 
Can you see any screws going down through the window, if not I'd say they've attempted to screw the sill to the window before installing and hit the metal in the frame. Being a grained profile it's likely to be fully reinforced and what looks like timber screw hasn't pulled the frame in tight to the sill.
If that is the case, it will need to come out.
 
The builder has now packed the cill underneath to raise it, and applied sealant under the cill. He has also sealed the edge where the internal wooden sill meets the window, and put sealant into the edge of the plastic trim strip that covers the edge where the window meets the internal MDF sill.

I've attached more photos:
First one shows the inside of the casement: one black headed screw (the one visible in the gap in my original photo was bright finish).
Second photo is the casement on the other side of the doors (no screws). I've checked the casements in the other room of the extension, which have a couple of screws inside each casement.
Third photo shows the sealing at the lower edge against the internal sill.

Draughts seem to be much improved (I can just feel very, very gentle air movement in a couple of places) However, the internal sills feel cold to me, compared to wooden sills around 20+ year old double glazing in the rest of the house, so I guess I still have a concern about whether the installation has been isolated correctly from the outside. Builder is referring me to the manufacturer, so I may go down that route to get another opinion.

1.jpg
2.jpg
3.jpg
 

Attachments

  • 1.jpg
    1.jpg
    58.9 KB · Views: 168
  • 2.jpg
    2.jpg
    65.1 KB · Views: 170
  • 3.jpg
    3.jpg
    50.1 KB · Views: 160
You say he sealed under the cills but did he seal the top of the cill and 2 ends of the cills before fixing them together? This is what will cause you no end of problems down the line!

Also that looks like a plasterboard screw, It will rust away there.
To be honest its looking like your builder doesn't have a clue what he is doing!!!
 
Is that a 150 cill on a stone cill...........oh dear! A drywall screw used to hold the cill to the window............oh dear!
 

DIYnot Local

Staff member

If you need to find a tradesperson to get your job done, please try our local search below, or if you are doing it yourself you can find suppliers local to you.

Select the supplier or trade you require, enter your location to begin your search.


Are you a trade or supplier? You can create your listing free at DIYnot Local

 
Sponsored Links
Back
Top