Advice needed on opening a fireplace which has an odd lintel

Joined
7 Mar 2014
Messages
6
Reaction score
0
Location
Hertfordshire
Country
United Kingdom
Hi,

I'm trying to figure out if I can open up my fireplace to fit a stove and have reached a point I don't know if I can pass.

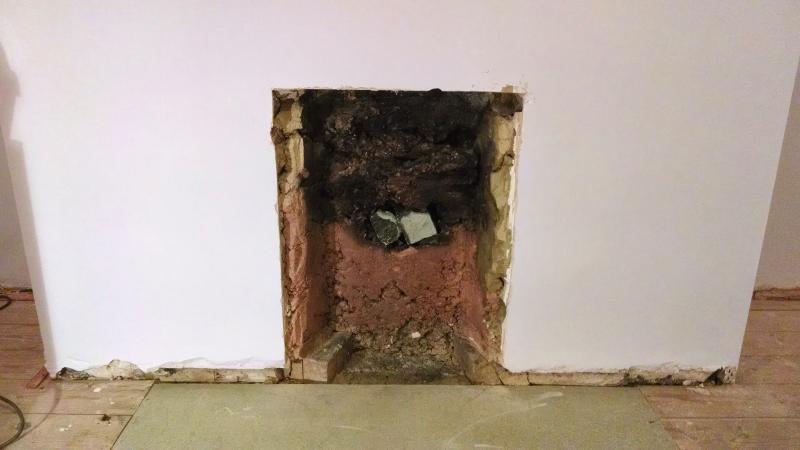
This is my first house and it requires updating. It was built sometime between 1956 and 1962. The fireplace when I bought it was a horrible gas monster, which has been taken out and the gas capped.

Look at that rubbish fire back!

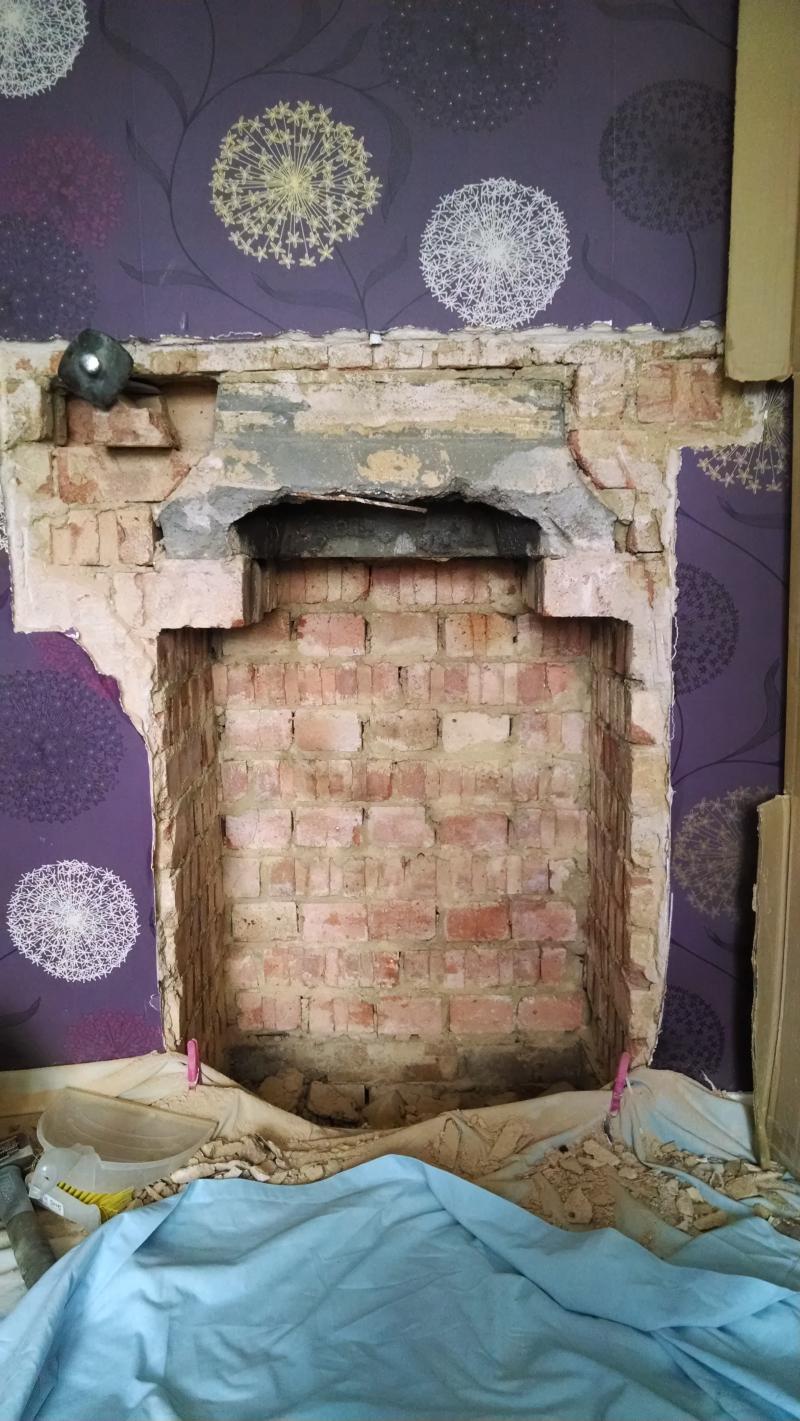
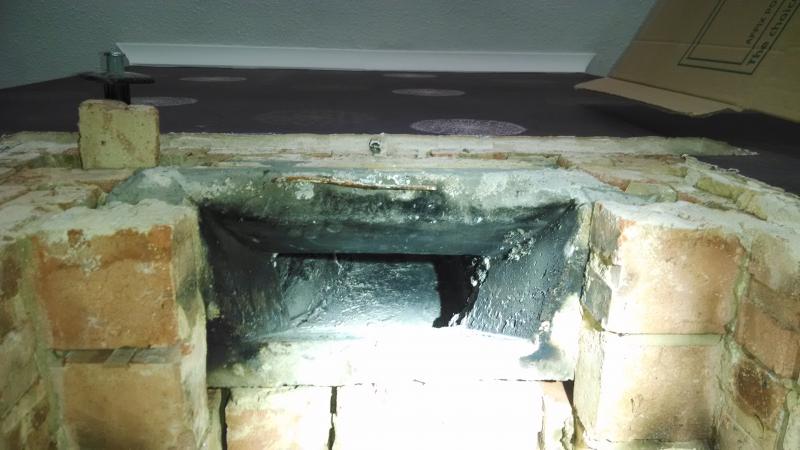
I'm liking the idea of a wood burning stove, and have opened up the fireplace to what I think is the builders opening/recess.


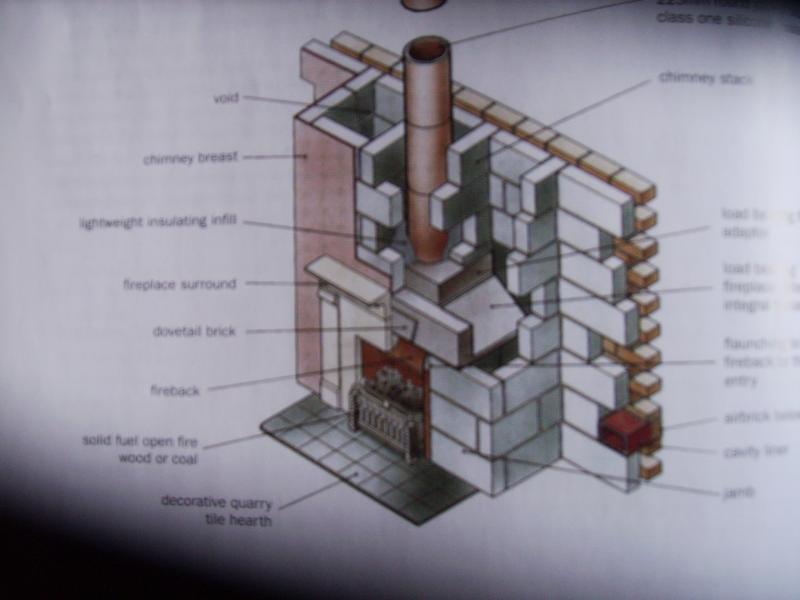
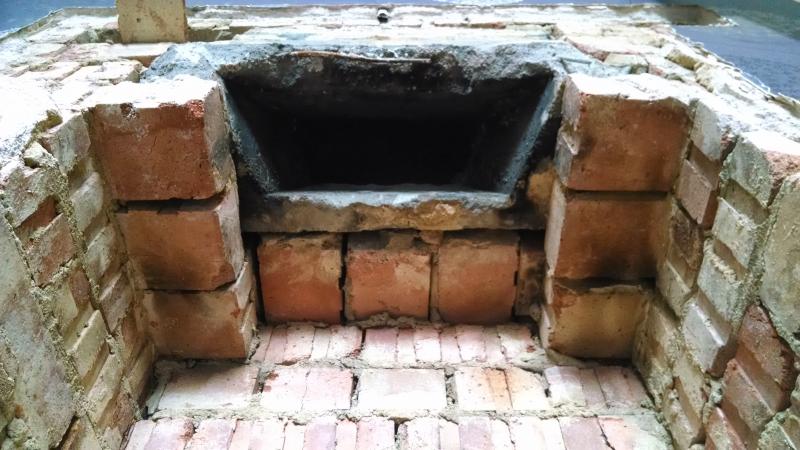
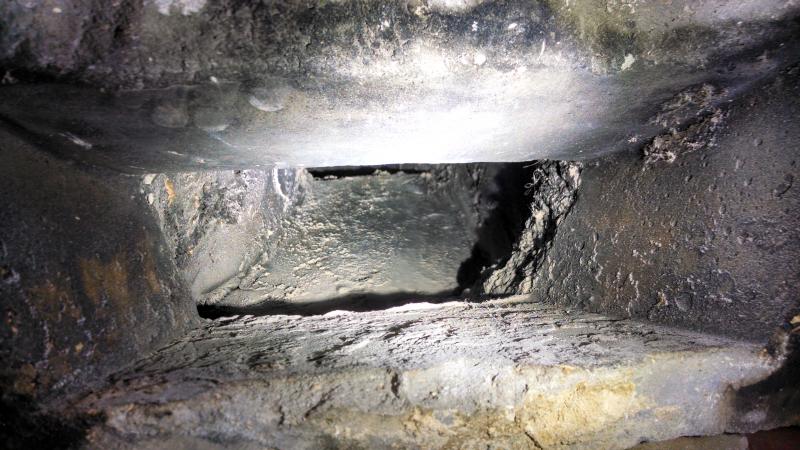
At the top of the image, you can see what I think is a massive precast throated lintel crossed with the top of a fireback sitting on a brick gather.

To fit a stove, I'm probably going to have to remove this thing as I will be wanting to fit a liner suitable for the stove and it won't fit through this opening and I will need the additional height for above the stove to get everything connected. Putting in a lintel in line with the top of this "cast lintel throat thing" gives me three courses worth of height.

My questions are:
1- do you think I can remove this thing without a load of flue falling down?
2- what is this thing called? I'm struggling to research this problem as I don't know what it is!
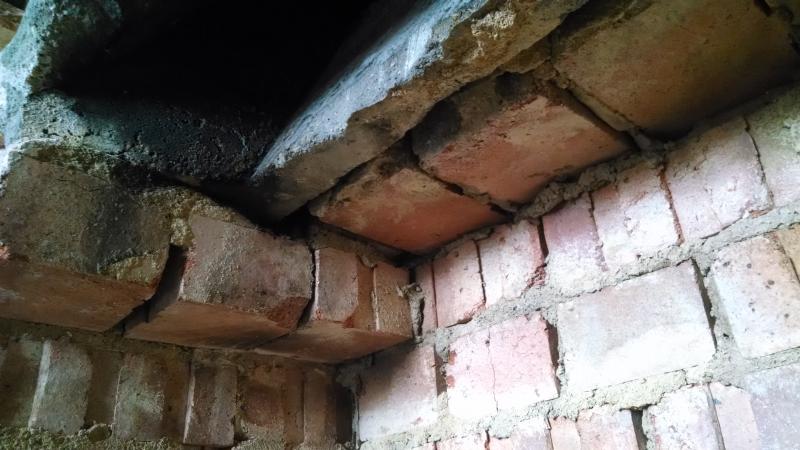
3- what can I do with the brick gathers beneath it (3 deep but the cast only sits on the front one - not sure what's above the other two brick gathers)? Ideally I don't want them protruding into the opening beneath the lintel. There's also gathers behind the side gathers coming out of the back wall, one course higher which seems to be supporting a sculpted part of the flue.


Thank you for your help - I'm new to this game!
 
Sponsored Links
Is that a party wall (semi-detached) behind the fireplace or you own external one. That info might influence your options.
 
Jackrae, its my own internal wall. It separates the lounge from the kitchen dining room. I am aware that on one side of the Brest, further up above the existing and proposed lintel there may be a second flue entering in from the kitchen area as next door had this and the houses are mirror images of each other. Next door can't remember just how high up it was, but it was just a pipe on the otherwise leaving a kitchen stove before entering the back of the chimney at some point before the ceiling.

This is all on the ground floor over a structural hearth by the way.
 
In that case you can happily take out the shaped lintel without upsetting your neighbours and fit in a new one higher up (if there isn't already one in there. You need to do some more plaster removal to find out. A couple of strongboy wall supports fitted in above where you want the new lintel and before you remove the existing lintel should hold things up.
http://www.scaff-online.co.uk/index.php?cPath=25#
 
Sponsored Links
In that case you can happily take out the shaped lintel without upsetting your neighbours and fit in a new one higher up (if there isn't already one in there.

Thanks Jackrae. What do you think of all the gathers there are coming from left, right and back? Could they be supporting the flue, in which case, would a lintel at the front be enough?
 
Thanks, I hadn't seen this post. He may have a similar situation to me. Think I'll get a Hetas to have a look at it for suitability before pushing on further.
 
First thing you should consider is the height of your stove plus the hearth height.
Then add another 350mm at least.

Width at least 270mm wider than the stove.

I wouldn't stop digging until I had enough space for a shutter box to fit (which forms the (re-barred) lintel and flue base) and then I'd pour concrete in. Vibrated using an sds drill.
Job done. Ready for the stove.
Dug my own out and completed the shutter box in a single day. A few hours the next day poured it.

If your concerned about the flue coming down fred dibnah style drill a hole through it and slide a length of rebar in.


If you get a hetas guy out to this he'll do some fannying around looking at it and do not much else.

You'll most likely be shoehorned into fitting a flue liner also.
Lucky for me I know my chimney (class 1 refractory sections) so just designed and made an adaptor plate and industrial sized compression ring (to form the transition and seal between the vitreous enamel flue and the concrete base) which I turned on our large Colchester lathe. Not something you'll find in b&q!
Again job done.

http://www.solidfuel.co.uk/pdfs/lining_old_chimneys.pdf
http://tiny.cc/ls9ccx
 
If your concerned about the flue coming down fred dibnah style drill a hole through it and slide a length of rebar in.
Iv'e known people drill through and leave the drill bit in till it's secure, but never had to do this myself. You don't want any movement which could break the joints in the liners.
I think norcon is talking about putting in a concrete raft lintel.
 
Cut the bricks below the throated "lintel" ( i think its called a Flue Gather) and you should be able to lower the whole thing down.

The brickwork in the chimney breast above the "lintel" will be sound, and wont come tumbling down.

Typically, unless there is obviously loose brickwork above the opening, then no Strongboy or Acrows are needed.

But as suggested above, before doing any knocking about, sort out your finished opening dimensions (stove Mfr's) and work to them - perhaps you can insert the new lintel above the Flue Gather, and then drop the Flue Gather?

this site and others like it might help you: stovesonline.co.uk - chimneysweepcompany.com - stovefittersmanual.co.uk - plus an early view by a HETAS might save a lot of grief down the line.

Lift the board/sheet(?) from the floor, and see whats under it as regards front hearth possibilities.

I dont understand the suggestion to drill through the flue and insert re-bar. If its what it seems to suggest, then, left there, the re-bar would actually be introducing an obstacle into the flue.
Plus, you, a DIY'er, would need an extra long masonry bit, a hefty drill and a length of re-bar.
And, in this case, what would be its purpose?
Then again, perhaps i dont understand whats being said.

Cheers. I get what he's saying - temporarily leave the drill bit in as insurance to stop anything from falling down, then replace the lintel, which will support the flue which would have otherwise tried to fall, and then take out the drill bit. I actually have a 550mm 15mm bit which I used to divert flexipipe under the floorboards going from boiler in dining area into the lounge. That would do it. Using a regular drill. Works, just slower.

Under the sheets is a structural concrete heart. I've been under the boards and it goes to the ground. Used to have a hideous white flaked marble hearth on top of it. I'm going to slate tile it.

All good suggestions from everyone. Cheers all!
 
I dont understand the suggestion to drill through the flue and insert re-bar. If its what it seems to suggest, then, left there, the re-bar would actually be introducing an obstacle into the flue.
ree, the bar would be removed later. If you look at the pic the precast gather is holding up the liners. In older flues mortar should be around the flues which would hold them in place. Modern ones have insulation.
However I have worked with bricklayers who didn't flush up the flues, meaning there could be a chance of movement when the gather was removed.
 
Well yes, but there's no indication that the OP's c/breast and flue match your diagram. From what i can make out from the information given, the flue is a conventionally brick built flue ie the flue is part of the c/breast, so there would be nothing to drop or come down.

I dont know what "flush up the flue" means - unless you are referring to parging the brickwork of the flue. Or, if clay flue tiles have been badly plumbed?

Or something else?
 
There may be flue liners sitting on top of the precast gather. It could also have no liners and have a parged brick flue. I can't really tell from the photo.
Up to the mid 60's most flues were built in brickwork and parged. After the introduction of the 65 Building Regs flues were required to be lined.
Liners were built on top of each other with mortar joints, and the brickwork was built round them. The gap between the liner and the brickwork was filled or flushed up with mortar. This held the flue in place.
Some bricklayers didn't do this as the flushing up could push out the brickwork if it was a bit wet, and it made plumbing up the stack a bit harder.
Nowadays you use a mix of vermiculite and cement in between the flue and brickwork.
 
If it helps identify it - the flue is square in appearance through the cross section and not circular like I would imagine a clay flue liner would be. I can make out what looks like a horizontal layer of mortar every 20cm or so, which confuses me a bit. I'll check again tomorrow and get exact measurements and try for a photo.
 

DIYnot Local

Staff member

If you need to find a tradesperson to get your job done, please try our local search below, or if you are doing it yourself you can find suppliers local to you.

Select the supplier or trade you require, enter your location to begin your search.


Are you a trade or supplier? You can create your listing free at DIYnot Local

 
Sponsored Links
Back
Top