Can DIYer Repair Roof?

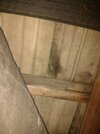
The installer of the roof appears to have hammered a nail into the batten and then the metal piece, ties into the groove of the interlocking tiles (pics attached).
As said , not nailed but clipped .
Standard modern had no nail holes unless specially requested .
19 x 38 is no longer acceptable size batten as far as BC or BS require.

In this case 25 x 50 is ideal.

When tiling opt for solo clips they are fast and easy.
Set the roof out properly and the gapping will not be excessive .

If the existing battens are wet , check the batten gauge and roof pitch

Permo forte is a good choice easy to use and very weather resistant while the roof is exposed.
 
Sponsored Links
Given the above, it is baffling why the the existing roof tiles have eaves clips installed on rows of tiles above the eaves course?
Perhaps the installer looked up that the house is in an extreme wind area and felt clipping random tiles to help avoid wind lift was sensible

when I replace it could I use treated 2x1?
Sure; nicer to work with thicker batten as they don't bounce so much and you're less likely to snap em and disappear through the roof if you step in the wrong place.

It's the height of the batten (the 25/how far it sticks up away from the plane of the roof) that matters for creating a uniform look
When you install battens you measure top to top when setting them out; you might see some people cut a stick the gauge minus a batten width and use it as a prop between the last batten and the current as they go up the roof, But that introduces cumulative error if the battens vary in width (the 50mm dimension), are bent, expanded, gauge stick not straight, two gauge sticks not exactly the same etc. For slate you can get away with battens wandering a bit but concrete tile you can't

Better to use a tape, measure the run, do the division and then mark the rafter up, move 2 rafters down and repeat. If your division leads to a horrible, hard to remember set of numbers, take a batten offcut a couple of metres and screw a small bit to it at the bottom to make a long L shape, then mark it up with the top to top spacings and carry it round with you, using it as a "tape measure" to set out
Given the pic/size of the gap between some of the tiles (ie. 10mm) could this be a cause of the water ingress?
Could be. The felt or undertile appearance underneath would likely tell you with the staining

Yes, besides the roof tiles, all other materials will be brand new.
Have you any idea how old they are?
 
Last edited:
As said , not nailed but clipped .
Standard modern had no nail holes unless specially requested .
19 x 38 is no longer acceptable size batten as far as BC or BS require.

In this case 25 x 50 is ideal.

When tiling opt for solo clips they are fast and easy.
Set the roof out properly and the gapping will not be excessive .

If the existing battens are wet , check the batten gauge and roof pitch
Thank you.

Existing batten guage is 33 cm

Roof pitch 3½/12


Permo forte is a good choice easy to use and very weather resistant while the roof is exposed.
Thanks, I saw a number of recommendations with this membrane. I think you have even recommended it.

With Permo Forte when lapping the two joins would you use Klober's tape or just batten it to secure it?

Perhaps the installer looked up that the house is in an extreme wind area and felt clipping random tiles to help avoid wind lift was sensible
The house is located in Zone 1
Better to use a tape, measure the run, do the division and then mark the rafter up, move 2 rafters down and repeat. If your division leads to a horrible, hard to remember set of numbers, take a batten offcut a couple of metres and screw a small bit to it at the bottom to make a long L shape, then mark it up with the top to top spacings and carry it round with you, using it as a "tape measure" to set out
I am going to have to read this a few times to get my head around this. This seems technical, but it's a better job, so will have to strive to do it.

Thank you.
Could be. The felt or undertile appearance underneath would likely tell you with the staining


Have you any idea how old they are?
It don't know to be honest.

Just guessing, I think the tiles may be 20-30 years old.

We had some rain and when I removed the tiles, the back of the tiles were wet as if rain has penetrated through and the batten (at least in the lower half which o exposed were wet.

Is it a no brainer that these roof tiles will also need to be replaced?

I will upload some pics the tiles later
 
Concrete tiles can degrade and become porous; lay one flat and see if you can get a puddle on it or make it into a shallow bowl with sealant and fill it to see how bad it is. If the underside is becoming damp with water soaking through then come cold weather trapped water will start jacking the tile apart if it freezes, accelerating the degradation. Tiles showing signs of being porous should be replaced

Might not be sound to assume that water on the back of the tile is rain though; if the tiles were cool and there is warm moist air in the loft space from human activity in the house the damp on the back of the tile could be condensation. Check independently whether water is coming through the tile in a more controlled experiment
 
Sponsored Links
that's not a great pitch for that tile gauge.
Is there a calculator on the ideal tile gauge for the pitch?

As the roof has been fine many years without issue with this guage and the neighbours appear to have the same guage (terraced houses), wouldn't most just proceed with the existing batten gauge?
Concrete tiles can degrade and become porous; lay one flat and see if you can get a puddle on it or make it into a shallow bowl with sealant and fill it to see how bad it is. If the underside is becoming damp with water soaking through then come cold weather trapped water will start jacking the tile apart if it freezes, accelerating the degradation. Tiles showing signs of being porous should be replaced
Thanks.
Might not be sound to assume that water on the back of the tile is rain though; if the tiles were cool and there is warm moist air in the loft space from human activity in the house the damp on the back of the tile could be condensation. Check independently whether water is coming through the tile in a more controlled experiment
I very much doubt this is mainly condensation, given the water ingress in lower portion of the roof.

In the first pics, the underside of one tile (not a problem area) is mainly dry. There is a tiny bit of dampness where as seen where the tile is dark. But no water ingress here.

However in the problem area, the batten, and underside of tile is soaked. The batten is very dark and I have coloured the areas where this is tile is wet.

I may just replace these as it will be a quicker job and i will have piece of mind knowing that these tiles are new/defect free.
 

Attachments

  • IMG_20231127_141058221.jpg
    IMG_20231127_141058221.jpg
    317.6 KB · Views: 31
  • IMG_20231127_140305876~2.jpg
    IMG_20231127_140305876~2.jpg
    395.1 KB · Views: 31
  • IMG_20231128_101746270~3.jpg
    IMG_20231128_101746270~3.jpg
    599.3 KB · Views: 32
Last edited:
Is there a calculator on the ideal tile gauge for the pitch?

As the roof has been fine many years without issue with this guage and the neighbours appear to have the same guage (terraced houses), wouldn't most just proceed with the existing batten gauge?
The felts given up now .
 
Is there a calculator on the ideal tile gauge for the pitch?
There probably is a calculator somewhere (or you can ask ChatGPT) but generally it's not hard to work out with a pen and paper. Your tiles have to cover a distance from eaves to ridge, including an overshoot into the gutter. Tiles have a height and the manufacturer states a headlap (the amount the tile above overlaps this one) range depending on the angle of the roof, wind zone etc. The height of the tile minus the headlap is the visible surface of the tile

Take the lower of the headlap range off the height to get the visible height, divide the distance from eaves to ridge by the visible height to get the number of rows. It's quite likely you end up with a decimal number so round up to the nearest whole number of rows and divide the distance by this number of rows. That is your top-to-top batten spacing for the minimum number of rows that satisfy the headlap

Example
The distance from gutter overshoot to ridge is 9.2m.
The tile is 400mm and the headlap is 75 to 100mm.
The visible part of the tile is 325mm at a 75mm headlap.
9200mm distance divided by 325 is 28.3 rows. Round up to 29 rows.
9200mm / 29 rows is about 317mm.
You can set your tiles at this and your headlap will be 83mm, which is in the range allowed

If you have access to excel you can put 317 in cell A1, 634 in A2, select them both and then drag the little handle in the bottom right to fill the sum down. Excel will generate a series for you (317, 634, 951, 1268, 1585, 1902...) that is the batten spacing measured from a single point (more accurate than measuring 317 repeatedly off the top of the last batten). If you don't have excel

If you grab eg a 2 metre batten and mark it up with the measurements up to 2 m then use that as your "tape measure" to mark out and nail on 6 battens then go again it's convenient
Thank you so much for the info.

1. Will the above technique/method for calculating the gauge still work if I am only replacing only the lower 7-8 rows of tiles?
In total the roof on the front elevation has 16 rows of tiles.

According to the Marley website, they state here that given the roof pitch (i.e. 3.5/12 inches or 16.3 degrees), I should be using 'smooth' tiles, as opposed to granular tiles. However the existing tiles of the roof look granular

According to Marley, the headlap should also be 100mm Given the moss build-up and shallow roof pitch, does this sound about right?
 
If you're only replacing some rows now, you have a choice..
Do the calc and see how different the result is to what is on the roof now. You'd hope that whoever set it out last time did it properly and go the same result so in essence you'd just be following the existing spacing.
If they're wildly different then either:

Do it at what the roof is now, because you're not planning on replacing the others any time soon

Or

Do it at the correct gauge even it it ends up looking a bit gash, because you're already planning to finish it off in the near future(or you can live with the Frankenstein)


The minimum pitch is 17.5, so your roof is actually a bit too flat for smooth modern and even more "too flat" for the granular. If you want to install tiles that are within spec you'll probably have to use mendip or anglia

According to Marley, the headlap should also be 100mm Given the moss build-up and shallow roof pitch, does this sound about right?

Re installing them at the wrong gauge/headlap, if 17.5 degree+ tiles are installed at 16.3 I doubt Marley would support any warranty claim or performance complaint regardless the spacing - the discussion would probably stop at "pitch is wrong". You've got the max headlap dialled in, and you kinda can't really do anything else- there isn't actually a headlap stated for the pitch of your roof so you can only go to the max and hope (or change tile, or steepen the roof)
 
There probably is a calculator somewhere (or you can ask ChatGPT) but generally it's not hard to work out with a pen and paper. Your tiles have to cover a distance from eaves to ridge, including an overshoot into the gutter. Tiles have a height and the manufacturer states a headlap (the amount the tile above overlaps this one) range depending on the angle of the roof, wind zone etc. The height of the tile minus the headlap is the visible surface of the tile

Take the lower of the headlap range off the height to get the visible height, divide the distance from eaves to ridge by the visible height to get the number of rows. It's quite likely you end up with a decimal number so round up to the nearest whole number of rows and divide the distance by this number of rows. That is your top-to-top batten spacing for the minimum number of rows that satisfy the headlap
Many thanks for this. The calculation and example provided was so helpful.

Here is my calculation

Gutter overshoot to Ridge - 4994mm

Tile Length - 420mm* (*This is the size of the Marley Modern in 2023. The exisiting Modern on the roof is slightly shorter in length and width)

Headlap - 100mm

Visible Part of Tile - 320mm

Rows - 16

Batten Gauge - 320mm (i.e. 4994/16) or 32 cm

Existing Batten Gauge - 330mm or 33cm

Am I right in saying that there is not much between 33 and 32cms?

Many of the old tiles in the problem area seem like they are defective (allowing water to penetrate through), so will probably replace these with new Moderns although given the slight size difference could this pose a problem?
 
Am I right in saying that there is not much between 33 and 32cms?
If you start where you should and replace 8 rows then your new gauge of 32 will mean your tiles are 8cm further down the roof that the old ones were for ray row, which kinda wipes out your 10cm headlap ..
 
If you start where you should and replace 8 rows then your new gauge of 32 will mean your tiles are 8cm further down the roof that the old ones were for ray row, which kinda wipes out your 10cm headlap ..
Definitely.

What I meant to say is that 32 and 33 cm is not wildly different.

So can I just proceed with the existing batten gauge (33 cm) without fear of issues like water ingress, felt failure etc?

Given the slight size difference between the old and new Moderns, could this pose a problem when I am laying the tiles down?
 

DIYnot Local

Staff member

If you need to find a tradesperson to get your job done, please try our local search below, or if you are doing it yourself you can find suppliers local to you.

Select the supplier or trade you require, enter your location to begin your search.


Are you a trade or supplier? You can create your listing free at DIYnot Local

 
Sponsored Links
Back
Top