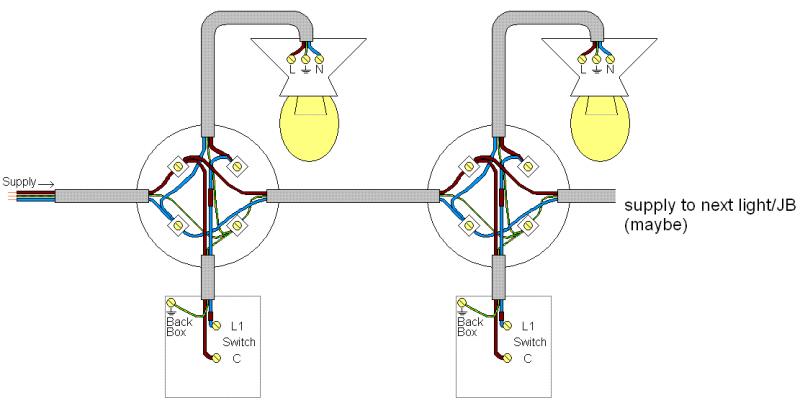
All the wiring is clipped to the beams
joints are made in JB's
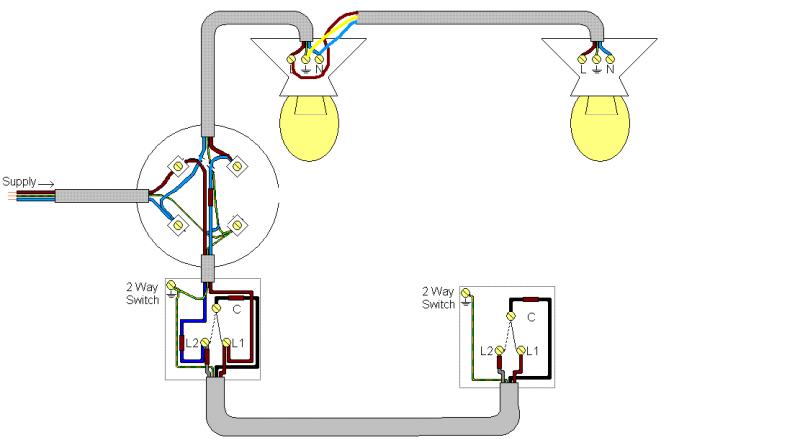
T&E to each fitting
T&E also to each switch.
You currently have a setup like this only with numerous light fittings...
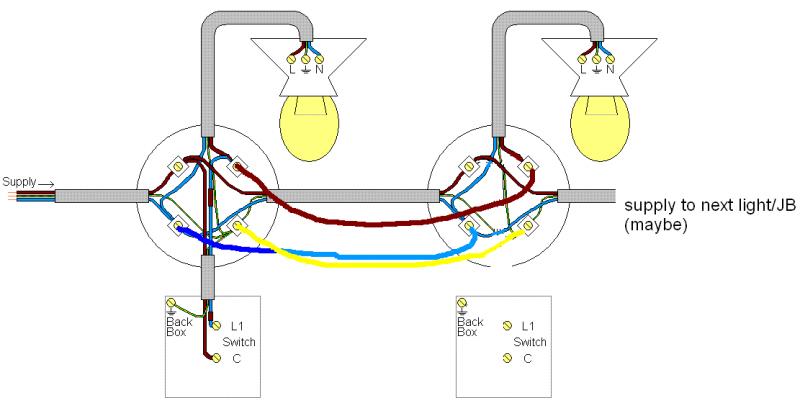
After you have isolated the circuit and confirmed it is dead you need to chose one switch and remove the cable between it and it's associated junction box. From that junction box you should then be left with a supply cable coming 'in', perhaps a feed cable going 'out', and a cable going to the light/s.
Using a length of 1.5mm² twin and earth, link the 3 terminals at each junction box that is used to supply the light fittings (by that I don't mean join phase to neutral and neutral to earth but to link the phase of one JB to the phase of the other, always being careful that you are connecting to the terminals that supply the light, and not anything else. Remember to sleeve the bare earth conductors with green&yellow sleeving). This connection has linked the 2 banks of lights together.
The other option is to link the 2 banks together at the rear of the lights instead of the junction box, either way it makes no difference.
If there isn't a supply to another junction box, an easier method would be to disconnect all cables going to that junction box and just link the supply cable to the light to the terminals at the first set of lights...
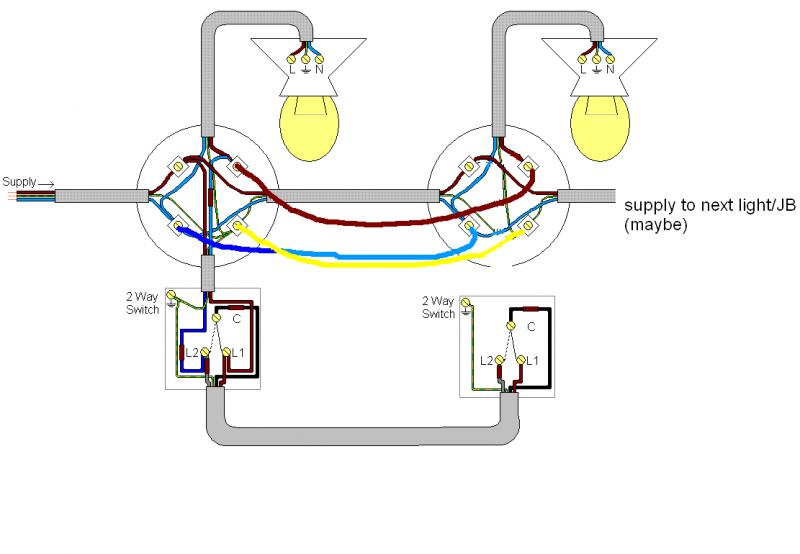
Now disconnect the 1-way light switches and run a length of 3-core and earth between them. Connect the brown core to L1, grey core to L2 and the black core to C, and then make exactly the same connections at the other switch. Then connect the brown core from the twin and earth to L1 and the blue core (that should have some brown sleeving over it) to L2.
or
PS I know the drawings are poo, but I don't have all day to make them pretty