It's fairly straight forward IF you've done it before - I hadn't!
With a bit of help from Tinternet, it took me 12 hours including head scratching, sourcing of parts / tools and
occasional spanner holding moments by partner. I could probably do it in six next time knowing what I am about to
impart plus holding toolkit.
You must equate the value of your own time weighed against repair person.
Disconnect and move to space where you can access all sides and tip to get bits dropped in progress.
Screws at rear hold top which then slides off to rear.
Circular plate in rear held by one bottom screw then drops & away.
With door open you can waggle the drum about to judge the severety of the collapse.
This is your best time to walk away if in doubt - you can quickly pop it back together and tip it.
Otherwise, get partner to hold front of drum whilst you welt the big (normal rh threaded) nut at rear to loosen (the
large alloy pulley looking like a steering wheel is also threaded).
Pull off the front rotary knob.
Unclip and remove the powder tray.
Remove four screws holding top facia.
Top facia is wired up with indistinguishable wires so either tag them up or live with facia bungied to one side.
Bottom facia simply unclips (now note the little peened metal trap for front in centre).
You now have three screws top and bottom to release front.
If you have a trained marmoset to hand, have it remove clips to leave outer drum front attached to door.
Otherwise use a 300mm shaft philips to detach large grey rubber door seal retaining cable from outer drum and move
door and rubber to one side.
Gently ease out the outer drum front taking care not to harm the heating element in base (mine showed slight signs of
damage from wonkey inner drum).
Slacken off motor and remove pulley belt.
The nut and pulley may be unscrewed (I had to drift the drum shaft forward bit by bit)
The Pulley comes out from beneath.
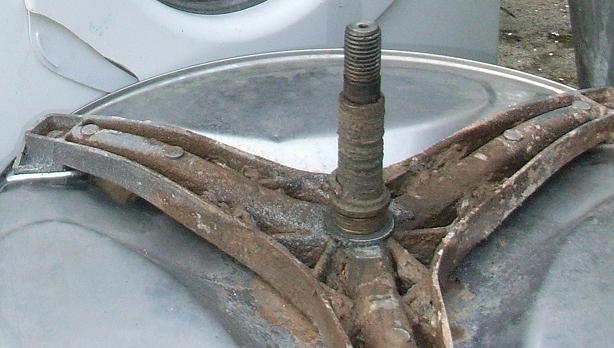
Remove inner drum forward to reveal the two bearings (remains of seal in front).
Both mine were intact but my front was clearly shot.
NB If my front bearing had collapsed at this stage, I cannot think of any solution.
The rear bearing drifted out quite easily from the front.
From hindsight, I would suggest it is well worth great effort to try and remove all trace of front seal and clean at
this stage.
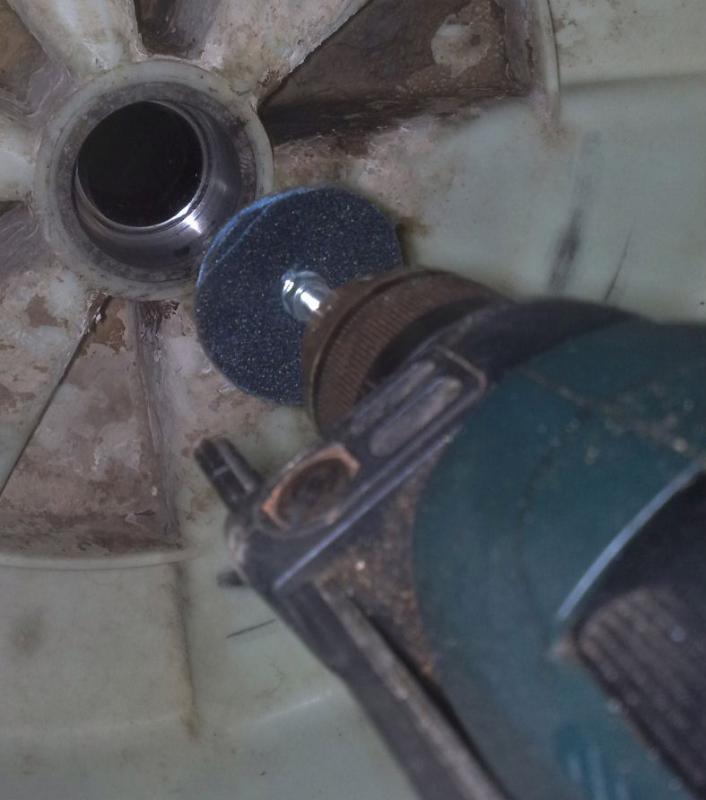
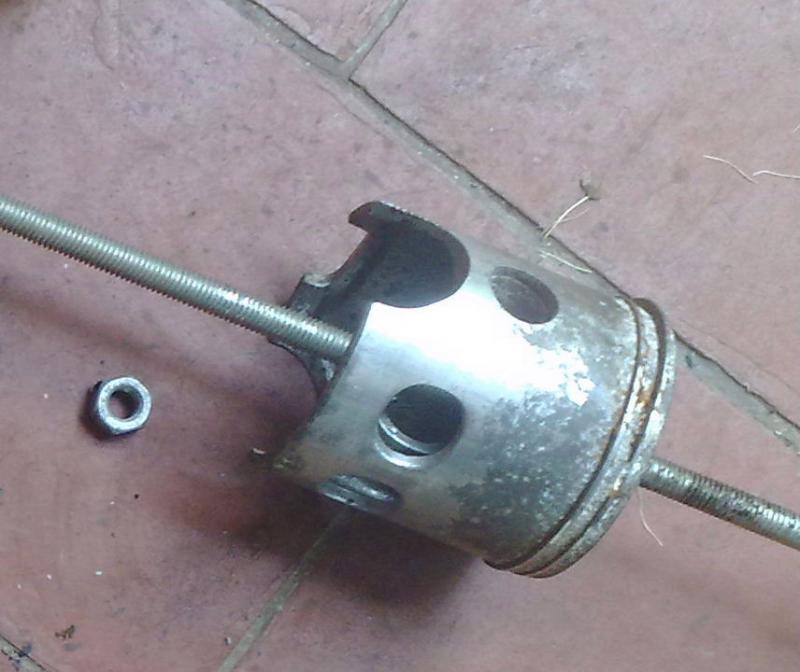
I proceded to create a puller from an old piston with a long bolt and socket to draw out the front bearing. Only with
additional drifting from rear did I get some movement but, eventually, the bearing race collapsed. The seal was
mostly out - well corroded and (I suspect) the bearing was siezed on this crud. Oh woe woe and thrice woe!
My inspired solution was quite elegant (for me) and very lucky.
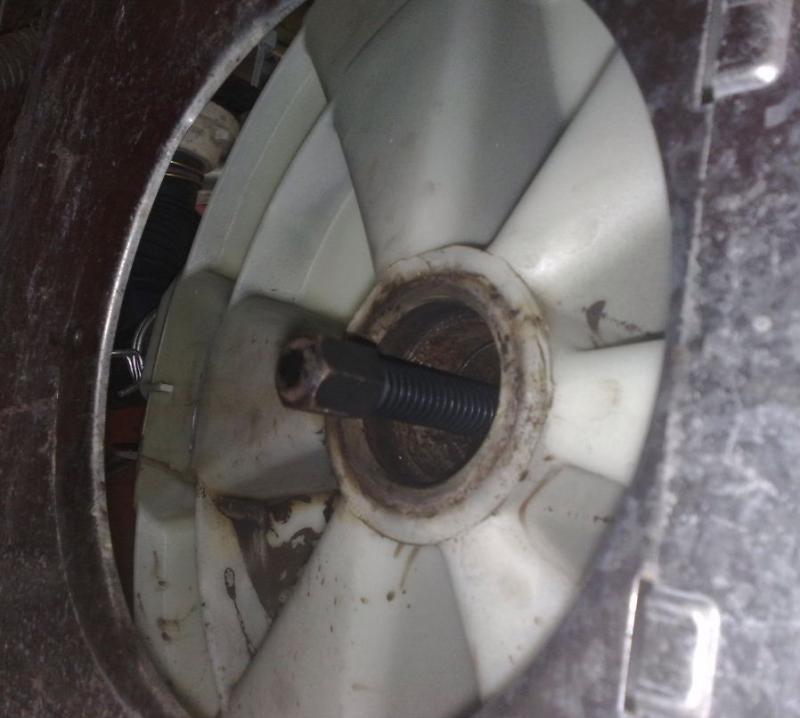
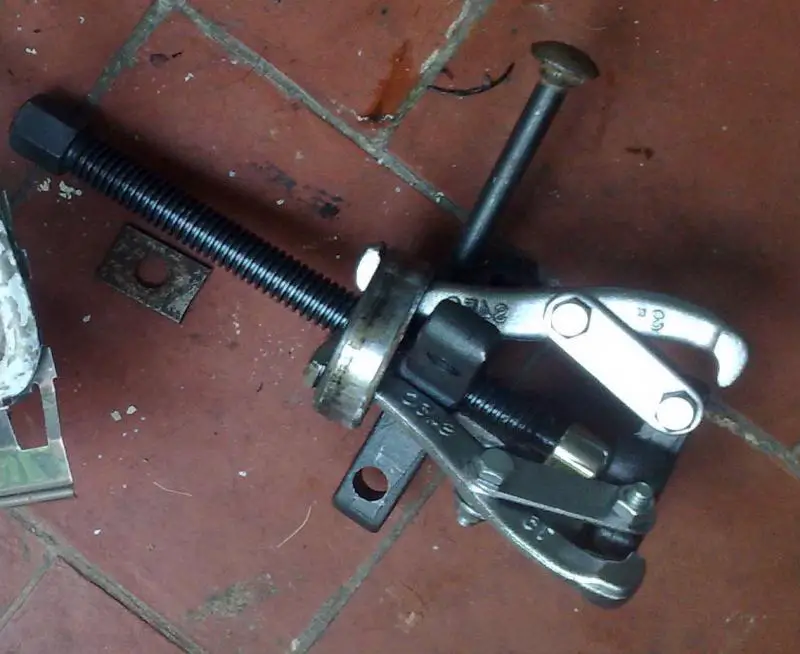
Machine Mart offer a three puller set from which you need the 3" & 4" in combination.
Because the bearing has collapsed and is forward, the 3" puller will fit inside but nothing to bear against.
Take the thrust bolt out of its centre.
Take the legs off the 4" puller, reverse it and nest it inside the 3".
With all the link bolts tight, this stiff assembly holds together as one whist positioning it.
The hybrid puller now activates from the rear but - again - additional drifting is required.
If you have success this far then re-assembly is routine stuff unless your monkey has run off.
Smearing petroleum jelly around drum and door seal does the trick (well it did it in one for me after much
frustration).
Cost of pullers = £20
Cost of bearings & seal = £20 (cheaper in my high street store than web!)
It is on its fifth load OK but I don't think I'd attempt it again if it fails within a year.
With a bit of help from Tinternet, it took me 12 hours including head scratching, sourcing of parts / tools and
occasional spanner holding moments by partner. I could probably do it in six next time knowing what I am about to
impart plus holding toolkit.
You must equate the value of your own time weighed against repair person.
Disconnect and move to space where you can access all sides and tip to get bits dropped in progress.
Screws at rear hold top which then slides off to rear.
Circular plate in rear held by one bottom screw then drops & away.
With door open you can waggle the drum about to judge the severety of the collapse.
This is your best time to walk away if in doubt - you can quickly pop it back together and tip it.
Otherwise, get partner to hold front of drum whilst you welt the big (normal rh threaded) nut at rear to loosen (the
large alloy pulley looking like a steering wheel is also threaded).
Pull off the front rotary knob.
Unclip and remove the powder tray.
Remove four screws holding top facia.
Top facia is wired up with indistinguishable wires so either tag them up or live with facia bungied to one side.
Bottom facia simply unclips (now note the little peened metal trap for front in centre).
You now have three screws top and bottom to release front.
If you have a trained marmoset to hand, have it remove clips to leave outer drum front attached to door.
Otherwise use a 300mm shaft philips to detach large grey rubber door seal retaining cable from outer drum and move
door and rubber to one side.
Gently ease out the outer drum front taking care not to harm the heating element in base (mine showed slight signs of
damage from wonkey inner drum).
Slacken off motor and remove pulley belt.
The nut and pulley may be unscrewed (I had to drift the drum shaft forward bit by bit)
The Pulley comes out from beneath.
Remove inner drum forward to reveal the two bearings (remains of seal in front).
Both mine were intact but my front was clearly shot.
NB If my front bearing had collapsed at this stage, I cannot think of any solution.
The rear bearing drifted out quite easily from the front.
From hindsight, I would suggest it is well worth great effort to try and remove all trace of front seal and clean at
this stage.
I proceded to create a puller from an old piston with a long bolt and socket to draw out the front bearing. Only with
additional drifting from rear did I get some movement but, eventually, the bearing race collapsed. The seal was
mostly out - well corroded and (I suspect) the bearing was siezed on this crud. Oh woe woe and thrice woe!
My inspired solution was quite elegant (for me) and very lucky.
Machine Mart offer a three puller set from which you need the 3" & 4" in combination.
Because the bearing has collapsed and is forward, the 3" puller will fit inside but nothing to bear against.
Take the thrust bolt out of its centre.
Take the legs off the 4" puller, reverse it and nest it inside the 3".
With all the link bolts tight, this stiff assembly holds together as one whist positioning it.
The hybrid puller now activates from the rear but - again - additional drifting is required.
If you have success this far then re-assembly is routine stuff unless your monkey has run off.
Smearing petroleum jelly around drum and door seal does the trick (well it did it in one for me after much
frustration).
Cost of pullers = £20
Cost of bearings & seal = £20 (cheaper in my high street store than web!)
It is on its fifth load OK but I don't think I'd attempt it again if it fails within a year.


")