Ikea Whirlpool Dishwasher DWF B10 Flashing Start Button

Same problem on a DWH B10, but thought I'd try cleaning from inside before removing the builtin dishwasher. Toothbrush used to clean it from the inside after removing the metal grate and all sorted! 2 minute job and now working perfectly :)
 
Sponsored Links
Hey all. I was having a problem with my Whirlpool DWH B80 Dishwasher and thought i would share what I found.

I would start a cycle and the dishwasher would run through right up until the Rinse cycle and then start beeping. The green light was flashing in intervals of 4 flashes. The bottom of the dishwasher was full of water.

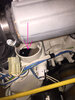
Turned out that the hose was blocked with junk near the outlet to the sink waste. I cleaned that out and "Hey Presto!", the machine now works.
Thanks very much once again.

Thanks for your post rdb! This is exactly what it was. 60 seconds with a plunger on my kitchen sink and all is good. Here i was thinking i was looking at a hefty repair bill. Thanks again!

cwnj
 
Hi all, another one here with the "11-blinks problem". I have followed this thread an tried a DIY - but didnt quite make it... Well here is how it all went:


(...)

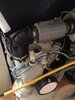
  • - I put the dishwasher on its back.
    - Removed the front metal panel, then the bottom metal panel.
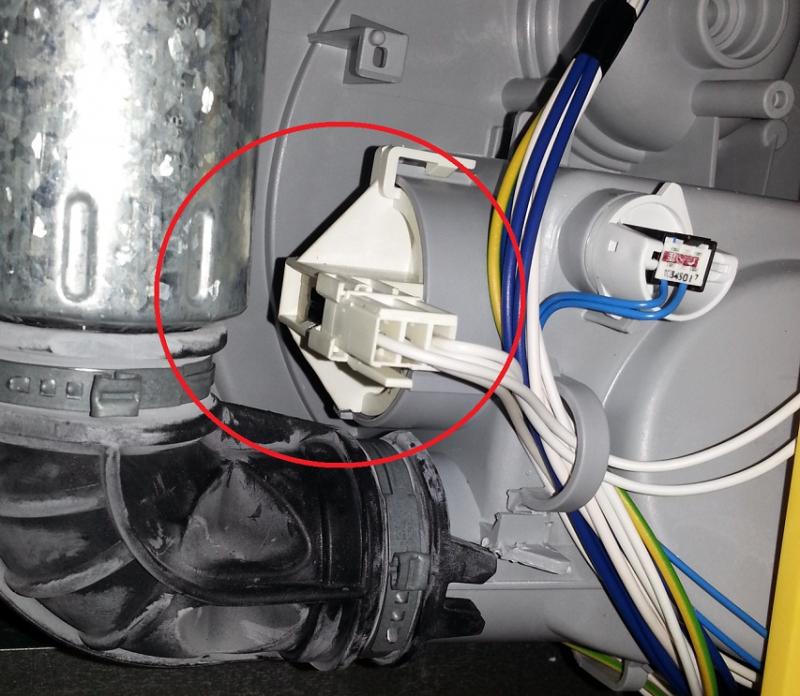
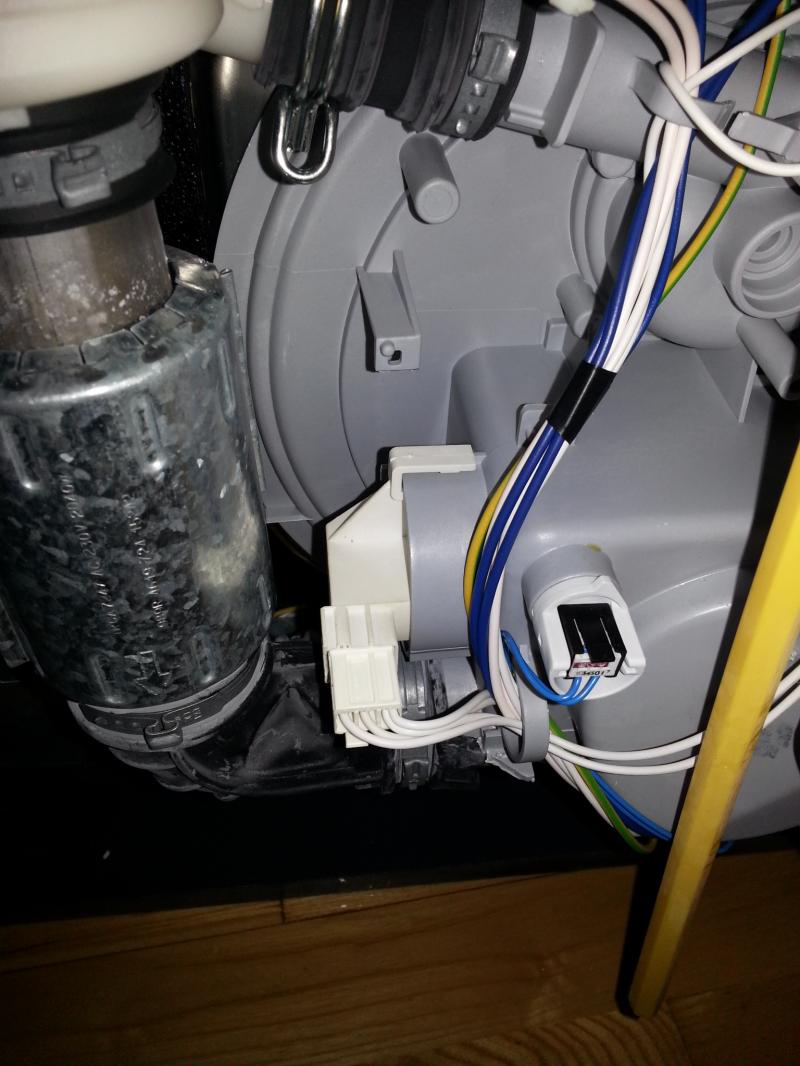
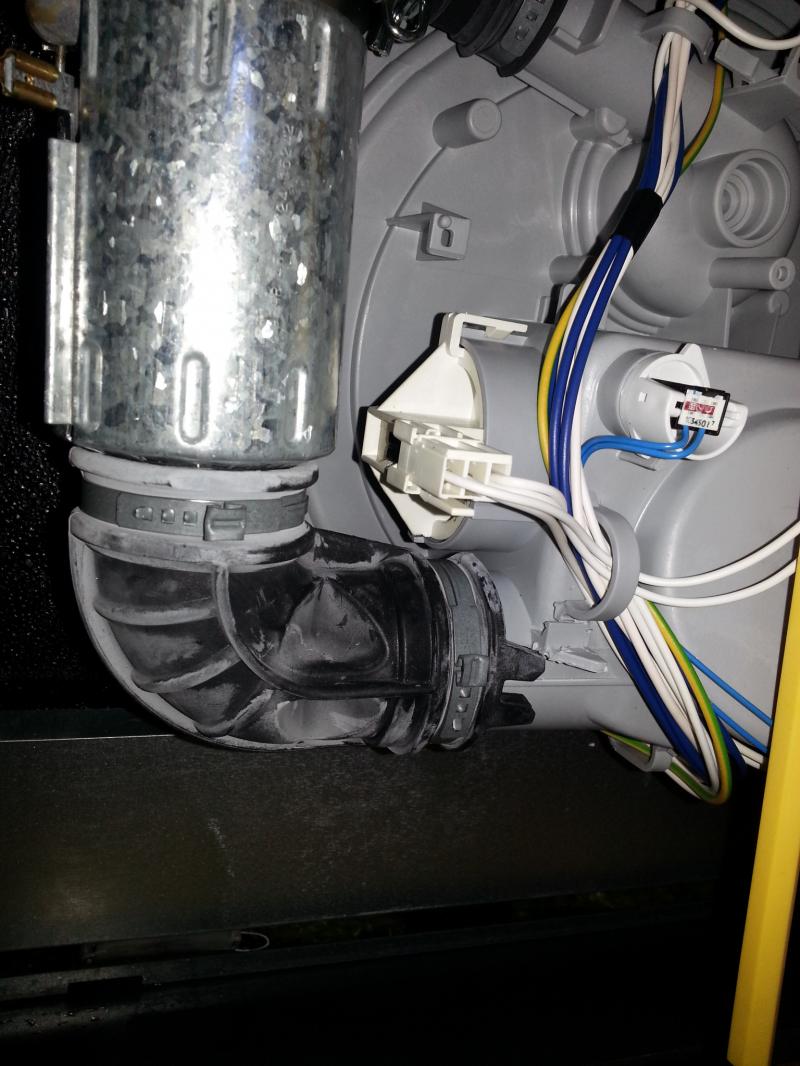
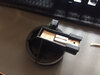
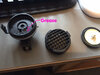
    - If the dishwasher is lying on it's back on the right hand side of the bowl there is a round approximately 3cm wide white plastic valve with an electrical wire connection coming out of it.
    - Disconnect the wire.
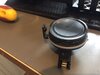
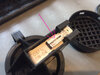
    - Had to turn the valve clockwise a quarter turn to remove and hold down a latch. Had to turn it quite hard.
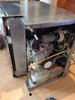
    - Couldn't get the valve out because a black hose was blocking it so I removed the hose.


  • This is where I gave up. Didn´t dare to remove the black hose, as i was not sure i would get it back on. It seems to require some special tool for making it water-tight with a special metal-band. So, could someone help with the following:

    -> Can the sensor be removed without removing the blach hose?
    or
    -> How can I removed the black hose - and making shure I can get it back on in a good condition?

    Any tips or alternatives here?

    This is how it looks like on my machine:

    So, didnt get through the remaining steps...

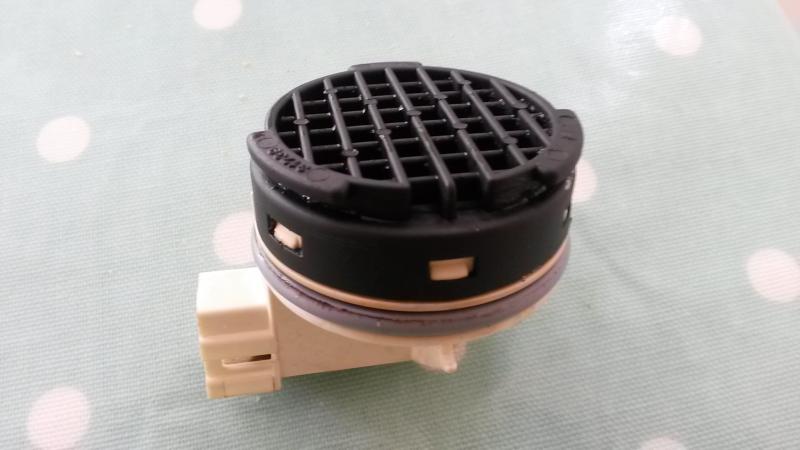
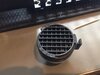
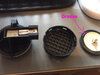
    - Had to pry off carefully a black cover to the valve. This black cover is what is exposed and can be seen inside the dishwasher at the bottom of the bowl.
    - It was clogged up with white gunk.
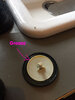
    - Cleaned the round rubber membrane which keeps the water out of the switch.
    - on the inside of the rubber membrane there was some sticky grease. I think this was to seal the membrane. Now that I think about it I should have spread it around the membrane when I put it back.
    - put the valve back together
    - connected the electrical connection.
    - put back the metal panels
And now the machine works again and we cancelled the repairman who was coming to fix it.
Total time was about 30 - 45 minutes.

...but re-assembled the machine and cleaned the filter/sensor from the outside with boiling water and a toothbrush. It works again, but (i guess) only for a limited time.

Any help or tips is appreciated.

Kind regards, Lasse
 
I have the same problem (DWFB10)

I've managed to remove the black filter mechanism - didn't need to remove the big black hose, just managed to get the filter round behind it.

But I can't work out how to now open the filter to clean it properly (no obvious muck on the outside of it, which I'd already cleaned from inside the machine.


I'm worried about prising the black bit from the white catches, in case they snap

Update - actually I did just get it apart by working my way round, prising off each one at a time. Now to put the whole thing back together...
 
Sponsored Links
Hi,

My Ikea/Whirlpool DWF B00 dishwasher had the same 11 flashes problem this weekend, and following the steps suggested in this forum I got it working again. Just wanted to extend a massive thanks to all your contributions, especially SleepyHead.

The Problem:
When starting the wash cycle, after approx 30 seconds the Dishwasher would bleep repeatedly, and the green light near the start button flashed in cycles of 11 flashes.

The solution/This is what I did:
- unplugged the dishwasher
- Turned off the water supply
- unscrewed the dishwasher from the cabinet and slide it forwards
- unscrewed the main water inlet hose
- laid the dishwasher on its back (being careful not to squash the pipes coming out the back) on lots of towels
- quite a bit of water ran out the machine - which was soaked up by the towels
- Using a Torx 15 screwdriver, I unscrewed the small panel at the bottom of the dishwasher, below the main front door. Four screws
- Unscrewed the big panel on the bottom of the machine. Two screws and I slid the panel upwards to remove.
- located the "pressure sensor" using the pics above
- disconnected the electrical connector going to the "pressure sensor"
- "unscrewed" the pressure sensor (I had to lift the little clip using a small flathead screwdriver, then you turn it a quarter of a turn anti-clockwise to remove)
- it was fiddly, but possible to remove, but I did not have to remove the big black hose.
- (very carefully!!) cleaned the black grid part of the sensor with a toothpick, removing all the gunge and crud (mainly white blobs of fat/calcium)
- I tested the switch was working by gently pressing in the sensor and listening for the click
- Using a multimeter, I tested the resistance of the electrical connectors when activating the sensor. they should alternatively change from zero to high resistance when activating the switch
- screwed the pressure sensor back on
- reconnected the electrical connector
- screwed the dishwasher panels back in place
- returned it to upright
- reconnected the main water inlet hose
- slid the dishwasher back into the cabinet (Tip - squirt washing-up liquid on the floor under the legs to allow it to slide easier)
- rescrewed it back into the cabinet (two screws)
- plugged it back in
- turned on water

Hurray - the problem was solved!
 
Hi, i had the same problem and followed the instructions indicated here (thank you), but the problem did not go away.
So knowing that the problem is linked to WI switch or LS6 i started testing them:
- to test LS6 i did a short circuit on the conector (i.e. a wire replacing the switch), so LS6 is not the problem (this is the switch in charge of detecting water leaks on the botton of the dish washer)
- to test the water level sensor i placed the multimeter to measure impedance on the pins that are suposed to be connected when the water level rises, and then put the dishwasher on its feet, then added water manually inside until the ohmeter sais 0 ohm
- also, with the same setup i started the whasing program and i could see that the ohmeter changes to 0 ohms just before the error beep starts. => so it works OK, the problem must be somewhere else.
-then i opened the "front door" to access the control board, in order to do this i unscrewed the screws on the rigth side of the door. i looked for the connector labeled as "WI", two wires, then checked electrical continuity from the WI switch to the control board conector, one was ok but the other one was not! so i followed the cable and BINGO!, broken cable just under the door:

https://www.dropbox.com/s/1nwcoiriouhutag/2015-09-08 19.25.12.jpg?dl=0

Then i just pulled the bottom half of the broken cable and routed it again to reconnect both halves:

https://www.dropbox.com/s/dyuw90au0xmolp2/2015-09-08 19.45.24.jpg?dl=0

and finnaly problem was solved.

So to resume:
check the wires just below the dishwaser door, it seems that they may broke due to mechanical stress during door opening/closing.

hope this helps
Regards
 
My Dishwasher had this problem (beeping and flashing 11 times) and I fixed my machine earlier this week.

I didn't quite follow the advice above and accessed the faulty unit from the side of the machine, which meant I could keep the hoses attached at the rear and I didn't have to turn the machine over.
Important: Before doing anything;
1) remove the water from the sump at the bottom of the machine using a sponge (easy to do, see above posts about this)
2) isolate the power

Then I got on with sorting this out;
3) I pulled out the machine so I had access to the right-hand side (as you look at machine from the front)
4) I removed the front panel below the door (hidden by kickboard) using T15 star tool, then removed the right side panel which also needs T15 tool only
5) The unit containing the sensor (see pic in jnix2 post above) is behind the black hose that curves 90 degrees which you can see at the front left as you look at the right side of the machine. Accessing the unit is easier with the black hose removed, but I managed it with the hose in place. Pictures shown above (see La55e post on 27 Dec 2013) are from the bottom of the machine but give you a good idea of what you are looking for.
6) Disconnect the electrical connector and the unit comes out with a twist (there is a clip on the outside of unit which stops it twisting if not released).
7) Once twisted and pulled out you can manoeuvre the unit out by pressing the hose in to create a little more space.

I decided to disassemble the unit and clean it. To do this I used a very small flat screwdriver to separate the black grid section from the white housing by prising the clips apart gently.

Inside I found a sort of rubber/flexible diaphragm which on the back in the middle has a plastic arm that inserts into a switch. When the diaphragm moves in an out (under pressure) it operates the switch (which connects to the connector removed in step 6 above. Anyway, I cleaned this diaphragm carefully and reassembled the unit. I tested its operation by connecting my electrical testing meter (set to continuity) to the electrical connectors of the unit and then gently blew into the black grid. I could hear the switch click on and the electrical testing meter change. This told me the unit was operating and the switch inside was ok.

Put the unit back in place (again quite tricky with black hose in situ), attached the electrical connector to the unit, replaced the side & front panels, put the machine back in place, switched on power and tried the machine - it worked perfectly.

If you can get machine in and out easily this fix should take you an hour with a T15 tool and a bit of patience.

Hope above helps you. Good luck.
 
I had this typed out then lost it all after trying to add photos argh!

I'll keep this short. Thanks all who posted step by steps. I know thread is old, but dishwashers last a while!

My pressure sensor really wasnt clogged up much. Just a bit of grime and calcium build up. Removed with toothpick and paper towel, and black grid removed and cleaned in water.

My problem may have been the diaphragm needed a clean on edges and grease smudging back around where i found it. To create a seal. You'll here the sensor click when you lightly press it through the grid with a screwdriver or simlar.

Some photos of mine, which had same problem. Two extra things to note. Dont clean off the grease on the diaphragm inside the pressure sensor. Its meant to be there to seal it.
Separate the black grid for cleaning with a small flat head (or two) prising it up near the tabs around the edges. Dont wash the whole pressure sensor, you'll wash off the grease and get the electric contacts wet.
My electric contact (top exposed one) was black from carbon build up. I used a small edge of metal pan scourer to clean the contact up. Just in case.

Hope these help someone if your dishwasher has lasted as long as mine!
 

Attachments

  • IMG_6511.JPG
    IMG_6511.JPG
    195.4 KB · Views: 111
  • IMG_6510.JPG
    IMG_6510.JPG
    225.9 KB · Views: 111
  • IMG_6509.JPG
    IMG_6509.JPG
    219.8 KB · Views: 115
  • IMG_6508.JPG
    IMG_6508.JPG
    191.3 KB · Views: 107
  • IMG_6507.JPG
    IMG_6507.JPG
    269.4 KB · Views: 104
  • IMG_6506.JPG
    IMG_6506.JPG
    309 KB · Views: 115
  • IMG_6505.JPG
    IMG_6505.JPG
    243.7 KB · Views: 115
  • IMG_6504.JPG
    IMG_6504.JPG
    261.4 KB · Views: 138
  • IMG_6503.JPG
    IMG_6503.JPG
    251.7 KB · Views: 94
  • IMG_6502.JPG
    IMG_6502.JPG
    324 KB · Views: 122

DIYnot Local

Staff member

If you need to find a tradesperson to get your job done, please try our local search below, or if you are doing it yourself you can find suppliers local to you.

Select the supplier or trade you require, enter your location to begin your search.


Are you a trade or supplier? You can create your listing free at DIYnot Local

 
Sponsored Links
Back
Top