
Installing two noggins into the same stud

Joined
1 Oct 2023
Messages
15
Reaction score
0
Country
United Kingdom
Hello

I'm looking to install a noggin either side of an existing stud. The noggins need to be level as it's to support a floating shelf.

How should I go about attaching them to the middle joist?

Can I do a straight screw for one of them and then angled for the other? Would one screw per noggin suffice?

It's a 38mm X 63mm stud.

Thanks
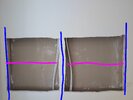
PXL_20260704_104116376~2.jpg
 
Red is blocks of wood x 8.
Wood glue and screw through to side studs.
Then to secure nogging one screw going down the through lower block of wood only.
Screenshot_20260704-140629.png


You will want noggins top and bottom so all sides of plasterboard are secure
 
@Wayners thanks, would one screw into a sister stud make the noggin sturdy enough to fix a floating shelf to it?

It won't be carrying excessive weight, but it feels like this solution would take less load than if it were attached to the stud directly via two screws?
 
Yeah. Be fine.
Just add some wood glue to the noggin ends and it will be solid no matter how you screw straight or on an angle.

I'm always belting and braces but that's just me
 
Hey @Wayners thanks for all your help. I've built out the frame/noggins but have run into a small issue and would appreciate your thoughts.

The noggins protrude by 1 or 2mm maybe because the existing studs have shrunk over time. Existing plasterboard is 15mm but I can't seem to source that locally.

So I can either:
1. Source some 15mm plasterboard from elsewhere and shave down the points where they meet the noggins
2. Get some 12.5mm plasterboard and pack out the noggins with some stripwood

What do you think, or any other ideas?
 
Mkm building merchant.
Ccf LTD

That's where I get 15mm plasterboard.
Any local building merchants will stock it and you can buy no problem.

DIY stores won't stock though.

As above.. Plane off wood
 
If I understand what you are doing correctly.....

I would get 12.5mm plasterboard, and attach it to your wood with many lines of no-more-nails.
I would use lines of no more nails rather than a layer so that the new plasterboard can be pushed in place (squashing the lines of no more nails) so the new plasterboard is flat with the surrounding plasterboard.
 
I've done as above.
I used any fast setting mix like plaster. Easyfill. And anything else I had to hand and a couple of screws not tightened until the plaster set.
Keep the new board level with existing.
Add more screws when plaster set
 
  • Like
Reactions: SFK
I would:

Screw two decent sized wood strips to the studs either side of the hole, set back enough to allow for a piece of 12mm or 18mm ply to sit flush with the back of the existing plasterboard. Cut a piece of ply the width of the hole but ply taller than the hole you have in the plasterboard, insert it into the hole so that the ply overlaps the existing plasterboard, top and bottom, and screw to the wood strips you attached to the studs. You can then either source 15mm plasterboard and attach it directly to the ply or get some 12.5mm plasterboard and pack it out with no nails or other adhesive and either glue the existing plasterboard to the ply or screw into it so that the ply bridges the joins in your plasterboard.

The ply will give you a very solid attachment point for your shelf and, as foxhole says, gives you a much bigger target behind the plasterboard.
 

If you need to find a tradesperson to get your job done, please try our local search below, or if you are doing it yourself you can find suppliers local to you.

Select the supplier or trade you require, enter your location to begin your search.


Are you a trade or supplier? You can create your listing free at DIYnot Local

 
Back
Top