
You are using an out of date browser. It may not display this or other websites correctly.
You should upgrade or use an alternative browser.
You should upgrade or use an alternative browser.
Is this damp on new plaster?
- Thread starter lee666
- Start date

At first glance it looks like condensation but you mention salts.
Can you post more pics (with a better focus) of the chimney breast and larger areas of these two walls(?).
I dont understand "heat proof plasterboard skim"? Did you simply skim a fire opening, or the whole c/breast. Or did you apply, so called, heat proof plaster board to a chimney breast?
When was the work done? Did you do it? Why was it done?
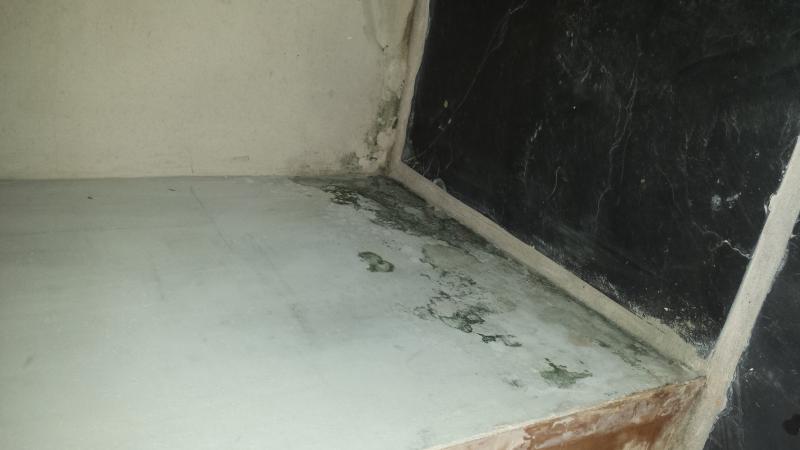
Is that a solid floor covered in asphalt?
Did you remove and examine the back of any skirting?
Can you post more pics (with a better focus) of the chimney breast and larger areas of these two walls(?).
I dont understand "heat proof plasterboard skim"? Did you simply skim a fire opening, or the whole c/breast. Or did you apply, so called, heat proof plaster board to a chimney breast?
When was the work done? Did you do it? Why was it done?
Is that a solid floor covered in asphalt?
Did you remove and examine the back of any skirting?
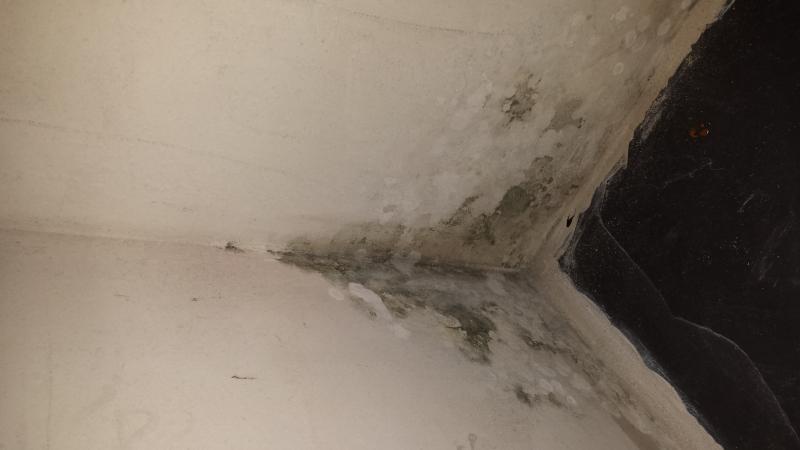
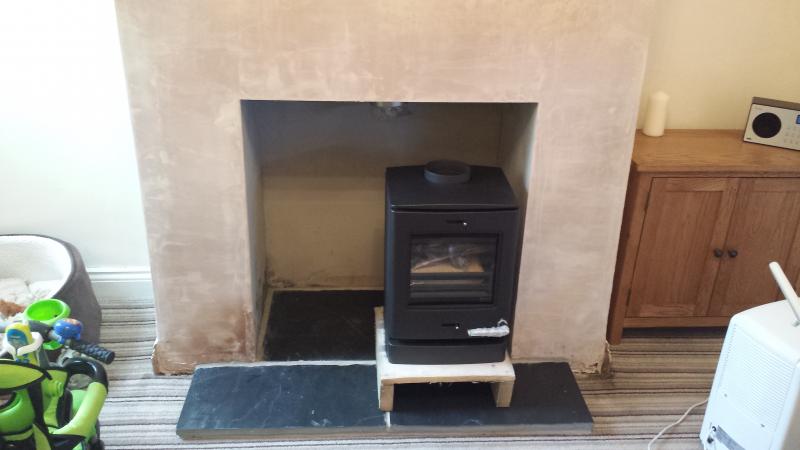
Hi there, I will take a few more pictures tonight when I get home. Basically in June we had the inside of the fireplace prepped for a wood burner. The installer dot and dabbed heat proof plasterboard and then did a skim with heat proof plaster. Everything bar 1 little bit dried like normal, but in the last few weeks black patches and salt deposits have started to appear. The bottom of the opening has slate tiles but underneath I was told to do a base of concrete. This was poured onto a bed of hardcore but no waterproof sheeting was put underneath. I'm starting to think that maybe moisture is coming up through that.
I might also add that half of the front of the chimney breast was re plastered and this has dried normally. Prior to opening the fireplace we did have damp problems as whoever closed it up did a bodge job with no ventilation and lots of dirt and debris thrown into the bottom.
I might also add that half of the front of the chimney breast was re plastered and this has dried normally. Prior to opening the fireplace we did have damp problems as whoever closed it up did a bodge job with no ventilation and lots of dirt and debris thrown into the bottom.
So the only p/b is dot & dabbed in the fire opening?
Was any plaster hacked back to brickwork or skirting boards removed?
Has the stove and/or vent been fitted yet?
Did you have this particular flue swept?
What about the other flues including the one in the room above?
Has the chimney stack been checked for water tightness, and the correct terminals?
The lack of a membrane below the new hearth isn't good - but, for the moment, concentrate on the other issues.
So the only p/b is dot & dabbed in the fire opening?
Was any plaster hacked back to brickwork or skirting boards removed?
Has the stove and/or vent been fitted yet?
Did you have this particular flue swept?
What about the other flues including the one in the room above?
Has the chimney stack been checked for water tightness, and the correct terminals?
The lack of a membrane below the new hearth isn't good - but, for the moment, concentrate on the other issues.
Hi Ree,
That is correct, because the brickwork didn't look amazing we opted for them to use plasterboard on the 3 sides which they dot and dabbed on.
The inside of the fireplace was bare brick, when the previous occupants had it sealed up, whoever did it didn't put a vent in and there was a lot of dirt and soot and brick behind it which obviously retained moisture.
We removed a bit of skirting from the front but have since disposed of it.
The stove hasn't been fitted yet as this is holding us up from painting it.
Flue was swept twice before they installed the liner. I'm not sure if they could or would have swept the flue above, the opening that would have been in the above room has been sealed up so don't know if it could have been accessed from below.
Chimney stack should be fine as we had the flashing sorted when we moved in, which was 5 years ago.
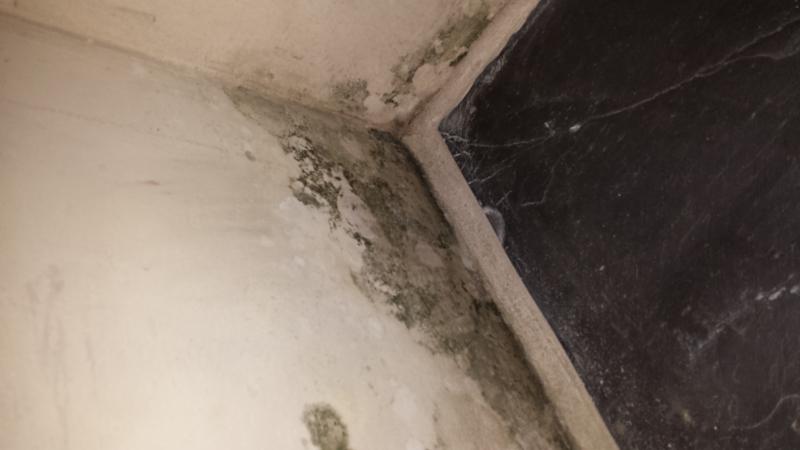
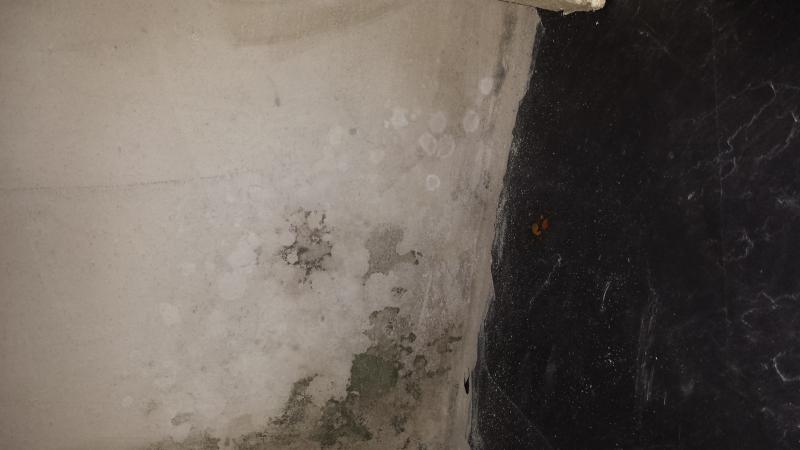
The dark patches are all at the bottom of the plaster and the plasterboard rests on the concrete base I poured in. When I was opening up the fireplace the bottom of it had tiles in the bottom which was uneven and a lot were broken. Underneath them was a lot of dirt, when I dug down for the base there was what appeared to be some kind of old cement base as there were clumps of crumbly yellow stuff so I'm guessing it perished due to water/moisture which is why I'm thinking the base as opposed to the walls.
The fireplace was open for about 6 weeks or so before they came in to start so it had a good bit of time to dry out, and the front brickwork which was plastered with normal plaster has dried ok with both sides showing no signs of salt deposits or damp.
A guesstimate:
the constant moisture that was rising from the old soil in-fill below the back hearth (& front hearth?) would have been dispersed by the open brickwork and cracked slate. And previously by the fire.
You blocked off the rising moisture escape routes and its now presenting as you see. Capillary pressure is even taking it on to the face of the c/breast.
If the above is accurate then the remedy is to remove all the D&D p/b, and clean off any sooty brick.
Then dig out to lay a membrane below the back hearth in the fire opening. Lap the membrane up to finished hearth level.
Hidden under the carpet, is there a front hearth?
You could inject DryZone cream into the fire opening three "walls" if you think it worth it, and then render up with a 4:sand and 1:lime mix. Or Limelite remedial plasters.
The LH metal corner bead (in the fire opening) will have to be replaced with a plastic corner bead, and affected plaster on the face of the c/breast will have to be removed to opening height - make good with the above mix.
Dont paint or tile anything - watch and wait.
Are there any signs of salts etc on the cheeks of the c/breast?
Is there an outside wall vent in this room?
Is this a party wall or a gable?
All flues should be swept - open them up if necessary.
Hi Ree,
Thank you for your reply.
There are no salts whatsoever on the front of the chimney breast. There is no front hearth under the carpet, there may have been in the past, but we have concrete floors whereas they used to be wooden.
There is no airbrick to the outside, I think there use to be but they removed it when they concreted the floor. The chimney breast is on a party wall by the way.
Unfortunately 2 of the 4 flues are bricked up as they are in the bedrooms, otherwise I would get them all done.
The front hearth is on the concrete floor as it needs to extend a certain amount from the stove front, the back piece of slate is the one on top of the concrete base.
I was hoping to try and remove the back slate tile without removing the plasterboard, mainly for the fact that the top plate has been installed on top of it and there is about 300 KG of insulation in the flue that I don't fancy having come down.
There is obvious damp on the LH face of the c/b. This damp contains salts - it wont go away. The contaminated plaster and plasterboard have to come off.
The air brick i was referring to was one set higher up the wall - room ventilation will help disperse the incoming moisture. Good strong ventilation is usually necessary with a solid fuel stove.
Does your solid floor have a membrane - typically, you would see it at the wall/floor edge.
When time allows, the bricked up flues should be opened up and swept or some time down the road you might have a similar experience with more salt penetration at other c/breasts.
The front hearth is a one slate slab, likewise the back hearth?
The steel Register Plate is usually fixed to the masonry - sitting it on the D&D p/b is not best practice.
Is that skirting inside the fire opening - if it is then it must be removed. No wood in there.
Hi ree,
no air brick higher up, I have no idea if there was in the past though. The main floor does have a waterproof membrane underneath as saw it when I was digging out the fireplace. There is no wood on the inside of the fireplace, only the bit on the side at the front. The front of the hearth is 2 slate slabs.
The register plate is screwed into the masonry but is flush and sealed around the top of the plasterboard. Would you say it would be better to cover the walls with the sand and lime mix rather than more plastarboard?
Yes
DIYnot Local
Staff member
If you need to find a tradesperson to get your job done, please try our local search below, or if you are doing it yourself you can find suppliers local to you.
Select the supplier or trade you require, enter your location to begin your search.
Please select a service and enter a location to continue...
Are you a trade or supplier? You can create your listing free at DIYnot Local
Similar threads
- Replies
- 9
- Views
- 8K
- Replies
- 1
- Views
- 239
- Replies
- 4
- Views
- 1K