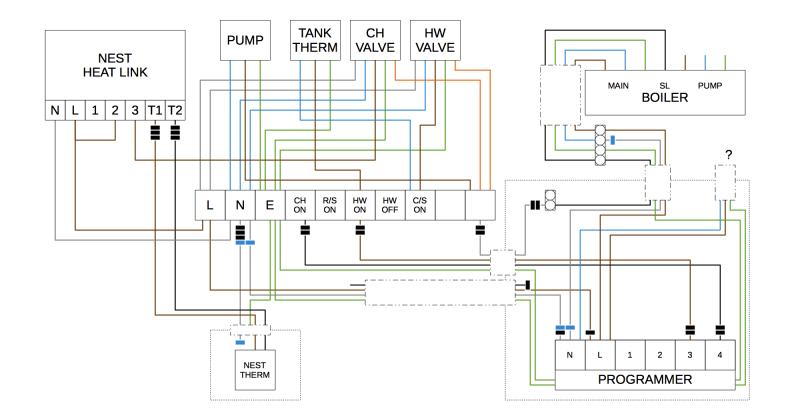
When they are to be used in place of a wireless connection, the T1 and T2 connections are meant to be connected to the corresponding heatlink connectors which supply 12V to the nest.
Was mains 230V still connected to those wires?
Was mains 230V still connected to those wires?