New oak floor - hybrid fixing technique!

Joined
27 Oct 2010
Messages
3
Reaction score
0
Location
Liverpool
Country
United Kingdom
First time poster everybody - so apologies if it's tedious or previously addressed - I can't find it!

We've just had a ground-floor extension to our house built. The old portion of the room has pine floor boards on the joists with a beautiful oak strip laid on top. This is very thin (7-8mm) and I cannot match it without spending a Kings ransom so it has to be transplanted into a future project. (For those interested and in the know, it's marked "Long-Bell Lumber, Kansas on the underside - I've not come across this sort of floor before).

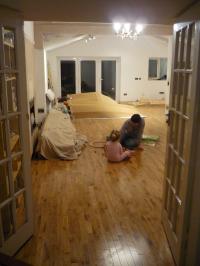
Anyway, the new bit of the room has a new (4-week old) concrete floor which is set lower than the existing joists (as we were still hoping to match the old flooring).

I am planning some new oak hardwood strip flooring - 18mm thick, 57mm x 1200mm. The plan is to strip the old floorboards altogether, secret nail through the tongue into the joists (I think about 300mm apart) and glue the grooves. In order to raise the level in the new bit, I'll lay some suitably thick ply on top of a DPM on the concrete and put the new oak onto this.

My questions are:1) Is this safe to do despite the concrete being so "young" - I'm hoping that the DPM will completely protect the wood.

2) Is it sensible to nail and glue in one part and float the floor on the other or should I stick to one technique and nail to the plywood as well? I'm worried that if the new portion is free to move more than the other then it might cause problems where the old and new bits meet.

3) Is there any benefit in attaching felt etc to the old joists or should I just crack on and nail straight to them?

Thanks in advance.
 
Sponsored Links
Rule of thumb with concrete drying times before you can install ANY floor covering on it:
30 days per inch (2.5 cm)
DPM will not protect your wood if the concrete it still too young, don't count on it. Liquid DPM will only work if the concrete has a moisture content BELOW 4.5%

Best is always to use one installation method throughout.
 
You'll probaly get a few different answers on this but my preferred method would be to secret nail onto the joists using a dpm building paper www.novia.co.uk stapled to the joists. It's about £1 per/m2 but will protect your floor from moisture.

At the concrete end i would lay 1200 gauge dpm (visqueen) and screw battens to the concrete. The advantage here being that you can choose a batten that might just be the right thickness or you can plane it to size allowing you to get the same height as your original joists and allowing you to run the flooring right through at the same height. Make sure the battens are treated.
Secret nail the new flooring to the battens as you would the joists. If you were to use ply you would need WBP and will be limited to thickness, it's also a lot more expensive !!
 
Thanks very much for this guys - having read most relevant topics in the forum, I was hoping to get a response from you both but didn't expect them in succession and so quickly!

I'm happier using a secret nailing technique throughout as I've done this before. Battens are a great idea. I'll try to post a photo of the finished floor in a few weeks.

Keep up the good work!
 
Sponsored Links
bicycle - Fix tanalised battens (2”x1” or thicker {if you can fit it – levels permitting} treated timber) on a bed of Synthaprufe (this stuff not only acts as a dpc but also as an adhesive for the bats) then fix the bats with 97mm long cartridge nails shot from a Hilty cartridge nailing gun into the concrete floor. Belt & braces you could give the whole of this new sub-floor a wash of our friend Synthprufe creating, once the stuff has dried, a completely dry environment for you flooring above.

Lay your hardwood floor by secret nailing through the tongues of your oak into the battens. The only downside to this Synthaprufe is when you shoot the Hilty nails sometimes the impact can squit a bit of the black stuff out onto your clothes – so wear old togs. Stand on the battens when shooting the nails to prevent 'bounce' and you MUST, MUST, MUST wear goggles & lug muffs when using a Hilty. Hilty guns (& concrete fixing nails) can be got at your local hire shop.

Use the Search function above as I’ve posted a number of other times – going back years - about this batten method.

Post again if you want more details/tips on this method.
 
The one downside to using a Hilti nailer is they punch the batten down so hard it follows the contour of the concrete, which if uneven will make the battens uneven (not level).
By using screws, you can place plastic packers under the batten (on low spots) and get your levels more precise.

Anyway, have you done yet ??
 
Thanks again for all your replies to my question.

The joiner and builder on the build were helpful also - we ended up adding 10mm battens to the old joists and screwing 20mm battens (all tannalised) onto the new concrete. Altogether, we let the 4in slab dry for 14-15 weeks (just shy of the advised 4 months). It took a long time to get the levels right. I undercut all of the architraves and we are fitting new skirting boards so it was easy to get a decent expansion gap. I glued onto the battens and between T&G as well as secret nailing with a pneumatic nailer throughout.

I'm really happy with the result. We'd bought the new oak online and it was very reasonably priced (£20/sqm). I think the trade-off was in the quality of the wood - lots of knots and light patches of grain but I'd over-ordered by about 5% and so had plenty of surplus to be able to screen out the unacceptable boards. The rest is characterful and looks great! I wish I'd spent even longer trying to get the levels right - there are a couple of low spots but I don't think they're really visible unless you know they're there.

So just have to fit the kitchen, floor in toilet/utility room, paint/decorate the lot and buy a load of new furniture - easy...

//media.diynot.com/152000_151706_30199_66607246_thumb.jpg[/img]
 
Can't see it. Fink you need to adjust your account setting so that anyone can view your album.
 
just remove the last bit of coding that got into the link by accident I think:
//media.diynot.com/152000_151706_30199_66607246_thumb.jpg

or

152000_151706_30199_66607246_thumb.jpg
 

DIYnot Local

Staff member

If you need to find a tradesperson to get your job done, please try our local search below, or if you are doing it yourself you can find suppliers local to you.

Select the supplier or trade you require, enter your location to begin your search.


Are you a trade or supplier? You can create your listing free at DIYnot Local

 
Sponsored Links
Back
Top