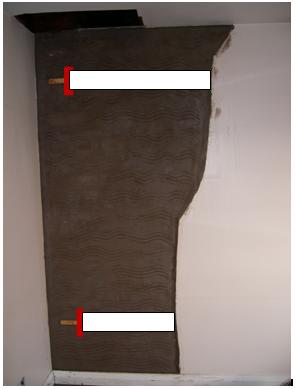
I would have put the 2 wooden dots in a "vertical" position.
Also,, "i wouldn't" have used them for the scratch coat. By using them for the scratch coat, then leaving them in for the top coat, when you remove the dots at the end of the rendering, you will have to patch up "two deep areas" where the dots were, in one thick coat, and risk them slumping, and showing as a patch. I know everyone has to learn.
Also,, "i wouldn't" have used them for the scratch coat. By using them for the scratch coat, then leaving them in for the top coat, when you remove the dots at the end of the rendering, you will have to patch up "two deep areas" where the dots were, in one thick coat, and risk them slumping, and showing as a patch. I know everyone has to learn.