Oak Table Repair

Joined
18 Jun 2011
Messages
80
Reaction score
0
Location
Yorkshire
Country
United Kingdom
Hi

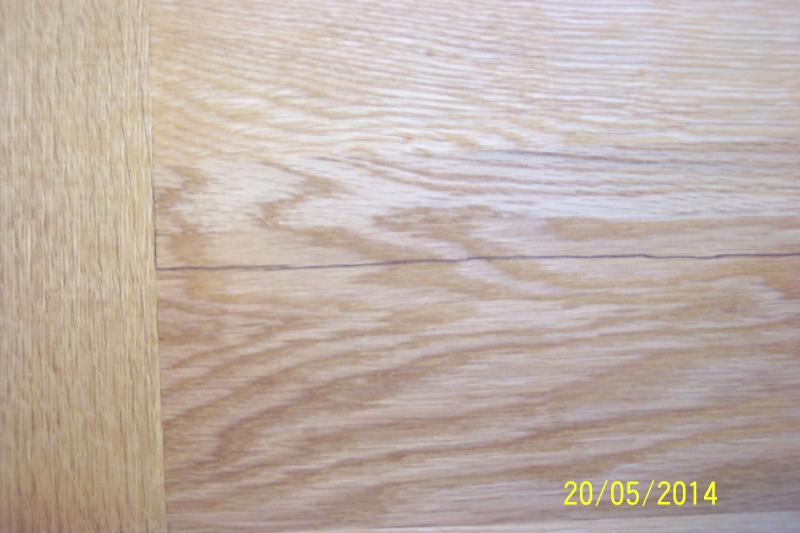
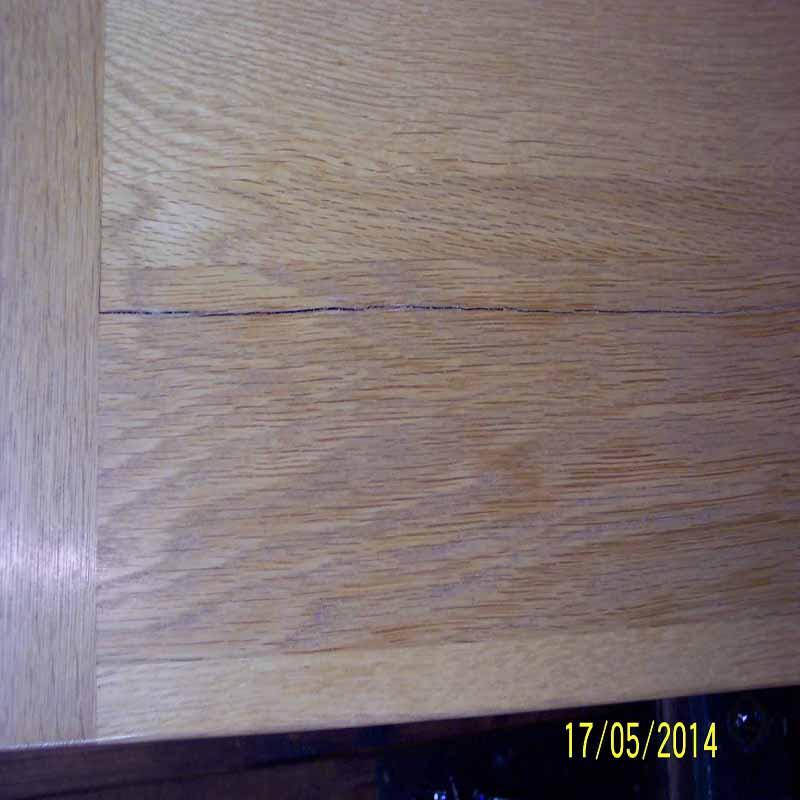
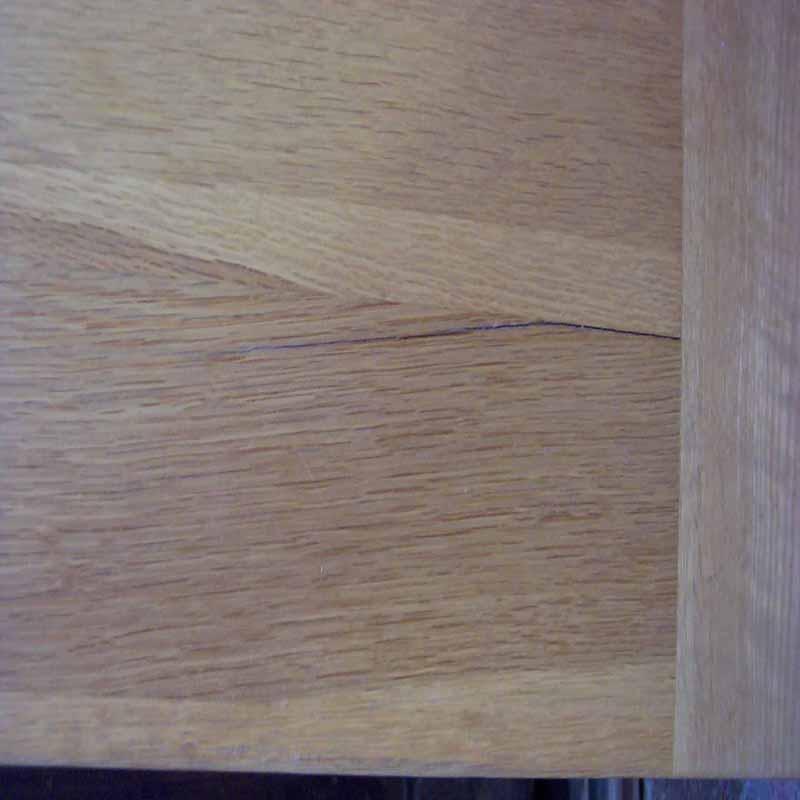
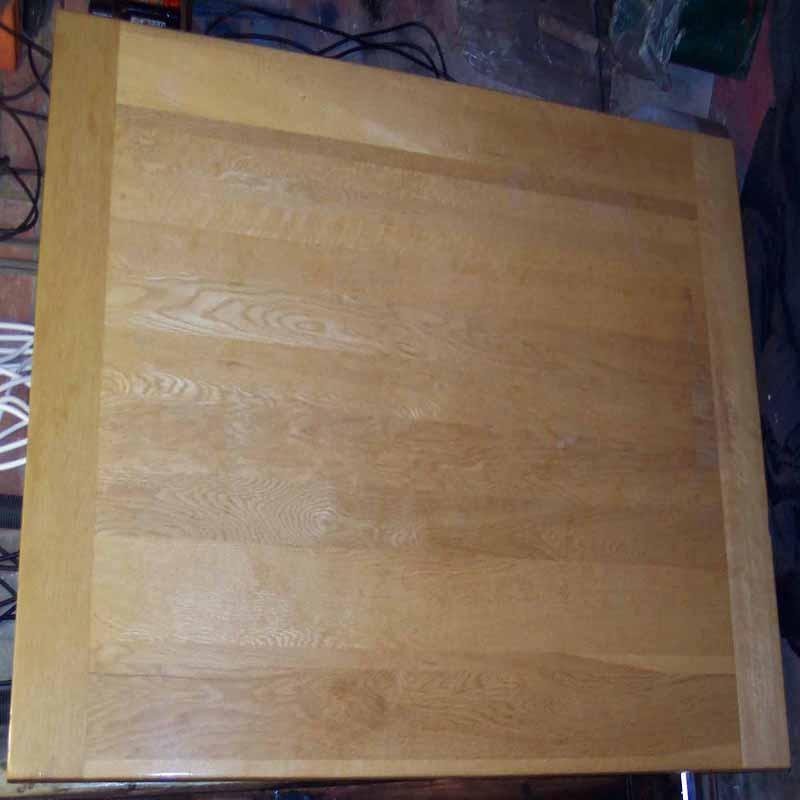
I have got a Solid Oak Dining Table that has a couple of cracks down it , in a couple of places as per pictures , question how and if , can I repair/hide these cracks , I was thinking of cleaning out the cracks ( how) I dont want to make them bigger than they are ( about 1mm ) and try to fill them with some wood filler that I remember awile back it came in a tube ! .
any help on this problem will be highly appreciated , and am also having to sand (400grit !) it all back to the base , because some of the Laquer as worn away .

cheers

spike
 
Sponsored Links
a few points - often its better to leave a thin crack as being filled can be more unslightly than cracked! Once filled, you will have a light or dark line of filler that wont match the surrounding wood. If you are happy with that then go to B&Q but some 2 pack ronseal wood filler in a round tin, choose the medium shade. Get some masking tape and mask along each side of the crack tight to the crack edges. Mix up the filler with the hardener and force it into the crack then scrape off the surplus filler using a flat blade ie narrow paint scraper before filler sets (work fast as it dries quick in the heat!) then, again, before filler hardens pull off masking tape ensuring you pull it way from crack not over it. let filler dry, then sand when hard. NOTE 400g is extremely fine for sanding off a finish, you need 180g really. Do the filling before removing the finish. You dont want to get the filler in the grain of the surrounding wood (the masking tape stops this btw)
 
Get yourself Liberon wax sticks the recommended colour/shade and fill the cracks with this. It's pliable moves a bit with the wood unlike any fillers...pinenot :)
 
Thanks for all your replies , question what would be the best way to clean out the cracks , physicaly with a small needle or something like that , or is there a chemical way , I would of thought that the cracks would need to be cleaned out before filling etc .

cheers

spike
 
Sponsored Links
Not with Liberon wax filler. If you have a sharp cabinet scraper, draw it gently over, this will cut the wax flush with the wood without exposing any of the split so none of the dirt in it doesn't show...pinenot :)
 
if you are sanding it you can use the sawdust mixed with PVA to make filler, with cracks of that size it will make them look invisible if well done.

If I am being lazy I just squirt pva into the crack, sand, and just let the sawdust fall into the crack.

FYI the tables split because of how they are made, timber expands on its width, the two edge pieces at parrallels stopped the members from freely shrinking. This only matters if you think the table will dry any further, and don't let it pick up moisture either (so dont store it in a shed for instance).
 
Just get the wax sticks as already said, Then have a Look on U tube if you are unsure how to use them.
Do not use any sort of filler unless you really want to see the crack
 
if you are sanding it you can use the sawdust mixed with PVA to make filler, with cracks of that size it will make them look invisible if well done.

I did just that to fill small knot holes. The advantage of pva and sawdust is that it absorbs stain, if used, and to my eye it looks far more natural than filler, it can look,like a natural dark band. Filler is too even, and the colours are awful. Or use wax stick.

You may know, but often dings can be removed by wetting them e.g. With spit. The wood expands naturally. If you are sanding off the finish, you could try painting some water along the crack, repeatedly, to see if it vanishes.
 
interesting range of opinions :)

water or "spit" only works on compressed fibres. A crack like this will doubtful go wider - if in doubt leave in the CH to get it to its widest, then fill it. Hard wax will not shrink less than 2 pack filler (which sets by chemical reaction) but can pop out slightly if crack closes up. 1mm is so so narrow that filler will be fine - slightly darker than the wood is better. 2 pack filler is by far the easiest to apply and will look neatest. Dont confuse 2 pack with the likes of Brummer which mixes with water and can shrink. And finally, Liberon markets its products brilliantly.....
 
Hi

I have filled the cracks with epoxy 2 pack mixed with wood dust , then belt sanded the whole Table , then blow of ,then wiped with a dry cloth and then cleaned the surface with a rag damped with white spirit , then applied one cote of Polyurethane satin finish varnish ( solvent type ) .

As you can see it looks ok , but the outline of the cracks are still quite clear .
not happy really , Now I am thinking of what I can do to improve the apearance of the cracks , like cleaning out some of the epoxy filler and using them Wax sticks as mentioned here before ! .
I want to do it right so I have a lot of patience and time to do it .


spike
 

DIYnot Local

Staff member

If you need to find a tradesperson to get your job done, please try our local search below, or if you are doing it yourself you can find suppliers local to you.

Select the supplier or trade you require, enter your location to begin your search.


Are you a trade or supplier? You can create your listing free at DIYnot Local

 
Sponsored Links
Back
Top