Painting on CH pipe problem

Joined
21 Jun 2013
Messages
16
Reaction score
0
Location
Sussex
Country
United Kingdom
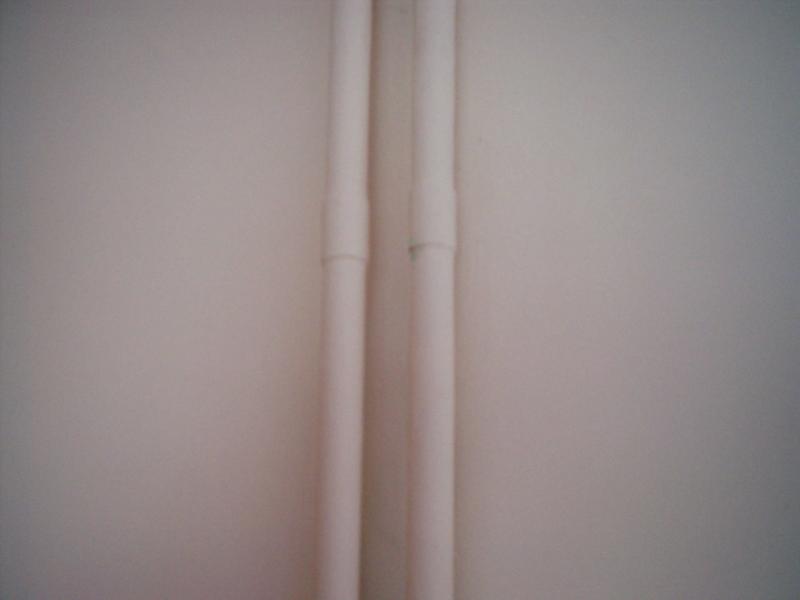
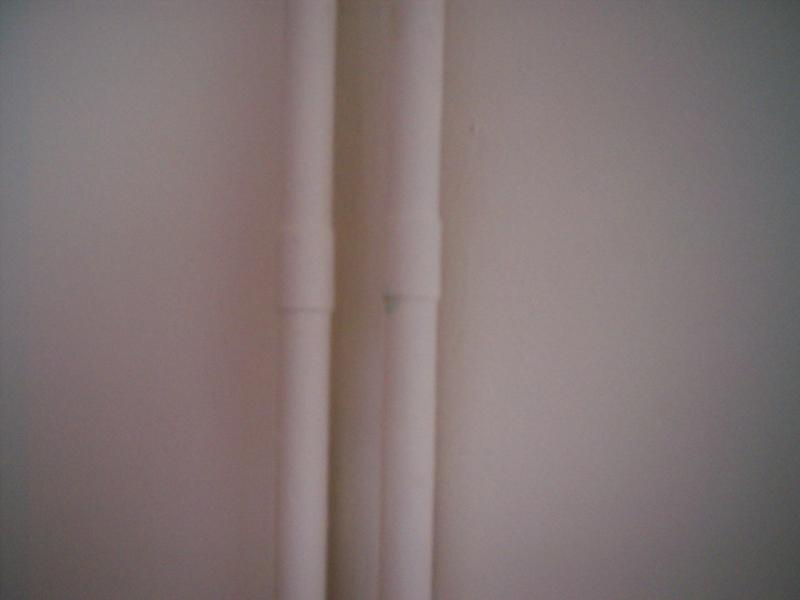
Hi all, I have a recurring problem with a central heating pipe in a bedroom, when it was painted within a very short time the paint discoloured and started to flake and bubble, I chatted to Brewers staff for help and the chap there recommended rubbing down to bare metal, washing off with meth's and then repainting, it was felt that the problem was caused by flux contamination, ( the problem is in one specific area on a joint in the pipework) I followed his instructions but after only 1 week the staining has appeared again, any ideas that would help?
Many thanks in advance to all repliers.

Terry B
 
Sponsored Links
The paint is emulsion paint, good old magnolia! It's not a leak, I rubbed it back to bare metal following the Brewers recommendation, had it been leaking I'm sure I would have seen it. The stain is green, I would love to upload a picture but I don't know how.
 
Sponsored Links
A green stain on copper pipe is either from flux, if a soldered joint, or from water, or both. a water leak may be invisible if it evaporates away and seems dry. The leak mat be coming from avove where you see it.

To post a pic //www.diynot.com/forums/viewtopic.php?t=129539

You may need he Plumbing section.

Wire wool is the stuff to use when rubbing copper pipes; or green nylon scourer if mostly clean.

Emulsion is not very good for pipes and radiators. Satinwood is better. Very thin coats of primer and topcoat; thick coats will craze and crack. Radiators mostly come pre-primed in white so just touch up any chips or scratches.
 
If its a hassle just get some of that plastic tubing that wraps around the pipe
 
It's a leak.

It would be preferable, but surprisingly difficult once a pipe has had water in it, to open up and resolder, but you can bodge it by buying of tube of Fernox LSX sealant from a pluming place; polishing off all the paint, limescale and other detritus from the joint, and pressing a little of the sealant very firmly onto the joint so it bridges between the pipe and the fitting, and is pressed into the step where the pipe enters. Clean off any excess with a cotton rag because it will set alsmost immediately. You can inspect and paint the next day. Put the cap back onto the tube immediately or the tube will set from contact with the air.

Copy the question and the photos to the plumbing section if you don't believe me.
 
OK JohnD I'll give it a go, I must confess I am surprised because whjen I had it down to bare metal I left it for a day to see if anything was weeping out of it but nothing showed, however I bow to your greater knowledge. Watch this space for results.
 
You were right JohnD, I removed the old connector which was leaking cut the pipes both sides back and spliced in a new bit with new connectors, all good now.
Sorry about the time it took to respond, we actually have now moved,( not because of the pipe! ) hence the delay in filling this space!

Many thanks for all your help everyone.

Terry B
 
All copper pipe should have a coat of Calcium Plumbate prior to putting any other paint on. Water based paints should not be used as this causes the green stains on the pipes.
 

DIYnot Local

Staff member

If you need to find a tradesperson to get your job done, please try our local search below, or if you are doing it yourself you can find suppliers local to you.

Select the supplier or trade you require, enter your location to begin your search.


Are you a trade or supplier? You can create your listing free at DIYnot Local

 
Sponsored Links
Back
Top