Tiles & velux flashing

Joined
18 Aug 2008
Messages
27
Reaction score
0
Location
Yorkshire
Country
United Kingdom
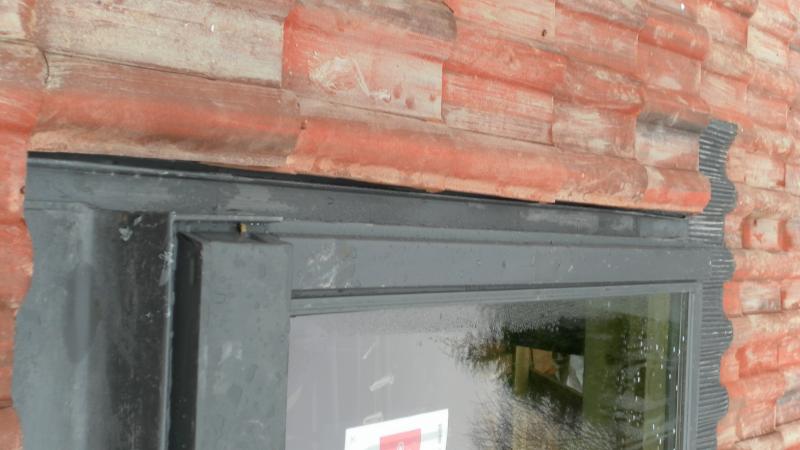
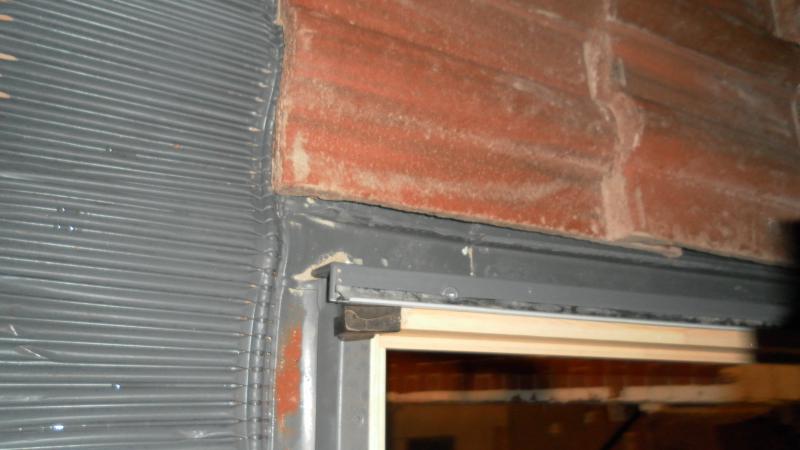
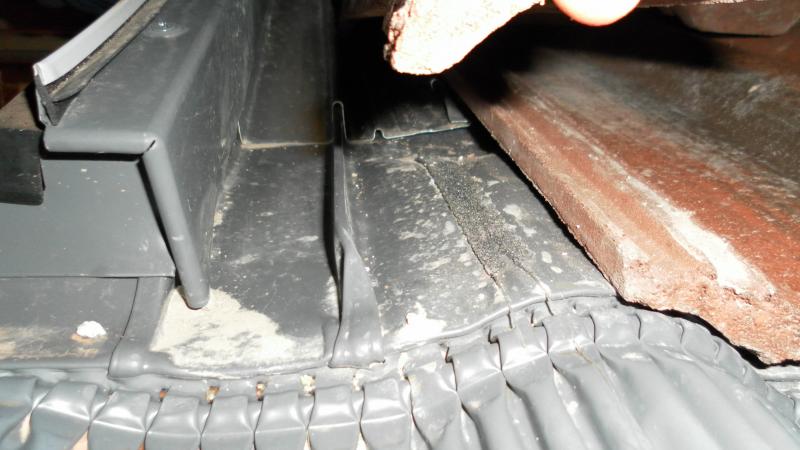
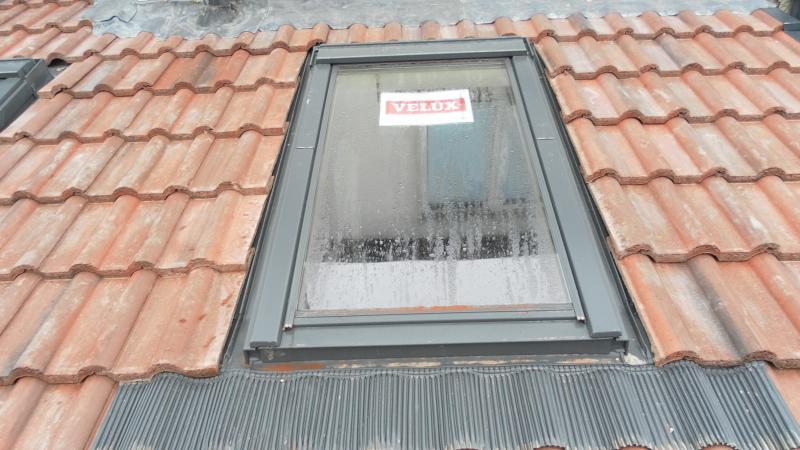
Can anyone reassure me this velux installation and roofing is OK? Done by competent roofer who seems to have done complex things elsewhere well, it is just that I'd expected the tiles to be trimmed so they pass over the ridge on the velux flashing. The velux instructions don't make it very clear, but indicate a foam barrier outside the ridge should be trimmed for the tiles to rest on. In my installation, as far as I can tell the foam barrier has been completely cut away. I can see that a clear channel inside the ridge is important, but I think some water will be able to pass outside the flashing ridge with a few mm gap beneath tiles. Is there another ridge further out hidden under the tiles? Correct flashing for pitch of roof has been used.

I have a leak bottom corner of one of the veluxes :( Ceiling not in yet so would rather sort it. Will get roofer back but would like to have an idea whether all the tiles should be closer to the veluxes.

 
Sponsored Links
He has cut the tiles correctly. the right flashing has been used. there are water checks you cant see. But cant comment on the foam ..because I cant see it. It should be trimed to follow the contors of the underside of the tile .
my only comment about the instalation is I hope he has not fixed those small cuts through the side flashing..

How about a picture of the leaking one?
 
Thanks for your comments datarebal.

The foam isn't trimmed, it is completely removed. There's one short bit of tile it is possible to lift which shows this.

I've taken a couple of photos best I can from inside until I can get outside with ladders. Bottom left hand corner leaks. Possibly where the side section of flashing sits on the bottom bit water might be getting in (the flashing isn't flat, the bottom section kicks up a bit), or water going over the edge of flashing at the bottom.

Not sure I know what you mean by the small cuts through the side flashing. Will look again tomorrow.

The only other thing I've noticed is I can't see any sign of either the apron/nappy skirting, or 4 strips of roofing felt (one or the other is specified in the instructions, according to another post on here). I did suggest they used the bdx kit, but they haven't. Perhaps you just can't see the felt skirt once installed. Breathable roof membrane has been used on the roof.
 
Firstly, The skirt/nappy is an option only..If you said use it then it should have been allowed for. Once the flashing has been fitted you will not be able to see it or anything else.

The foam has been removed rather than trimmed It looks like this has been done to allow the cut piece to sit flatter because i'm sure it would have cocked up.. look under the other side of the window to see if the foam is there...

I'm still concerned how that cut has been secured.. can you see a fixing at the top of the tile? has it penetrated the flashing ?

I think it has been made more difficult for them because the Velux has not been positioned correctly in relation to the tile battens or vice versa
Looks like they would have had to cut at least 75 mm from the top of the tile which is not strictly right.
 
Sponsored Links
Thanks again, am understanding better again due to datarebal!

Here's a better picture in daylight


All the foam has been removed all round on all the veluxes as far as I can see, not just under one or two tiles. That was the first thing I went looking for because I found a complete long piece of it in the rubbish left behind!

I now get what you mean about the cut being secured. It isn't secured, I can lift it clean off, and the one above. However doing this does reveal a nail through the outermost part of the side flashing, it looks like it is holding the edge of flashing down, about an inch further out than where the foam would have been. This is the only nail I've found through flashing (although I've not looked exhaustively all round), it is on opposite side to the leak.

I suspect the leak bottom left is where the side flashing sits on the bottom flashing. The bottom flashing isn't in the same plane as the side flashing creating a little gully/pooling point, by eye it looks possible that 2 or 3 inches right at the bottom of the side flashing is either flat or even at a tiny reverse pitch. Presumably water will run back under the join between side and bottom flashing. On the photo you can see where tile/brick dust has collected bottom left, which I guess shows water has sat there.

Am impressed by what you can tell just looking at some dark pictures! I think joiner/builder fitted veluxes to rafters/trimmers before there were any roof battens. I read another post on here where someone asked if veluxes have to be on battens as some people put them direct onto rafters, this seems to be what has been done here. So perhaps you are right, the roofer arriving after this may have had a non-ideal job. (also means the reveals inside can't be finished at an angle, they will have to be perpendicular due to vrw frame fixed on 150mm timber).

I can live with non-ideal as long as it doesn't leak and will stand up to wet and high winds (I am quite high up and we get some wild wind). Looks like this might hold things up...
 
Looking at the way the windows sit I would say they are corectly seated on timber of batten thickness.
any nail through the flashing should not be there. Velux supply clips to keep flashings secure.
As far as the leak is concerned tricky to say for sure from pics, but first lift the bottom of the tile on the leak side , (it will feel heavy but you wont break anything) when you look under see if water is tracking back over the edge of the front apron flashing..if so bend the edge back on it's self forming a better water check.
Also check all screws in the side trims are fitted and snug..
It is normal or a slight change in angle front apron flashing rom the side flashing.. it's the way it's designed

but ideally get the guy's to sort it..
but again the windows are not correctly postioned in relation to the tiling battens...
 

DIYnot Local

Staff member

If you need to find a tradesperson to get your job done, please try our local search below, or if you are doing it yourself you can find suppliers local to you.

Select the supplier or trade you require, enter your location to begin your search.


Are you a trade or supplier? You can create your listing free at DIYnot Local

 
Back
Top